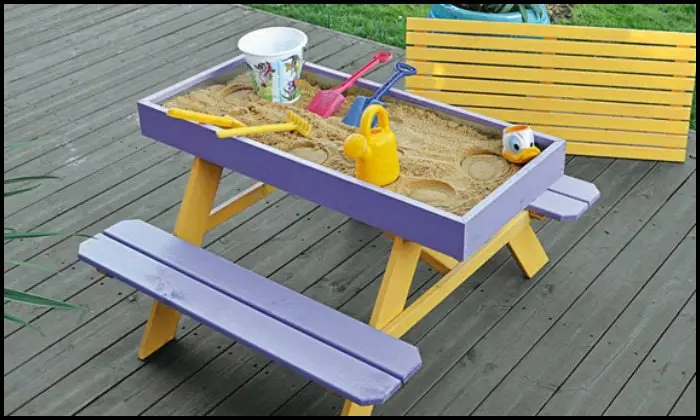
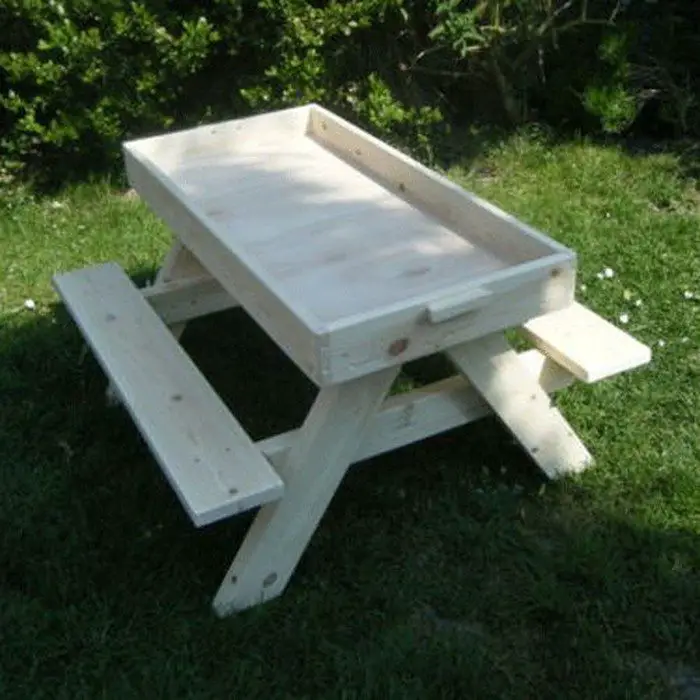
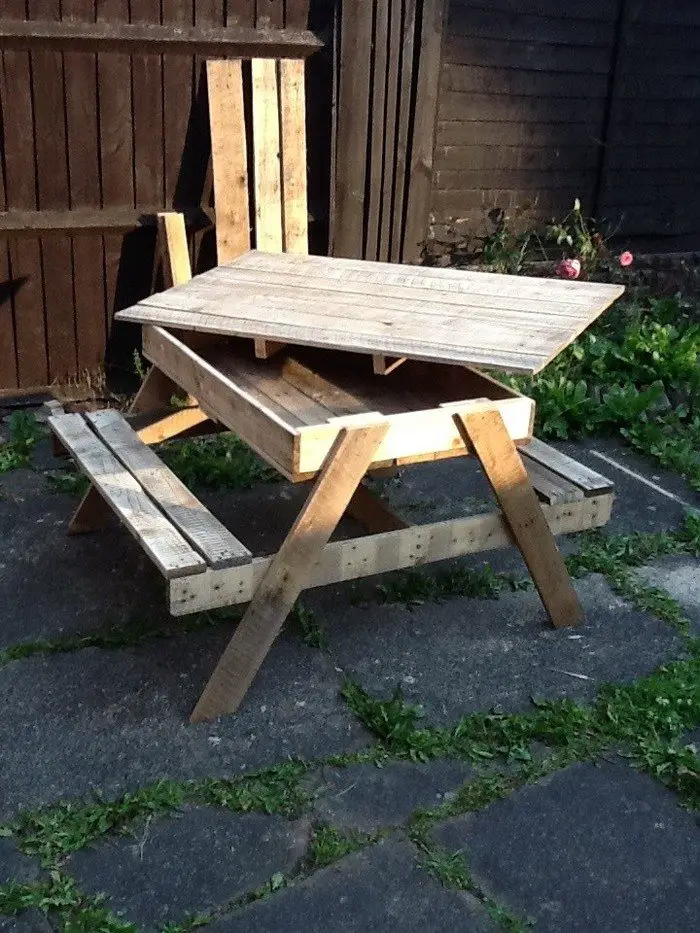
Want to give your kids a sandbox or a sandpit but don’t have enough room for it at home? If you do, why don’t you make them a picnic table and sandbox combo?
This piece of DIY furniture is a clever solution for those who have a small backyard. You can even move it back inside to play when the weather becomes bad. It’s a space-saver and makes playtime a less messy affair.
You get two things for the price of one. You can even use pallets to save on costs further.
Think your kids would love to have this picnic table and sandbox combo? Go ahead and make one for them!
Contents
Building a Picnic Table and Sandbox Combo
Materials
- 1×3 Timber
- Plywood
- Timber
- Wood Glue
- Wood Screws
- Outdoor Lacquer
Tools
- Measuring Tape
- Table Saw
- Cordless Drill
- Nail Gun
- Wood Clamps
Instruction
Step 1: Design and Planning
- Decide on the dimensions of your picnic table and sandbox. A standard size could be 4 feet long by 2 feet wide, with the sandbox depth around 6 to 8 inches.
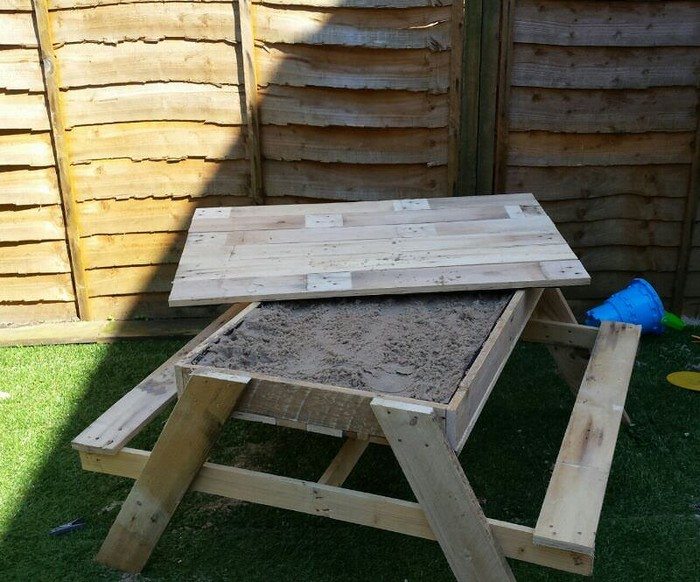
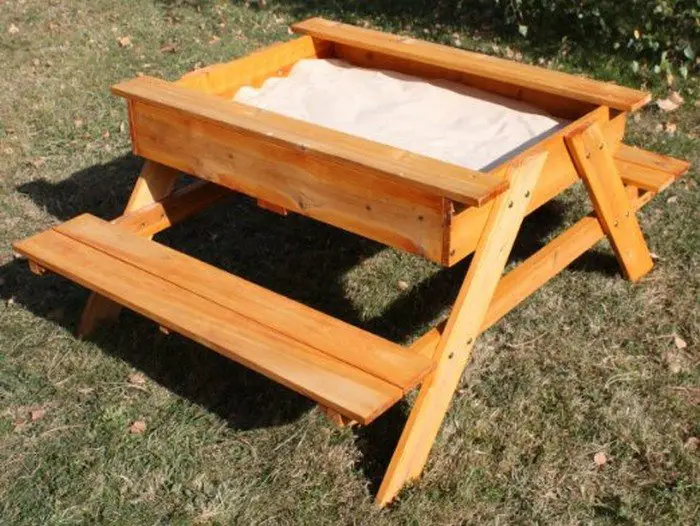
- Sketch your design, including the sandbox in the center with a lid that doubles as the picnic table surface.
Step 2: Cutting the Timber
- Use the table saw to cut the 1×3 timber and other timber pieces to your desired lengths for the table top, benches, and sandbox frame.
- Cut the plywood to the size of the sandbox base.
Step 3: Assembling the Sandbox Frame
- Construct the frame for the sandbox using the cut timber. Apply wood glue to the joints before screwing them together with the wood screws for added stability.
- Attach the plywood base to the bottom of the frame using the nail gun.
Step 4: Building the Table and Benches
- Create the table top by laying out the 1×3 timber pieces side by side. Use wood clamps to hold them in place, apply wood glue between each plank, then secure them together with screws drilled from underneath to hide the screw heads.
- Repeat a similar process to construct the bench seats.
Step 5: Attaching the Legs
- Cut the timber for the legs to your desired table height, typically around 20 to 24 inches for a kids’ table.
- Attach the legs to the table top and sandbox frame using the cordless drill and screws. Ensure the structure is stable and level.
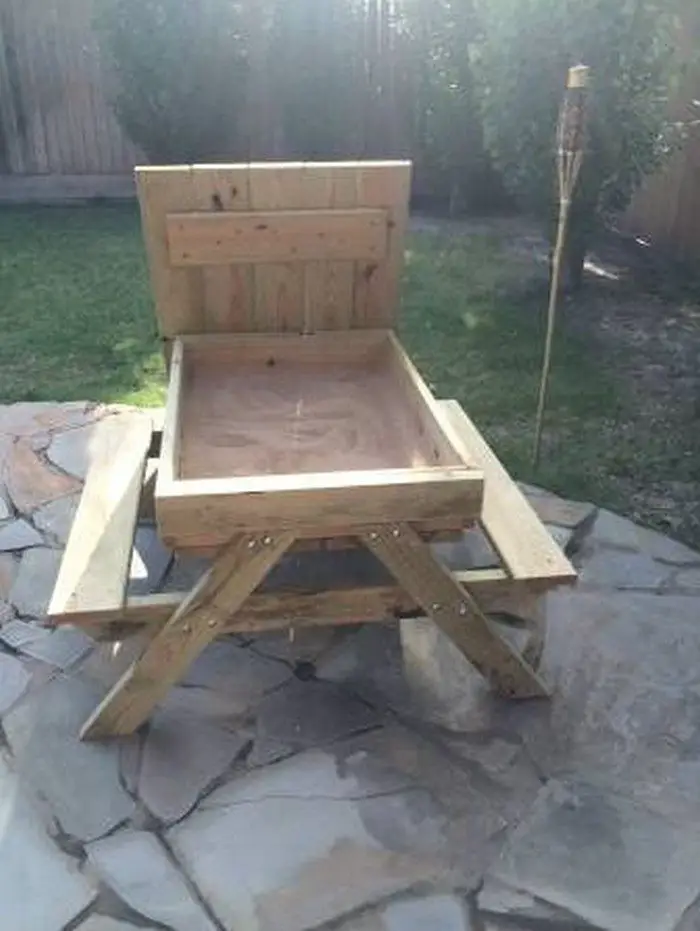
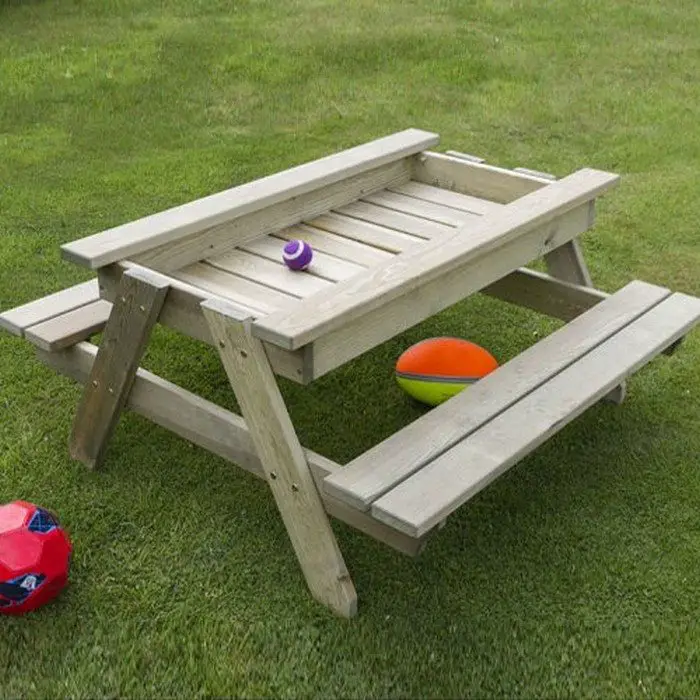
Step 6: Creating the Lid/Table Surface
- If your table top is the lid for the sandbox, design it to be easily removable or hinged for easy access. Otherwise, build a separate lid using timber planks, ensuring it covers the sandbox area completely to protect it when not in use.
Step 7: Finishing Touches
- Sand all surfaces, edges, and corners to make them smooth and safe for children.
- Apply outdoor lacquer to all wooden parts to protect them from weather elements. Allow it to dry according to the lacquer’s instructions.
Step 8: Final Assembly
- If not already attached, place the table top/lid onto the sandbox frame. If using hinges, secure them now with the cordless drill and screws.
- Place the bench seats opposite each other at the sides of the table.
Design Considerations for Durability and Safety
When designing a picnic table and sandbox combo, it’s crucial to prioritize features that will stand up to the elements and daily use, while ensuring the safety and well-being of the children who enjoy it. Attention to materials, construction techniques, and safety features will contribute to a durable and secure play space.
Choice of Materials
Select materials that are known for their durability and resistance to weather conditions. Treated timber resistant to rot, decay, and insect damage is ideal for outdoor furniture. Ensure the finish is non-toxic and safe for children, such as ones made from linseed oil. For added protection, consider using outdoor lacquer to seal the wood, extending its life and maintaining its appearance.
Sturdy Construction
The construction of the picnic table and sandbox combo must be robust enough to handle the rough and tumble of playtime. Use strong joinery techniques such as screws and wood glue to ensure that all parts are securely attached. Avoid sharp edges by rounding off corners and sanding down surfaces smoothly to prevent splinters. Stability is key, so ensure the table and sandbox are well-balanced and won’t easily tip over.
Safety Features
Safety is paramount in any children’s play equipment. For the picnic table and sandbox combo, ensure no small parts could become choking hazards. If the design includes a lid for the sandbox, incorporate safety hinges that prevent the lid from slamming shut. Additionally, consider adding a mechanism to lock the lid when open to avoid accidental closures.
Weather Resistance and Maintenance
Outdoor furniture is exposed to the elements, so it’s important to design the picnic table and sandbox combo with weather resistance in mind. Use materials and finishes that protect against UV rays, rain, and temperature fluctuations.
Regular maintenance checks are essential to spot any potential hazards like loose screws or worn-out parts. Encourage parents to conduct these checks periodically to ensure the combo remains safe and enjoyable for years.
Designing a durable and safe picnic table and sandbox combo involves carefully selecting materials, solid construction techniques, and integrating safety features. By focusing on these considerations, creators can provide a fun and secure play area that will endure time and create lasting memories for children.
Click on any image to start lightbox display. Use your Esc key to close the lightbox. ?


For a visual instruction on making your picnic table and sandbox combo, watch the video below.
Don’t have time to DIY? This timber picnic table and sandbox combo with adjustable canopy is currently on sale at just $99.91 with FREE shipping (from its original price of $200.00)!

Maintenance Tips
Maintaining your picnic table and sandbox combo is crucial for ensuring it remains a safe, durable, and attractive centerpiece in your outdoor space. Regular care extends its lifespan and keeps it inviting for children’s play and family gatherings.
Follow these tips to keep your combo in top condition.
Routine Cleaning
Regularly wipe down the surface of your picnic table and sandbox combo to remove dirt, food particles, and other debris. Use a mild soap and water solution for the table and benches. For the sandbox, sift through the sand to remove foreign objects and rake it to maintain an even surface.
Sand Replacement and Care
Over time, the sand in your sandbox can become compacted or contaminated. Replace the sand every one to two years, or sooner if you notice it’s getting dirty or if it doesn’t dry well after rain. This ensures that the sandbox part of the combo remains a safe play area for children.
Wood Preservation
The wooden components of the picnic table and sandbox combo are exposed to the elements year-round. To prevent weathering, reapply outdoor lacquer or a wood preservative annually. Before applying, lightly sand the wood to remove any flaking lacquer or stains. This not only enhances the wood’s appearance but also adds a layer of protection against moisture and UV rays.
Hardware Inspection
Check the screws, bolts, and any hinges on your picnic table and sandbox combo periodically. Tighten any loose hardware to prevent wobbling or instability. Replace any rusted or damaged hardware immediately to maintain the structure’s integrity and safety.
Winter Care
If you live in an area with harsh winters, take steps to protect your picnic table and sandbox combo during the off-season. Cover the sandbox to prevent water and debris from entering. If possible, store the table and benches in a shed or garage. If outdoor storage is your only option, consider using a waterproof cover to shield the combo from snow and rain.
Pest Control
Wooden outdoor furniture can attract termites and other wood-loving pests. Inspect your picnic table and sandbox combo regularly for signs of pest infestation. Treat the wood with a pest repellent recommended for outdoor furniture, taking care to choose products safe for areas frequented by children.
Enjoyment and Safety Checks
Beyond maintenance, regularly inspect the picnic table and sandbox combo for any sharp edges, splinters, or structural weaknesses. Ensuring the safety of this play area is paramount. Address any issues immediately to prevent injuries.
Keep It Clean
Dirt, leaves, and debris not only make the picnic table and sandbox combo look untidy but can also encourage the growth of mold and mildew. Wipe down the table surfaces regularly with a mild, child-safe cleaner and a damp cloth. For the sandbox, sift through the sand to remove debris and stir the sand to aerate and prevent compaction.
Over time, the sand in the sandbox can become dirty and compacted. Consider replacing the sand every couple of years or when it looks dirty or feels gritty. This ensures a clean, soft play area for children.
Inspect and Tighten Hardware
The screws and hinges connecting the table, benches, and sandbox lid can loosen over time due to usage and weather conditions. Periodically check and tighten any loose hardware to ensure the structure remains stable and safe.
Protect Against Pests
Sandboxes can attract insects and other pests. To minimize this, consider using a sandbox cover that fits snugly over the area when not in use. Additionally, avoid using too fine sand, as it can be more appealing to cats and other animals looking for a place to relieve themselves.
Weather Protection
If you live in an area with harsh winters, consider storing the picnic table and sandbox combo indoors or covering it with a waterproof, heavy-duty cover. This can prevent damage from snow and ice and extend the life of the wood.
Over time, the sun can fade and damage the wood. If your combo is in a particularly sunny spot, consider applying a UV-resistant sealant or moving it to a location with partial shade to protect the wood and keep the sand cooler.
Engage with Care
Encourage children to play gently with the picnic table and sandbox combo. Discourage climbing on the table or benches in a way that could weaken the structure or pose a risk of falling.
Create a Safe Play Zone
Ensure the area around the picnic table and sandbox combo is clear of sharp objects, poisonous plants, and any other hazards. Consider laying down rubber mats or wood chips to provide a softer landing in case of falls.
By following these maintenance tips, you can enjoy a picnic table and sandbox combo that looks great and provides a safe, fun environment for children to play and families to gather for years to come.
Engaging Children in the Building Process
Involving children in the building process of their picnic table and sandbox combo makes the project more enjoyable and provides an excellent learning opportunity. It helps them develop a sense of ownership and pride in their play area. Here’s how you can engage children safely and effectively throughout the construction.
Introduction to the Project
Start by gathering your children and introducing them to the idea of building a picnic table and sandbox combo. Show them drawings, photos, or even digital designs of what you’re planning to build. Explain the dual purpose of the combo: a comfortable place for them to eat and play outdoors, and a fun sandbox for imaginative play.
Highlight how it will be a special spot just for them, which can ignite their interest and excitement. Discussing the project beforehand also allows them to visualize the result, sparking their imagination and making them eager to see the project come to life.
Choosing the Design
Involvement in the design phase is crucial for fostering creativity and decision-making skills. Sit down with your children and explore different picnic table options and sandbox combo options. This could include the overall size, shape, whether it will have a fixed or removable top for the sandbox, and any additional features they find exciting.
Perhaps they’re interested in a particular theme, like pirates or princesses, which could influence the design. Encourage them to think about colors or decorations, like handprints or footprints in the paint, making the project uniquely theirs. This step increases their anticipation for the finished product and makes them feel valued and heard.
Shopping for Materials
Taking your children with you to select materials is an educational adventure. As you pick out the wood, explain the differences in types and why certain woods are better for outdoor use. Let them feel the texture of the wood, comparing rough and smooth finishes.
When choosing paint, discuss why certain paints are used for outdoor projects. Allowing them to select the sand for the sandbox gives them a tangible connection to the project from the start. This outing is a hands-on learning experience about materials’ properties and suitability for different purposes, imparting practical knowledge engagingly.
Preparing the Workspace
Setting up the workspace with your children is about more than just organization; it’s about teaching responsibility and safety. Show them how to safely arrange the tools and materials, emphasizing the importance of a tidy workspace to prevent accidents.
Explain what each tool does and the safety precautions associated with them, even if they won’t be using the more dangerous tools themselves. This is also an opportunity to assign them specific roles or tasks, such as handing you materials or holding pieces steady, which can help them feel involved and important to the project’s success.
Measuring and Marking
Involve your children in the measuring and marking phase to give them a practical math lesson. Show them how to hold and read a measuring tape. Explain the importance of measuring twice and cutting once, a rule that emphasizes accuracy in all building projects, including their picnic table and sandbox combo.
Let them mark the wood under your supervision, using pencils to indicate where cuts and screws will go. This hands-on experience not only aids in their understanding of mathematics and geometry but also shows them how these skills apply in real-life scenarios.
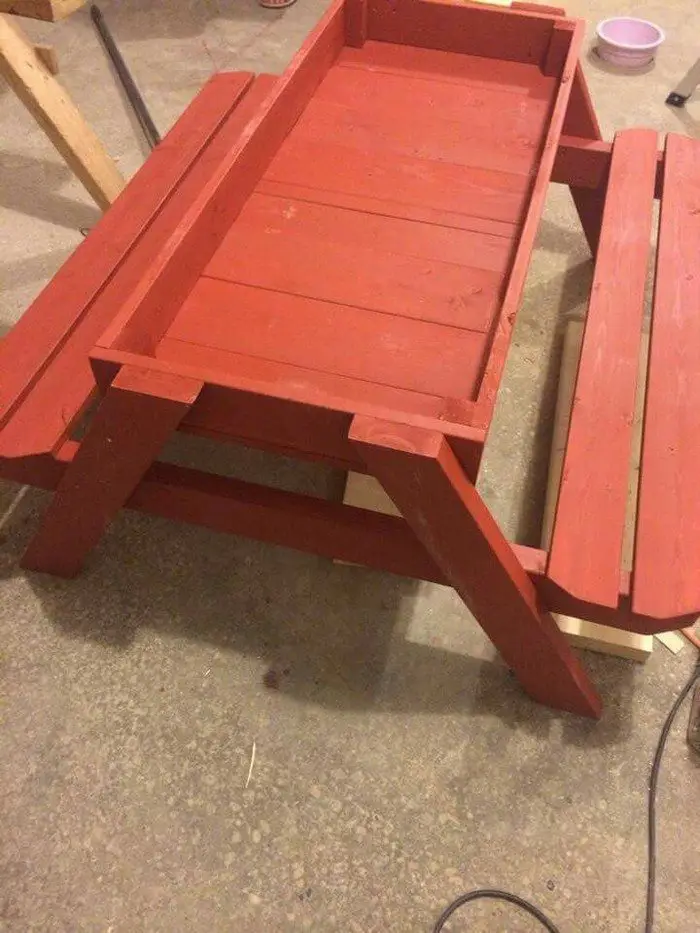
Painting and Decorating
Painting and decorating the picnic table and sandbox combo is an activity where children can truly shine. Once the structure is built and the wood is sanded, they select the paint colors. Discuss with them how different colors might look in the outdoor light and how they can choose a theme for their play area.
Provide them with brushes and safe, non-toxic paints, and let their creativity flow. They can add personal touches like handprints, stencils, or their favorite characters and motifs. This stage allows them to personalize their play area and teaches them about the properties of different paints and the importance of thorough work in the finishing touches.
Observing the Process
Even during parts of the building that are unsafe for them to directly participate in, children can learn greatly from observing. Set up a safe spot where they can watch you work. As you progress, explain the steps to construct the picnic table and sandbox combo, the tools you’re using, and the safety precautions necessary for each task.
This can be an invaluable lesson in patience, attention to detail, and the value of craftsmanship. It also provides a deeper understanding of the work involved, making them appreciate the final product even more.
Cleaning Up
Involving children in the cleanup process teaches them responsibility and the importance of maintaining a clean and safe workspace. After completing the picnic table and sandbox combo, show them how to properly put away tools, dispose of waste, and store leftover materials.
This not only ensures the area is safe for everyone but also instills good habits for any future projects they undertake. Explain how taking care of their environment is a way of respecting their work space and the people they share it with.
Involving children in building their picnic table and sandbox combo is more than just the final product; it’s about spending quality time together, teaching them new skills, and inspiring creativity. Plus, the picnic table and sandbox combo will hold even more value to them, knowing they had a hand in its creation.
Conclusion
Building a picnic table and sandbox combo is an enriching project that offers a creative outlet and a practical learning experience for children. It fosters a sense of accomplishment and pride, as they see their contributions come to life in their backyard. This combo provides endless hours of fun and imagination and serves as a tangible reminder of the value of teamwork and the joys of outdoor play.
For more fun project for children, check out our DIY water wall!


