There’s a particular kind of wizardry that comes with seeing things for what they can be, rather than what they are. You can build things that put smiles on people’s faces, and make them think.
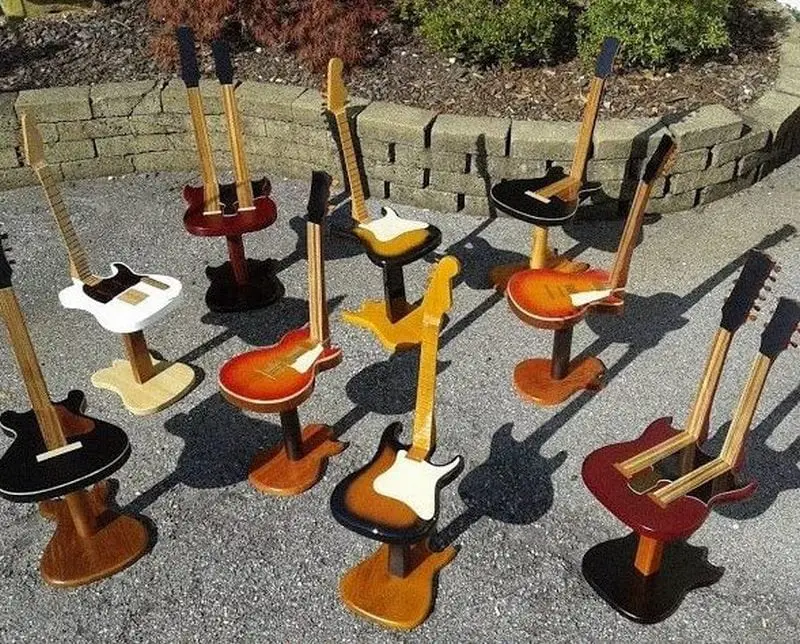
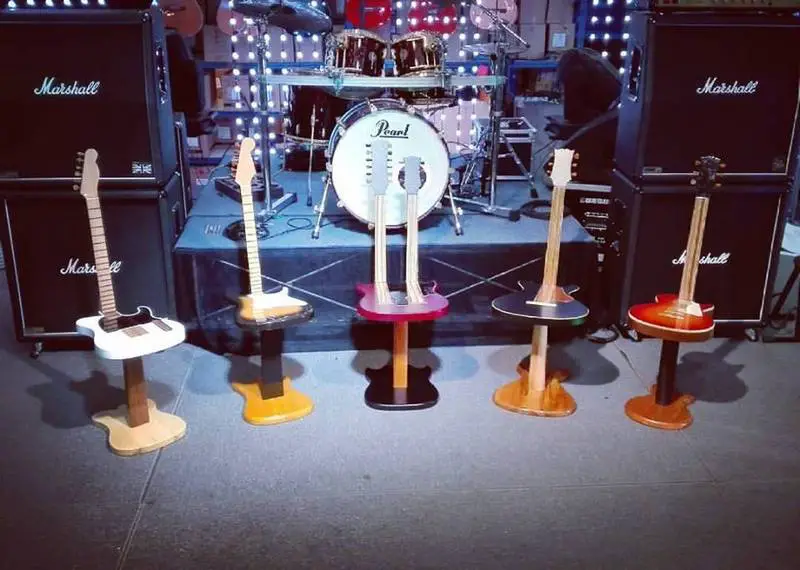
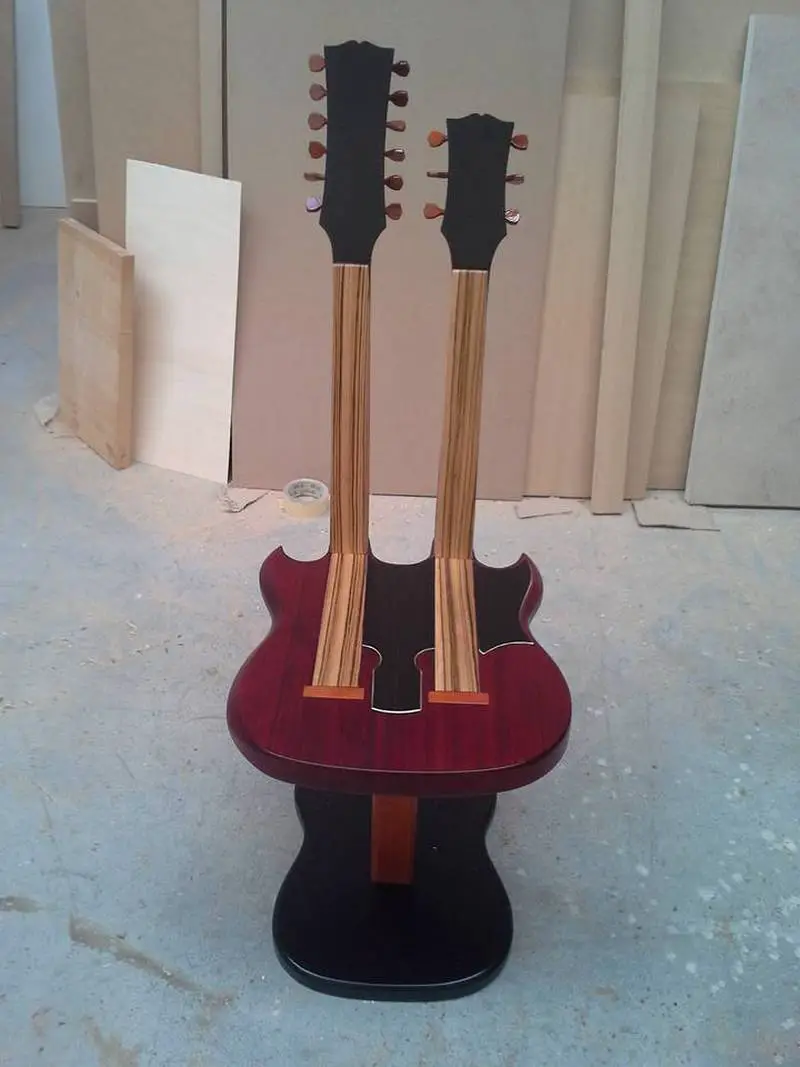
This guitar stool is a perfect example. It doubles as a chair and as a decorative element. I imagine this being the focal point of conversation when you have friends over. If you’re a music lover, this one’s definitely for you!
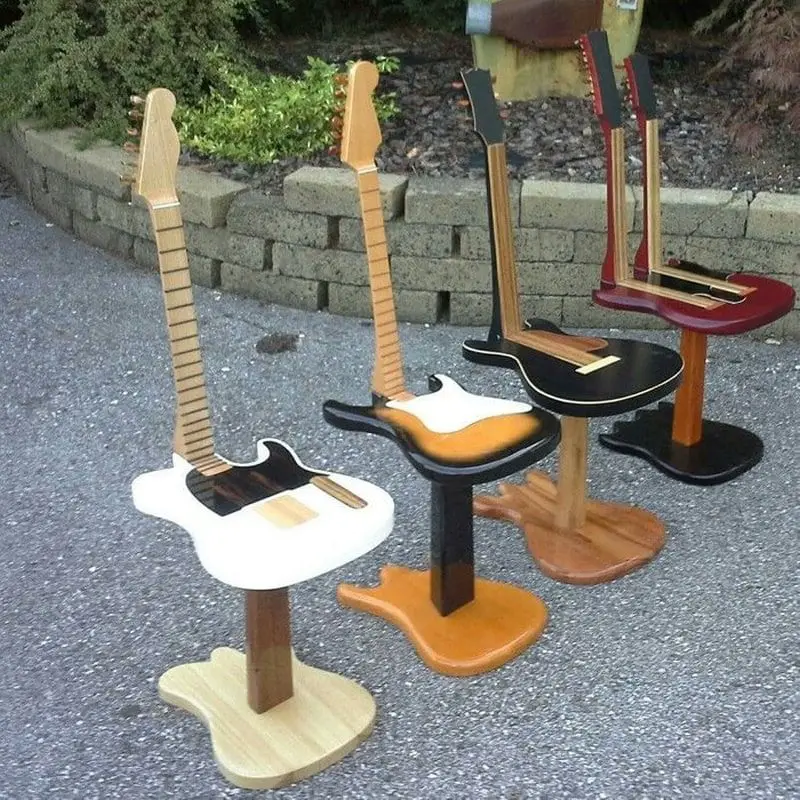
This project requires woodworking skills. You’d have to cut the wood and turn it into something that resembles a guitar. Not very easy, right? But still doable, so cheer up. When it all comes down to it, the result is well worth your time and effort.
You’ll need a few materials but quite a lot of tools. Gather ’em up and start making your very own guitar stools!
Contents
Constructing Your Guitar Stool
Materials
- Your choice of wood
- Plywood (for the template, optional)
- Epoxy
- Screws
Tools
- Bandsaw or Jigsaw
- Router table
- 2” straight bit with ball bearing
- Rounding-over bit with ball bearing or file and sandpaper
- Hand plane
- Fret saw
- Drill
Instructions
Step 1: Design and Template Creation
- Sketch your design: Draw the guitar shape for your stool on paper. Consider the size and ergonomics to ensure comfort.
- Make a template: Transfer your design to plywood. This step is optional but recommended for precision. Cut out the template using a bandsaw or jigsaw.
Step 2: Cutting the Wood
- Select your wood: Choose a type of wood that suits your aesthetic and durability needs.
- Trace the template: If you made a plywood template, trace its outline onto your chosen wood.
- Cut the shape: Using a bandsaw or jigsaw, carefully cut the wood following the traced outline.
Step 3: Routing Edges
- Set up the router table: Install a 2” straight bit with a ball bearing on your router table.
- Route the edges: Gently route the edges of your guitar-shaped wood to achieve a smooth, rounded edge. This enhances the stool’s appearance and safety.
Step 4: Rounding Over
- Change the bit: Switch to a rounding-over bit with a ball bearing or prepare a file and sandpaper.
- Smooth the edges: Round over the edges for a more finished look. Pay special attention to curves and corners.
Step 5: The Seat
- Mark the seat area: Decide on the dimensions of the seat. It should be comfortable to sit on and aesthetically pleasing.
- Shape the seat: Use a hand plane to shape the seat area. Aim for a slight indentation for better seating comfort.
Step 6: Sanding
- Sand the wood: Start with coarse sandpaper and work your way up to finer grits. Sand until the wood is smooth to the touch.
Step 7: Assembling
- Prepare for assembly: Drill holes in the seat and legs for screws. Ensure alignment is correct.
- Epoxy and screws: Apply epoxy to the joining parts for extra strength. Screw the pieces together securely.
Step 8: Finishing Touches
- Final sanding: Sand the stool lightly after assembly to remove any glue marks or rough spots.
- Apply finish: Choose a wood finish that complements your room’s decor. Apply according to the manufacturer’s instructions for best results.
Step 9: Inspection and Enjoyment
- Inspect your work: Check the stool for any sharp edges or loose screws. Make adjustments as necessary.
- Enjoy: Place your new guitar stool in your favorite spot. It’s ready for use!
Click on any image to start the lightbox display. Use your Esc key to close the lightbox.

Here’s a quick video tutorial…
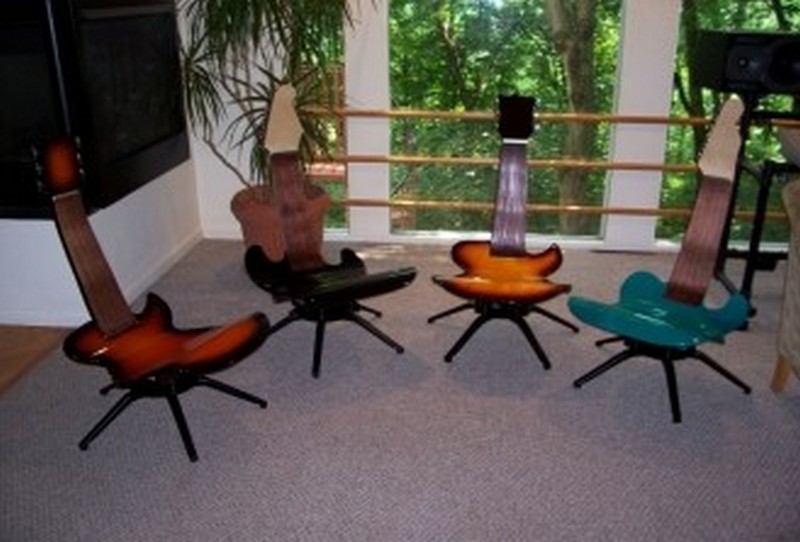
Design Variations for Guitar Stools
Creating a guitar stool offers a unique opportunity to blend functionality with personal expression, especially for music lovers and woodworking enthusiasts. Whether you’re a guitarist seeking a comfortable seat for your practice sessions or someone looking to add a musical touch to your living space, designing a guitar stool allows for a range of creative variations.
Here’s a look at some design variations for guitar stools, each with its own charm and appeal.
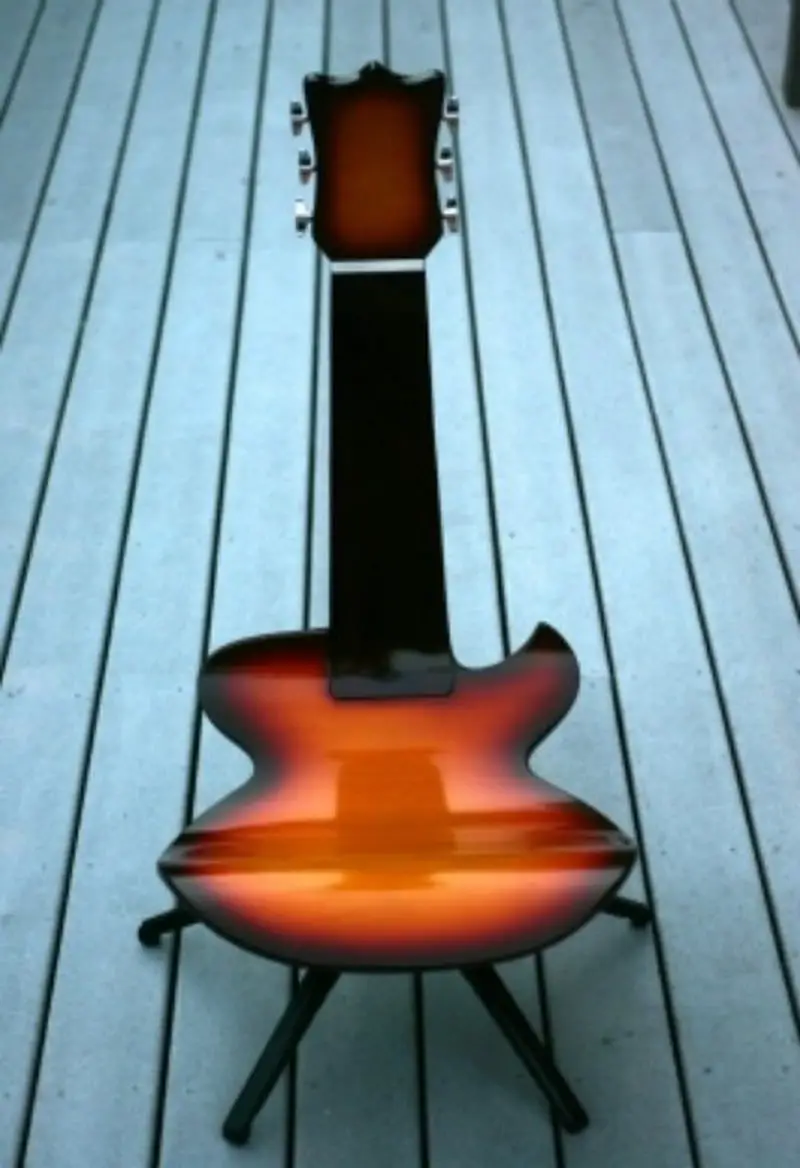
Classic Acoustic Guitar Stool
The classic acoustic guitar stool mimics the shape and elegance of an acoustic guitar. Its design can feature the guitar’s body as the seat, with the neck extending down to form one or more of the legs.
This style celebrates the timeless beauty of acoustic guitars and is perfect for folk, country, and classical music enthusiasts. Incorporating wood finishes that match classic guitar woods, such as spruce or mahogany, can enhance its authenticity and appeal.
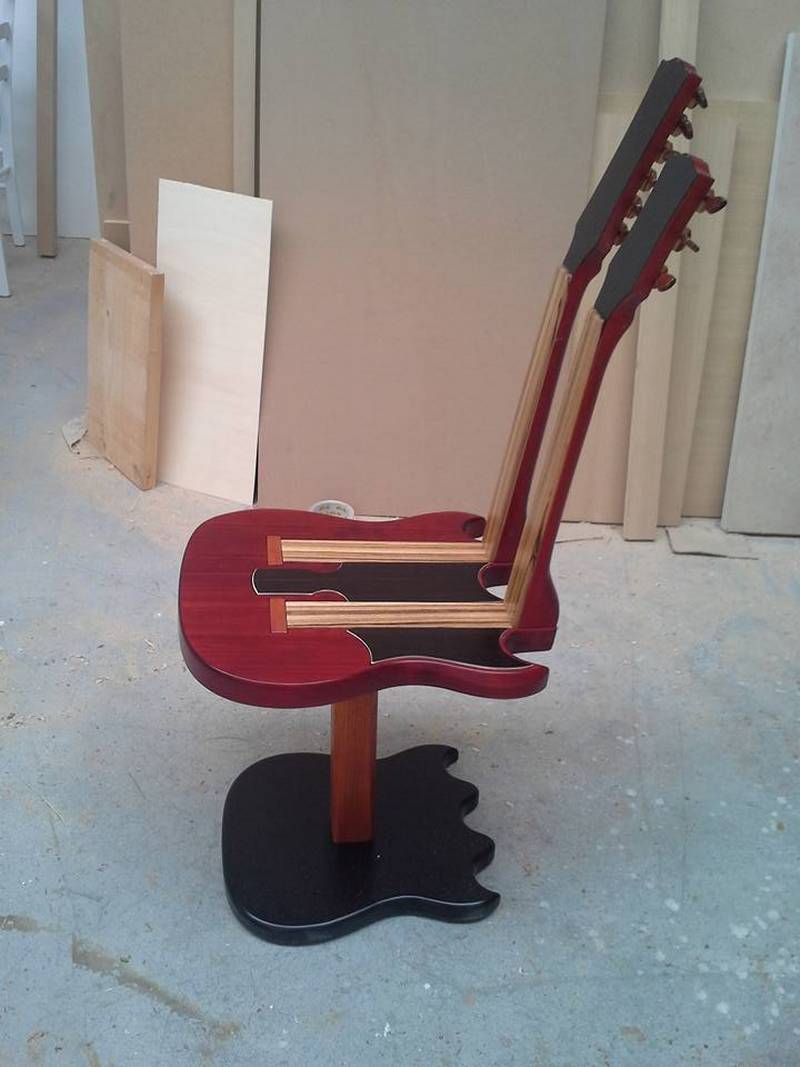
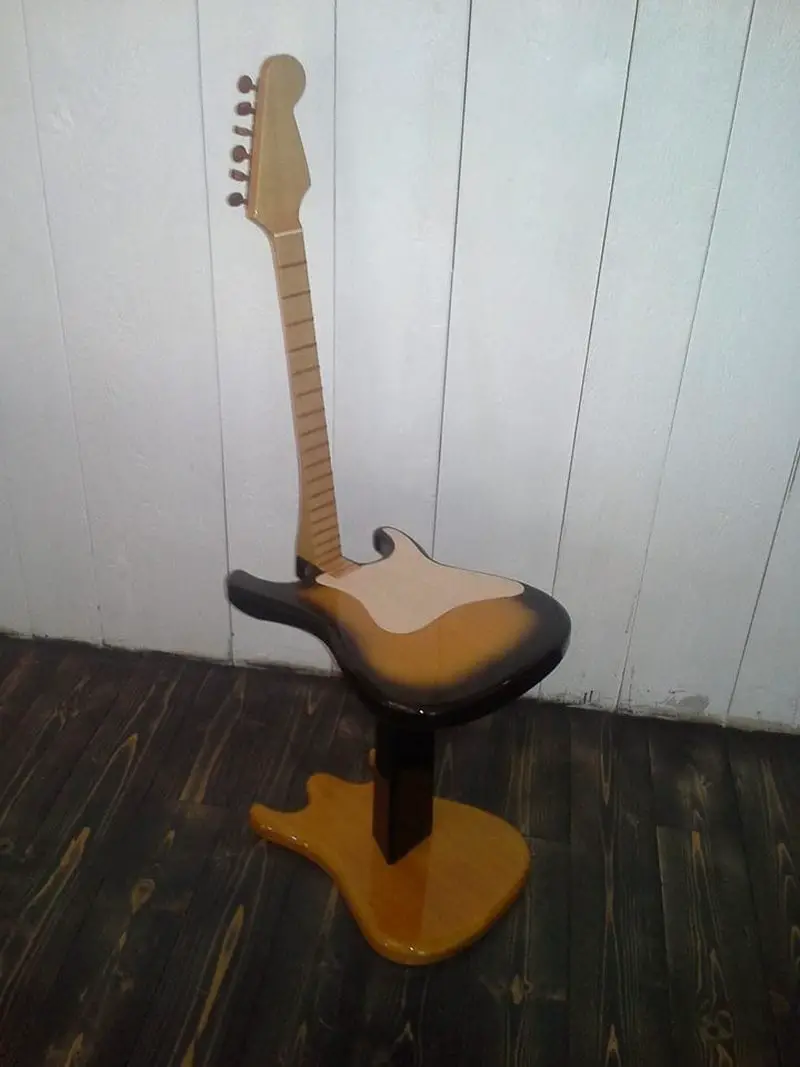
Electric Guitar Stool
For lovers of rock, blues, or metal, an electric guitar stool offers a sleek, edgy design option. With sharper angles and potentially incorporating elements like the headstock or electric guitar body shapes, this stool can make a bold statement. Materials like metal or vibrant, glossy finishes can mimic the look of legendary electric guitars, making it a striking addition to any music room or studio.
Bass Guitar Stool
Bass guitar stools pay homage to the deep tones and rhythms of the bass. These stools can be designed taller, reflecting the larger size of bass guitars. Using thicker wood or incorporating a wider seat can ensure comfort and stability, mirroring the robustness of bass sounds. This design is perfect for bass players or those who appreciate the foundational elements of music.
Ukulele Stool
A ukulele stool brings a touch of whimsy and lightness to the design variations. Smaller and more playful, this stool can incorporate the rounded shapes and cheerful aesthetics of a ukulele. It’s an excellent choice for spaces needing a light-hearted touch or for ukulele players looking for a matching piece of furniture. Bright colors and lighter woods can reflect the ukulele’s fun and accessible nature.
Customizable Guitar Stool
The customizable guitar stool allows for personal touches that reflect the player’s style or favorite music genre. Options for customization include engraving names, band logos, or music quotes into the wood, choosing unique colors, or even integrating guitar picks into the design. This variation invites guitarists to contribute their own visions, making the stool truly one-of-a-kind.
Multi-Functional Guitar Stool
A multi-functional guitar stool combines practicality with passion, offering built-in features like a guitar stand, music storage, or amplification systems. This design variation is ideal for musicians who appreciate efficiency and convenience, allowing them to store or showcase their guitars safely and stylishly.
Each design variation of a guitar stool offers a way to celebrate the love of music through functional art. Whether you prefer the classic elegance of acoustic guitars, the boldness of electric guitars, or the playful charm of ukuleles, there’s a guitar stool design that matches your personal style and needs.
Finishing Techniques for a Professional Look
Crafting a guitar stool isn’t just about putting pieces together; it’s about adding that final touch that transforms it from a mere piece of furniture into a masterpiece. The finishing stage is where your stool really starts to shine, and choosing the right techniques can make all the difference.
Let’s dive into some methods that’ll give your guitar stool that professional, eye-catching look, while also making sure it stands the test of time.
The Art of Sanding
First Things First: Before you even think about finishes, get your sanding right. Kick things off with a coarser grit to tackle any rough patches, then graduate to finer grits. This step is all about achieving a butter-smooth surface that’s ready to soak up whatever finish you throw at it.
Picking the Perfect Finish
Making the Choice: There’s a whole world of finishes out there, from the understated elegance of oil to the sleek sheen of lacquer. Think about what you’re after – is it the warm glow of the wood you want to highlight, or are you gunning for a finish that could probably survive a minor apocalypse?
Adding Oil
Keep It Real: If you’re leaning towards something that feels natural and brings out the wood’s true character, oils like linseed or tung are your best friends. Slather on with a rag, give it some time to drink it up, then wipe off the excess. Layer it on, and watch the grain come to life.
Varnish and Shellac
Shiny and Strong: For a stool that’s not just for show, a varnish or shellac coat can fend off scratches and the occasional coffee spill. Brush it on lightly, let each layer dry, then sand it down softly before going in for the next. Shellac’s got a neat party trick – it’s pretty forgiving if you ever need to touch it up.
Lacquer
Glam Up: Want that stool to reflect like a mirror? Lacquer’s your go-to. It’s a bit more of a process, usually involving a spray gun and a good amount of ventilation. Patience is key here; build up those layers slowly, with gentle sanding in between, for a finish so glossy you can see your reflection in it.
Top Coats
Last Line of Defense: Sometimes, you want a bit more armor. A polyurethane top coat can add an extra layer of toughness without dimming your stool’s sparkle. Glossy, satin, matte – it’s all about what vibe you’re going for.
The Final Once-Over
Dotting the I’s and Crossing the T’s: Take a step back and inspect your masterpiece for any slip-ups. A bit of light sanding here and a touch-up coat there can fix most boo-boos, leaving you with a stool that looks like it walked straight out of a professional workshop.
Rolling up your sleeves and applying these finishing touches not only ensures your guitar stool looks fantastic but also gives you the satisfaction of a job well done. It’s about putting in that extra effort to make something you’re truly proud of. Plus, there’s nothing like the feeling of sitting back, maybe strumming a few chords, and admiring a piece that’s not just made by you, but finished with a flourish, too.
Conclusion
Crafting a guitar stool merges the worlds of music and woodworking, resulting in a functional piece of art that resonates with personal style and comfort. Through each step of the process, from selecting the wood to applying the final finish, the creator embarks on a journey that is as rewarding as it is intricate. The finished guitar stool stands not just as a testament to craftsmanship, but also as a unique symbol of the maker’s passion for music and design.
Are you looking for more amazing seating for your bar? Check out our tractor seat bar stool project!


