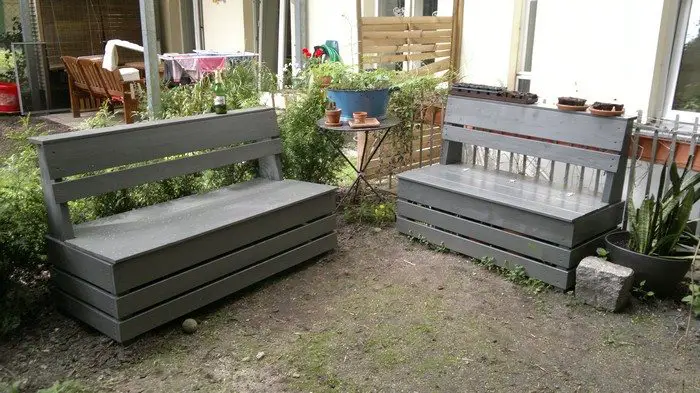
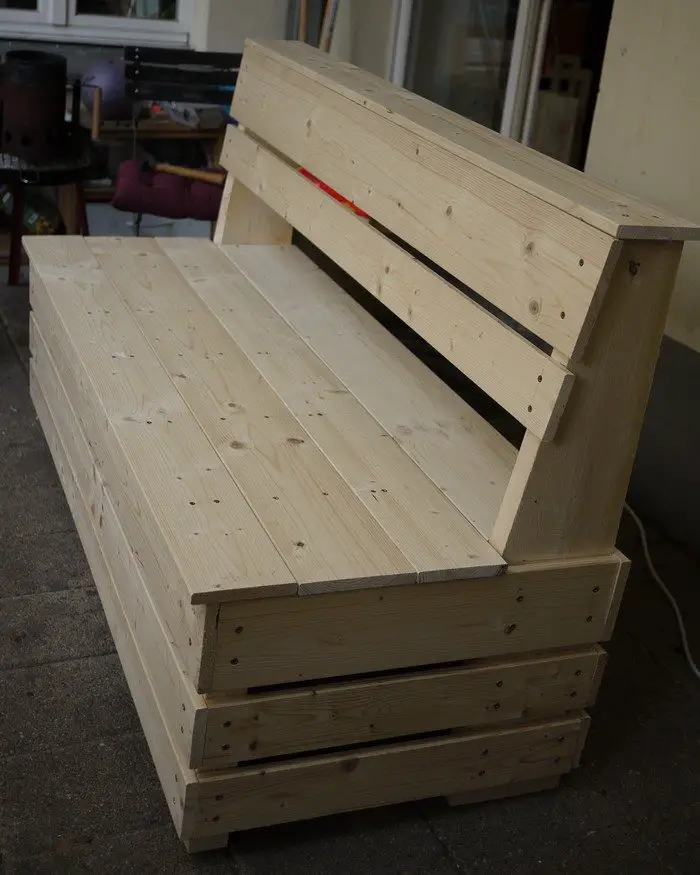
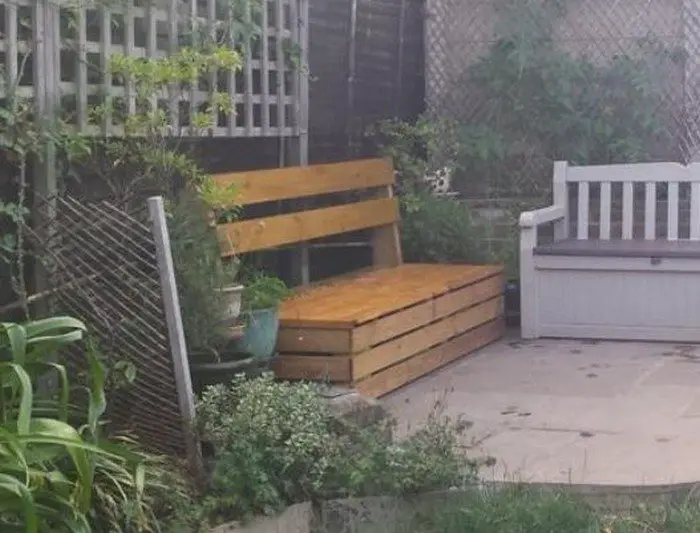
Is your yard lacking a garden bench right now? Here’s a DIY project for you which is also great storage for some of your gardening tools and materials!
The design and build are very straightforward. All cuts are simple and there are no special joints. And no special tools are needed, so these garden benches are very easy to build!
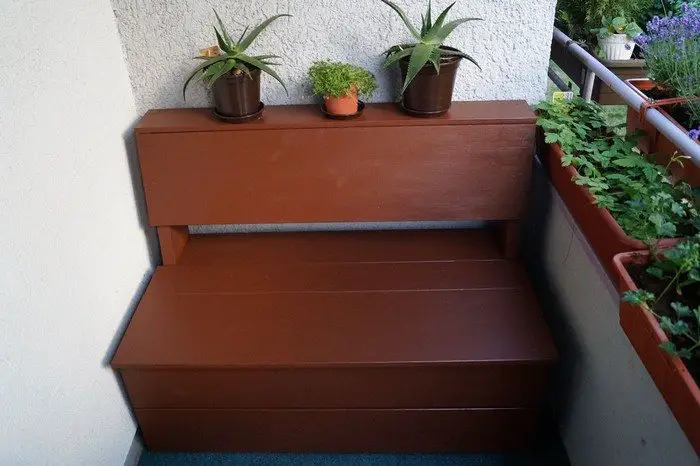
This garden storage bench has an angled backrest with shelf where you can place your drinks as you enjoy your outdoor area.
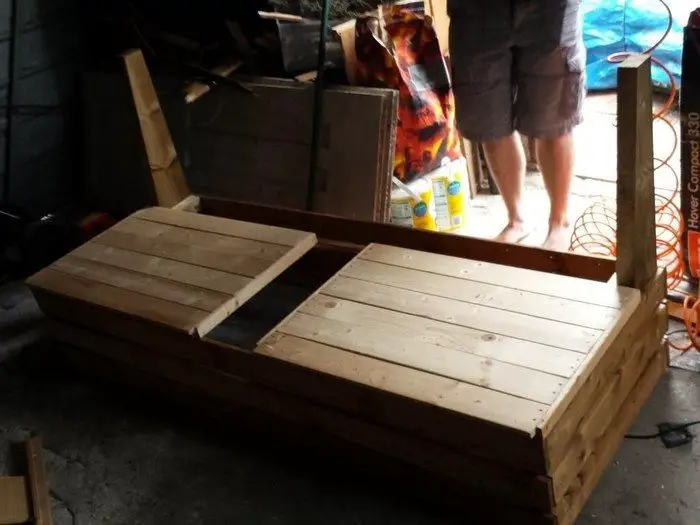
The two-seater bench measures 120-cm wide and the three-seater measures 149-cm wide. Both provide spacious storage for pots, watering cans and other things in your yard that you want to keep out of sight.
Do you need a bench and storage in your backyard? You can learn how to build one by following the step-by-step tutorial below!
Materials:
- Pine Timber
- 5 pcs 5 cm x 5 mm Deck Screws
- 4 cm x 4 mm Screws (for the seat)
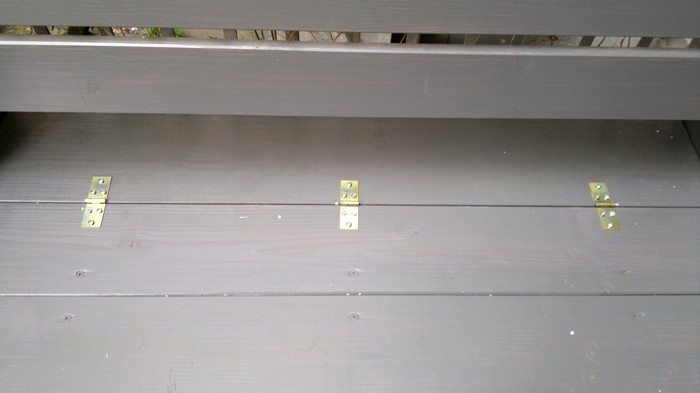
- 3 Hinges
- Finishing (of your choice)
Tools:
- Circular Saw
- Hand Saw
- Drill(s) – with 4mm Drill Bit
- Philips Screwdriver
- Ruler
- Pencil
- Paintbrushes
Click on any image to start lightbox display. Use your Esc key to close the lightbox. ?
Steps:
Timber Cuts: All measures are in centimeters.
The depth of the finished bench is 65 centimeters total.
For the two-seater bench
Cut from smooth wood
- 5: 120x10x1.8 (seat back + front and back slats)
- 4: 60x10x1.8 (side slats)
- 5: 120x14x1.8 (seat back shelf + front and back slats + seat)
- 2: 60x14x1.8 (side slats)
- 2: 120x17x1.8 (seat and seat back)
- 1: 108.4x20x1.8 (back seat hinge board)
Cut from cheaper, rougher wood
- 2: 42×5.8×5.8 (front legs)
- 2: 90x20x4 (back legs–these need a diagonal cut, explained later)
- 2: 20×4.8×2.4 (inside support)
- 1: 116.4×5.x5.6 (inside support)
- 3: 34×4.8×2.4 (seat cleats)
For the three-seater bench
Cut from smooth wood
- 5: 149x10x1.8 (seat back + front and back slats)
- 4: 60x10x1.8 (side slats)
- 5: 149x14x1.8 (seat back shelf + front and back slats + seat)
- 2: 60x14x1.8 (side slats)
- 2: 149x17x1.8 (seat and seat back)
- 1: 136.4x20x1.8 (back seat hinge board)
Cut from cheaper, rougher wood
- 2: 42×5.8×5.8 (front legs)
- 2: 90x20x4 (back legs–these need a diagonal cut, explained later)
- 2: 20×4.8×2.4 (inside support)
- 1: 145×5.6×5.6 (inside support)
- 5: 34×4.8×2.4 (seat cleats)
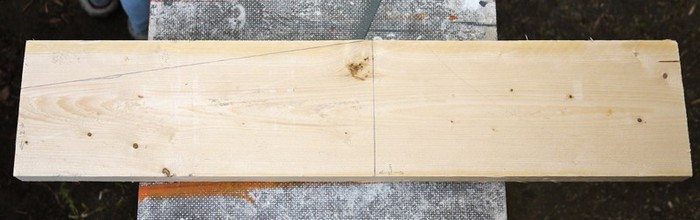
All of the cuts are perfectly straightforward except for the diagonal of the back legs. To do this, lay the leg down so the 20-cm wide side is parallel to the ground.
Measure 42 cm up from the base of the leg.
Measure 12 cm from the opposite edge of the leg across the top edge. Make a mark.
Using a ruler, draw a line from the top mark to the mark at 42 cm from the leg base.
Measure 42 cm from the base on the other side edge, draw a line across. You won’t use this line for the cut, but you need it later.
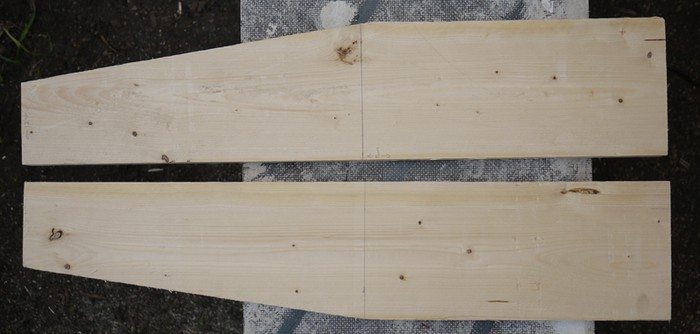
Using the circular saw, cut along the diagonal line. Do that twice.
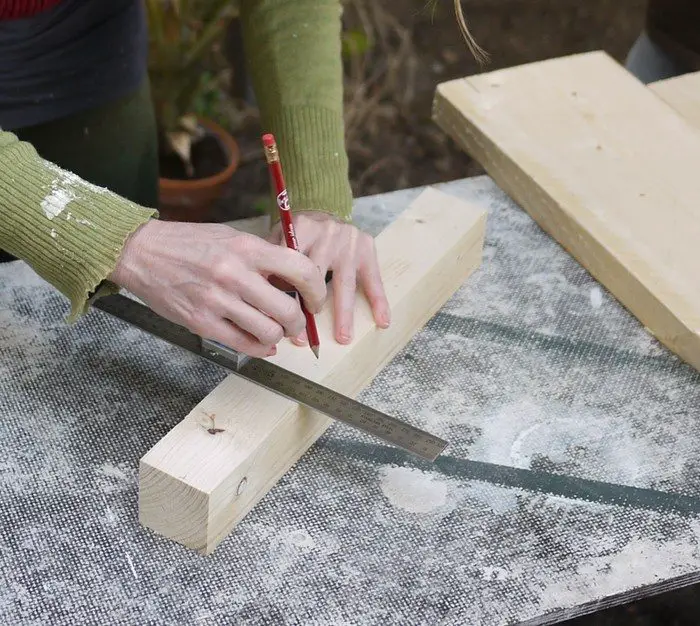
Put the sides together. Mark the slat placements: First, you are going to mark the placement of the slats with a pencil. That way, your bench will not look like it was slapped together by a monkey. Be sure that when you mark the back legs, you lay them down so that the two straight back edges are facing each other.
Take one of the front legs. Measure from the top down on each edge 14 cm, 2cm, 10 cm. 2cm, 10cm. Draw lines across. Use these marks to transfer the measurements to the other legs. Draw lines across all.
On the back legs, the measurements are done from the 42-cm-high line, but if you are transferring the measurement from the front leg, you should line up the bottoms.
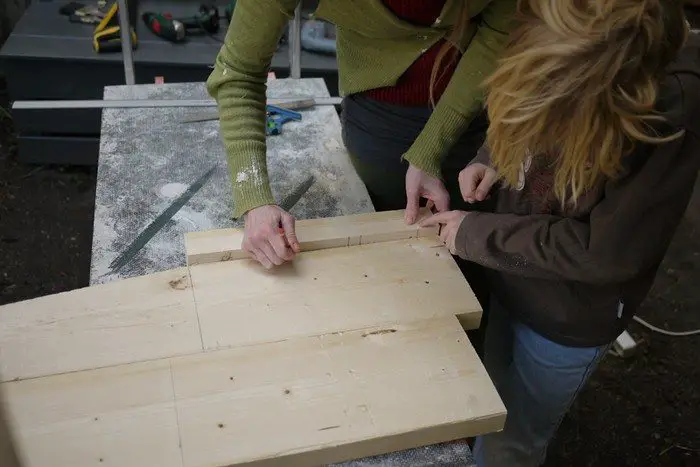
Put the sides together. Mark the screw placements: Look at each side slat and pick the prettiest side to keep facing out. You will mark the screw placements on that side.
You might think that I am acting a little OCD with all this measuring, but your bench will be a lot hotter if your screws are all placed regularly. If you think that this is a waste of time, you can skip the marking and go straight to the drilling.
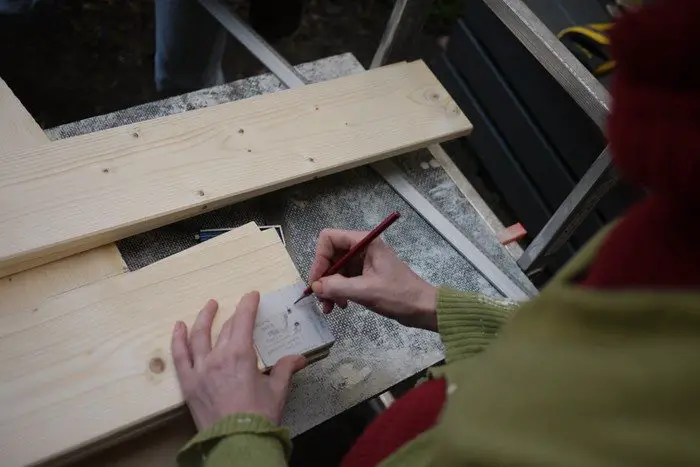
I do the marking with a template. Grab a cerial box out of your recycling bin and take a piece with a proper right angle on it. Then do this:
On the top edge, write “top” on the front side and “bottom” on the other side.
On the left edge, write “side” on both sides.
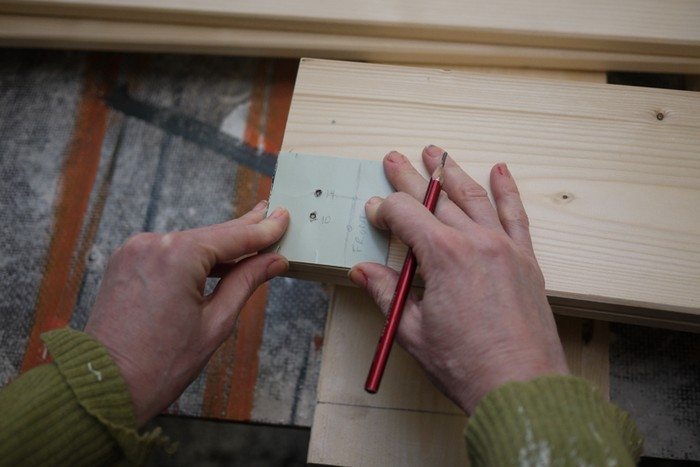
With the front side facing you, measure three centimeters from the left edge and draw a line parallel to the left edge.
Measure three centimeters from the top edge and draw a line parllel to the top edge.
Where those two lines intersect, poke out a hole with some pointy scissors or whatever sharp object is handy.
Write the number “10” next to that hole on the front and on the back of the cardboard.
Now measure 4.5 cm from the top edge and draw a line parallel to the top edge.
Where that line intersects with the vertical line, punch another hole.
Write the number “14” next to that hole on the front and on the back of the cardboard.
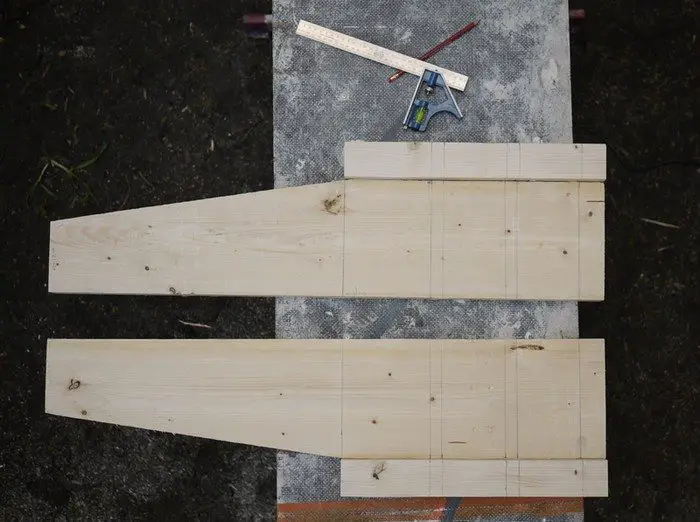
Now you can just line the top and side edge up in the corners of each board and make a dot with your pencil where your screws will go. The “10” hole is to be used for the 10-cm wide slats. The “14” hole is for the 14-cm wide slats. You turn the paper upside down to mark the opposite side.
Now you have 6 slats and 4 legs all ready to go.
The front slats have a slightly different screw placement.
Continued Page 2…


