Raising chickens can be rewarding, fun, therapeutic, and for some, maybe a bit nerve-wracking!
There is literally tons of information about raising chicks and chickens and it is hard to sort through it all to determine what is right, what is not, and what is just plain weird.
If people have beds, then chickens have perches or roosts. And just like beds, chicken roosts should be properly designed and built to be comfortable for the chickens to roost at night!
Yes there are certain features that make a good chicken perch but there is definitely nothing difficult about making one. As long as you take note of some simple reminders, your chickens will be happy with their roost. Happy chickens lay lots of eggs :)
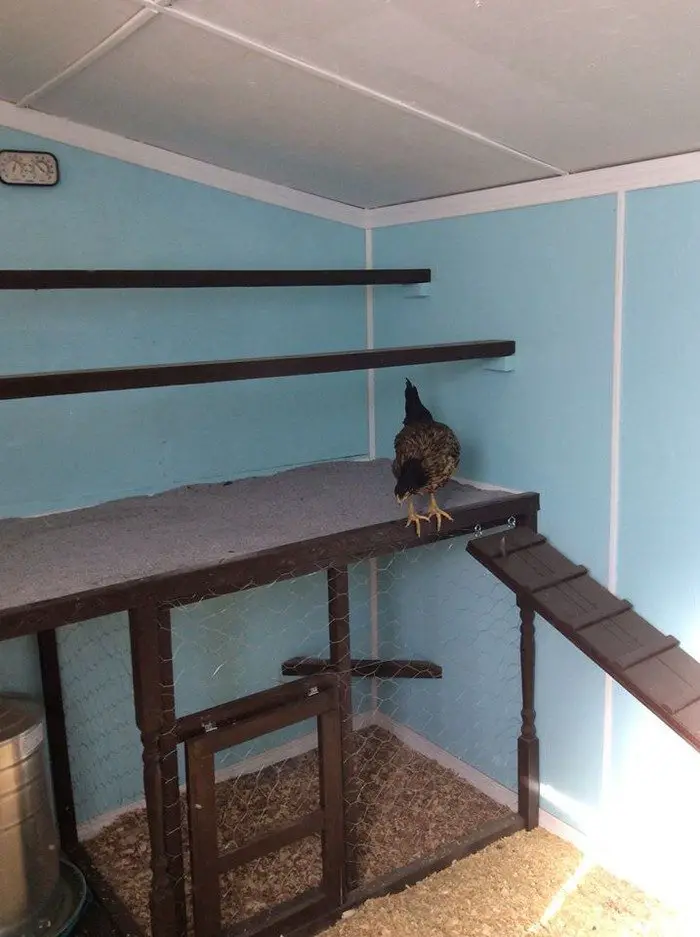
First, your chicken perch should be secure. Make sure it can be closed up at night because it serves as their ‘bedroom’ where they want to feel safe while resting. Once a predator enters and scares or harms the chickens, they will start looking for a new place to perch!
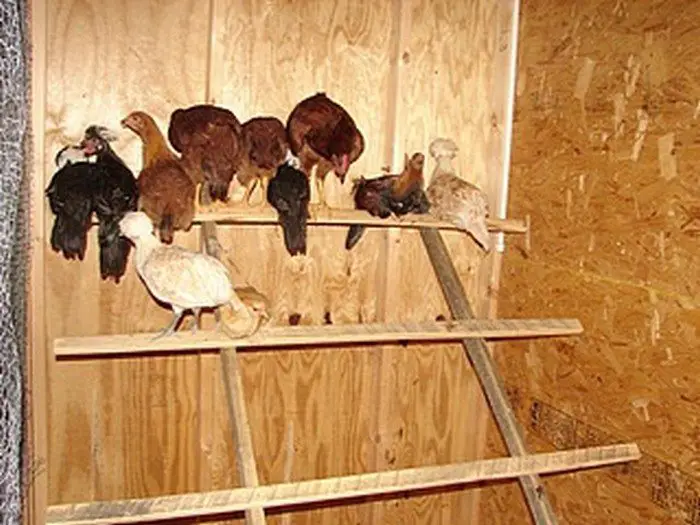
After finding a good spot for it, make sure the dimensions of your perch are good. There should be enough room for all the chooks which means that the perches or branches have to be at least 8 inches apart from each other.
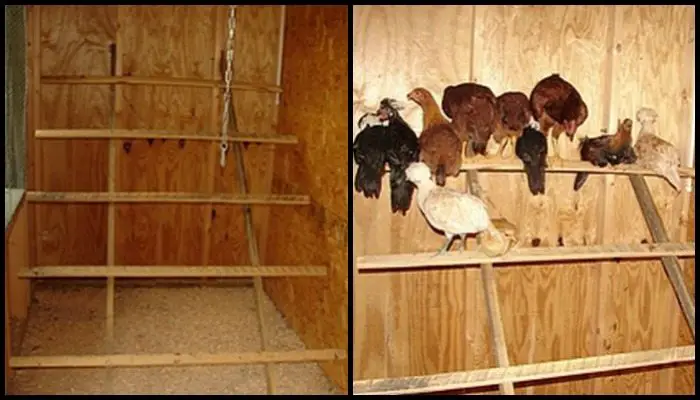
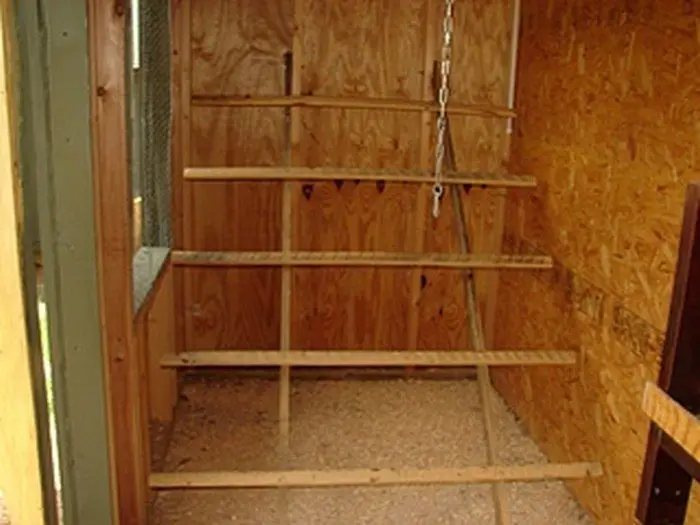
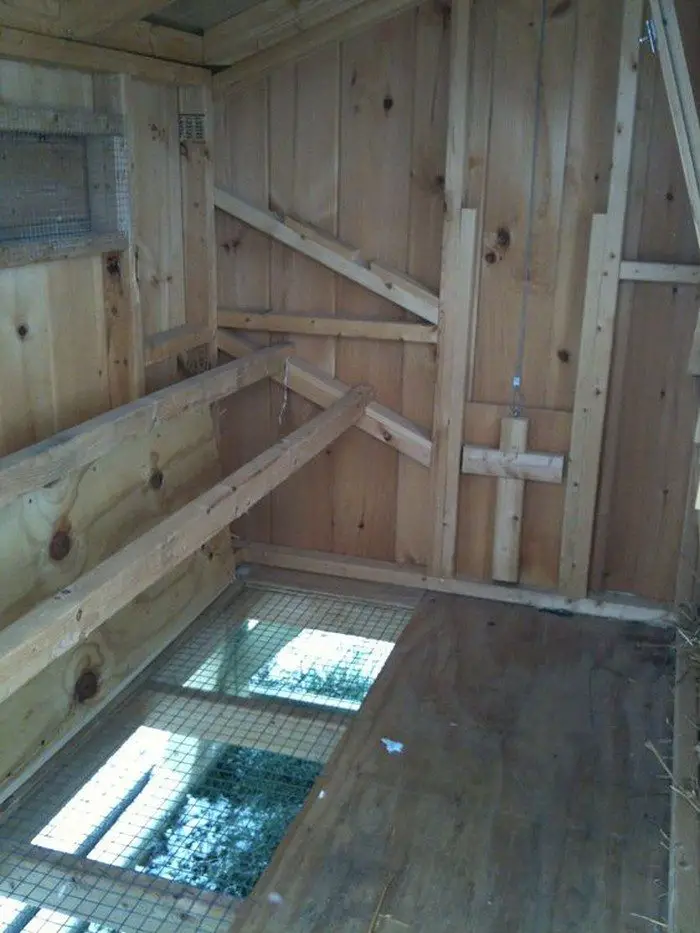
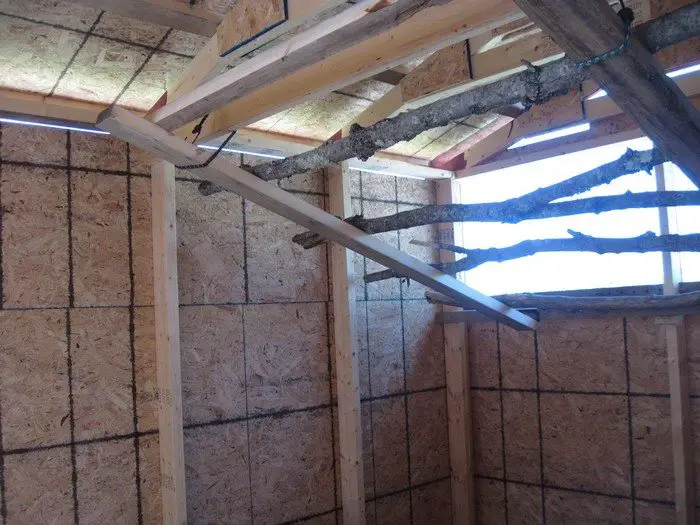
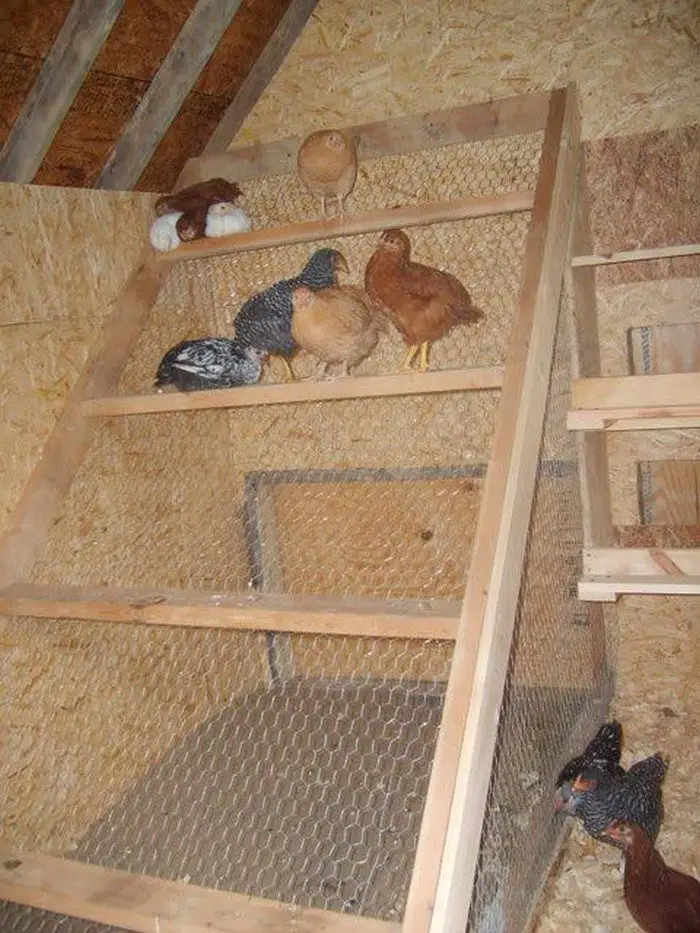
Chickens digest food and release their waste during the night, too, so your chicken perch should be angled such that they won’t be dropping waste on one another; around 30 to 40 degrees.
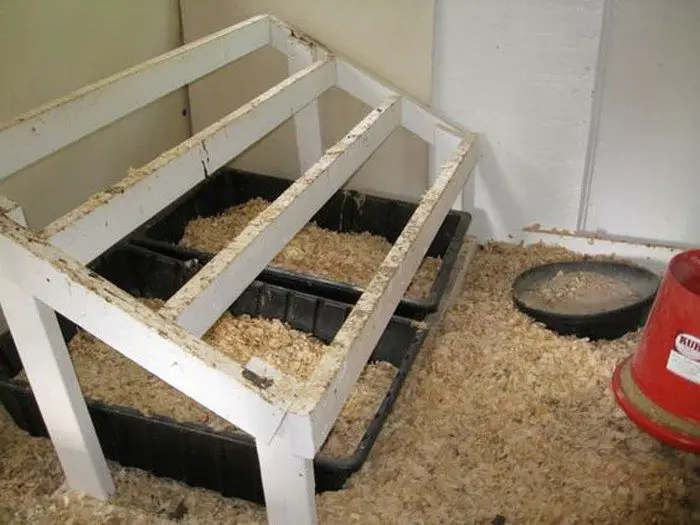
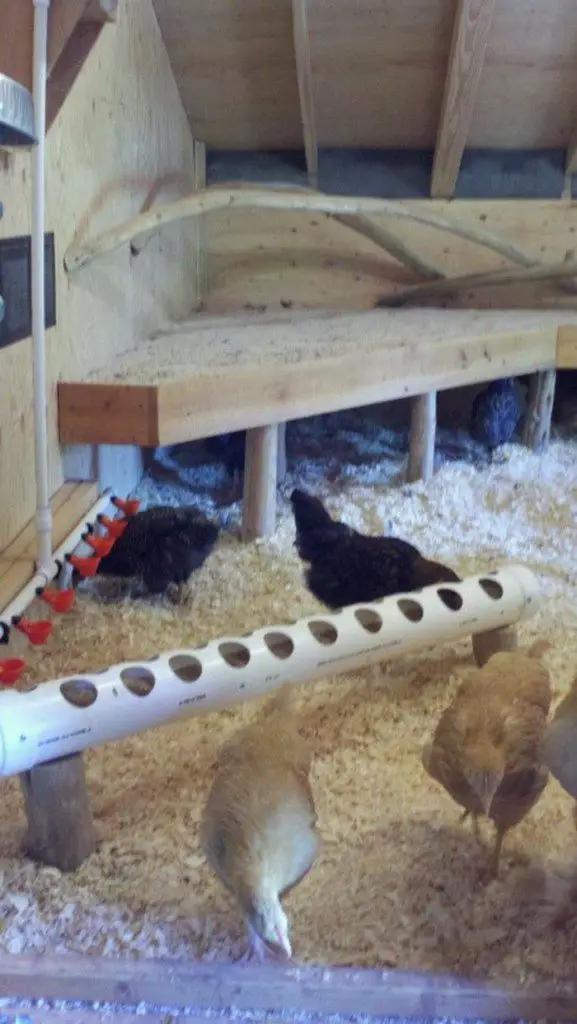
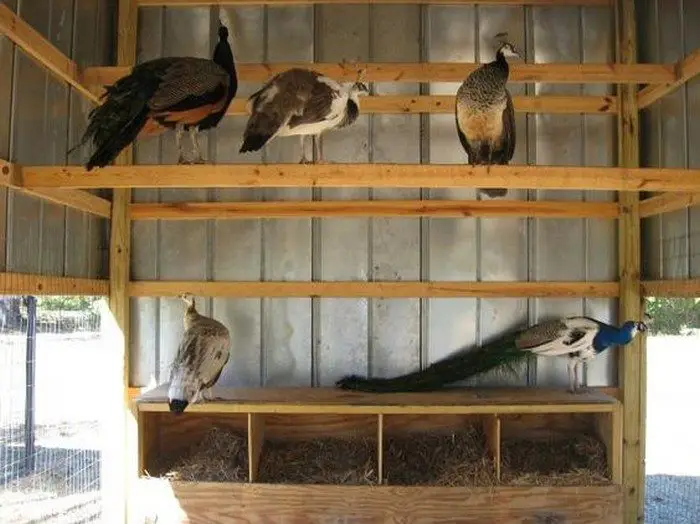
Now since all the waste goes below the chicken roost, you should also consider how you can access the area for easy cleanup. You can attach chains to the chicken perch so you can lift it up out of the way while cleaning. Or you can simply install a tarpaulin under it to serve as a collection tray which you can easily remove and empty. (There are plenty of solutions for this and you can find more ideas by viewing our album below.)
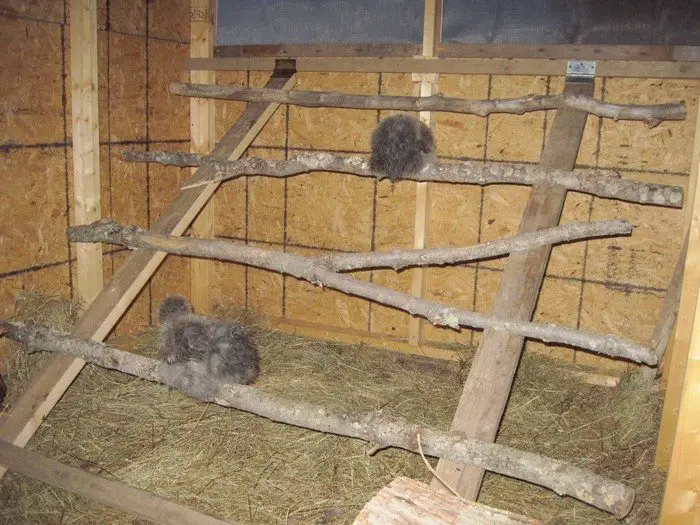
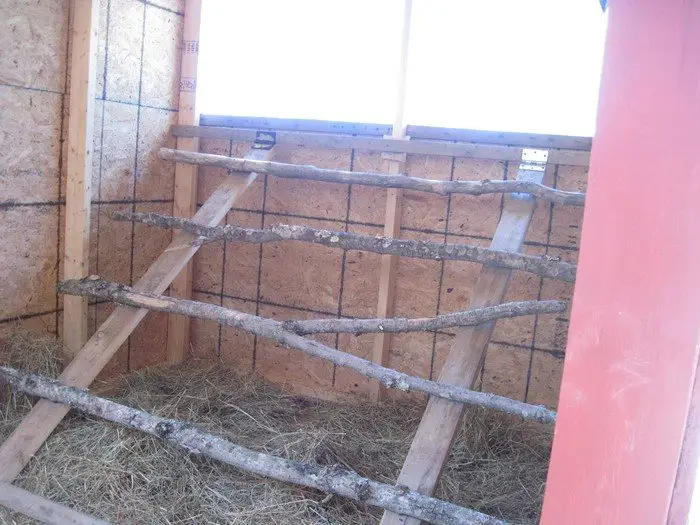
Simply use timber, large dowel rods, or just tree branches (the best material since it is natural) when building a chicken roost. You don’t have to (and should not) use any other material as chickens are most comfortable and naturally roost with wood. You can use a combination of different sizes of these wood materials to let your chickens choose and find a favorite spot.
And that’s it! Those are the only factors you need to think about to make your chickens happy with their roost and their home in general.
Do you know someone new to raising chickens who could use this information? :)
Contents
Building a Chicken Roost
Materials
- 2×2 Timber, Large Dowel Rods or Tree Branches
- 1×2 Timber
- Bolts
- Screws
- Chains
Tools
- Measuring Tape
- Saw
- Planer
- Sander
Instructions
Step 1: Design Your Roost
- First, decide on the size of the roost based on the number of chickens you have. Each chicken needs about 8-10 inches of perch space. Plan for a roost that is at least 2-3 feet off the ground.
Step 2: Measure and Cut Timber
- Using your measuring tape, measure and mark your 2×2 timber for the frame and perches. You’ll need two long pieces for the sides and several shorter pieces for the horizontal perches.
- Cut the timber using the saw. If you are using tree branches or dowel rods, cut these to your desired length as well.
Step 3: Sand and Plane
- Use the planer to smooth any rough edges on your cut timber, ensuring there are no sharp areas that could hurt the chickens.
- Sand all pieces thoroughly to prevent splinters.
Step 4: Assemble the Frame
- Lay out the two long pieces of 2×2 timber parallel to each other on the ground. These will serve as the vertical sides of your roost frame.
- Attach the shorter 2×2 pieces horizontally between the vertical pieces using screws and bolts, spacing them evenly to create a ladder effect. Ensure they are level and securely fastened.
Step 5: Add Support Beams
- Cut additional lengths of 1×2 timber to act as support beams along the length of the roost. These will help stabilize the structure.
- Attach these supports between the horizontal perches, screwing them into both the frame and the perches.
Step 6: Install the Chains
- If you want your roost to be adjustable, attach chains to the top of the frame. This allows you to raise or lower the roost easily for cleaning or to suit different ages and breeds of chickens.
- Ensure the chains are securely bolted and can safely support the weight of the roost and the chickens.
Step 7: Final Touches
- Once the frame is assembled, give everything a final sanding. Check all bolts and screws are tight and that there are no loose parts.
- If using, attach natural branches or dowel rods in place of or alongside the timber perches for added variety and grip for the chickens.
Step 8: Installation
- Position the roost in the desired location within your chicken coop.
- Secure the roost to the coop if necessary to prevent tipping or movement.
Step 9: Test and Adjust
- Let your chickens explore the new roost. Watch how they interact with it and make any necessary adjustments to enhance their comfort or improve stability.
Click on any image to start the lightbox display. Use your Esc key to close the lightbox.![]()

Health and Safety Tips
A well-designed chicken roost is essential not only for the comfort of your chickens but also for their health and safety. Properly constructed and maintained roosts can prevent various health issues and ensure a safe environment for your flock.
Below are some crucial health and safety tips to consider when building and maintaining a chicken roost.
Proper Spacing and Sizing
Avoid Overcrowding
Ensure each chicken has enough space on the roost to comfortably roost without crowding. Chickens typically require about 8-10 inches of space per bird. Overcrowding can lead to stress, pecking, and the spread of disease.
Appropriate Height
The height of a chicken roost should be such that chickens can easily hop up without struggling, but not so high that they risk injury if they fall. Typically, 2-3 feet is sufficient, depending on the breed.
Material Safety
Use Safe Materials
When building your chicken roost, use untreated wood to avoid exposing chickens to harmful chemicals. Ensure that all materials are smooth and free of sharp edges or splinters to prevent injuries.
Secure Fixings
Use screws and bolts to assemble the roost securely, ensuring it can support the weight of all your chickens without collapsing. Regularly inspect these fixtures for wear and tear and tighten them as needed.
Cleanliness
Easy to Clean Design
Design your chicken roost with cleanliness in mind. An easily accessible design, possibly with a removable bottom or a droppings tray, will make it simpler to maintain hygiene and control parasites and bacteria growth.
Regular Cleaning
Clean the roost regularly to prevent the buildup of droppings and reduce the risk of disease. Use natural cleaning agents like vinegar or citrus to disinfect the area without harming your chickens.
Ventilation
Good Airflow
Ensure the area around your chicken roost is well-ventilated. Good airflow helps to keep the coop dry and ammonia levels low, both of which are crucial for maintaining respiratory health in chickens.
Pest Control
Prevent Pest Infestations
Regularly check the chicken roost and the rest of the coop for signs of pests such as mites and lice. Implement natural pest control measures like diatomaceous earth or herbal treatments to keep pests at bay.
Observation and Adjustment
Monitor Chicken Behavior
Pay attention to how your chickens use the roost. If you notice that they avoid it or seem uncomfortable, reevaluate the design and placement. Adjustments may be needed to ensure maximum comfort and utility.
By following these health and safety tips, you can ensure that your chicken roost provides a secure and healthy environment for your chickens to rest. Regular monitoring and maintenance of the roost are key to sustaining a happy and healthy flock.
DIY Cleaning Solutions for Under the Roost
Maintaining cleanliness under the chicken roost is crucial for ensuring the health and well-being of your chickens. Accumulated droppings not only produce unpleasant odors but can also harbor pathogens and attract pests. Implementing effective DIY cleaning solutions can help keep the area under the chicken roost clean, reducing the risk of disease and making your coop maintenance easier.
Daily Scooping
Make it a habit to remove droppings from under the chicken roost daily. Use a scraper or a small shovel to clear the area. This prevents the buildup of waste and reduces the smell and the likelihood of disease.
Vinegar Solution
Create a cleaning spray using white vinegar and water in a 1:1 ratio. Vinegar is a natural disinfectant that can help eliminate odors and kill bacteria. Spray this solution under the chicken roost after removing the droppings, and allow it to air dry.
Citrus Peel Spray
Boil citrus peels in water to create a fragrant solution that can act as a natural disinfectant. Cool the solution, strain it, and pour it into a spray bottle. Use this spray to clean and deodorize the area under the roost.
Lime Spreading
Sprinkle agricultural lime under the chicken roost to help neutralize odors and absorb excess moisture. Lime also aids in breaking down feces and can reduce fly populations. Ensure you use garden lime (calcium carbonate), not hydrated lime, as the latter can be harmful to chickens.
Baking Soda
Spread baking soda under the chicken roost to absorb odors. Baking soda is safe for chickens and can be a very effective odor neutralizer. It can be used in conjunction with lime for even better results.
Herbal Repellents
Mix dried herbs like lavender, mint, and lemon balm, and spread them under the chicken roost. These herbs not only smell great but can also help deter pests such as mites and lice.
Diatomaceous Earth
Apply food-grade diatomaceous earth under the chicken roost to control pests. This natural powder can kill insects by dehydrating them but is non-toxic to chickens when used in moderation.
Weekly Washing
Once a week, wash the area under the roost thoroughly with hot soapy water followed by one of the natural disinfectant sprays. This regular deep cleaning helps prevent the buildup of harmful bacteria and keeps the coop smelling fresh.
By using these DIY cleaning solutions, you can effectively manage the cleanliness of the space under your chicken roost, contributing to a healthier environment for your chickens. Regular maintenance using these natural and safe methods not only keeps your coop clean but also ensures the health and happiness of your flock.
Conclusion
Building a chicken roost is a straightforward project that can significantly improve the well-being of your chickens, providing them with a safe and comfortable place to rest. Using the right materials and following detailed construction guidelines ensure durability and functionality of the roost. Regular maintenance and proper cleaning further enhance the health benefits, making your coop a clean and inviting environment for your flock.
We have more ways to keep your chickens engaged and healthy. Check out our chicken playground ideas!


