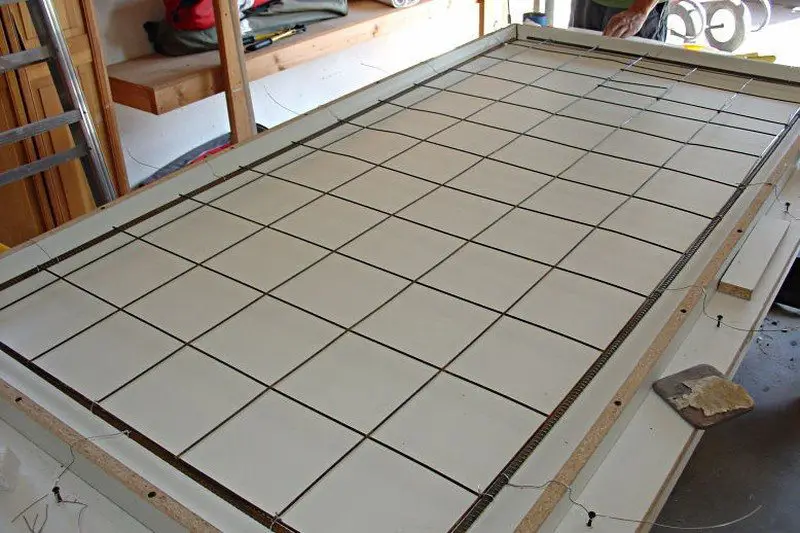
Once the grid is fully secured, you can remove the styrofoam supports and the entire grid should hang in place nicely. If it sags at any spot, you probably just need more ties between the rebar and remesh.
When everything is secured and ready, do another thorough cleaning with alcohol. It’s a little tougher with the rebar in place, but it’s very important since any specks of dirt or debris will put a blemish in the finished product.
Now it’s time for the concrete. While small projects can be hand mixed in a 5 gallon bucket (as we did with our test forms), you’ll want a concrete mixer for this size. We rented ours from Home Depot and were able to get it back within their 4 hour time frame. The concrete should be mixed to the “consistency of oatmeal.” But…how thick do you eat your oatmeal? Basically, you want the concrete to be dry enough to minimize potential cracking during curing, but thin enough to work with. We found that it was better to err on the side of being a little wetter than too dry. (And I said a little wetter). There are different ways of coloring the concrete, we added pigment during the mixing.
You definitely want at least two people when pouring. One works with the mixer and shovels the concrete into the form while the other(s) use their hands to push it into place. Make sure you don’t push it too hard over the support grid. You actually want to kind of scoop it under to make sure the remesh is supported.
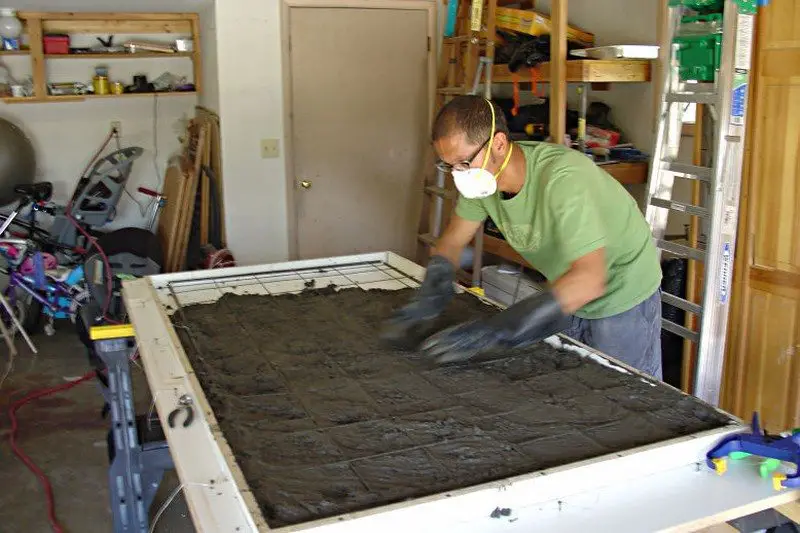
*One thing we learned is that it’s not a bad idea to vibrate the air bubbles out at a couple of different points before all of the concrete is added. You obviously don’t want to spend a lot of time because you don’t want the concrete to start setting up between pours, but even one time in the middle will help. If you have more people available at this step, one or two can be tapping the form while others are working the concrete.*
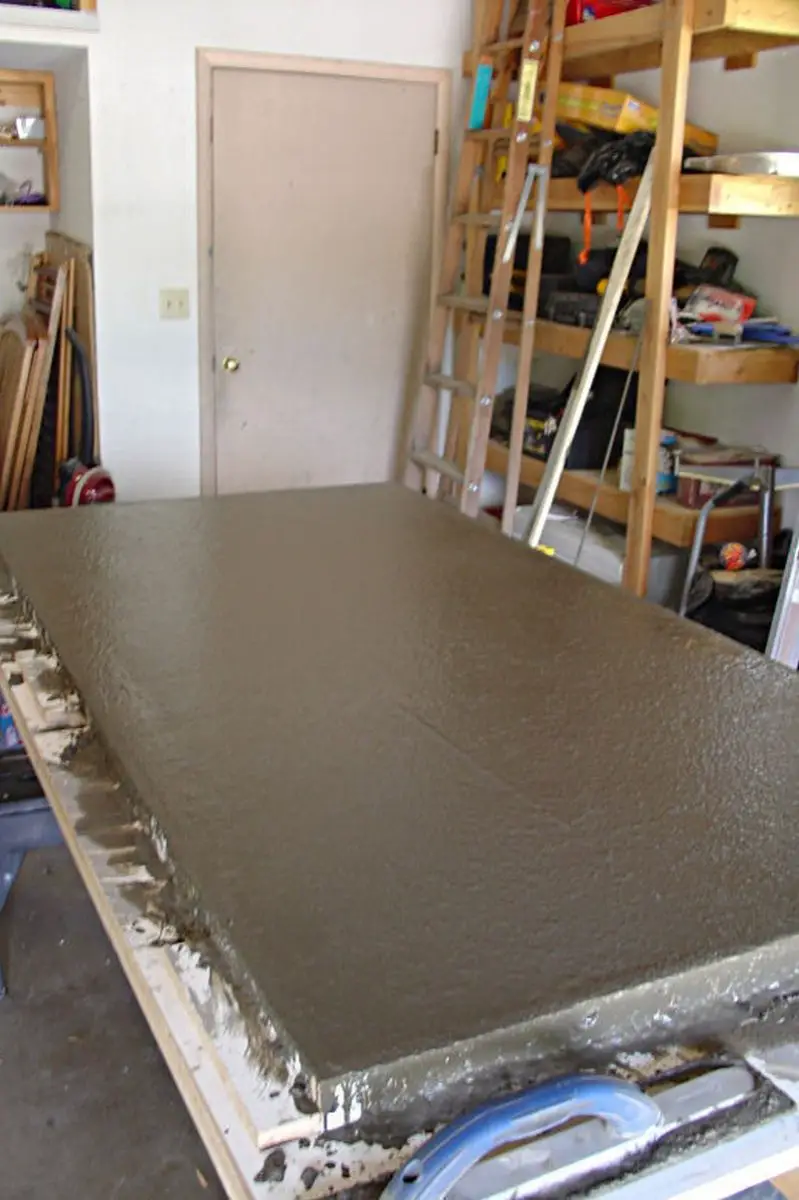
Fill the form until it looks like there’s a little too much. You will be screeding it off next and don’t want low spots.
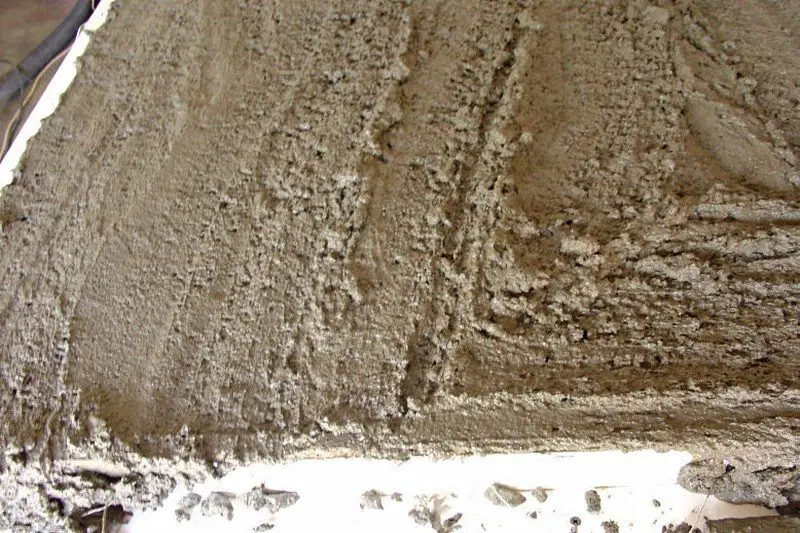
Using a long, straight board, you now screed across the concrete with a sawing motion. This pushes the concrete into the form more and levels everything out. There will be spots where the screed board will come up to the wire ties, at this point you can just lift over them and continue screeding. You’ll be knocking off a lot of extra concrete and probably finding some low spots or holes. Use the overflow to fill in those spots and continue screeding until it all looks uniform.
Now is when you’ll want to cut your support wires. Don’t worry about messing up the concrete, just follow the wires as deep into the concrete as you can (an inch should be fine) and clip them off. Then use your fingers to make sure the remaining wire isn’t going to show or protrude. Once they’re all clipped, you can go back and fill the spaces and re-screed.
Now you’ll use a concrete float to begin finishing. The float is drawn across the surface with the leading edge raised just a bit so as not to cut into the concrete. You’ll probably notice water coming to the surface which is fine. The concrete shouldn’t be so dry that the float tears it up rather than smooth it out. Float it several times if necessary to get a rather smooth surface.
*Don’t be afraid to pull concrete out and re-mix if it’s too dry. Our first test form was too dry and ended up with large voids from air pockets that couldn’t be vibrated out. If you notice the concrete is too dry when pushing it into the form, pull it back out and put it back into the mixer with a little more water.*
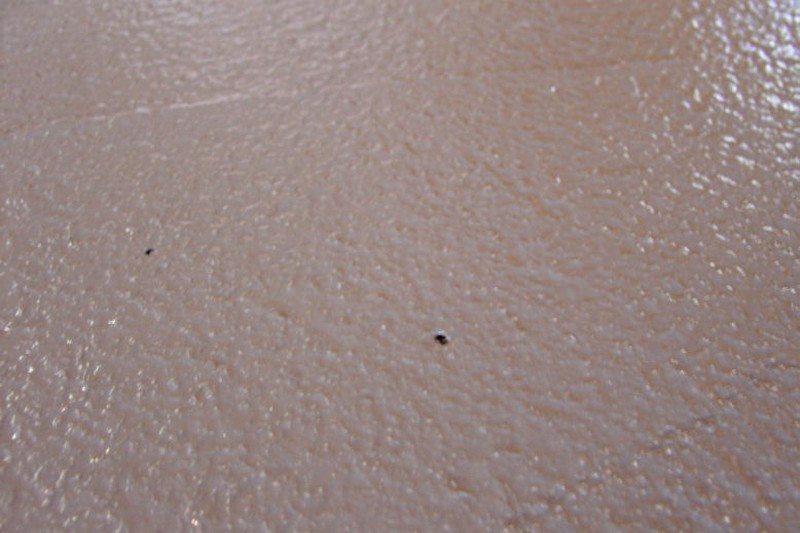
Now it’s time to make sure your finished countertop looks nice. While the concrete is still wet, you need to get the air pockets out. This can be accomplished in different ways, the most low tech being a rubber mallet. Simply go around the entire form and gently tap on the sides and bottom to bring the bubbles to the surface. You’ll have to spend a bit of time in every area to assure that they come up. As they do, you’ll see a bubble(s) grow until they pop. These can then be re-floated to fill and smooth them.
*When using this method, be sure you don’t pound too hard. We had three star pattern cracks in the finished top due to the melamine cracking while being hammered.*
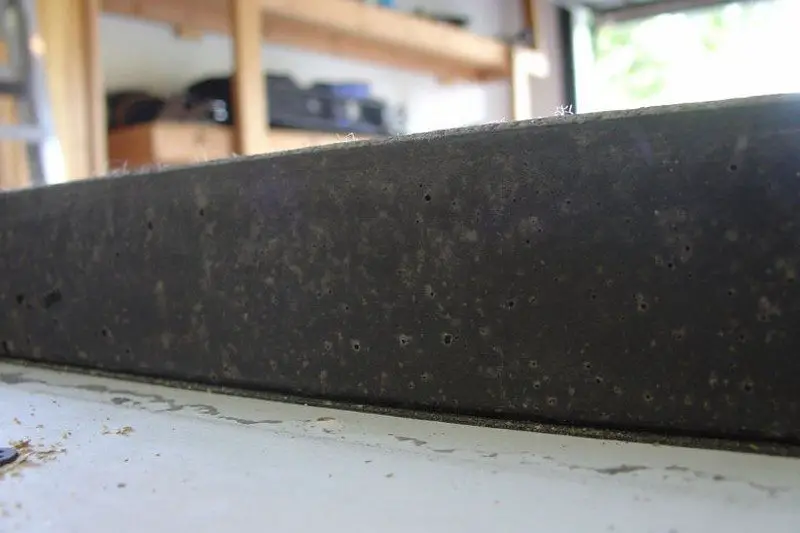
You can also use a palm sander without sand paper to vibrate the form, or even a large vibration machine hooked to the form. The longer and more evenly the form is vibrated, the better it will turn out. Our top was pretty well vibrated (apart from the 3 cracks), but the sides could have been done a little more. Just don’t underestimate the importance of this step. It’s probably the most important when it comes to obtaining a smooth finished surface without voids. Also, fewer voids means less potential for cracking.
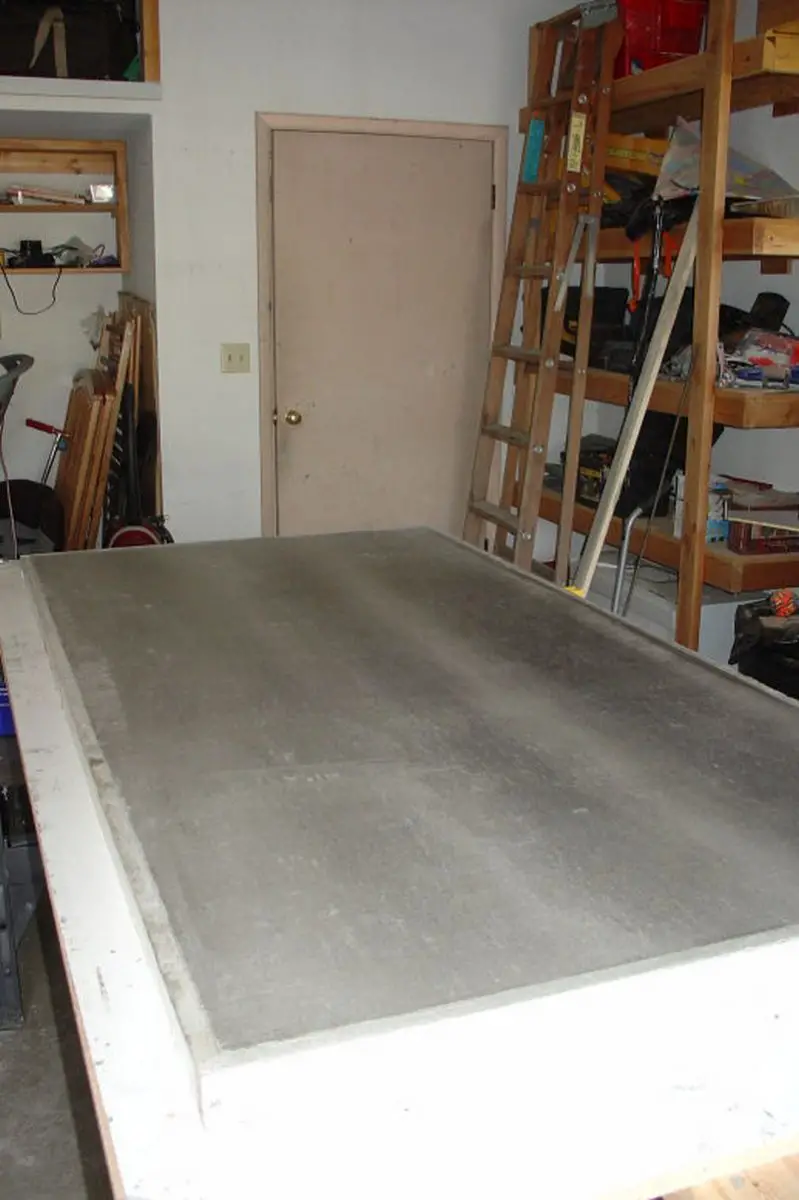
After the concrete has begun to set up, it’s time to trowel it. We used an aluminum rectangular trowel with gentle pressure to remove any lines left from floating. This will end up being the bottom of the countertop, but you still want it as smooth as possible so it will sit level on your cabinet base.
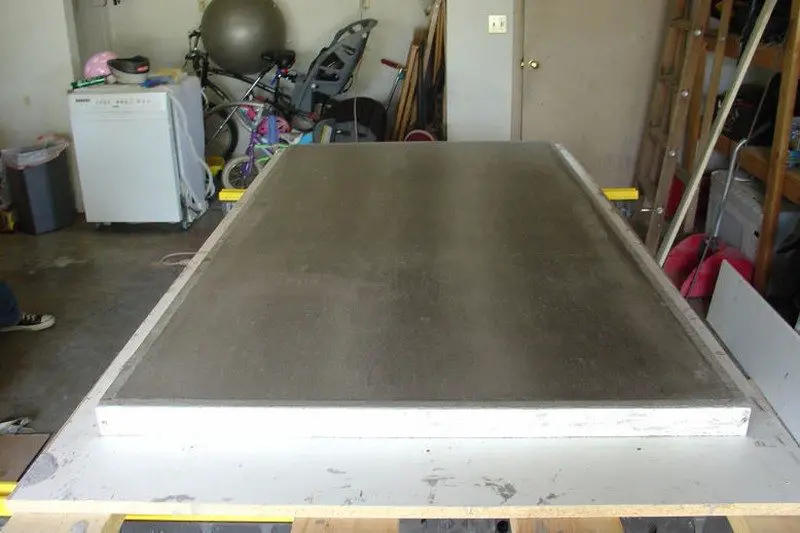
After several hours, you can also remove the sides of the form to trowel the sides if you’d like. For a rounded edge you can use a rounded corner trowel on the top and/or bottom. We just left the corners sharp (relatively speaking) and left the form sides in place for a couple of days. We figured the surface of the sides wouldn’t get any smoother with us messing around with them. You’ll want to remove the sides of the forms after a couple of days of curing anyway to allow the sides to dry more fully.
When removing the sides of the form, be sure you’ve taken out all the screws. The boards should begin to pull away with gentle pressure at a corner. Do NOT put any type of prying tool on the concrete or you can mar the surface. You can pry against the adjacent corner board which should give you enough room to grab the board and gently pull it back. If a board really seems to be stuck, double check that there’s not still a screw hiding under a spot of concrete on the form board.
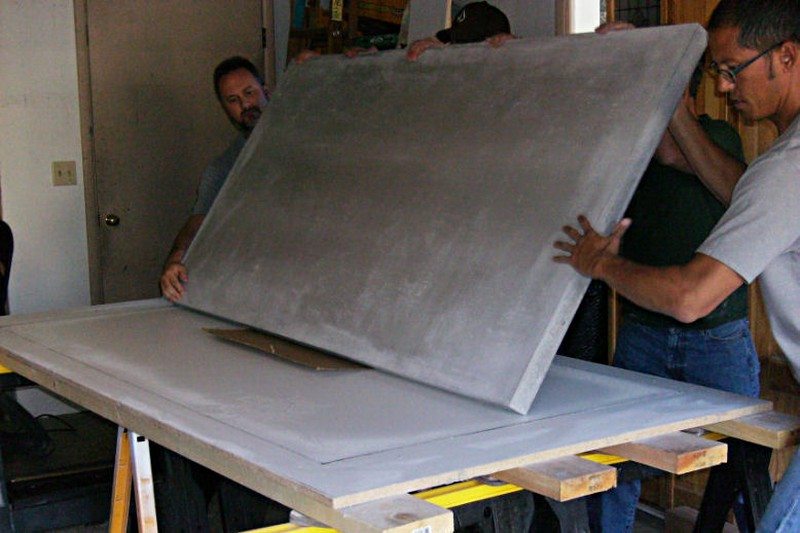
After 7-10 days of curing, you need to get the countertop face up so you can finish it (and in our case, do any patch-up work necessary). Again, our finished top weighed about 400 pounds, so we needed four guys to do this. We placed some cardboard against one side and tipped the countertop up onto its side on the cardboard. This allowed us to slide it to the other side and then gently lower it back down, now resting top up.
Continued Page 3…


