Got an old drum set that’s only collecting dust at home? Then why not give it a new purpose by turning it into an awesome drum set chandelier!
This upcycling idea is perfect for musicians and music lovers out there, who would love a musical theme for their interiors. Of course, you can also do this project if you simply want to replace your existing lighting with something that’s a whole lot more interesting than the usual lighting fixture.

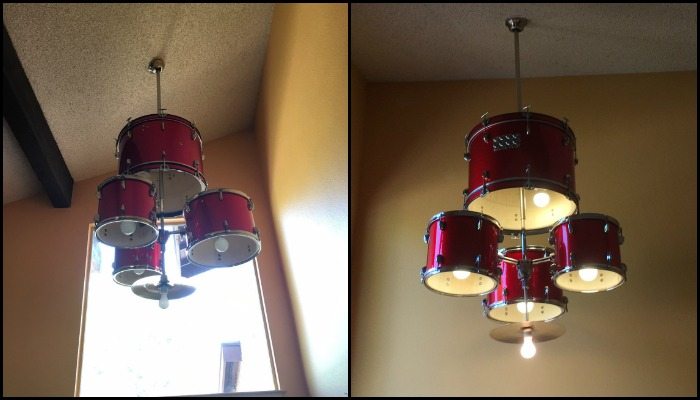
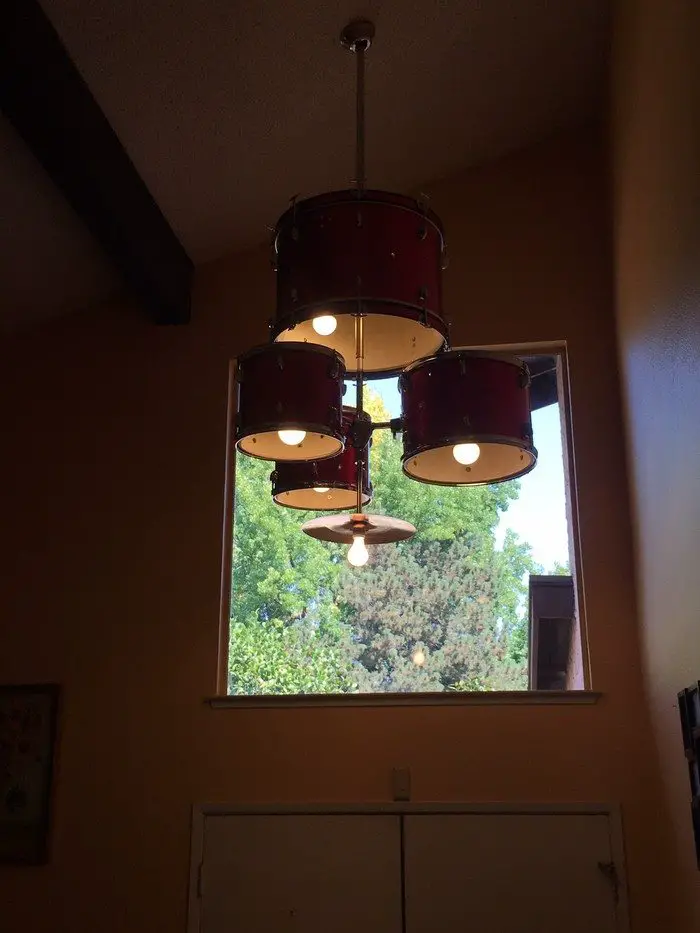
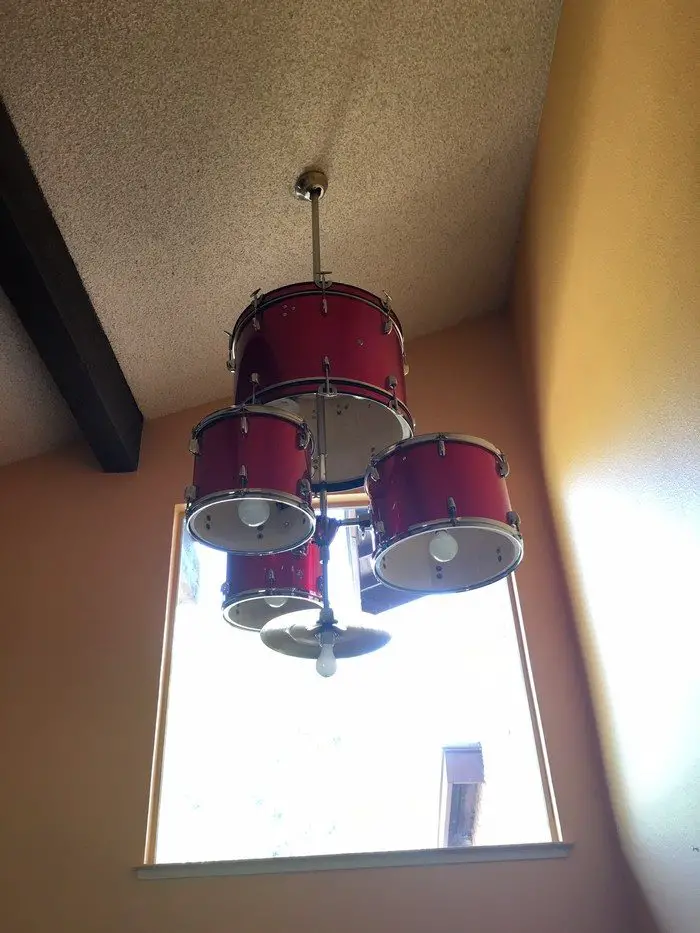
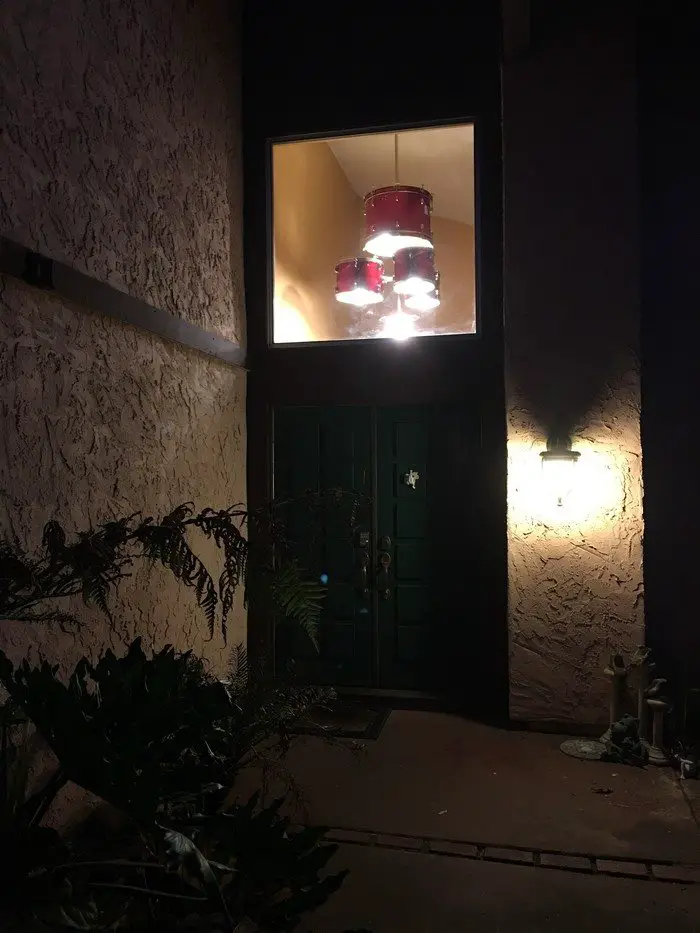
This drum set chandelier is made using a full-size drum kit. But it’s one of the cheaper brands, so weight was not an issue. It’s as heavy as the ceiling fan it replaced, hence the owner-builder was able to use the existing mount for installing his new DIY chandelier! Here’s a tip: check Craiglist or GumTree for junior drum kits if you are concerned about the weight of a full-sized kit.
There are many ways to turn an old drum kit into a chandelier It would depend on the materials that are available to you. You also have to consider the final weight of it. If you want to know further details of this project, you can learn how from the DIY-er who built this drum set chandelier by heading over to the link provided below.
Do you know someone who would love this idea too?
Contents
Building a Drum Set Chandelier
Materials
- Old Drum Set
- LEB Bulbs
- Metal Microphone Stand Base
- 1×3 Timber
- Ceiling Fan Mount
- Pipe Flanges
- L-Brackets
- Electrical Boxes
- Plumbing Fittings
- Screws
Tools
- Measuring Tape
- Cordless Drill
- Saw
Instructions
Step 1: Planning Your Design
- Decide the arrangement of the drum set. Consider the size and number of drums to use, as well as their placement relative to each other.
- Measure the ceiling height and the space where the chandelier will hang to ensure it will fit and hang at an appropriate level.
Step 2: Preparing the Drum Set
- Disassemble the drum set. Remove any hardware not needed, such as the drum skins and hardware that won’t be part of the chandelier’s final design.
- Clean the drums thoroughly to remove dust and grime.
Step 3: Modifying the Drums for Installation
- Use the saw to cut the 1×3 timber into lengths that will fit inside the drums. These will be used to mount the drums to the ceiling mount and pipe flanges.
- Drill holes in the center of each timber piece for the wires and to attach the pieces to the drum and the mounting hardware.
Step 4: Assembling the Mounting Structure
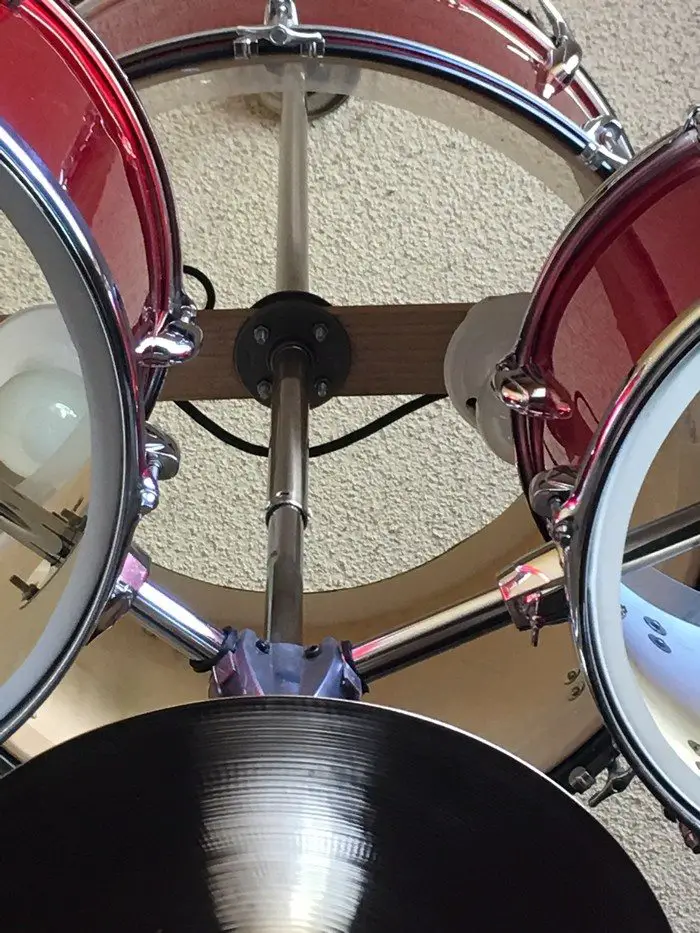
- Attach the ceiling fan mount securely to the ceiling, ensuring it’s anchored properly to support the weight of the chandelier.
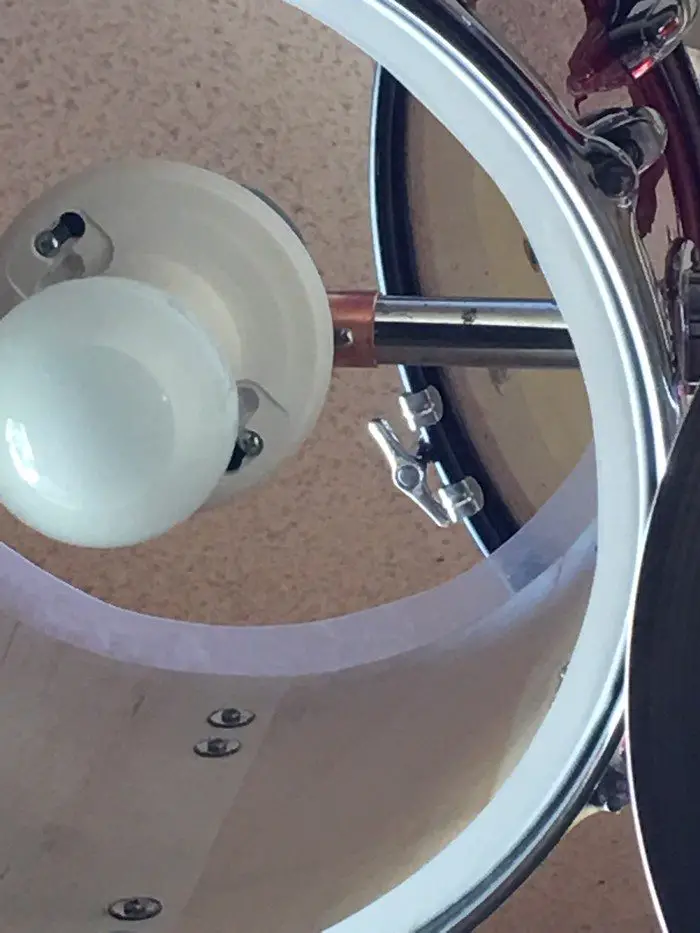
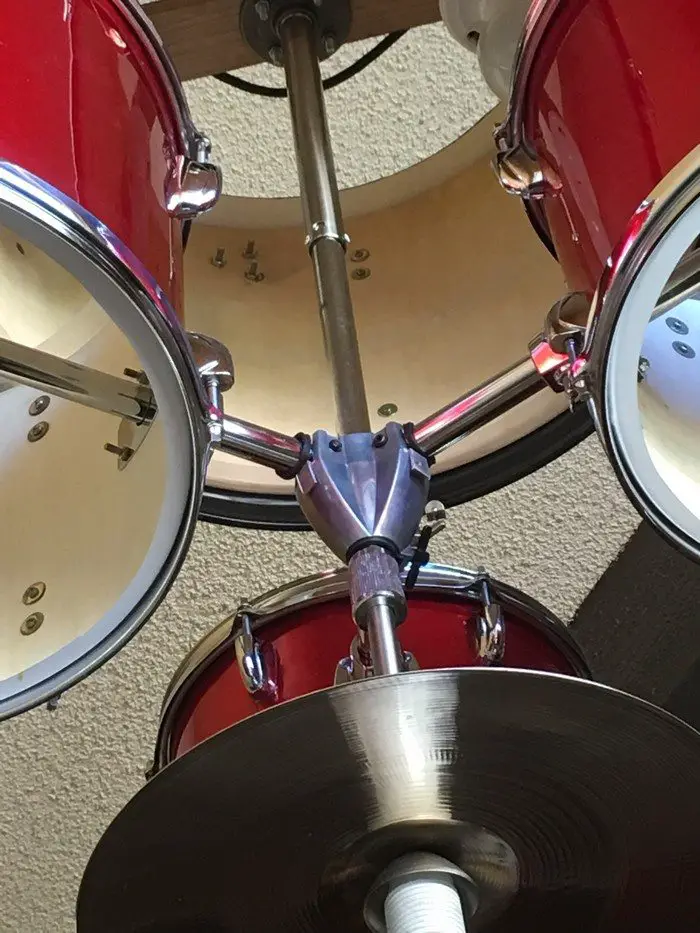
- Screw the pipe flanges to the cut timber pieces, then attach these to the inside of the drums using screws. This creates a secure base to which each drum will be mounted.
Step 5: Preparing the Electrical Components
- Place an electrical box inside each drum where the bulb will be located. Ensure there’s enough room for wiring.
- Thread the electrical wires through the drums, timber pieces, and the metal microphone stand base, which acts as the central support structure. Use plumbing fittings to manage and secure the wiring as needed.
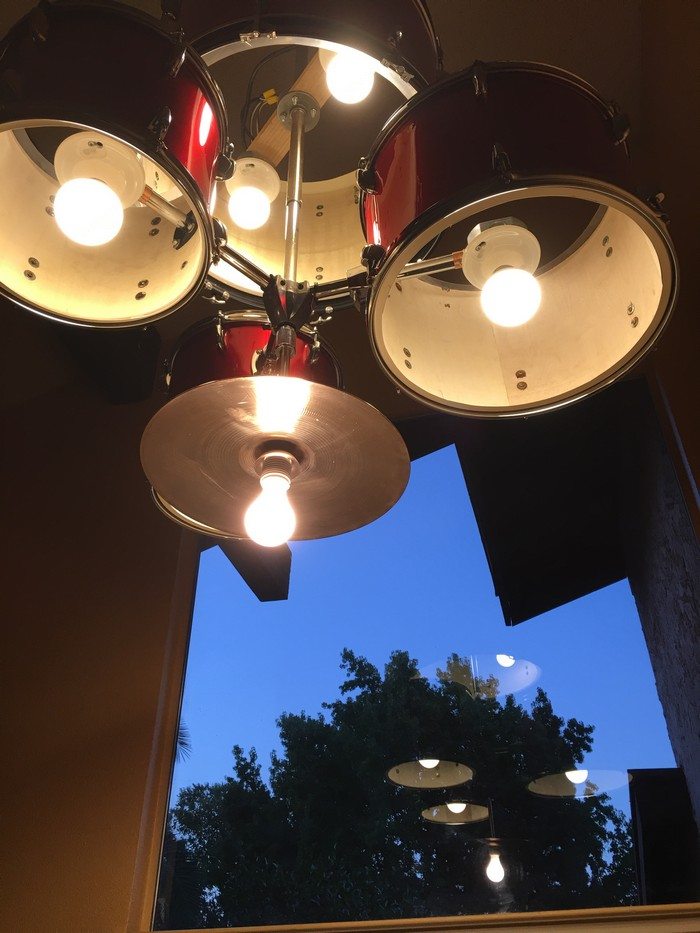
Step 6: Installing LED Bulbs and Final Assembly
- Connect the LED bulbs to the wires in each drum, following proper electrical safety protocols. Secure the bulbs in place.
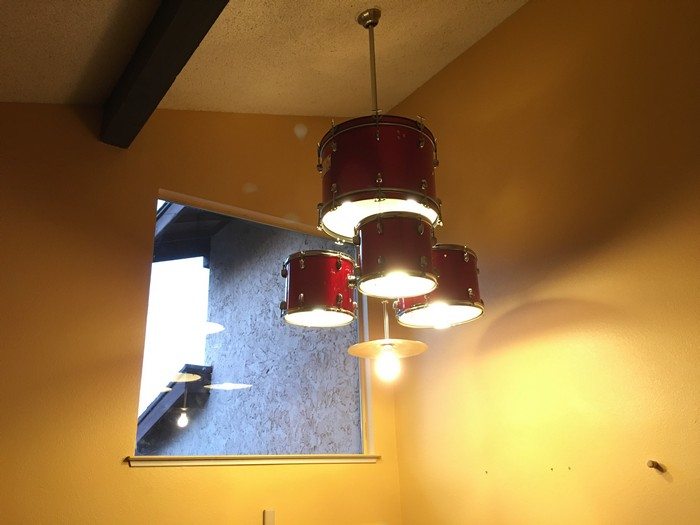
- Assemble the chandelier by attaching each drum to the central microphone stand base, using L-brackets if needed for additional support.
- Make any necessary adjustments to ensure the chandelier is balanced and hangs correctly.
Step 7: Hanging the Chandelier
- Carefully lift the chandelier to the ceiling mount. Secure it in place, double-checking all connections are tight and secure.
- Connect the chandelier’s wiring to your home’s electrical system, adhering to local electrical codes. It might be wise to seek professional help for this step to ensure safety.
Step 8: Testing and Adjustments
- Turn on the electricity and test your new drum set chandelier. Adjust the placement of the drums if necessary to achieve the desired aesthetic.
- Enjoy your new, striking piece of functional art that lights up the room both literally and figuratively!
Safety Note: This project involves electrical wiring and hanging heavy objects. If you’re not experienced with electrical work, consult or hire a professional electrician to ensure your chandelier is safe and up to code.
Click on any image to start the lightbox display. Use your Esc key to close the lightbox. ![]()

Lighting Options and Installation Tips
Creating a drum set chandelier illuminates your space and adds a unique touch that reflects a love for music and creativity. This guide explores various lighting options and provides installation tips to ensure your drum set chandelier is a stunning and functional centerpiece.
Choosing the Right Bulbs
- LED Bulbs: Ideal for drum set chandeliers, LED bulbs offer long-lasting performance and are energy-efficient. They generate minimal heat, reducing the risk of damaging the drum surfaces. Additionally, LEDs come in a range of colors and brightness levels, allowing you to customize the ambiance of your space.
- Intelligent Bulbs: Incorporating smart LED bulbs into your drum set chandelier can add an innovative twist. These bulbs can be controlled via smartphone apps, enabling you to adjust the brightness and color based on the time of day or your current mood. Smart bulbs can significantly enhance the interactive experience of your lighting fixture.
- Vintage-Style Filament Bulbs: For a warmer, more intimate atmosphere, consider vintage-style filament bulbs. These add a nostalgic charm to your drum set chandelier, perfect for spaces with a rustic or retro theme. While they may not be as energy-efficient as LEDs, they contribute a distinct aesthetic that can complement your décor beautifully.
- Color Temperature Variability: For a drum set chandelier that truly matches the vibe of your room, consider bulbs with adjustable color temperatures. These bulbs can shift from cool to warm light, enabling your chandelier to adapt from a focused, energetic daylight setting to a cozy, relaxing evening ambiance. This adaptability makes your drum set chandelier not just a lighting fixture but an ambiance creator.
- Eco-Friendly Halogen Bulbs: While LEDs are top for energy efficiency, halogen bulbs offer a brighter and crisper light, which can be particularly striking in a drum set chandelier. Opting for eco-friendly halogen bulbs provides a compromise between brightness and energy consumption, offering another layer of customization for your project.
- Beam Angle and Spread: Consider the beam angle of the bulbs you choose. A wider beam angle spreads light over a larger area, ideal for drum set chandeliers intended to light up a whole room. Narrower beam angles create focused lighting effects, highlighting specific areas or creating dramatic shadows. Mixing beam angles can add depth and complexity to your chandelier’s lighting.
Installation Tips
- Weight Considerations: Before installing your drum set chandelier, it’s crucial to assess the weight of the entire assembly and ensure the ceiling mount can support it. Reinforce the mount if necessary to prevent any accidents.
- Electrical Safety: Safety should be your top priority. Hiring a professional electrician is recommended if you’re not confident in your electrical skills. They can ensure that your drum set chandelier is installed correctly and complies with local electrical codes.
- Height and Placement: The placement of your drum set chandelier should complement the room’s layout without obstructing movement or sightlines. Hang it at a height that illuminates the desired area effectively while adding to the room’s overall aesthetics. Consider the drum set chandelier’s dimensions when deciding on the installation height to maintain balance and proportion in the space.
- Secure Mounting: Hang your drum set chandelier using sturdy hooks and chains. Ensure that all components are securely fastened to prevent them from loosening over time. Regular checks and adjustments can help maintain the stability and safety of your chandelier.
- Customization: Don’t hesitate to experiment with different arrangements and bulb placements within your drum set chandelier. This project’s versatility allows for customization that can reflect your personal style and creativity. Adding dimmer switches or choosing bulbs of various intensities can create dynamic lighting effects that enhance the visual impact of your chandelier.
- Adjustable Suspension: Implementing an adjustable suspension system for your drum set chandelier allows you to change its height based on the occasion or your preference. This flexibility is particularly useful in spaces used for different purposes or when you want to alter the ambiance for special events.
- Integration with Room Control Systems: For those who enjoy smart home technologies, integrating your drum set chandelier with a room control system can streamline lighting management. This setup lets you adjust lighting levels, turn the chandelier on or off, and even change colors (if using smart bulbs) directly from your smartphone or a centralized control panel.
- Reinforced Ceiling Support: If your drum set chandelier is particularly large or heavy, reinforcing the ceiling support is crucial. This may involve installing additional joists or using a specialized mounting bracket designed for heavy fixtures. Ensuring that your chandelier is securely supported will prevent damage to your home and ensure the safety of those below it.
- Regular Maintenance: Once your drum set chandelier is installed, regular maintenance is key to its longevity. This includes cleaning the bulbs and drums to prevent dust accumulation that can dim the light output and checking the wiring and fixtures for wear and tear. A well-maintained chandelier will continue to dazzle for years to come.
- Utilizing Reflective Surfaces: To maximize the light from your drum set chandelier, consider the use of reflective surfaces in its design or placement. Positioning the chandelier near reflective wall paint or mirrors can amplify its light, making the room brighter and more inviting.
By considering these lighting options and following these installation tips, your drum set chandelier will serve as a functional light source and an extraordinary focal point that celebrates your love for music and design.
Conclusion
Crafting a drum set chandelier stands as a creative testament to blending music with function, illuminating spaces with a touch of personal flair and innovation. This unique project not only repurposes old musical instruments but also serves as a striking centerpiece that sparks conversations. Through careful selection of lighting options and adherence to detailed installation tips, anyone can transform an ordinary room into an extraordinary symphony of light and music.
Are you still looking for amazing lighting ideas? Check out our well lights guide next!


