Do you want to spice up the look of your bedroom? This woven bed head is a simple project that could be completed easily over a weekend.
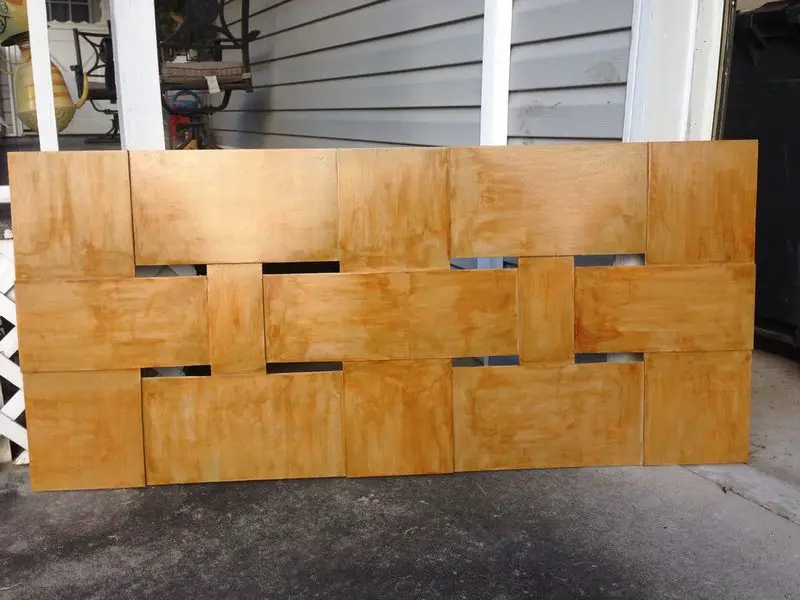
It’s rustic and simple — if you are into this kind of style, then this could be the perfect headboard for you. But if not, you could also stain or paint it any colour you’d like!
Materials:
- 1 piece of 1/4″thick 4′ x 8′ hardwood Birch Plywood
- 2 pieces of 1″ thick 2″ x 6′ Pine Wood
- Wood Stain – optional
- Clear Finish
- #8 2″ Wood Screws
- Wood Glue
- Eye-hooks
- Picture-hanging Wire
- Heavy Things (to serve as weights)
- Padding Material
[adinserter block=”11″]
Tools:
- Measuring Tape
- Saw
- Paintbrush
- Wood Clamps
[embedit snippet=”adsense-728×15-inline-text-only-ad”]
Steps:
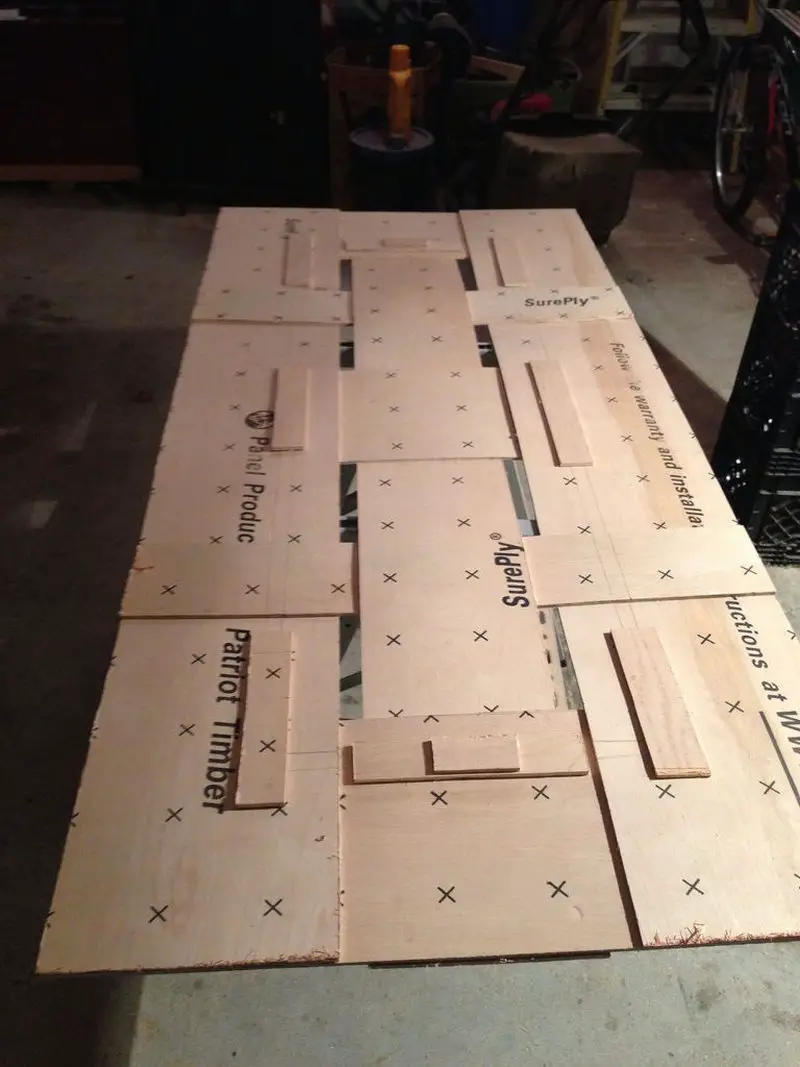
Cut plywood sheets and timber into these pieces…
- Cut three 10″ x 8′ strips from the plywood
- Cut each strip into 2 pieces, one 63″, one 33″
- Trim 2″ from one of the 63″ strips; save the cutoff for later
- From the leftover plywood, cut a piece 10 x 35″
- From that piece, trim a 2 x 10″ piece
- Then cut the resulting larger piece into two 5 x 33″ piecesResulting Plywood Pieces:
2 – 10 x 63″
1 – 8 x 63″
1 – 2 x 63″
2 – 5 x 33″
3 – 10 x 33″
1 – 2 x 10″ - Cut the 2 x 63″ & 2 x 10″ strips into 5″-ish pieces (you’ll need 10 of them)
- Chop the 1″ x 2″ x 6″ wood into:2 – 2 x 53″
2 – 2 x 23″
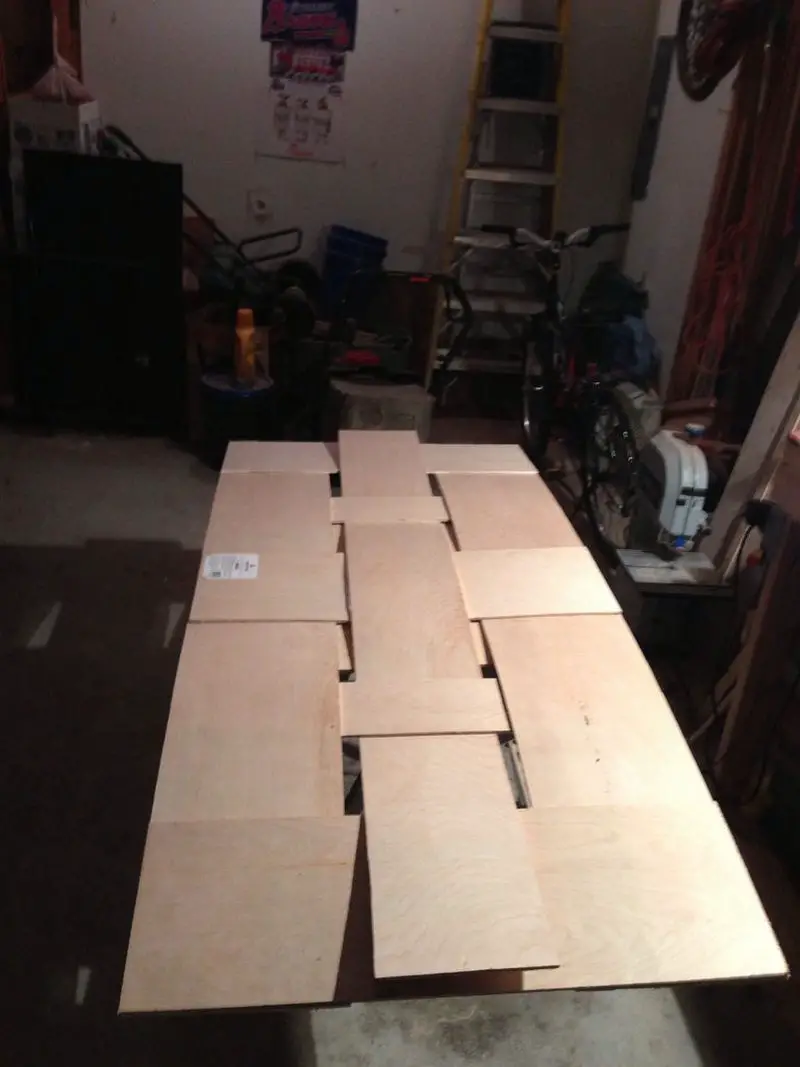
Put the two 10″ long strips on a flat surface, grain-side up. Place a 10″ short strip at each end, and center the third.
Use chalk or pencil to mark the edges of the cross-strips, the remove the short strips. Apply glue, the re-place the pieces. Do the end pieces first, making sure that the edges are flush; then re-place the center piece.
At each intersection, place something heavy to push the strips together. Use enough weight to ensure that you get a solid connection. If you have sawhorses, or enough milk crates, etc., you should use those & clamp the intersections instead. You’ll get better joins that way.
Let that dry for a couple hours before proceeding.

Flip the assembled piece over. Center a 5 x 33″ strip between the middle cross strip and either end cross strip, grain side down. Mark the edges, glue, and weight.
Let the glue dry for at least an hour before moving on.
Flip the assembled piece back over.
Take the remaining long strip and weave it through the cross pieces, over and under. You want it on top of the cross piece at each end. (Look at the pic, it’s easier to understand than a written description.)
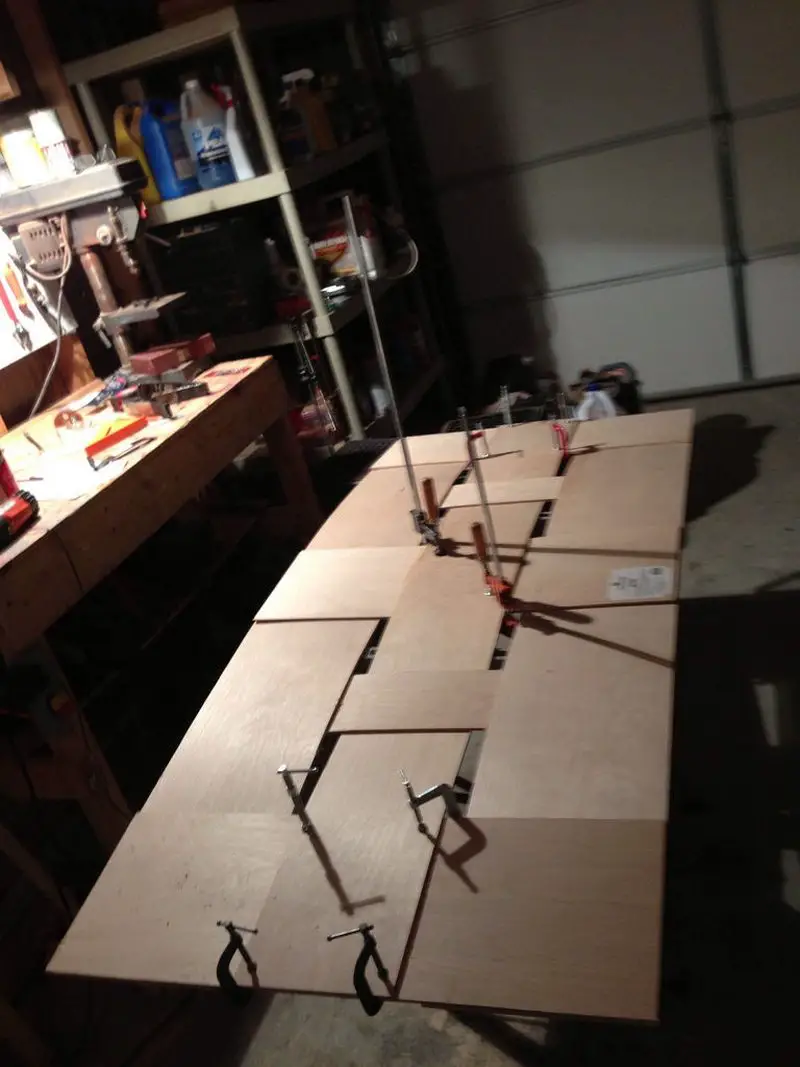
Apply glue to the intersection at each end, then clamp. Let this dry for at least a couple hours (but go ahead and start the next step whenever, as you’ll be leaving this assembled piece for now).
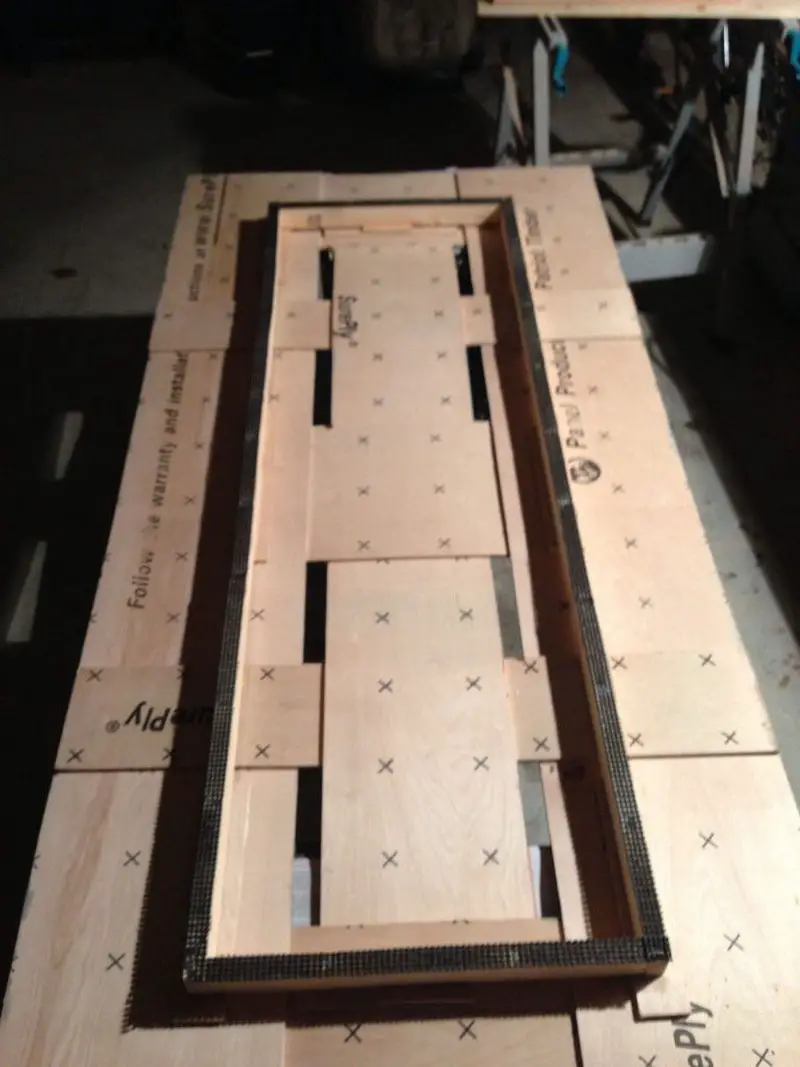
Take your frame pieces and make a, well, frame with them. Stand them on edge and glue then screw them together with butt joints.
Once the headboard proper’s glue has dried, flip it over. Place the frame on it and get it centered, then trace its outline onto the plywood.
Glue the 5″-ish pieces to the back of the plywood to make a level surface to attach the frame. You’ll need to stack 2 on the ends. Let that dry for at least an hour.
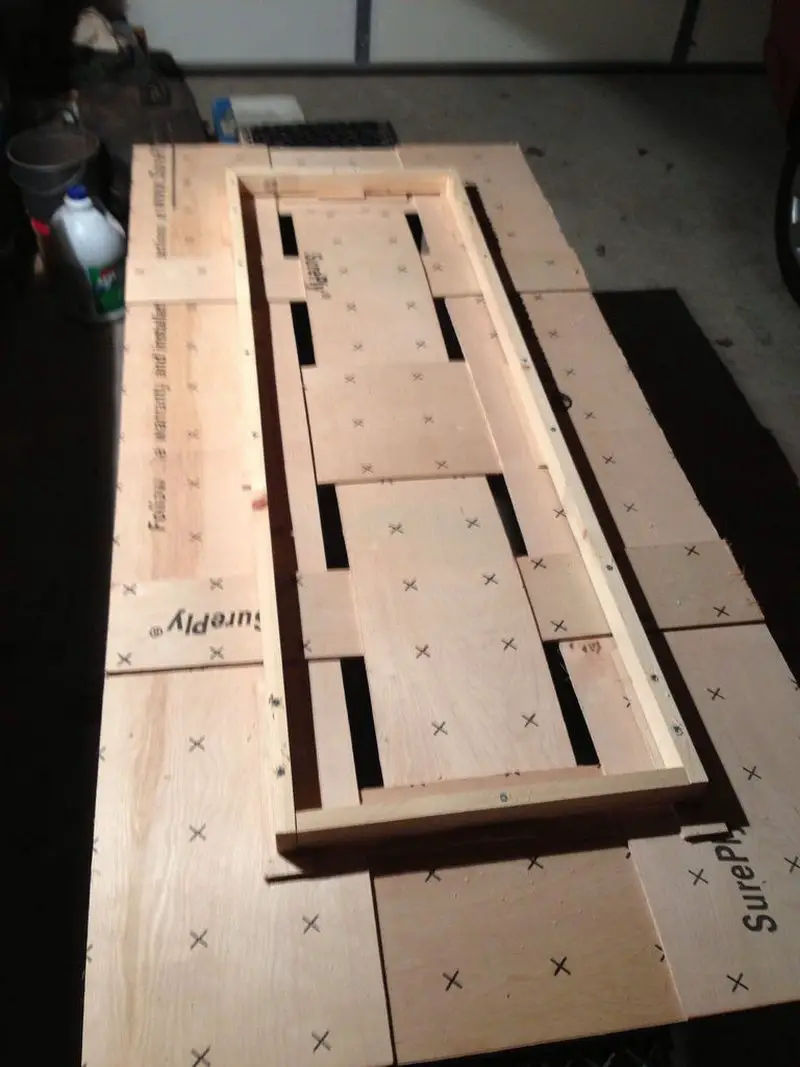
Apply glue to the top of each 5″-ish piece, as well as the backs of the strips at the same level, then re-place and clamp the frame. Let that dry for a few hours.
Drill pilot holes into the frame, then use screws to further secure the 2 components together. (This might be overkill, but this is what’s going to hold the whole thing up, so you want to make sure it stays together.)
Once that’s done, we move on to finishing!
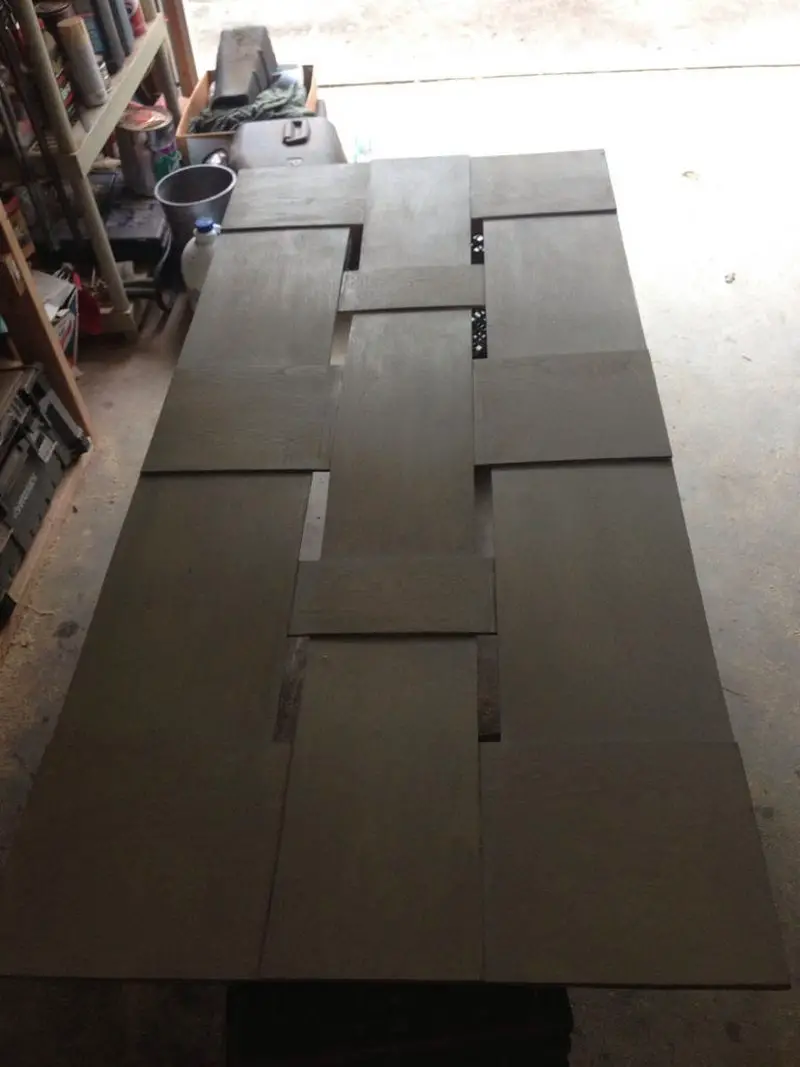
If you want to go with the natural color of the wood, skip this step.
Sand the entire piece with 120, then 220 grit sandpaper. Be careful not to sand through the top layer of the plywood, or to crack the edges.
I stained using a gray “sunbleached” shade, then sanded that back a good deal with the 220, just to make the grain pop.
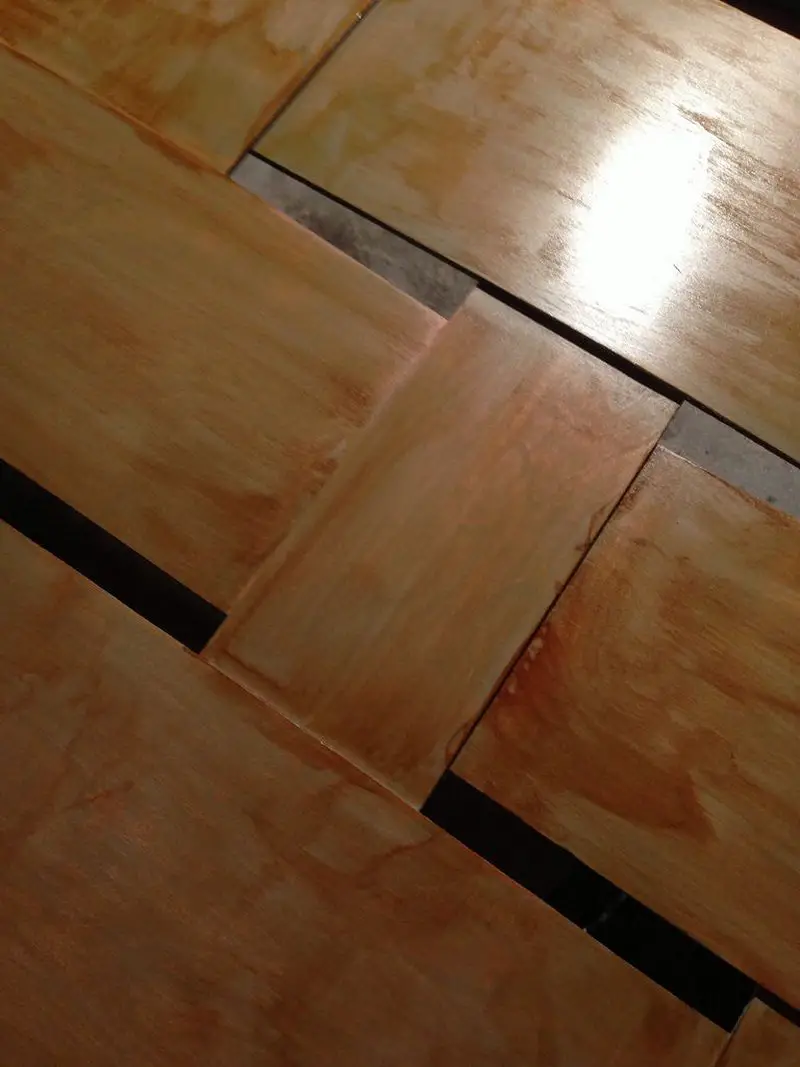
Apply your preferred clear coat. I went with amber shellac, semi-gloss, entirely because I had a can leftover from another project.
Apply a coat, sand it smooth, apply a coat, repeat as needed. Check your can of finish for instructions, I’m not a varnish prophet. :)
If desired, add your padding material to the exposed edge of the frame.
Install a picture-hanging wire on the frame; put the eye-hooks into the inside of the frame, not the outer edge.
And that’s that.
To hang it, insert a screw or picture-hanging hook in your wall (make sure to anchor it if you don’t have a convenient stud), and hang ‘er up.
Do you think you could still improve this DIY headboard? Or is it perfect as it is? :)
Thanks to jmacfarlane for this great project.
[embedit snippet=”media-net-inline-ad-728×90″]


