Rip one of the 1/4 inch plywood pieces to make it 83.5 inches long and 43 inches wide. Use the clamps and place them on the frame with no doors. Using a pencil, trace around the frame where windows need to be cut out for your VW micro-bus bunk bed, the front and back angles, and also around the wheels for wheel wells.
Use the jigsaw and cut out the pieces that are not needed to your VW micro-bus bunk bed. For the rear wheel well, measure up 8 inches on both sides of the drawn line. Make a straight line to guide you to cut the wheel’s flat top well. (See Illustration.) You will repeat this on the other side’s rear wheel.
Apply wood glue along the outside of the frame of your VW micro-bus bunk bed where the plywood skin will attach and clamp the skin to the frame to hold it while using drywall screws to attach.
Measure the areas to be skinned on the remaining walls and doors of your VW micro-bus bunk bed, cut out accordingly, and attach with glue and screws.
Attach the front frame with 4 small brackets; two at the top corners and two at the MDF base.
Use a tape measure and measure the front surface of the curved ribs on the front frame of your VW micro-bus bunk bed. Take this measurement as well as the height of bottom to top and this will be the size of front skin.
Apply wood glue to the surface of the three ribs. Now, starting from either the left or right side line up the skin to the edge of the ribs. Place some screws in to begin the wrap-around attachment. Once you have a few screws in, start to push the skin in against the ribs and place more screws in. Continue this process all the way to the other side until you have attached the skin. The 1/4 plywood should be pliable enough to wrap well.
You now have two narrow strips left to skin. The two sides where the ribs attach to the frame. It should be 1.5 inches wide by 27 inches long. Finish this, and you will be done with your outer skin.
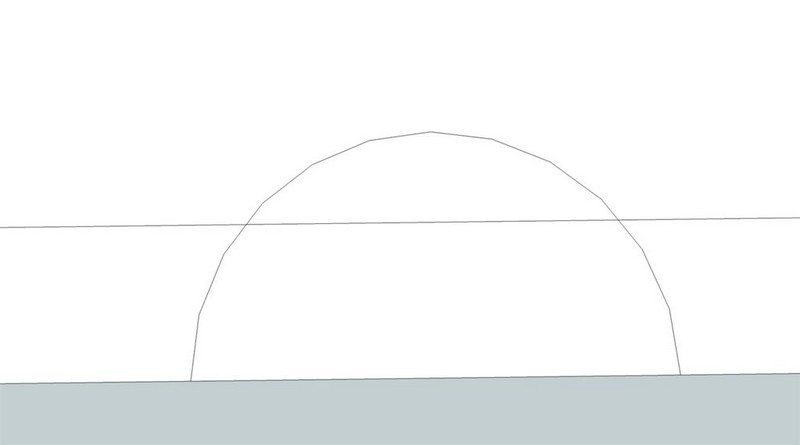
Take the 3/4″x12″x44.5″ piece and cut the pre-traced arc out. Now, you must notch the two inner sides to fit around the wall frame. See the illustration for a final look of the top cap.
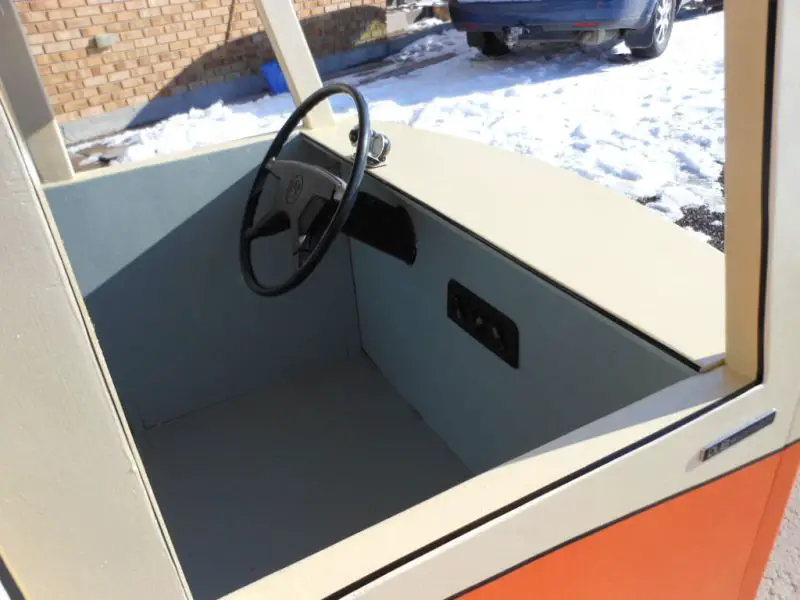
Attach this piece to the top of the front end of your VW micro-bus bunk bed with about a inch overhang. This is the dashboard.
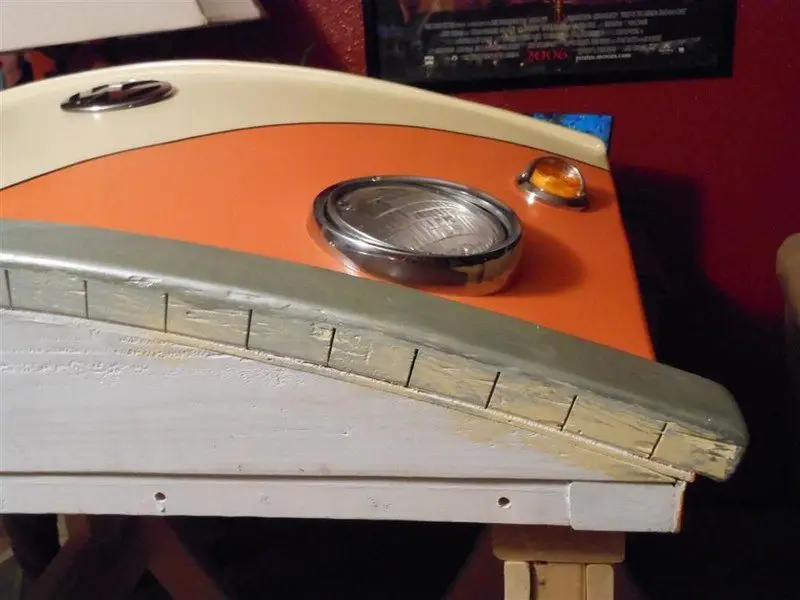
Measure, horizontally, across the front of the skinned front end. Add 1 inch to this length and cut a 2″x3″ this length, this gives you about half inch overhang on each side. This will be the bumper. About every 1.5 to 2.5 inches you will be making cuts approximately 1″ in depth. (See picture.) This will allow you to bend the 2″x3″. Find the center on the front end and the piece of 2″x3″. Use these center marks to line up the bumper. Glue and screw the bumper in place.
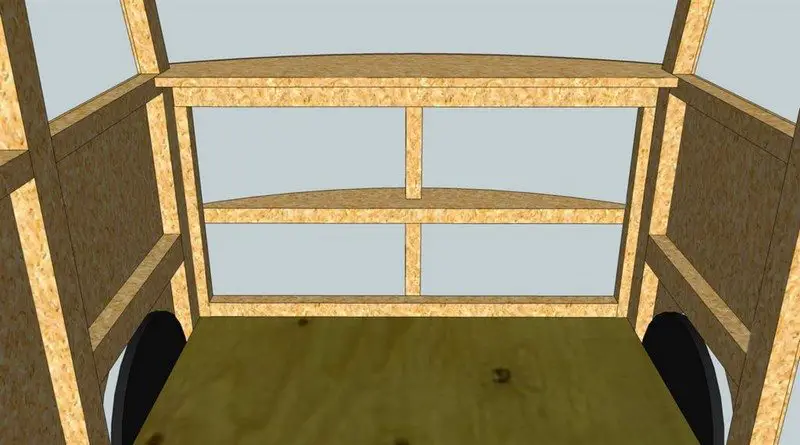
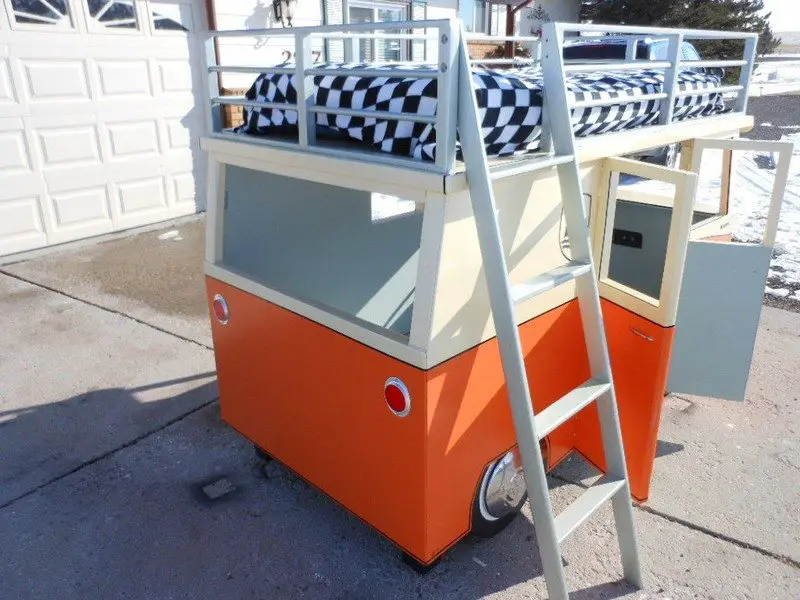
Get some help here, unless you are He-Man/She-Ra. Lift the top frame up and set onto walls. You’ll now notice the two 41 inch 2″x3″s you set on end fit nicely between the left and right walls.
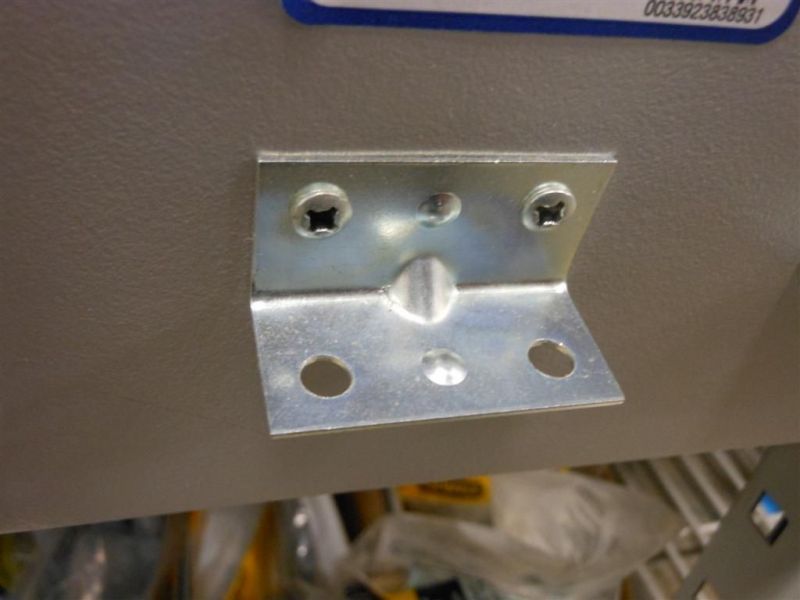
This is the junction where you will place the “L” brackets to help secure the top to the bus. 4 small brackets in the front and back will finish securing the structure. You will now find this bunk bed to be extremely sturdy and stable.
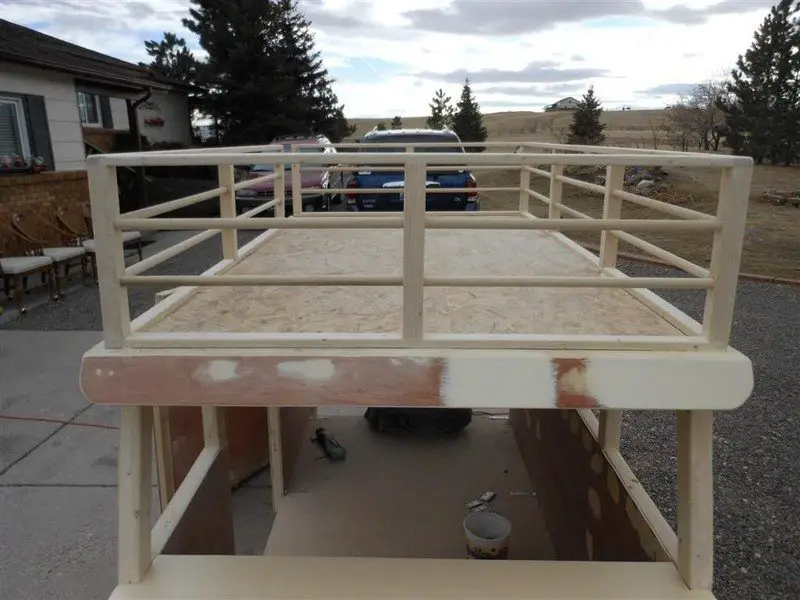
Security rail/faux cargo rack and ladder:
Material to pre-cut:
Rails
- 10, 12″ pieces of 2″x2″
- 2, 79″ pieces of 1″x2″
- 2, 60″ pieces of 1″x2″
- 4, 42.5″ pieces of 1″x2″
- 8, 20.5″ pieces of 3/4″ dowel
- 6, 25″ pieces of 3/4″ dowel
- 4, 29.5″ pieces of 3/4″ dowel
Ladder
- 2, 66.5″ pieces of 1″x3″
- 4, 14.5″ pieces of 1″x3″
I have the railing spaced one inch inside from edge. See the pictures for spacing and placement of uprights. To install the dowels, a drill press is handy and more precise, but not necessary. On the 2″x2″ pieces make two lines 4 inches apart and one line down the middle of wood. These intersections mark where you need to drill out the 3/4″ holes to glue dowels in. (See pictures)
The pictures will better explain the process.
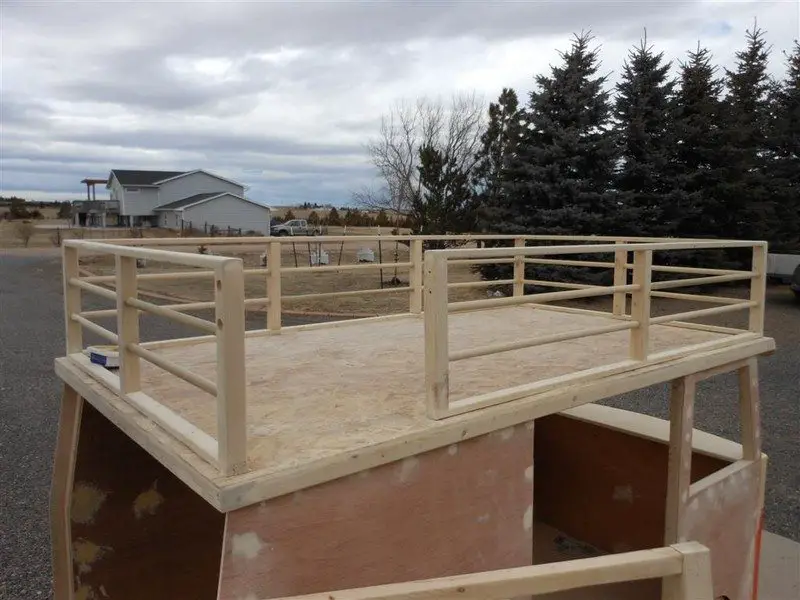
The ladder is best to actually build piece by piece onto the rail. The measurements are just generalized. The angle I chose seemed to be the best for strength. Your angle may vary.
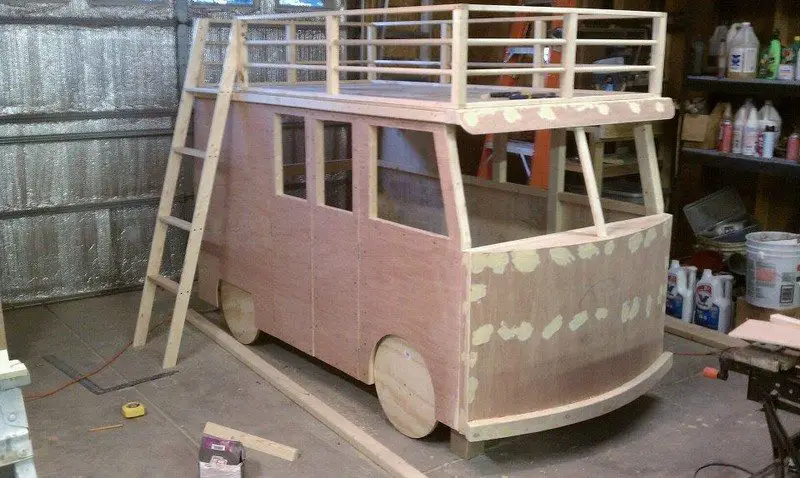
Accents and paint: Now the real work begins. Sand the entirety of the bus. (Don’t want the kids to get any splinters.) Apply wood filler to all the countersunk screws and any gaps you may have where the skin edges up with the frame. Choose some great colors, designs, or decals and have fun painting this beast. I noticed as I was building this, I kept thinking about green with flowers and “The Mystery Machine” on the side, lol.
Add your accents, and take a deep breath. You are finally done. This project is time consuming and can be frustrating at times, but when you stand back and look at your finished project, ahhh…such a good feeling!
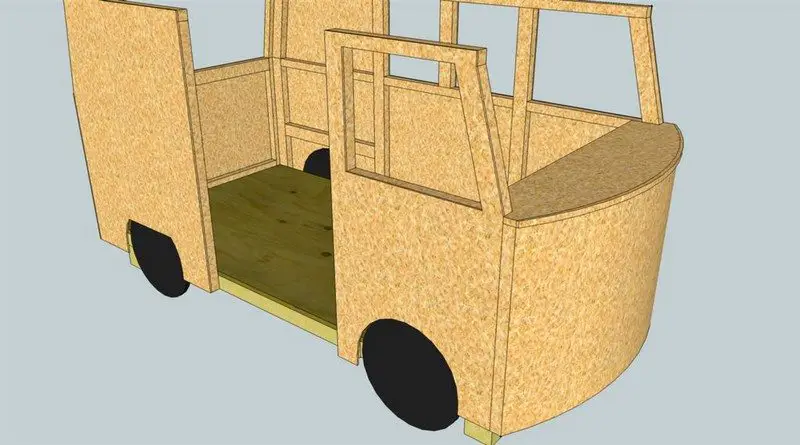
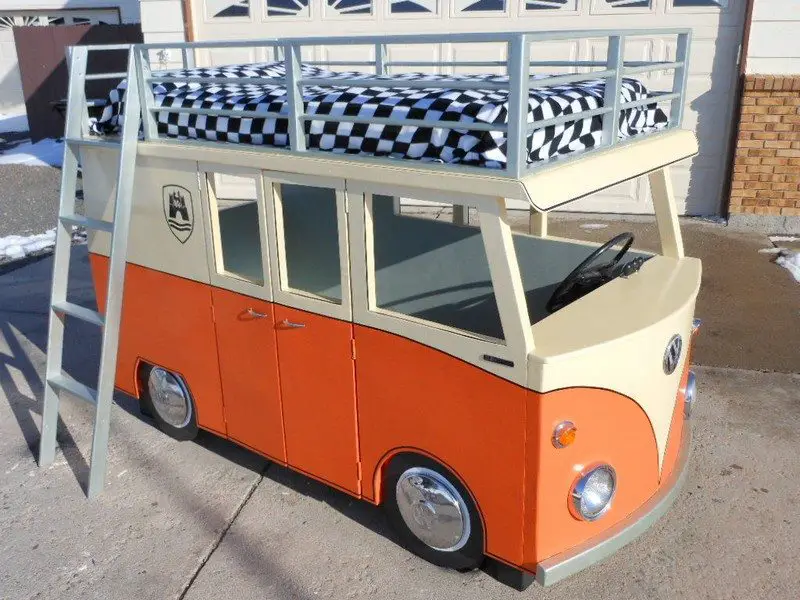
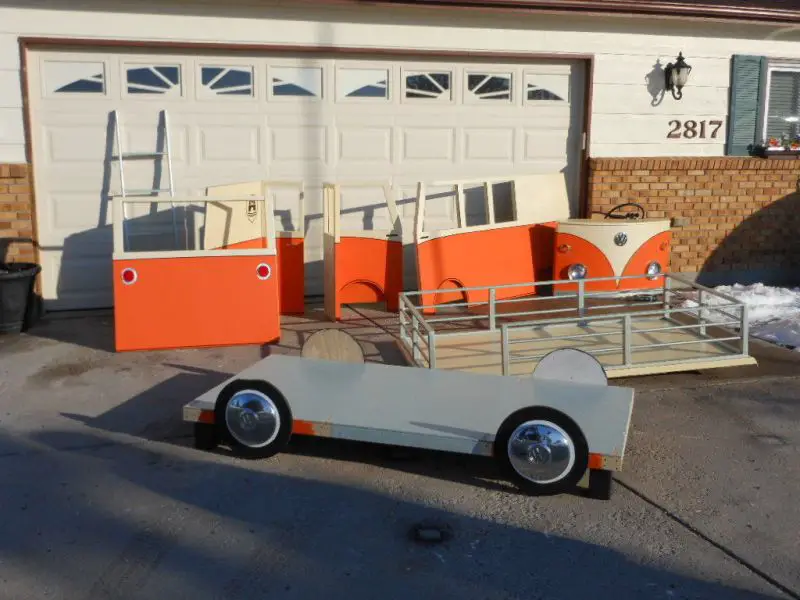
Here, the VW micro-bus bunk bed is broken down into eight component parts:
Thanks to Uptonb for this great project!
Conclusion
The DIY VW micro-bus bunk bed project is a creative and detailed endeavor, merging the love for Volkswagen with functional furniture design. By designing and building from scratch, the creators achieved a unique piece that offers a sleepover-friendly bunk bed and a playhouse, complete with working headlights, turn indicators, and a steering wheel. This project captures the essence of the iconic VW micro-bus and offers children a versatile and imaginative space, making it a delightful addition to any room.
Are you still looking for more amazing projects your kids will love? Check out our DIY water wall project!


