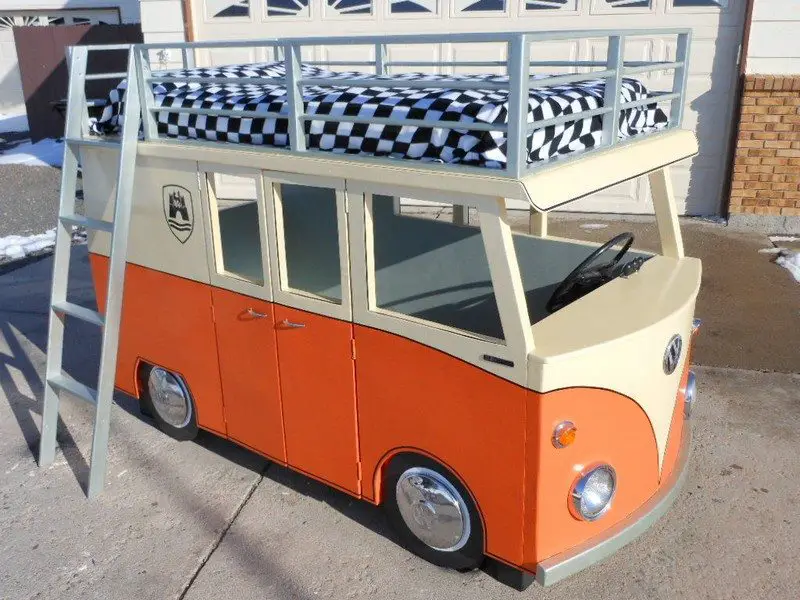
The main aspect of this build that determines the uniqueness of the VW micro-bus bunk bed is the rounded front end. This is actually not too hard to accomplish. I did my curve free hand. If you can find a compass large enough or something to use as a pattern, please feel free for your VW micro-bus bunk bed.
Cut 3, 44 inch length pieces from the 2″x6″ studs. See the first picture to show how to draw the arc.
Use a jigsaw and cut the arc out of this wood. Use the arc to trace onto the remaining two 44″ pieces. Clamp the 3 pieces together and sand the curves until each are identical with each other.

Use one of these as a template also to trace the same arc on the piece of 3/4″x12″x44″ piece to be used later as the top cap of the front end.
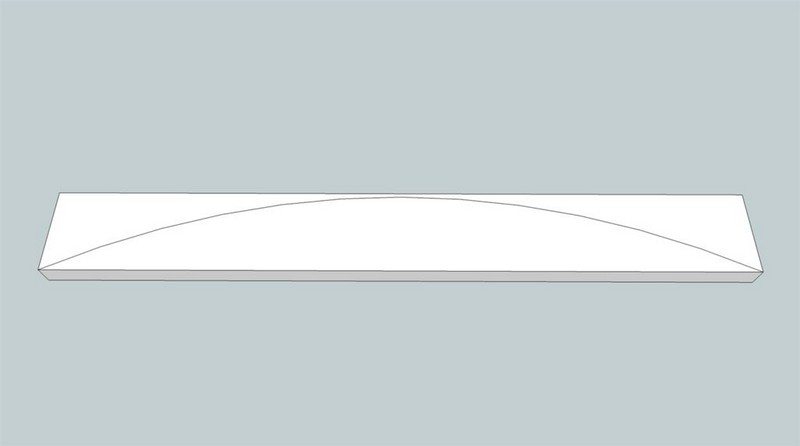
Pre-cut materials are:
- 3, 44 inches long 2″x6″
- 2, 39 inches long 2″x2″
- 2, 23.75 inches long 2″x3″
- 1, 44 inches long 2″x3″
- 2, 10 7/8 inches long 2″x3″ for bracing the arcs
Use the pictures provided for the layout and assemble of your VW micro-bus bunk bed. Place screws anywhere you feel is appropriate for strength.
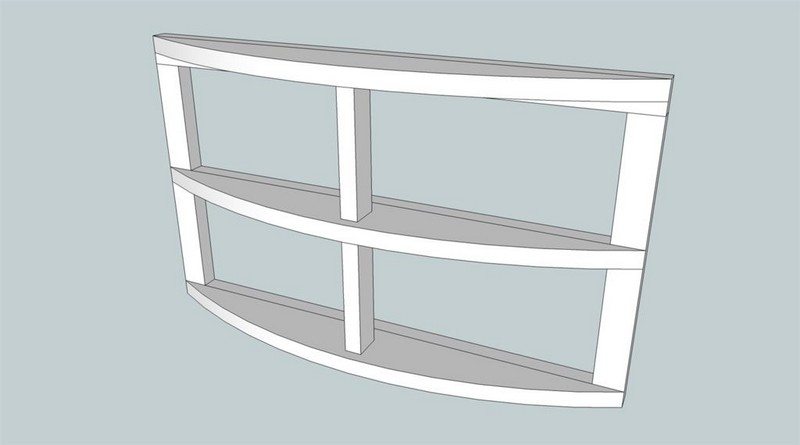
Rear frame: This is one of the more simple frames to assemble for your VW micro-bus bunk bed. The only difficult part is the angles of the upper pieces. They are cut at the 82 degrees.
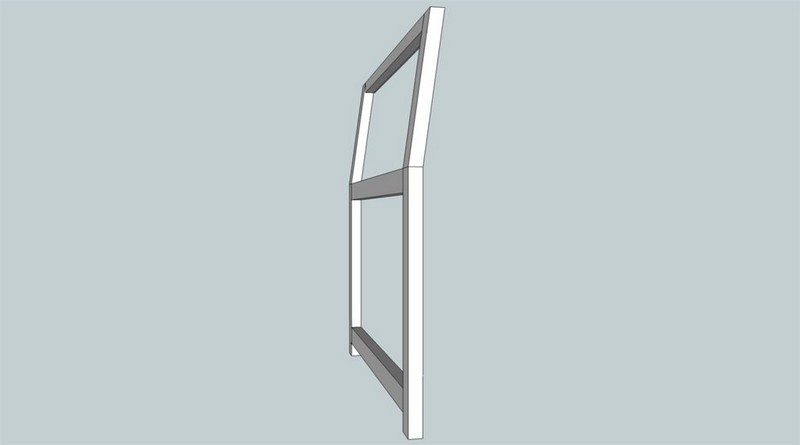
Pre-cut list is:
- 2, 27 inches long 2″x3″
- 2, 14.5 inches long 2″x3″ with parallel cuts at 82 degrees. The angle cuts are on the wide part of the 2″x3″
- 2, 39.25 inches long 2″x3″
- 1, 44 inches long 2″x2″
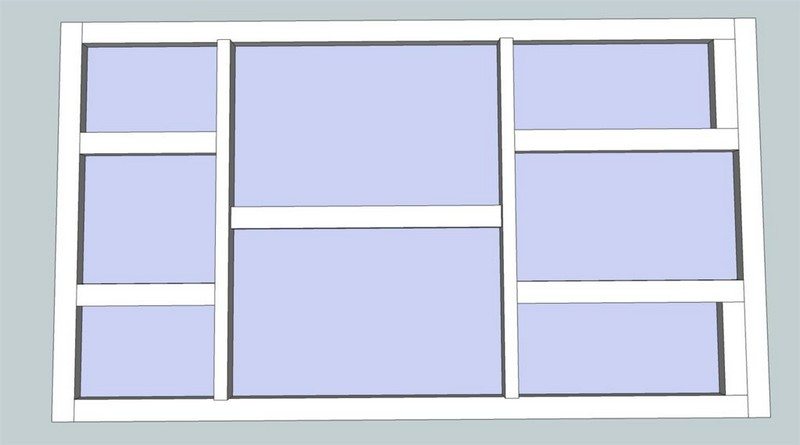
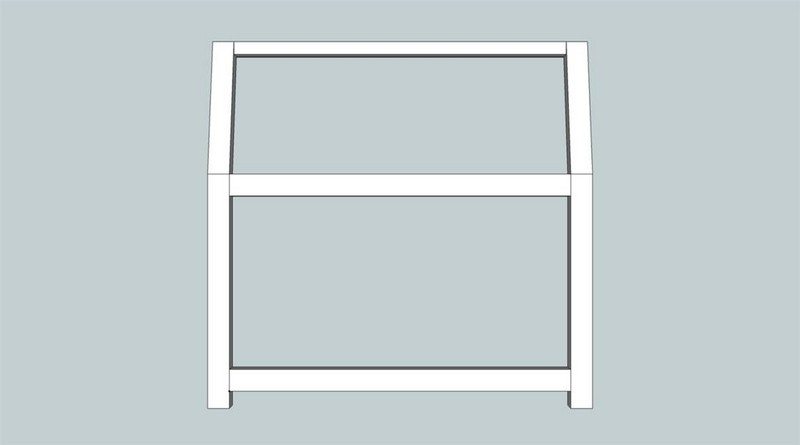
The top frame is a little bigger than the top of the bus, due to the size of a single mattress. I don’t think it takes anything away from the finished project though. You’ll also notice a couple of the 2″x3″ braces inside are on end instead of flat like the outside border is. I did this to help brace and space the middle area of the side walls.
The pre-cut list is:
- 81″x46″ sheet of 3/4″ plywood
- 2, 46 inches long 2″x3″
- 2, 76 inches long 2″x3″
- 2, 41 inches long 2″x3″ (Pay special attention to how these pieces are positioned in pictures.)
- 2, 16 inches long 2″x3″
- 2, 26 inches long 2″x3″
- 1, 31 inches long 2″x3″
- 2, 10.5 inches long 2″x3″
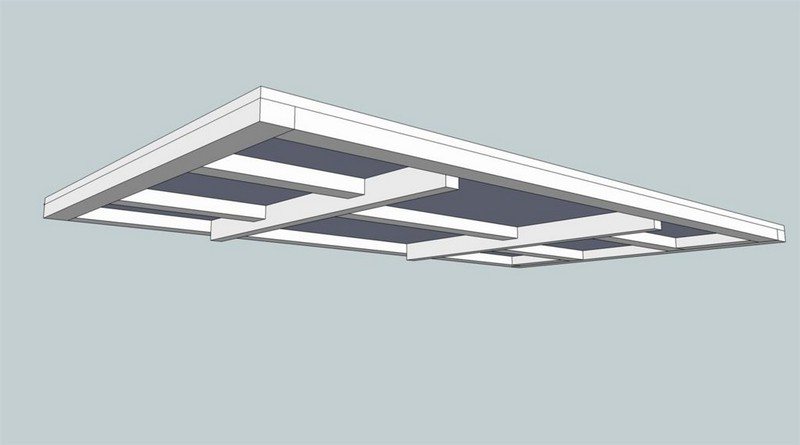
Assemble the pieces for your VW micro-bus bunk bed as seen in the pictures.

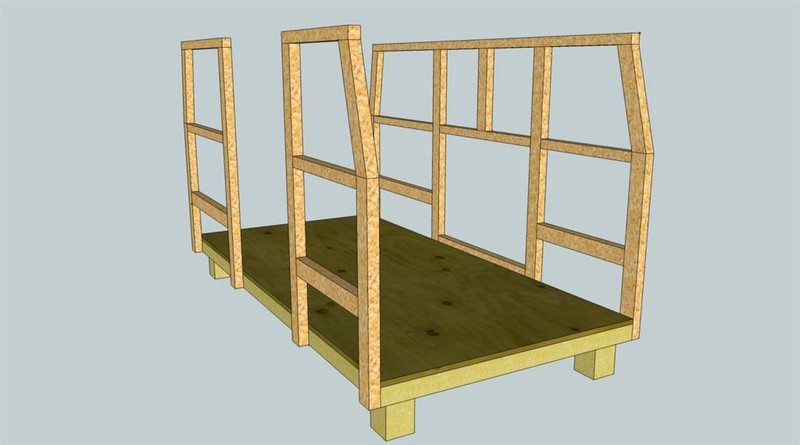
The following should be some of the last illustrations. I used colors in these illustrations to better differentiate the frames from the base. From here on out I will try to use real photos. Thank goodness, right? Pictures are so much more helpful.
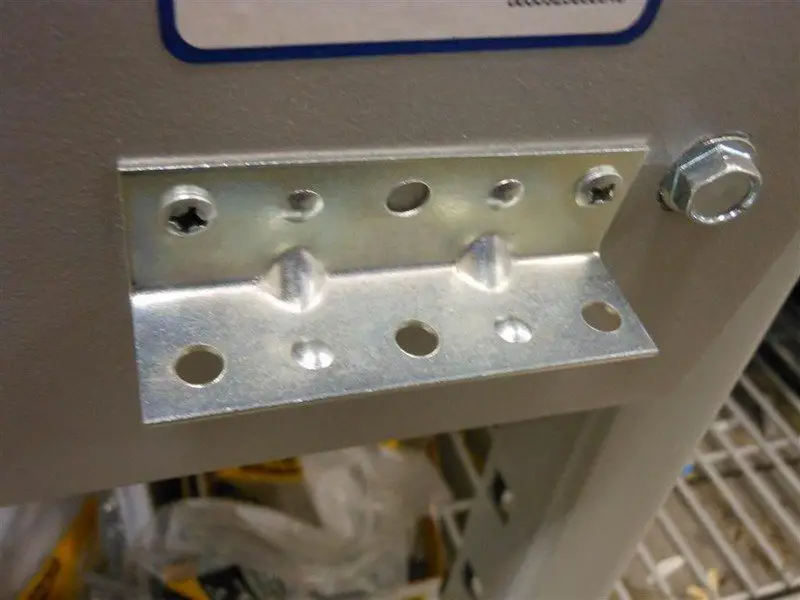
Assemble all the frames of your VW micro-bus bunk bed. Another person is very helpful here. If going at it alone during this step, clamps will do. Start with the wall containing no doors. Attach this wall with 4 of the 4″x4″ “L” brackets in the positions shown in the first picture. The wall will support itself after the brackets are installed. You can now move one to installing the two walls on the side with the doors. Use 4 more 4″x4″ “L” brackets here.
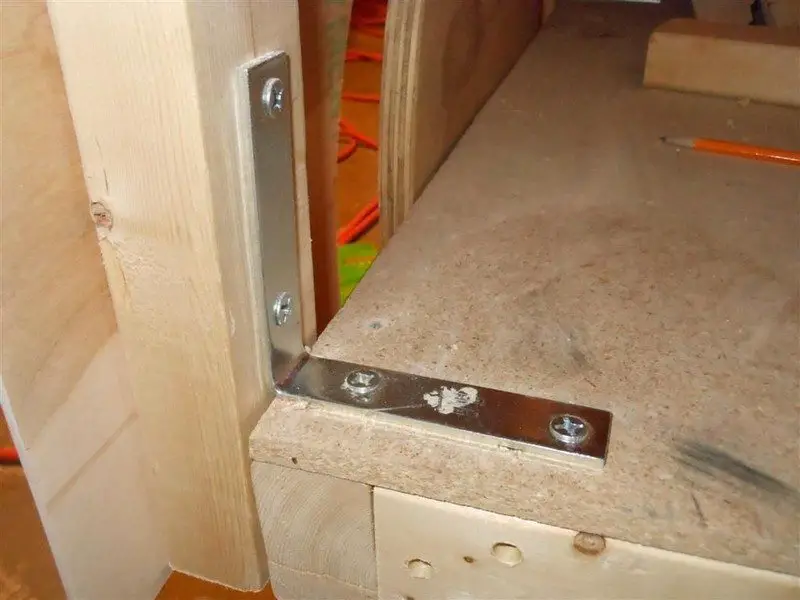
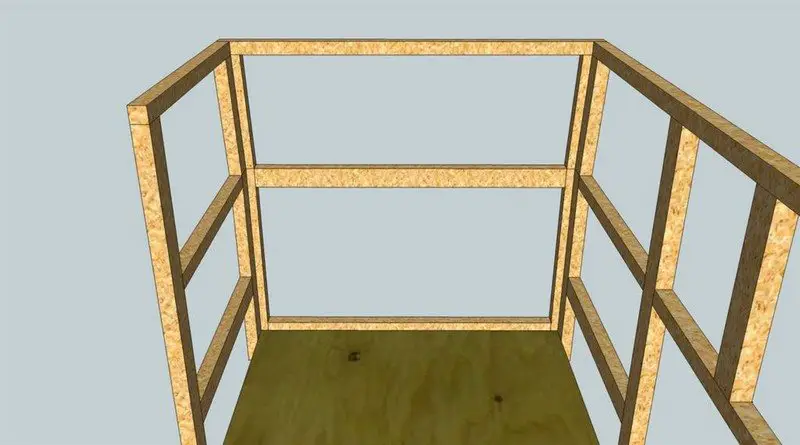
Then, move on to the rear section of your VW micro-bus bunk bed. Install with the smaller brackets as shown in the pictures.
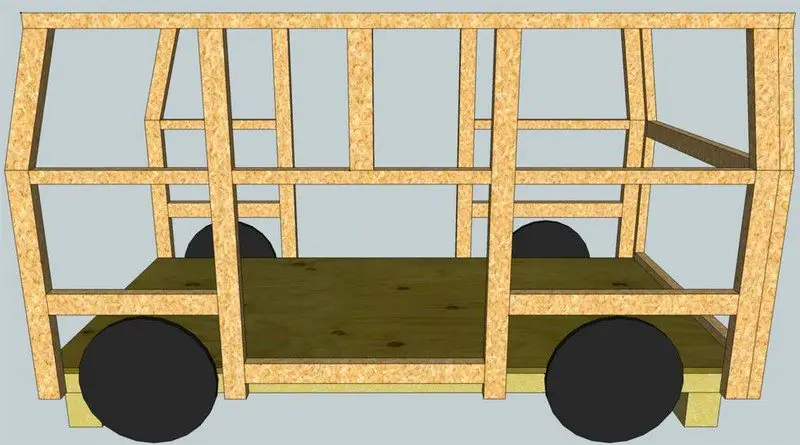
Time to place the 4 tires. See illustrations for placement to your VW micro-bus bunk bed. You might want to sand and paint the tires before installing them.
Continued Page 3…


