
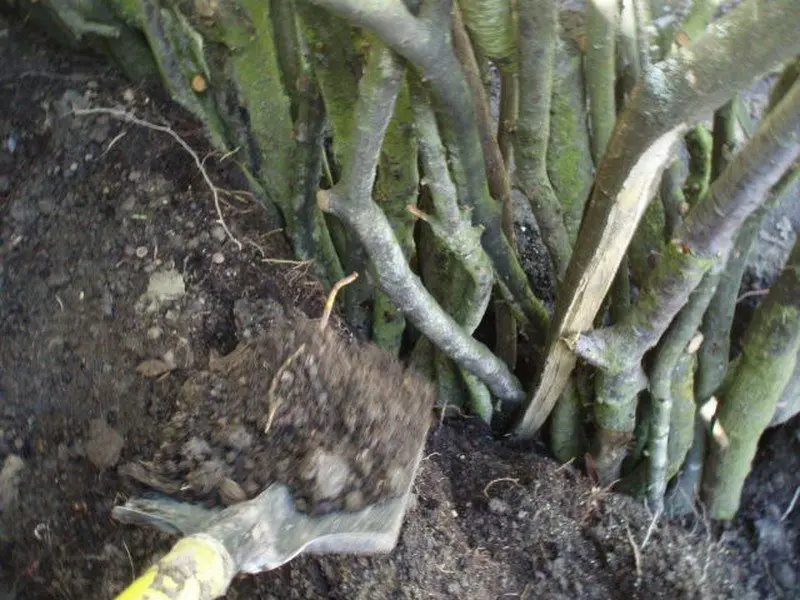
Step 8: Dig a trench between the posts about 200mm deep and 200mm wide to let the branches be placed into the earth to spread the force between the beams and the ground, meaning the wall will not fall over when soil is loaded behind it.
Select only branches that are between 10 and 50mm in diameter and that will span from the bottom of the trench to the top of the beam. Start placing the branches alongside each other, attempting to eliminate or minimize gaps, place branches about 3 deep at this stage.
Fill in behind the branches with soil and stamp down with your foot. This will ensure that the branches stay roughly in the same place.
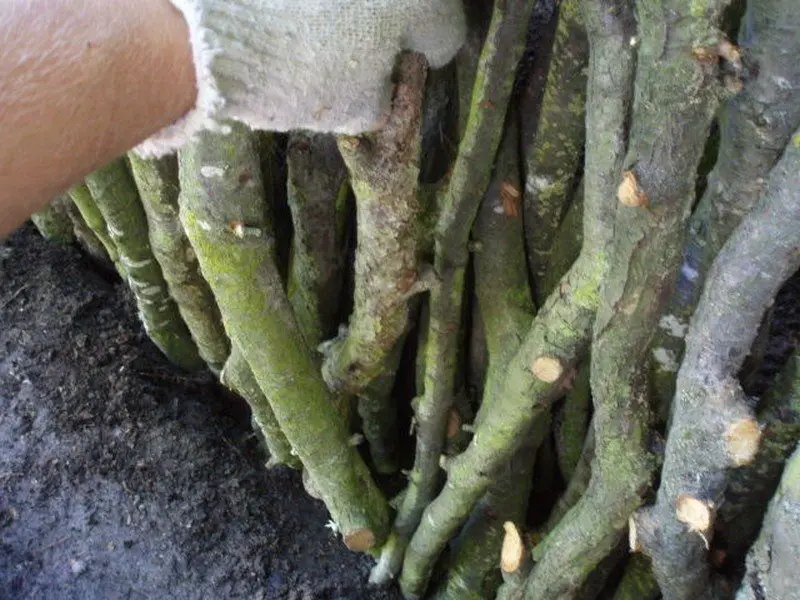
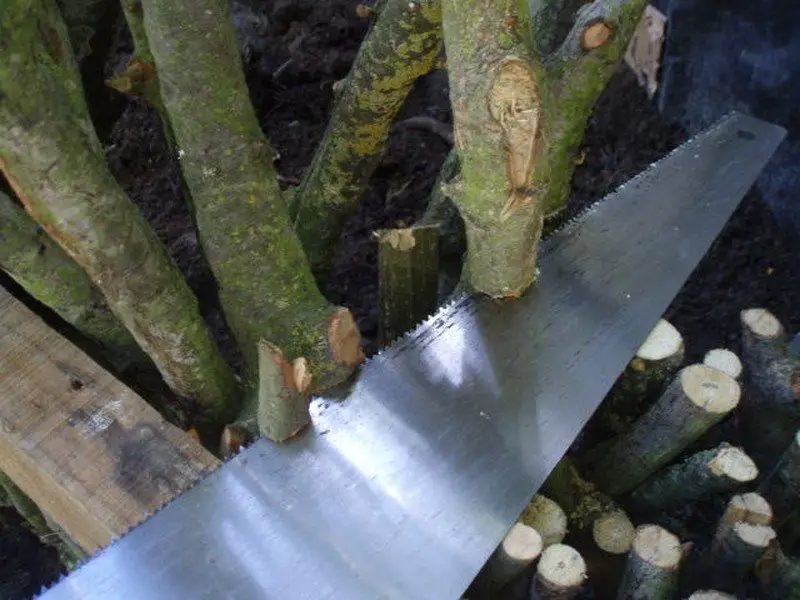
Step 9: After the first run with the branches and once they are reasonably firm in their positions, start to trim the branches flush with the top of the timber beams. After a few cuts, you will find that some branches are wobbly. If this is the case, you will need to keep squashing appropriately sized branches until this wobbling ceases.
After a while, you will notice that the wall is so dense that no gaps are apparent when looking through the front of the wall. If it is difficult to add new branches, use a hammer to smack the branches into position. If all of the branches are firm, you will have no structural problems in the future.

By the time all of the branches are cut and each branch does not wobble, the wall should be about 4-5 rows deep – enough to hold soil back from falling through the front.
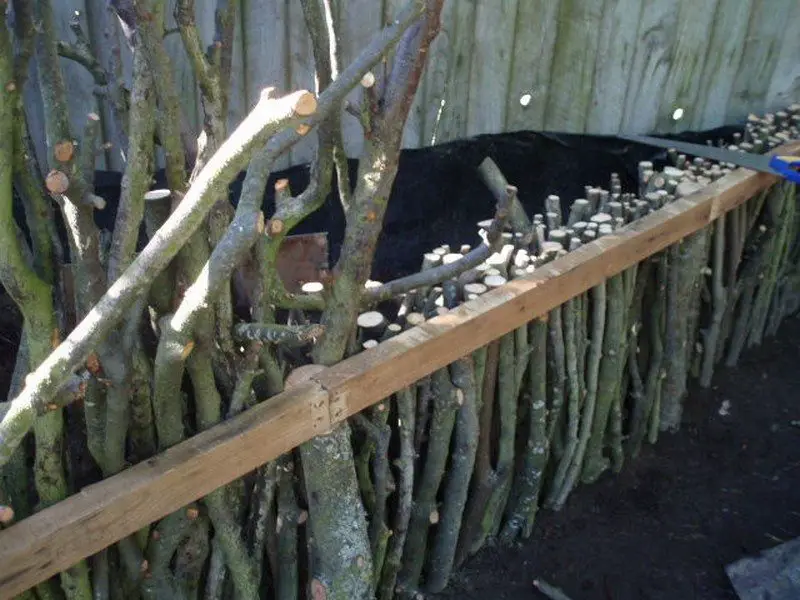
Step 10: Once all of the branches have been placed, fill with soil and other green matter as necessary.
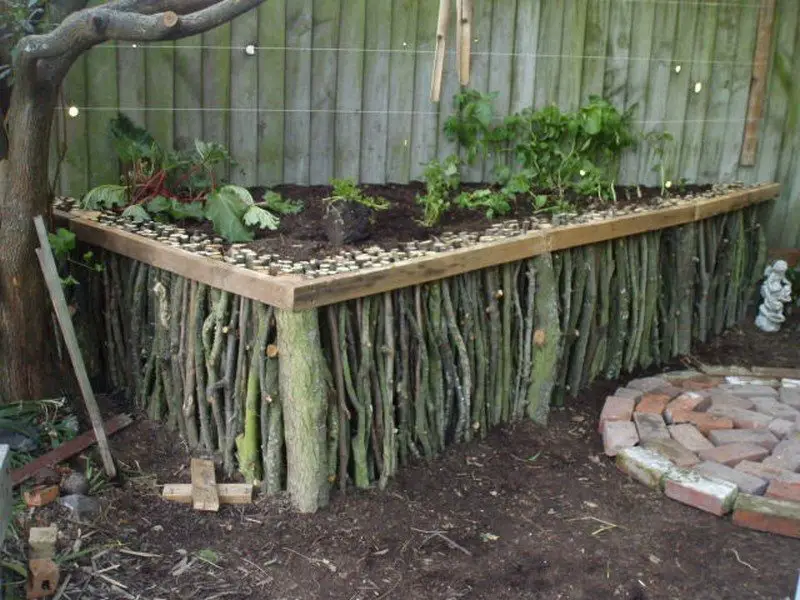
Step 11: Fill in the front of the trench so that the soil is level with the surrounding ground level. Then you’re done! Your natural wood raised garden is ready for planting.
Isn’t this a wonderful garden bed idea? An inexpensive but most probably free project that blends in well with most gardens. Do you have a pile of tree branches lying in your area? Why not rearrange them to make a natural wood raised garden like this?
Thanks to jamieicecream for sharing valuable tips and techniques for this fantastic natural wood raised garden project.
Natural Wood Raised Garden Magic
Step up your gardening prowess and embark on a rewarding journey with this comprehensive 11-step guide for crafting an amazing natural wood raised garden. Whether you’re a seasoned horticulturist, well-versed in the art of nurturing flora, or just taking your first steps on the path to a greener thumb, our user-friendly instructions are designed to make the process accessible to all.
In no time, you’ll find yourself immersed in the joy of cultivating natural beauty, transforming your outdoor space into a flourishing haven for your favourite plants and creating a vibrant oasis that’s uniquely your own.
Enhance your outdoor ambience and infuse a touch of organic charm by introducing a beautifully crafted natural wood raised garden to your landscape.


