
Some maths:

Let’s assume we want a tent of around 15′(4.5m) diameter, and we are using 8 bolt holes separated by one foot into an 8′ slat as described above. When the slats are assembled we will also assume that they are angled at 45 degrees. This results in a wall height of around 5’6″ with the slats at 45 degrees.
The angle of the roof will mean that the centre of the tent is over 7′ tall (more on that later), so if you are more than 5’6″ tall, don’t worry; you’ll only have to duck when going thru the door.
If the slats are at 45deg. then they will be forming diamond shapes in the wall grid that are actually completely square. The width of these “squares” across the diagonal (i.e. horizontal to the ground) is (using Pythagoras) square-root of 2, or 1.41′ (424mm).
In order to get a tent that is 15′(4.5m) round you need a circumference of 3.14×15′ (3.14x4500mm) ie: 47.1′ (14.13m). with each ‘square’ being 1.41′(424mm), that means we need 33.65 of them to go the entire way round the circumference.
Each square takes two slats, so we need 67.3 (must be multiples of 2) rounded to 68 slats for the entire tent. That said, we haven’t allowed for the door yet, or taken into consideration how the roof sits on the top of the walls, but you get the idea.
If we make the door 2×1.41′ or 2.82′ (846mm) wide, then it’s a nice even figure, and we can simply reduce the number of required slats by 4 to 64. (the door taking up the space that those slats would have take up).
Since the roof supports have to have their lower end supported onto a point where the slats intersect, then we must be able to divide the number of ‘squares’ around the tent evenly by the number of roof supports we decide to use (or suffer un-evenly spaced roof supports – eek!).
Let’s say we decide the roof is to have 8 primary supports that hold up the centre ring, and 8 secondary (smaller cross section) supports that are for stopping the canvas sagging, so we end up with 16 supports.
In order to divide the number of roof slats up evenly into the number of wall ‘intersections’, we must have either 16,32,48,64 or 80 ‘squares’ around the yurt (counting the door as two for the sake of the math). Since we figured that we are going to have ‘33.65’ (rounded to 34) squares, then we were pretty close to the required 32 that we have just said we must use. Of course, you could also change the number of roof supports to match the walls, rather than change the number of wall slats to match the roof supports.
So, the decision I made was to have 16 roof supports, meaning 32 ‘squares’ (two of them are the door), so with 30 actual squares (32 minus two for the door), we should need 60 slats (plus or minus a few to be cut up either side of the door), and have a resulting tent size of just a smidgen smaller than we originally said.
The final size is 32×1.41′ or 45.12′(13536mm) circumference, and 14.37′(4310mm) diameter if you keep the “diamonds” perfectly square. Just push the walls out a little more, and make them a couple of inches shorter, and you still have the 15′-16′ tent you started with.
Use a drill press, or be VERY careful to make sure you drill straight thru. Every plan I read said that a drill press was a good idea. I didn’t use one, I was just really careful and mine worked.
 ASSEMBLING THE WALLS:
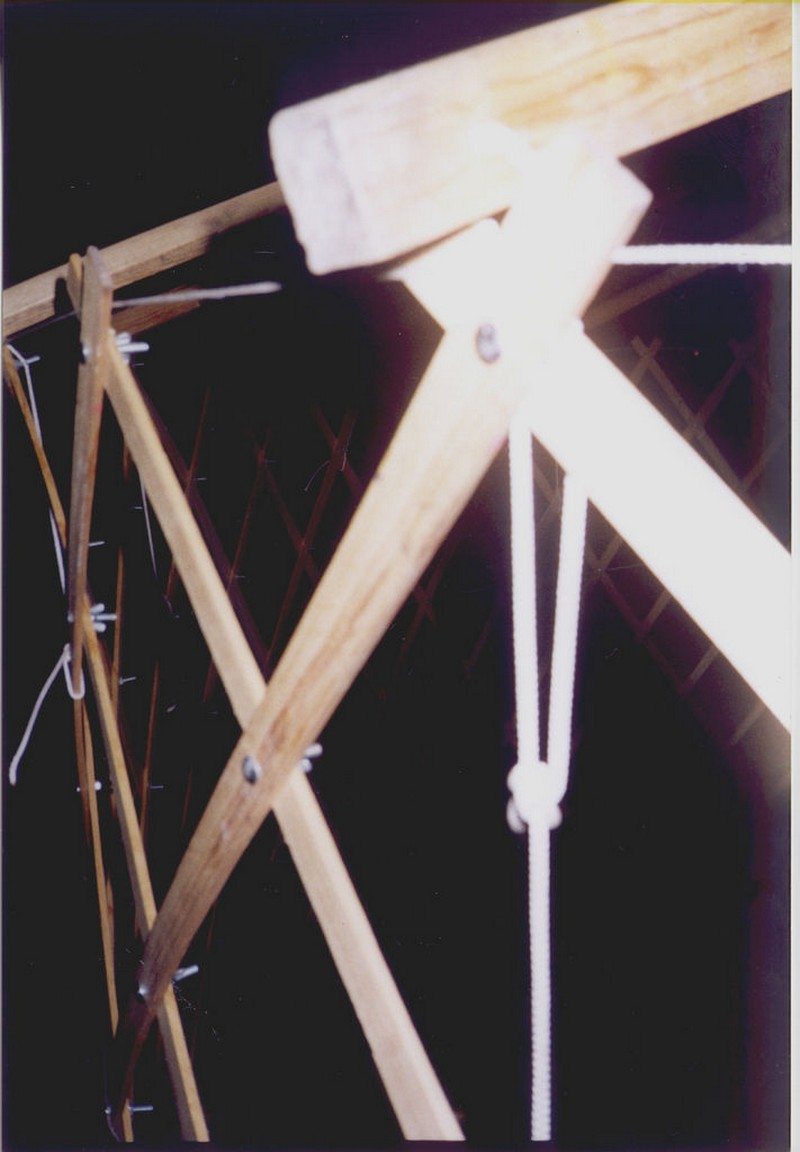
Bolts are so much easier then rivets, and so much stronger than cord or cotter pins. Just make sure that you either use self-locking nylon nuts , or deliberately damage the end of the bolt thread after putting the nut on (this stops the nuts coming off in-transit and getting lost).
I just hit the thread end of the bolt with a hammer a bit as it’s cheaper than nylon nuts (go to the hardware store and check the price difference for yourself – if you are on a tight budget you’ll do what I did).
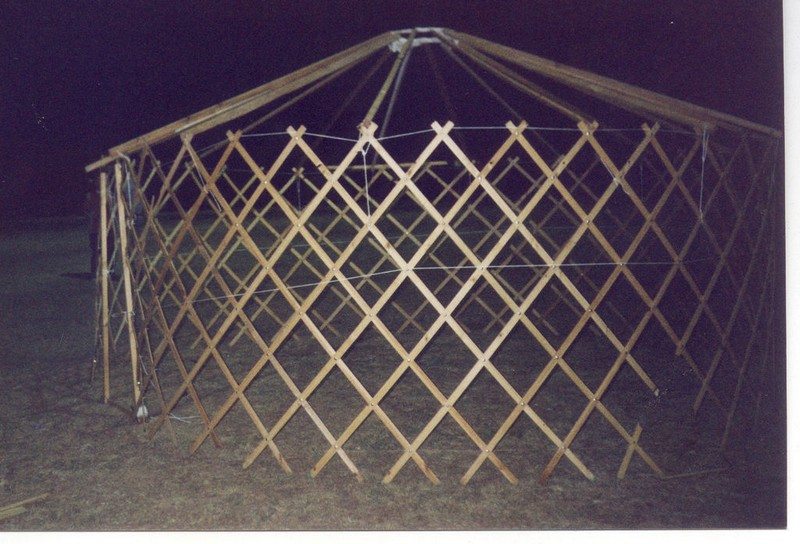
If you are building a yurt then you’ve obviously seen how the walls are put together so I won’t bore you anymore. It’s just a case of inserting 300 odd bolts thru the right holes, putting all the nuts on (no need to tighten them – actually tightening them is very bad!), and then making sure the nuts won’t come off easily after you damage the thread a bit.
The only assembly point that is ESSENTIAL is that all the slats angled one way are *inside* the circle, and all the slats angled the other way are outside the circle, otherwise the frame won’t fold-together in a scissor-like fashion.
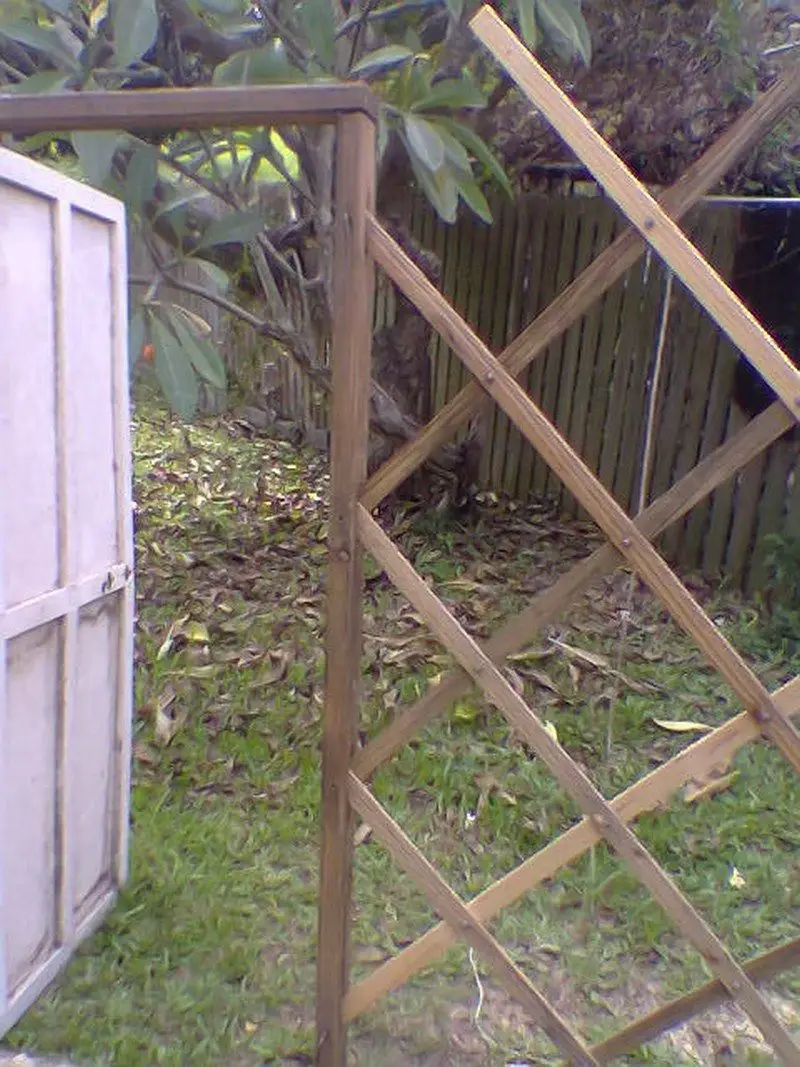
Near the doors, the slats must get shorter by one hole at a time, I fiddled with the shape of the timbers where they joined onto the door frame, just because I wanted a neat finish. Everyone does their doors differently as it depends what you want.
Mine is an extremely simple frame made from (suprise suprise) 90x35mm pine framing timber. Two lengths the height of the finished wall (5’6″), and two of the desired door width (2.82′ or 846mm). I made the simplest possible door frame, and the door is a canvas drapery that I hang over the space. I did that because I wanted portability, and a big solid door seemed like a real pain to carry around. To do similar, I suggest using a large timber screw called a coach screw, two in each corner of the door, , and drill a hole through them, and screw them together.
Continued Page 3…


