Having a lot of boys living under one roof can bring in some issues unusual to other households. There was a time when finding matching socks would take up to at least ten minutes. We’ve moved past that stage though. Lately, it’s organizing a lot of hats – and I mean, a lot.
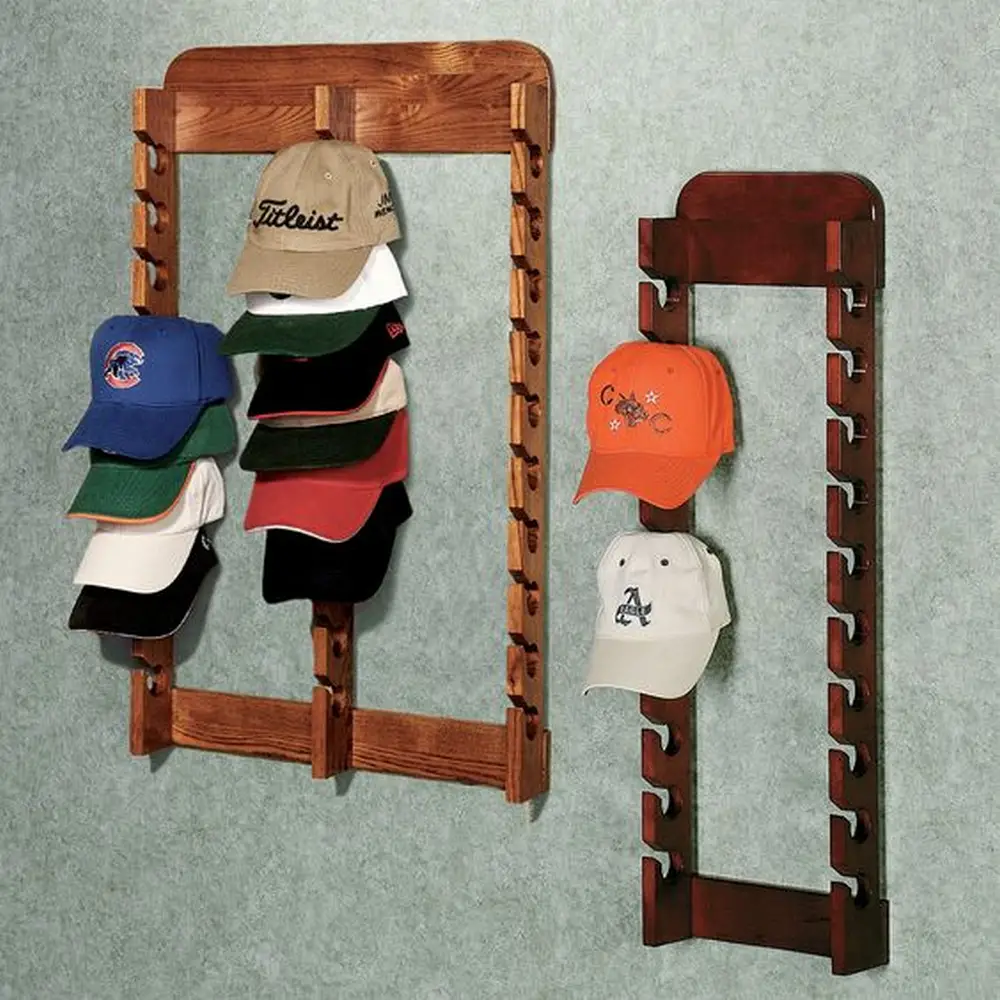
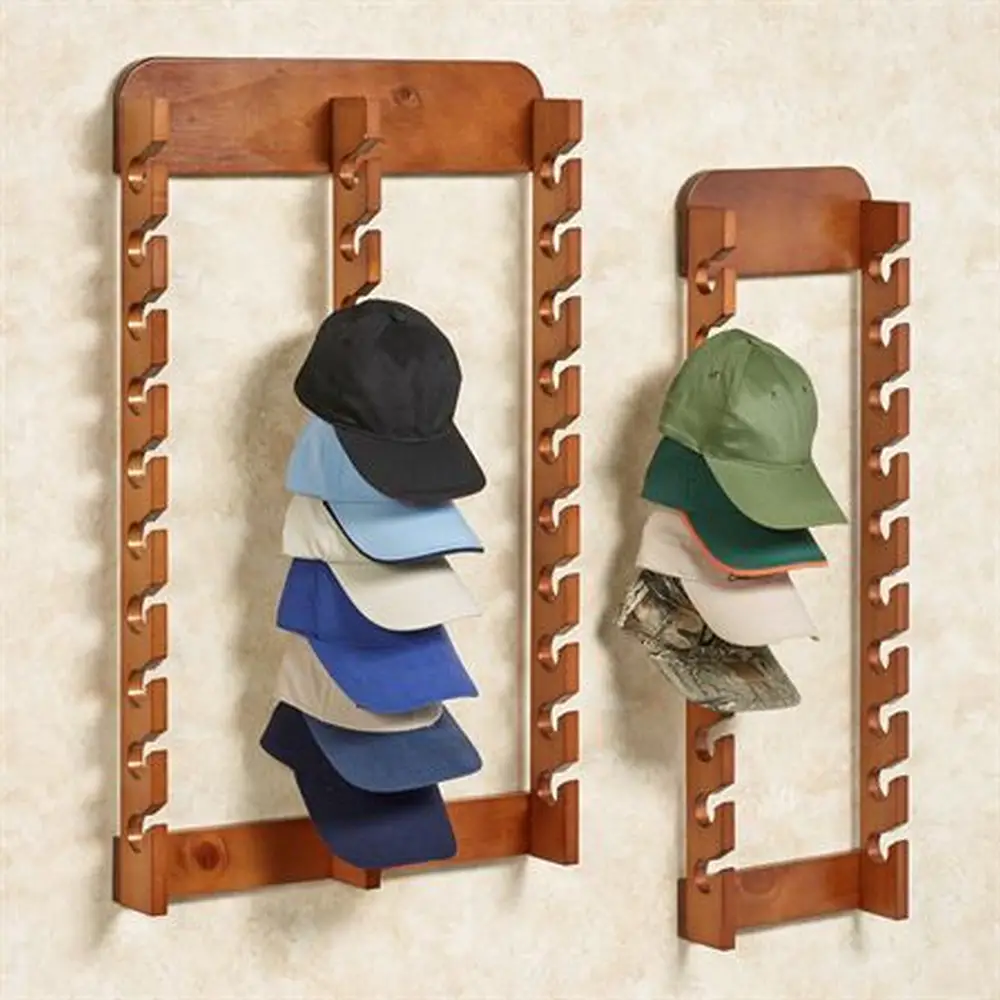
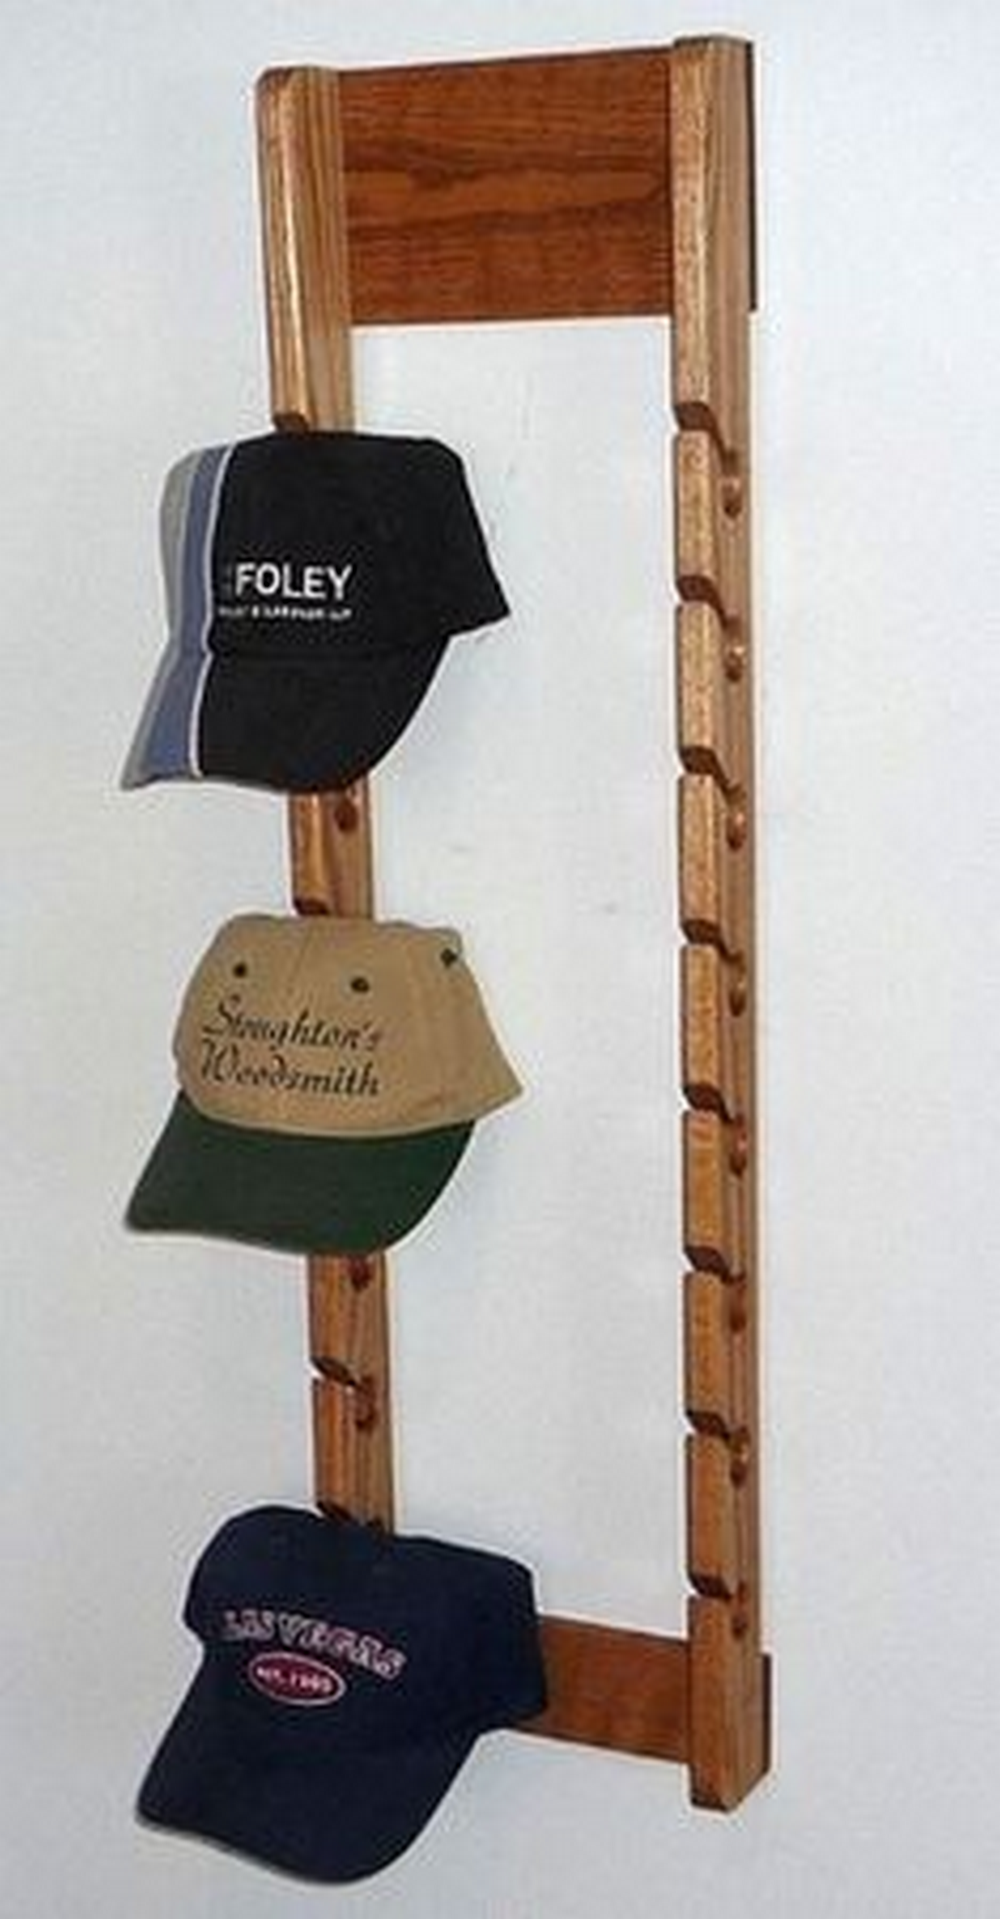
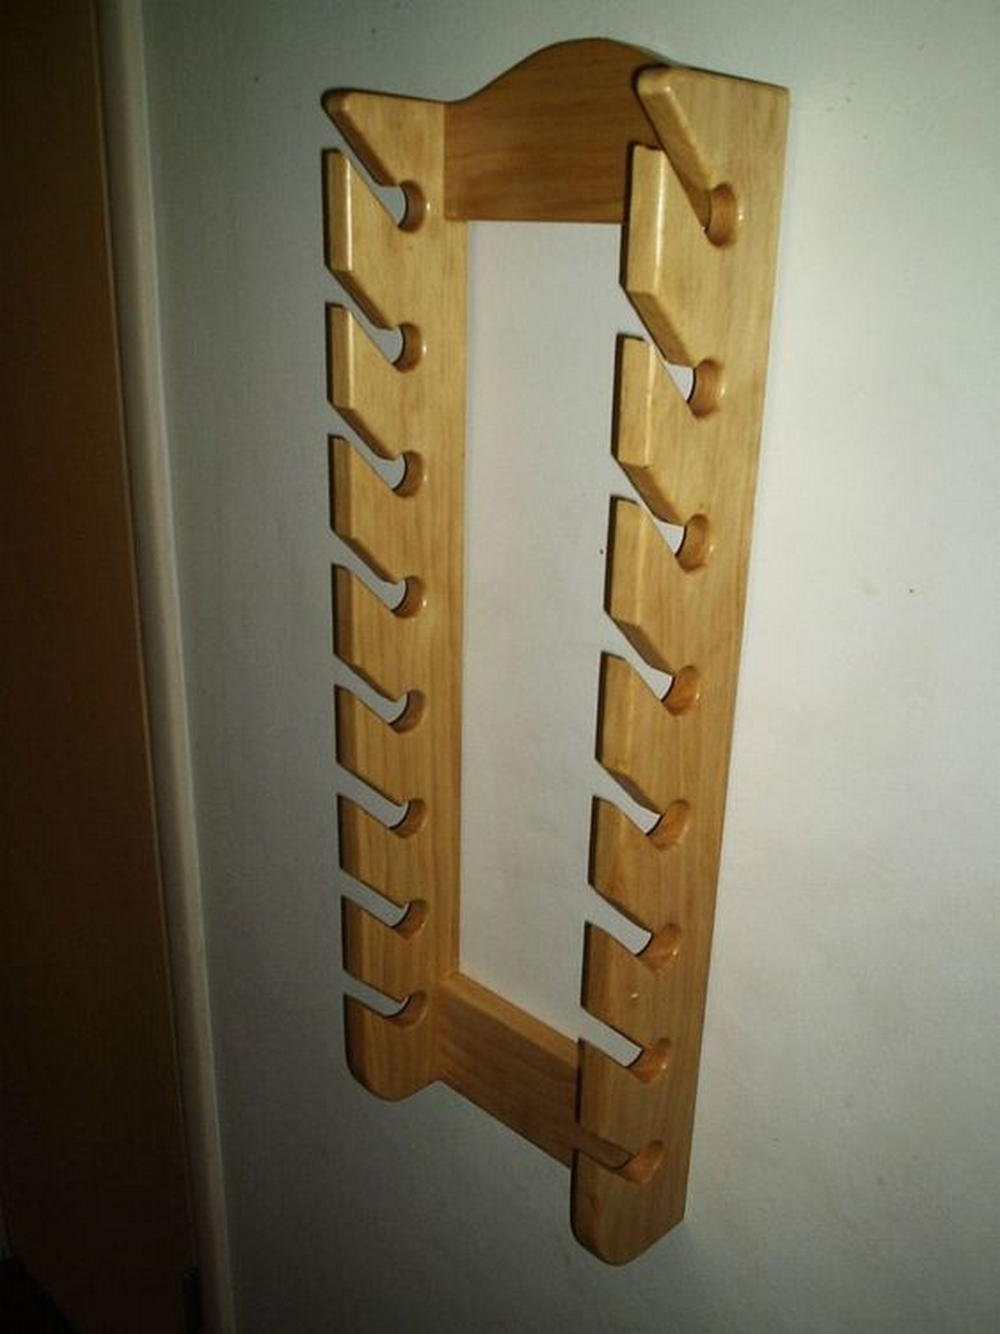
For the past years, my boys’ hats were just lying around in different rooms in the house. Some were so deformed, being scrunched inside a small drawer, that they had to throw those away. Fortunately, my husband found a great solution for organizing hats – a wooden hat rack he made by himself. This is also great as part of my boys’ bedroom.
It’s an easy project. It took my husband just several hours from start to finish. I love the finished product. It’s not bulky at all, perfect for putting hats up without deforming them.
Contents
- 1 Building a DIY Hat Rack
- 2 Design Options for Your DIY Hat Rack
- 3 Choosing the Right Materials for Your DIY Hat Rack
- 4 FAQ for Building a DIY Hat Rack
- 4.1 What materials are best for a DIY hat rack?
- 4.2 How do I choose the right design for my hat rack?
- 4.3 Can I make a hat rack without woodworking or metalworking skills?
- 4.4 What tools do I need to make a DIY hat rack?
- 4.5 How do I ensure my hat rack is stable and durable?
- 4.6 Can I personalize my DIY hat rack?
- 4.7 How do I mount my hat rack securely?
- 4.8 Is it possible to make a hat rack for a small space?
- 4.9 How do I protect my hats from damage on the rack?
- 4.10 Where can I find inspiration for my hat rack design?
- 5 Conclusion
Building a DIY Hat Rack
Materials:
- 2 pcs 2”x4”
- 2 pcs 1”x6”
- Wood glue
- Screws
Tools:
- Pencil
- Tape measure
- Miter saw
- Mag drill
- Table saw
- Sander
- Dowel
- Sandpaper
Instructions:
Step 1: Measure and Cut the Wood
- Using the tape measure and pencil, mark the desired length for your hat rack on the 1”x6” wood pieces. This will form the back panel.
- Measure and mark the 2”x4” wood for the hooks.
- Use the table saw to cut the 1”x6” pieces to length.
- With the miter saw, cut the 2”x4” pieces into smaller sections for hooks.
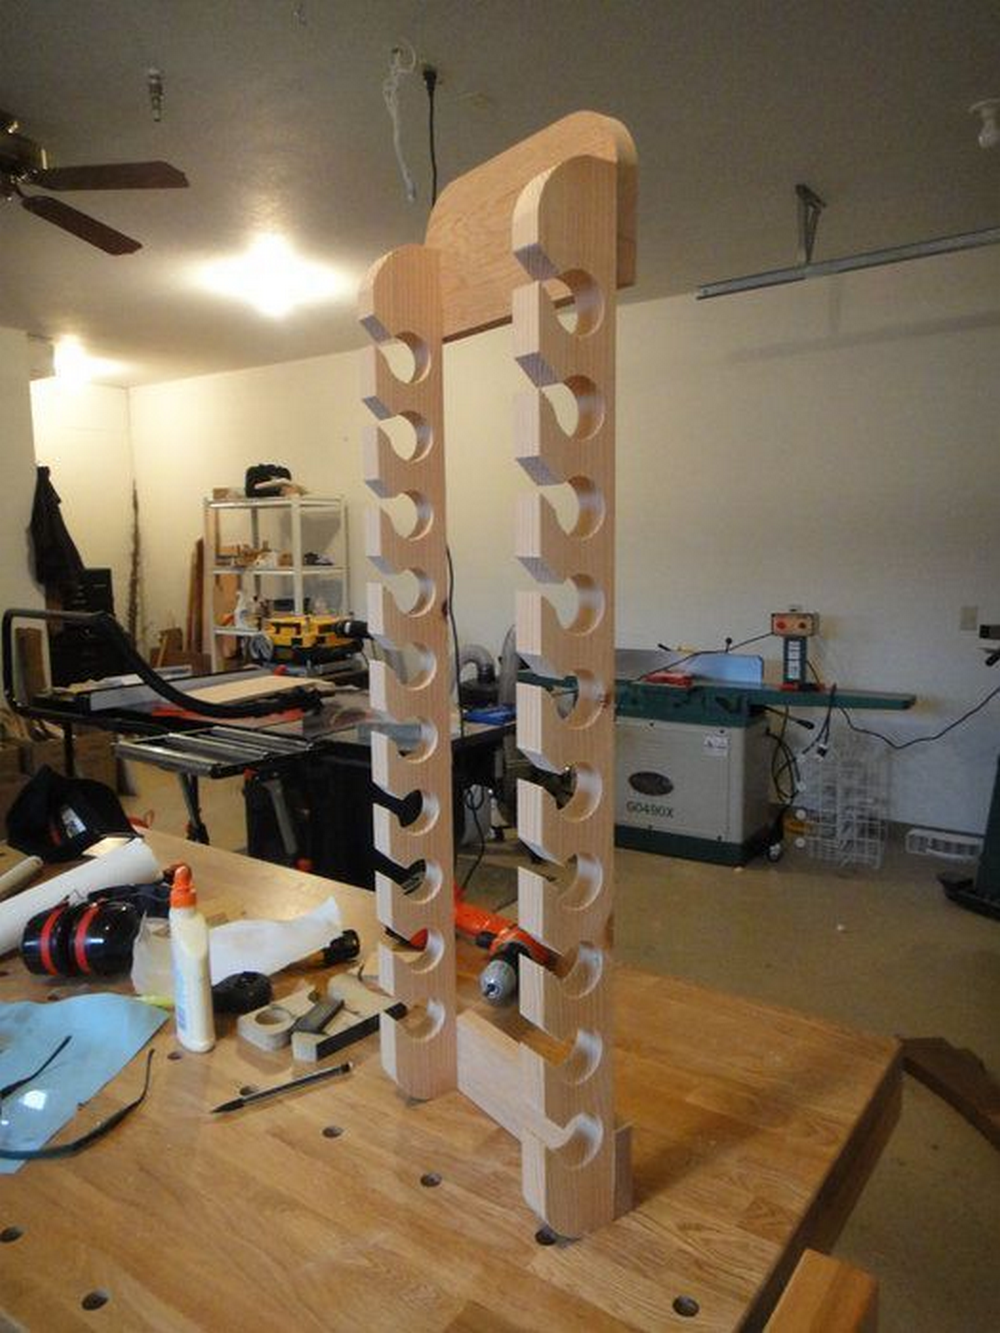
Step 2: Shape the Hooks
- Cut 2”x4” pieces and round off one end of each piece using the sander. These rounded ends will serve as hooks.
Step 3: Sand Everything
- Sand all the wood pieces with sandpaper to ensure a smooth surface. Pay special attention to the edges and ends.
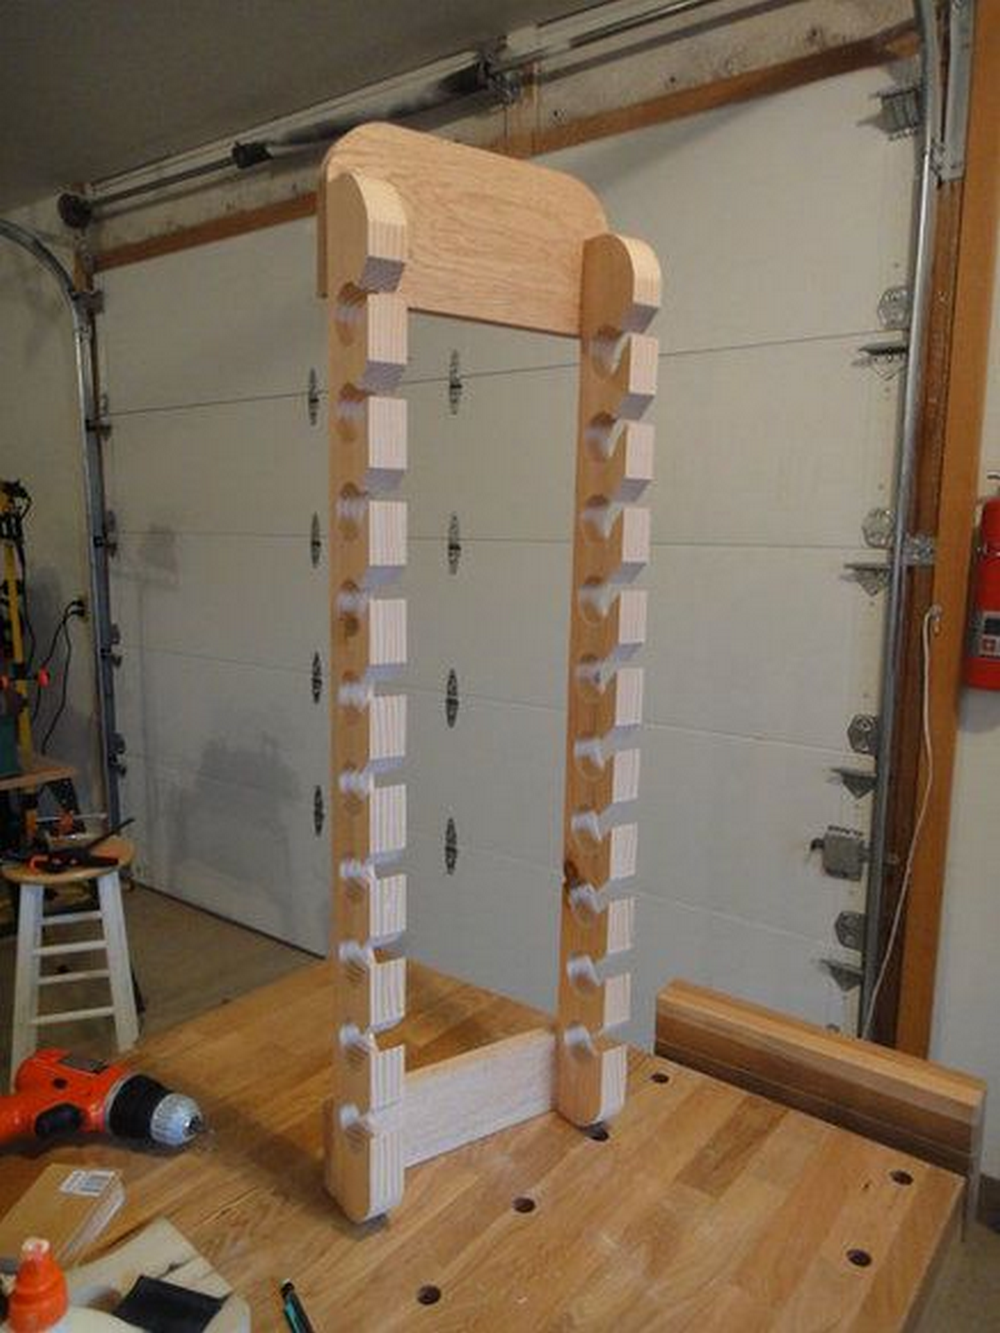
Step 4: Assemble the Back Panel
- Apply wood glue to join the 1”x6” pieces side by side. Use clamps to hold them together until the glue dries.
- For extra strength, you can also screw the pieces together from the back.
Step 5: Attach the Hooks
- Decide on the spacing for the hooks on the back panel.
- Mark the positions with a pencil.
- Drill holes at these marks using the mag drill.
- Apply wood glue on one end of the 2”x4” hooks and insert them into the holes.
- For added stability, you can drill screws through the back panel into the hooks.
Step 6: Final Touches
- Once everything is assembled, give the entire hat rack a final sanding.
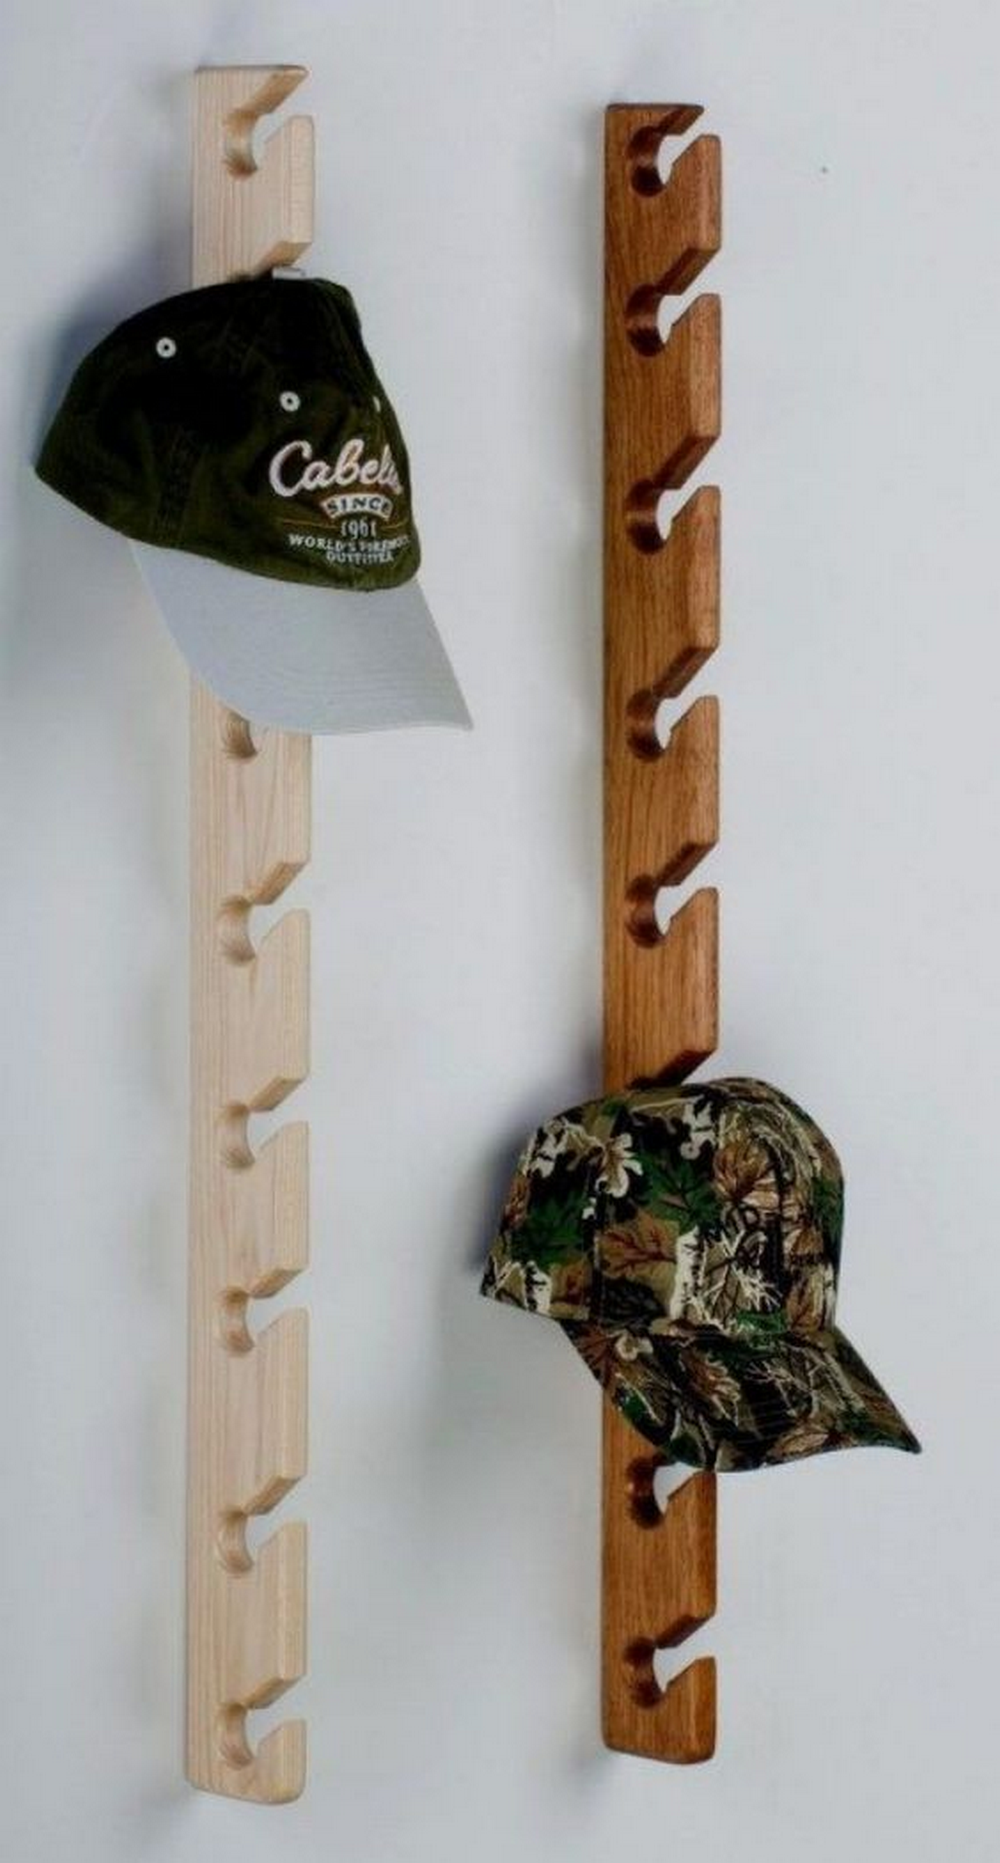
- You can leave the wood natural, or paint or stain it to match your decor.
- Allow any finish to dry completely before mounting the hat rack.
Step 7: Mounting the Hat Rack
- Decide where you want to place your hat rack.
- Use a level to ensure it’s straight.
- Mark the drilling points on the wall.
- Secure the rack to the wall with appropriate screws and wall anchors for your wall type.
Design Options for Your DIY Hat Rack
Creating a DIY hat rack offers endless possibilities to express your style and meet your storage needs. Whether you’re aiming for a look that’s modern, rustic, or unique, the design of your hat rack can be tailored to fit your space and taste. Let’s explore some popular design options that can inspire your next DIY project.
Rustic Charm
For a warm, country feel, rustic designs are perfect. Use reclaimed wood or distressed finishes to create a hat rack with character. Incorporating elements like vintage hooks or antique knobs can add to the rustic appeal.
Modern Elegance
Opt for a sleek, minimalist hat rack if your home has a more contemporary vibe. Think clean lines and smooth finishes. Using materials like polished metal or painted wood can achieve a modern look. You can also experiment with geometric shapes for a more artistic approach.
Creative and Unique
Don’t shy away from getting creative. Use unexpected materials like pipes, branches, or repurposed items. This approach lets you craft a unique hat rack that reflects your style.
Industrial Edge
An industrial-style DIY hat rack adds a bold statement to any space. Use materials like galvanized pipes, metal flanges, and wire mesh. These elements’ raw, exposed look fits well in a modern loft or urban apartment.
Vintage Revival
For those who love a touch of nostalgia, a vintage-inspired design is perfect. Transform old coat racks or repurpose antique ladders into unique hat storage. Adding details like aged brass hooks or using decoupage with vintage wallpaper can enhance the old-world charm.
Scandinavian Simplicity
Embrace the Scandinavian style, focusing on simplicity, functionality, and minimalism. Use light-colored woods and keep the design straightforward yet elegant. This style is perfect for those who appreciate a clutter-free and aesthetically calm space.
Bohemian Flair
A bohemian-style DIY hat rack is all about eclectic creativity. Mix and match colors, textures, and patterns. Use macramé, beads, or colorful fabrics. This style combines various elements for a playful, free-spirited look.
Nature-Inspired Themes
Bring the outdoors inside with a nature-themed hat rack. Use elements like driftwood, tree branches, or floral motifs. This design can create a peaceful, earthy vibe in your home.
Each design option offers a way to make your DIY hat rack functional and stylish. Choose the one that speaks to you and start creating!
Click on any image to start the lightbox display. Use your Esc key to close the lightbox.


Choosing the Right Materials for Your DIY Hat Rack
Selecting the right materials is crucial when building your DIY hat rack. The material defines the rack’s durability, style, and compatibility with your home decor. Here’s a guide to help you choose the best materials for your hat rack project.
Wood: Timeless and Versatile
Wood stands out as a top choice for DIY hat racks due to its natural appeal and flexibility in design. When selecting wood, consider the variety of types available, each offering its unique characteristics:
- Pine: Known for its affordability and softer texture, pine is an excellent option for those new to woodworking. It’s easy to cut and shape, making it ideal for various designs. Pine’s light color provides a neutral base, perfect for staining or painting in any shade to match your decor.
- Oak: If you’re looking for strength and longevity, oak is a superb choice. Its pronounced grain adds a touch of elegance and sophistication to any design. Oak is also highly resistant to wear, making it ideal for a hat rack that will see frequent use.
- Walnut: For a more luxurious look, walnut is a fantastic option. Its rich, dark tones bring warmth and depth to your design. Walnut is aesthetically pleasing but also robust and durable, ensuring your hat rack lasts for years.
- Cherry: Cherry wood is prized for its fine grain and smooth finish. It has a distinct reddish hue that deepens beautifully over time. Though slightly more expensive, cherry wood’s color and durability make it a worthwhile investment for a stylish hat rack.
- Maple: Maple wood offers a lighter color with a subtle grain, making it a versatile choice for various design styles. It’s known for its durability and resistance to wear, making it a practical choice for a frequently used hat rack.
Each type of wood brings its unique grain, color, and texture to the table, offering a range of aesthetic choices for your DIY hat rack. Whether you prefer pine’s rustic charm or walnut’s refined elegance, there’s a wood type to suit every style and need. Remember, the wood you choose not only defines the look of your hat rack but also its durability and how it will age over time.
Metal: Sleek and Modern
Metal is a standout choice for creating a DIY hat rack with a sleek and modern edge. It’s perfect for those aiming for a contemporary or industrial aesthetic in their home. Here’s a deeper look into the metal options available for your project:
- Steel: Known for its strength and durability, steel is a popular choice for a modern DIY hat rack. It can be molded into various shapes and designs, offering versatility. Steel’s robust nature ensures your hat rack can withstand the weight of multiple hats without bending or warping. For a more industrial look, leave the steel raw, or paint it for a cleaner, more refined appearance.
- Aluminum: Lightweight yet sturdy, aluminum is an excellent option for a sleek DIY hat rack. Its natural resistance to corrosion and rust makes it ideal for long-term use. Aluminum’s smooth surface lends itself well to painting, allowing you to match your hat rack with your room’s color scheme. Its malleability allows for intricate designs, perfect for those who want a modern look without the heaviness of steel.
- Iron: If you’re going for a more rustic or vintage industrial style, iron is the material for your DIY hat rack. It provides a classic, time-worn look that can add character to any space. Iron is exceptionally durable, making it suitable for heavy-duty hat racks. You can treat the iron with various finishes to prevent rust and achieve the desired look, whether natural, rustic patina, or a sleek, painted finish.
- Copper: Consider using copper for a unique and trendy DIY hat rack. Its natural reddish-brown hue adds warmth and elegance to any room. Copper is also known for developing a beautiful patina over time, adding character to your hat rack. It’s malleable, making creating intricate designs or simple, clean lines easy for a more minimalist approach.
- Stainless Steel: Stainless steel is perfect for a contemporary, maintenance-free option. It’s highly resistant to rust and corrosion, making it ideal for areas with high humidity. The sleek, shiny surface of stainless steel adds a touch of modern sophistication to your DIY hat rack, fitting seamlessly into a modern or minimalist decor.
Incorporating metal into your DIY hat rack assures durability and adds a modern touch to your home decor. Whether you choose the industrial appeal of steel, the lightweight versatility of aluminum, the rustic charm of iron, the elegance of copper, or the sleekness of stainless steel, metal can transform your hat rack into a stylish and functional piece.
Recycled Materials: Eco-Friendly and Unique
Using recycled materials in your DIY hat rack project is environmentally friendly and infuses your creation with unique character and history. Here’s how different recycled materials can be transformed into a one-of-a-kind hat rack:
- Pallet Wood: Pallets are often discarded after use, but they can be repurposed into beautiful DIY hat racks. Their rugged look gives a rustic or industrial feel. Sand down the wood for a smoother finish, or leave it as is for a more natural, rough texture. Pallet wood can be stained or painted to fit your desired aesthetic.
- Old Furniture Pieces: Repurposing parts of old furniture is a creative recycling method. For example, the sides of a worn-out dresser or the back of an old chair can be transformed into a unique hat rack. This approach not only saves materials but also retains the story and charm of the original piece.
- Scrap Metal: Scrap metal, whether it’s from old tools, automotive parts, or building materials, can be welded or bolted together to create an industrial-style hat rack. The natural patina of aged metal adds an authentic, vintage touch to your design.
- Reclaimed Wood: Wood from old barns, decks, or flooring carries a history that can’t be replicated with new materials. Its weathered appearance offers a charming, rustic look perfect for a DIY hat rack. Reclaimed wood is often stronger and more durable than new wood, as it has already been exposed to elements and has stood the test of time.
- Vintage Knobs and Hooks: Reusing old knobs and hooks from previous furniture or homes gives a unique flair to your hat rack. These elements can be mixed and matched for an eclectic look, or uniformly used to create a specific style theme.
- Wine Corks or Bottle Caps: Consider using wine corks or bottle caps for a quirky and unconventional hat rack. They can be attached to a wooden base to create a fun and creative way to hang hats.
Using recycled materials in your DIY hat rack benefits the environment by reducing waste and allows you to create a piece with a story and personality. Each recycled material, be it pallet wood, old furniture, scrap metal, or vintage accessories, brings its unique history and charm to your project, making your DIY hat rack a functional item and a conversation piece full of character.
Mixed Materials: Creative and Custom
Incorporating mixed materials into your DIY hat rack project opens up a world of creative possibilities, allowing for custom designs that blend different textures and styles beautifully. Here’s how you can experiment with combining various materials for a unique and personalized hat rack:
- Wood and Metal: Pairing wood with metal balances rustic and industrial styles. For instance, a wooden base with metal hooks or accents offers a harmonious blend of warmth from the wood and the sleek, modern appeal of metal. This combination works well in many decor styles, from farmhouse to contemporary.
- Glass and Wood: Adding glass elements to a wooden hat rack can create an elegant and sophisticated look. Consider incorporating glass shelves or panels with a wooden frame. This blend is particularly appealing in modern or minimalist interiors, where the transparency of glass adds a light, airy feel.
- Metal and Fabric: Combining metal with fabric can give your hat rack a soft yet contemporary look. Metal pipes or frames draped with fabric add color and texture and provide a gentle touch for storing hats without damaging them.
- Wood and Rope: For a nautical or bohemian theme, intertwine rope with a wooden structure. This combination is not only visually interesting but also adds a tactile element to the hat rack. Rope can be used to create hanging sections or wrapped around a wooden base for a unique texture.
- Acrylic and Metal: Acrylic, with its sleek and modern appearance, pairs well with metal for a futuristic look. An acrylic base with metal hooks or rods can create a hat rack that looks almost like a piece of modern art, perfect for contemporary spaces.
- Stone and Wood: For a more rustic and earthy hat rack, consider combining stone elements with wood. This could be as simple as attaching wooden pegs to a smooth, flat stone slab, creating a visually striking and highly functional contrast.
- Reclaimed Materials and New Hardware: Mixing old and new can yield fascinating results. Using reclaimed wood or metal with new, shiny hooks or pegs can create an interesting juxtaposition between the old-world charm and contemporary functionality.
By combining different materials, you can create a DIY hat rack that is functional and reflects your style. The mix of wood, metal, glass, fabric, rope, acrylic, stone, and other materials can cater to various design preferences, from sleek and modern to rustic and eclectic. This creative freedom allows you to craft a hat rack that is a storage solution and a statement piece in your home.
Choosing the right material for your DIY hat rack is not just about the look. It’s also about ensuring the rack is sturdy and functional, fitting perfectly into your home’s setting.
FAQ for Building a DIY Hat Rack
What materials are best for a DIY hat rack?
It depends on your style and needs. Wood and metal are popular for their durability and aesthetic appeal. Recycled materials offer an eco-friendly option, while mixed materials can create unique designs.
How do I choose the right design for my hat rack?
Consider your home’s decor and the space available. Rustic, modern, industrial, and creative designs each have unique characteristics. Choose a design that complements your interior and meets your storage requirements.
Can I make a hat rack without woodworking or metalworking skills?
Yes, there are simple designs that don’t require advanced skills. Using pre-cut wood, recycled materials, or repurposing items can make the project easier.
What tools do I need to make a DIY hat rack?
Basic tools like a hammer, saw, drill, and screwdriver are usually sufficient. The specific tools depend on your design and materials.
How do I ensure my hat rack is stable and durable?
Use quality materials and ensure all connections are secure. If using wood, consider hardwoods for added durability. Metal racks should be properly welded or bolted.
Can I personalize my DIY hat rack?
Absolutely! Paint, stain, or add decorative elements to personalize your hat rack. Incorporating elements like your initials, favorite colors, or thematic decorations can add a personal touch.
How do I mount my hat rack securely?
Use appropriate mounting hardware for your wall type. Wall studs provide the most support for heavier racks. For lighter racks, wall anchors can be sufficient.
Is it possible to make a hat rack for a small space?
Yes, there are many space-saving designs. Wall-mounted racks or vertical designs work well in small spaces.
How do I protect my hats from damage on the rack?
Ensure the rack has smooth edges. Adding padding or using rounded hooks can prevent damage to your hats.
Where can I find inspiration for my hat rack design?
Look online for ideas, check out DIY blogs, or browse Pinterest for creative inspiration. You can also visit furniture stores to see different styles and get ideas.
Conclusion
Building a DIY hat rack is a rewarding project that combines functionality with personal style. With various materials and design options available, you can create a hat rack that organizes your space and adds a decorative touch to your home.


