
Remember to always use 4-point barbed wire between courses. We used one strand on this dome due to its small size. Use two strands of barbed wire between every course for domes larger than this one.
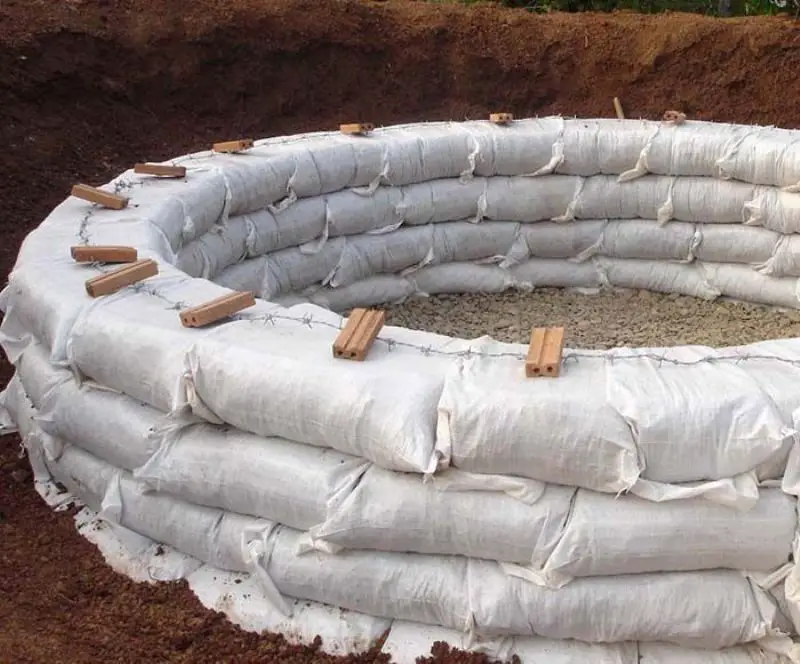
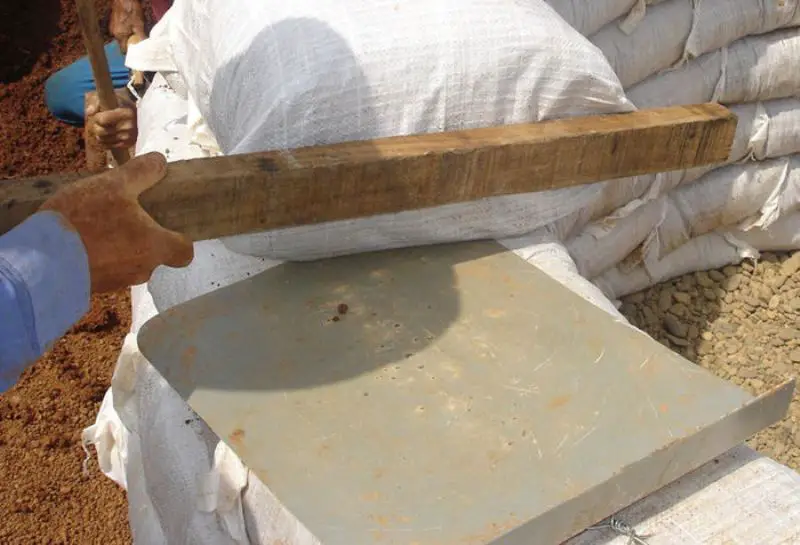
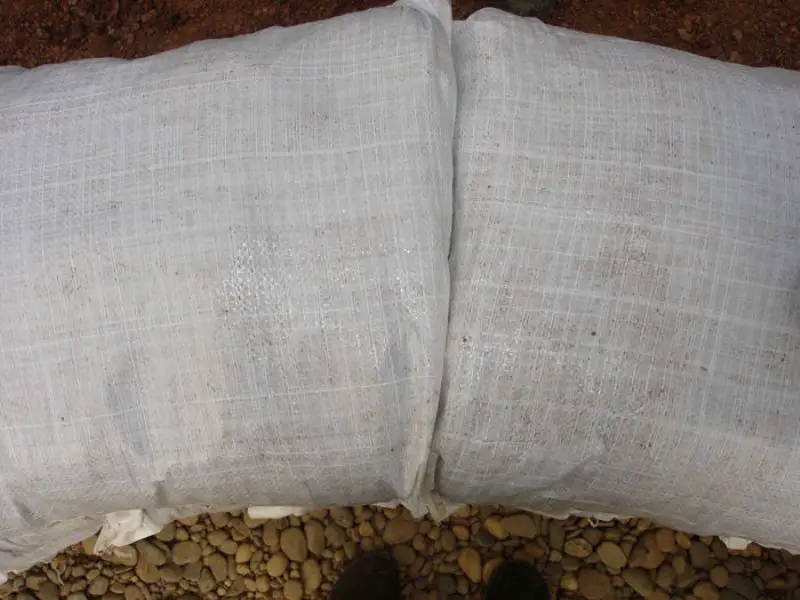
On straight earthbag walls, you can just butt the bags against each other. But for roundhouses and domes, you need to align the bag ends to the center point so the bags sit tightly against each other. Hit the bottom of each bag with a board until it aligns with the center of the dome. The second photo shows how the bag joints appear looking from above. (They look like mitered joints.) Repeat this process throughout the dome. At the top, the process becomes more pronounced as the radius decreases.
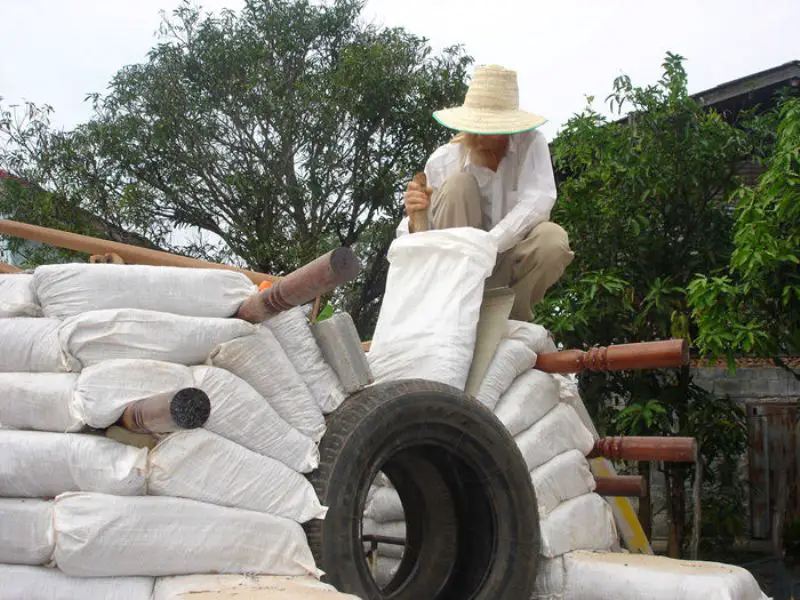
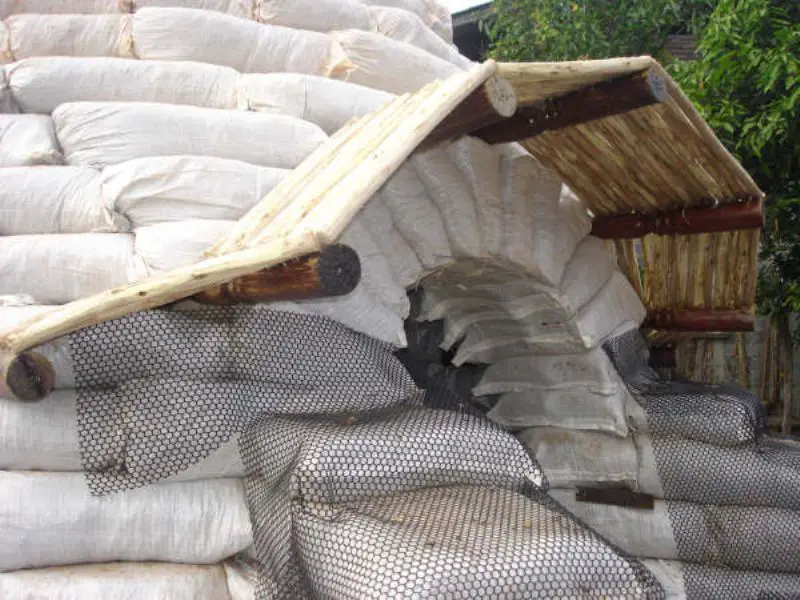
You need a way to support the bags as you build the arch over the door. You could build an elaborate wood and plywood form. This might be worthwhile if you’re building lots of arches the same size. But this dome has just one arch, so we lashed two used tires together for the form. Build some supports on each side of the door opening to hold the tires at the correct height. Add some horizontal blocking to hold everything together, but leave enough space in the middle to squeeze through and for the string line that will determine your dome curvature. Note: you could temporarily fill the space with adobes, bricks, etc. and remove them later, but then you lose access to the dome and can’t use the string line.
It looks really complicated to build an arch, but it’s not. Make tapered earthbags about 12” high. Make sure you use the right soil mix that will withstand high pressure. Compact the bags from the sides and top as much as possible. The taper aligns with the center point of your form (the center of the tires in this case). You could use a string line for this or just eyeball it like I did.
It’s a good idea to include a protected overhang above entry doors to protect the door and shelter people going in and out. This eyebrow or overhang is made with hardwood table legs embedded between bags. Then short pieces of insect resistant eucalyptus wood were nailed to the table legs and covered with 6 mil plastic sheeting. The wood was varnished with polyurethane for greater durability. (The table legs were varnished in advance.)
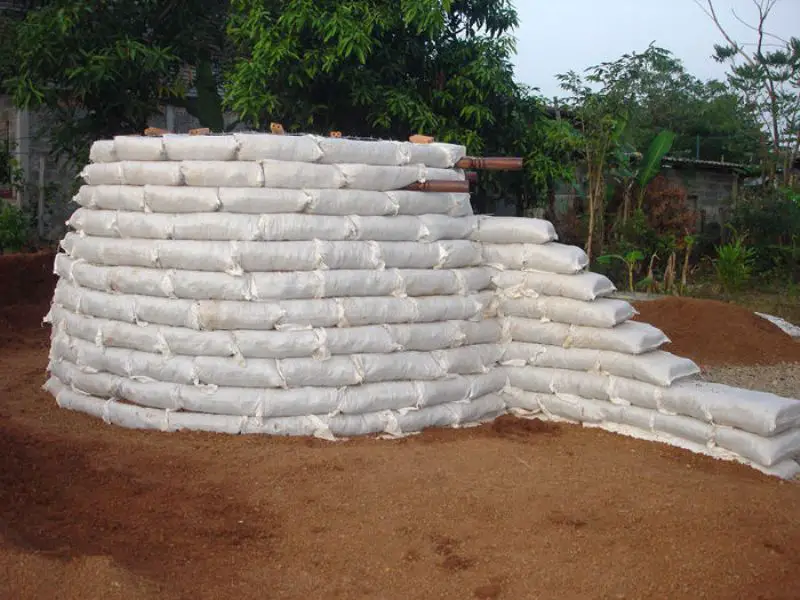
Continue building the buttress at the same time as the dome. The bags and barbed wire interlock at every course. We added a few ½” pieces of rebar for added strength where it seemed it would do the most good: down through the top of the bags to help preventing overturning, and where the buttresses connect to the dome. The buttresses are stepped to match the slope of the earth. The steps make it easy to climb on the dome. The lower part makes a nice bench.
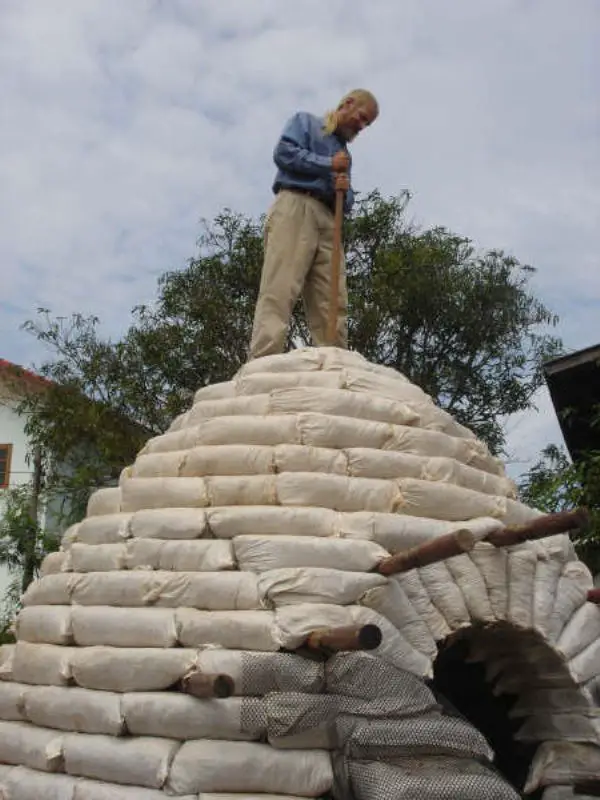
Continue the same process of laying and tamping bags. The corbel (overhang between courses) will increase the higher you go. Use the string lines at every course to arrive at the desired shape. Make sure each bag is angled toward the center point and tightly butted to the next bag. (This is what makes the dome really strong.)
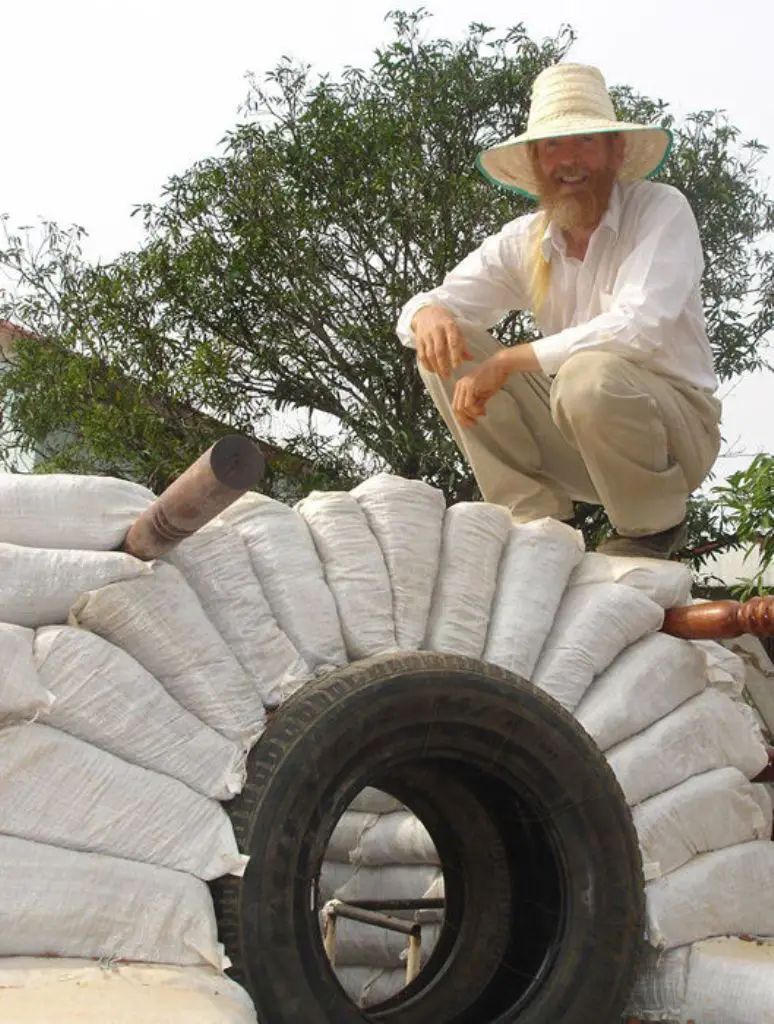
The photo shows the last bag being put in place with a great feeling of accomplishment. The last bag looks like a mushroom cap.
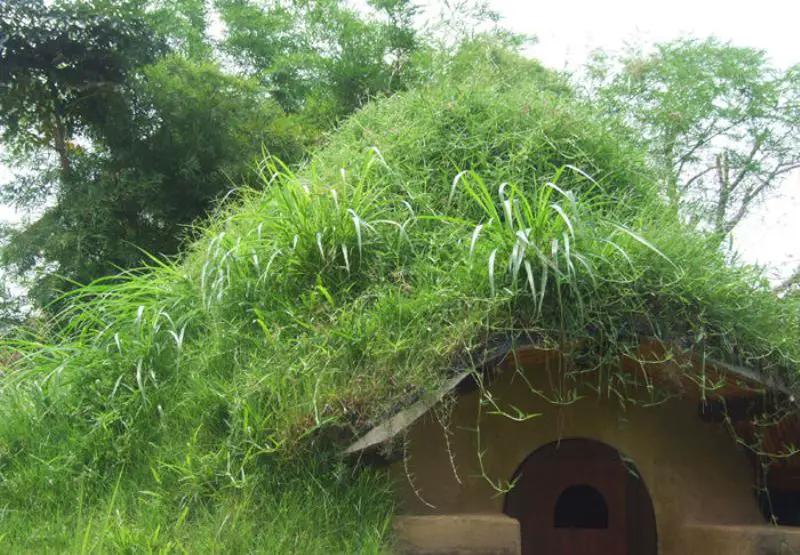
The easiest method of finishing the dome is plaster. We live in a rainy climate where a plastered dome might leak. Plus, we wanted a beautiful plant covered dome in our backyard. Living roofs require a lot of regular maintenance just like gardening, so think long and hard before going this route. Without regular watering, weeding and fertilizer the living roof will turn into a giant weed patch, die or maybe even erode away. We’ve worked hard to establish really healthy grass, as you can see in the photo.
The main steps for the living roof include adding two or three layers of 6 mil plastic sheeting (“black poly”). I put one layer directly against the dome and back side of the buttresses. Then I backfilled with earth (more road base) about half way up and added another layer of plastic. I added a third layer of plastic on the top of the dome where the risk of water penetration is greatest. Work carefully and try not to puncture the plastic. Gradually add soil on top of the plastic starting at the bottom and working up. Compact it slightly as you go. I used ‘field dirt’ – soil from rice fields for this step. It has enough clay to stay in place, but still enable grass to grow. Add drought resistant sod once the dome is covered in a layer of soil. Some pieces of sod require bamboo pins to keep from slipping. Time the project so the sod gets started during the rainy season. We have a lawn sprinkler on top of the dome and water it whenever it gets dry.
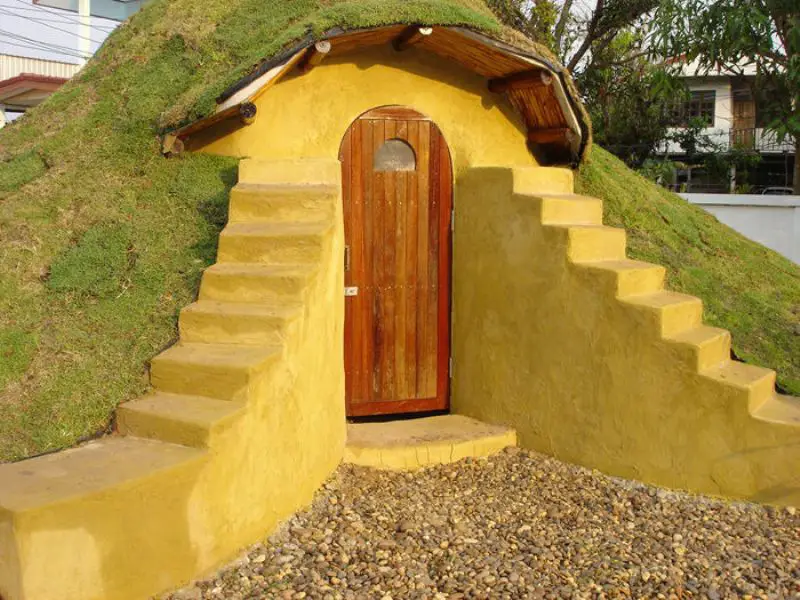
The outside (front area only) is plastered with cement plaster with yellow iron oxide pigment. All edges are rounded slightly to soften the look. Plaster mesh isn’t typically needed on earthbags, but we used plastic plaster mesh in this application due to the buttresses being exposed to the elements. Plastic mesh won’t rust. We never plastered the inside since our dome is used as a tool shed. This allows people to come and see how the dome was built.
Domes have lots of other advantages. They create the most floor space for a given length of wall. There are no wasted corners. The feeling inside is magical. Those who live in domes (and roundhouses) most likely never live in boxes again. Wind flows around domes and does not build up pressure against them.
You can build domes without wood. You can build domes with minimal tools and materials – no nails, no wood, no plywood, no shingles. This makes domes a good candidate for those who lack carpentry skills and for emergency shelters for disaster areas and war refugees. Give people some rice or grain bags and a little training, and soon they can build their own sturdy, safe shelters.
Thanks to Owen Geiger for this great tutorial!


