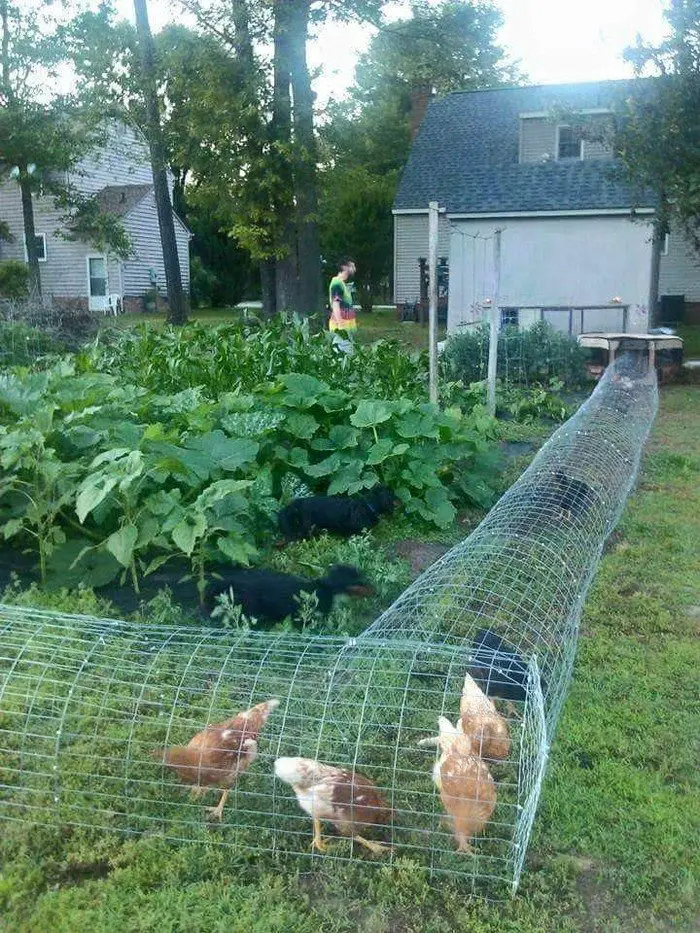
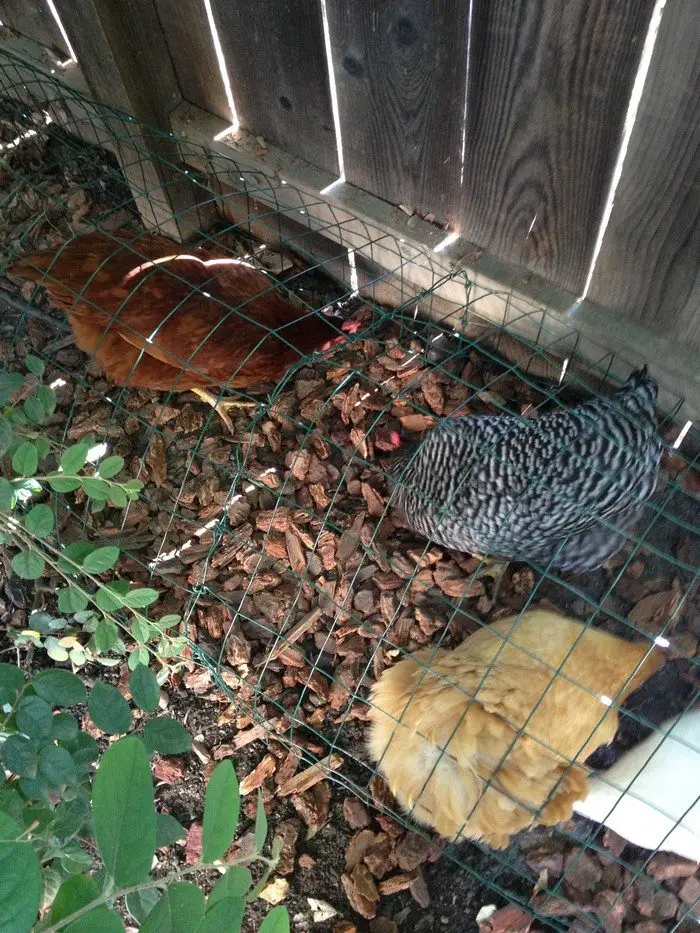
Raising chickens in your backyard? Here is a chicken tunnel system idea that will make you AND your chickens happier!
Chickens can do a lot more than just produce fresh eggs for us. They till and fertilize the soil, and they love to eat weeds, snails, bugs, and other critters that trespass our gardens.
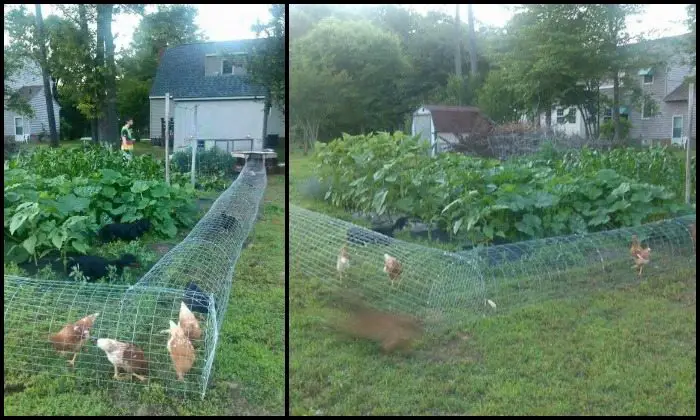
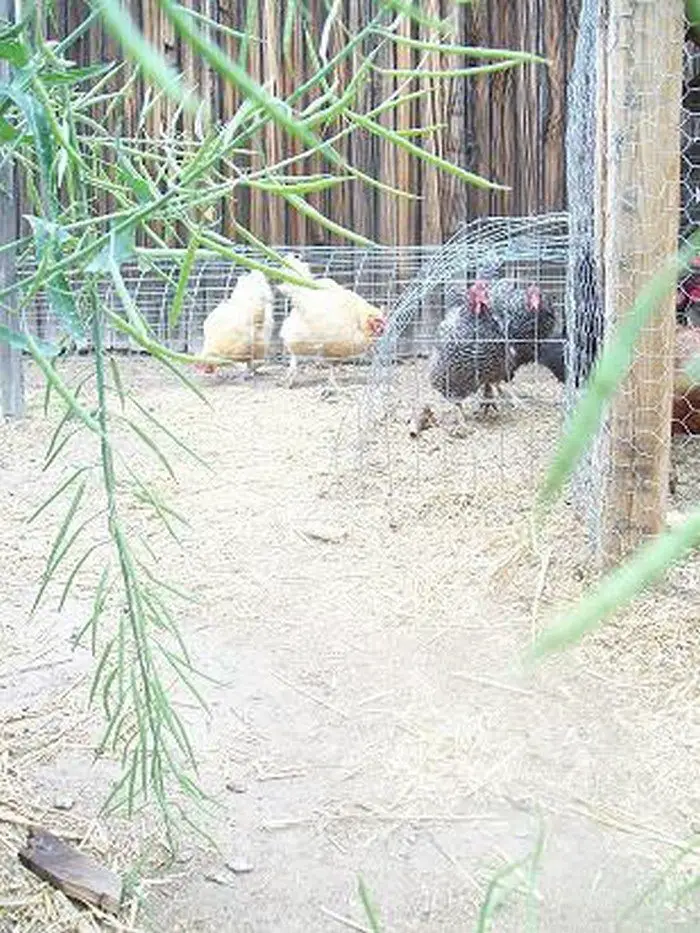
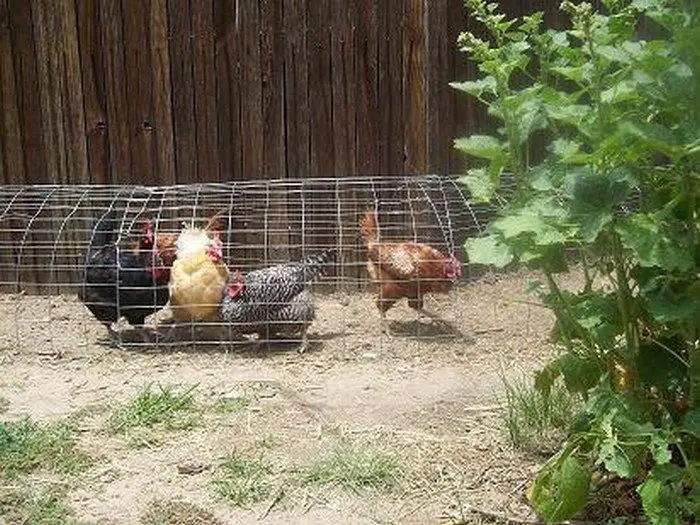
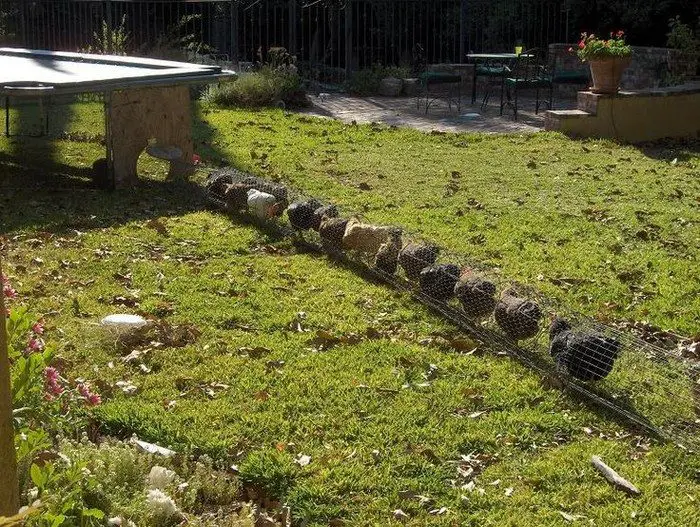
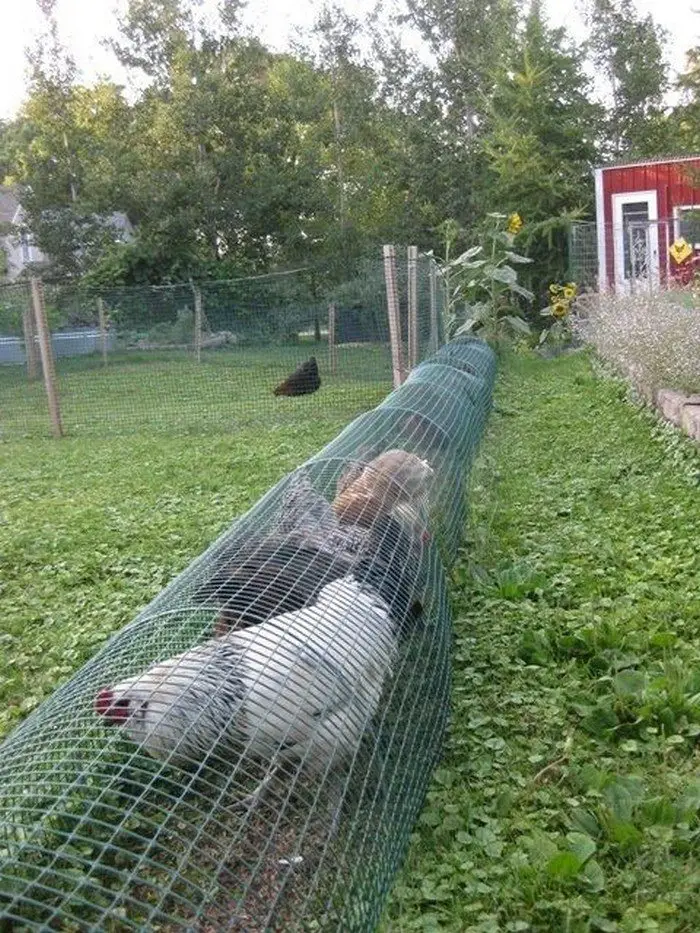
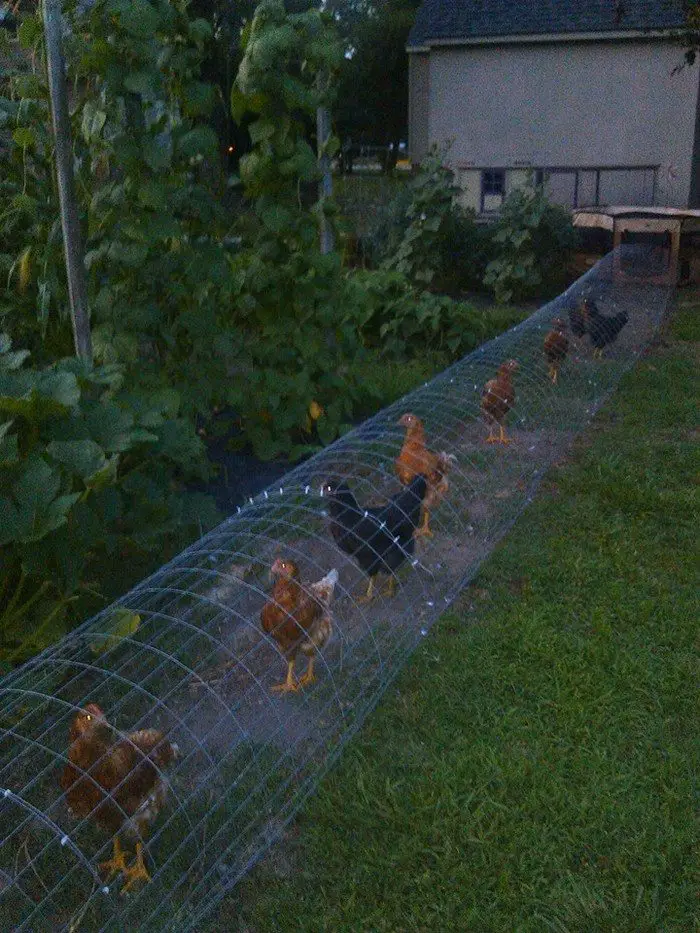
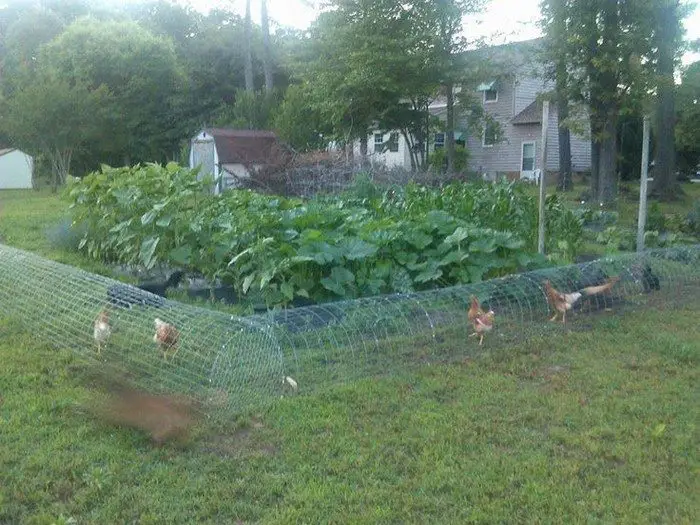
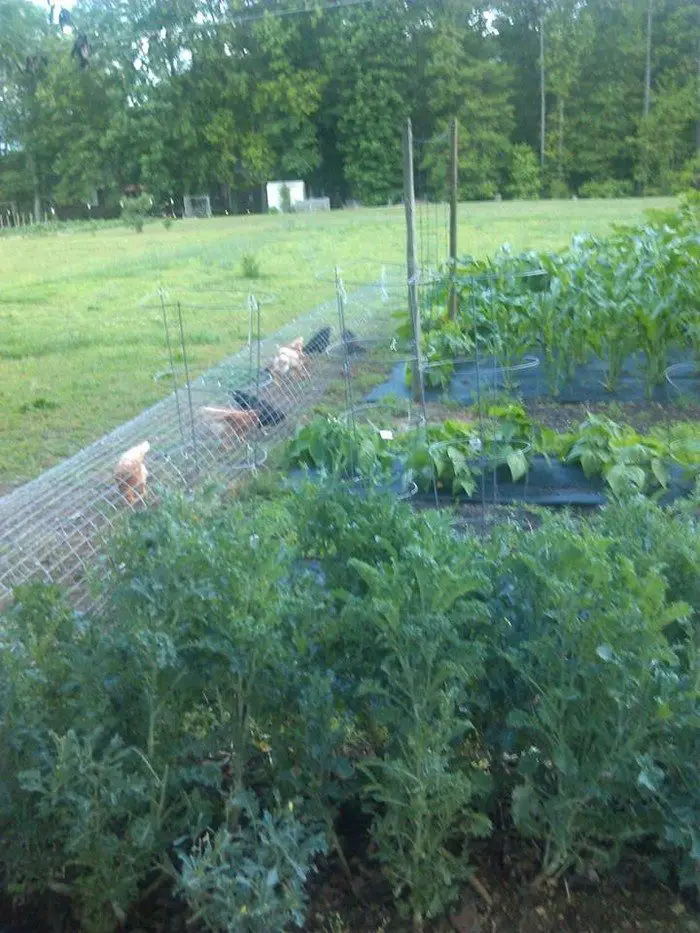
By making a movable chicken tunnel, chooks become effective helpers around the garden since you can direct them to areas that need to be taken care of. You’ll be amazed at how much work they can do! :)
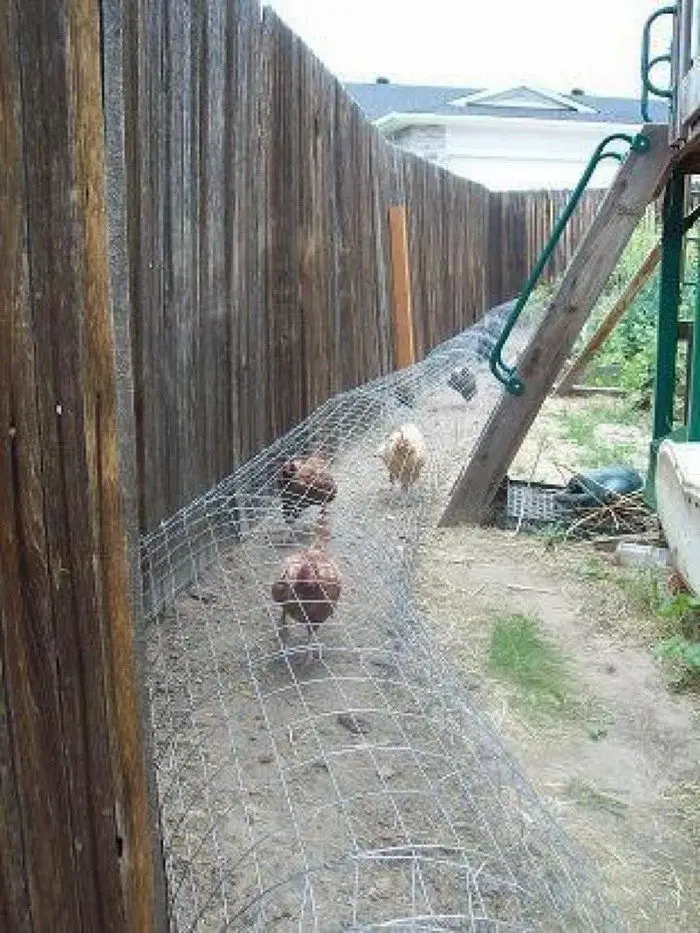
Love it? Your chickens will love it, too! With a chicken tunnel, your chooks are basically free range. They can run all they want without you having to supervise them or worry about predators if any!
You are happy, the chickens are happy — what is not to love?
Do you need a movable chicken tunnel in your yard?
The DIY Chicken Tunnel System presents several advantages:
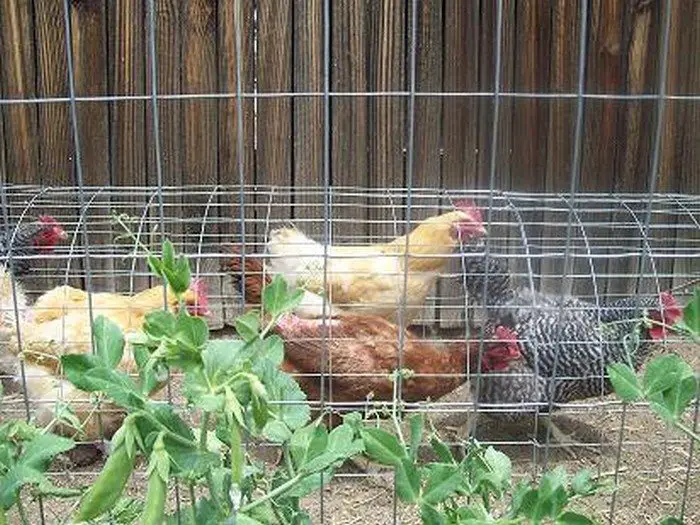
1. Enhanced Foraging: The tunnel system allows chickens to engage in natural foraging behaviours by providing access to fresh vegetation, insects, and seeds. This promotes their overall health and well-being.
2. Predator Protection: By enclosing chickens within the tunnel, it offers protection from predators such as foxes, raccoons, and birds of prey, ensuring the safety of the flock.
3. Garden Preservation: The tunnel helps prevent chickens from damaging garden beds, flower patches, and vegetable gardens, allowing plants to grow undisturbed.
4. Space Efficiency: The vertical design of the tunnel system optimizes space utilization, making it suitable for small backyard environments. It provides ample room for chickens to move around while minimizing the footprint.
5. Cost-Effectiveness: Building a DIY chicken tunnel system is more affordable than purchasing a pre-made enclosure. It utilizes simple materials and construction techniques, saving money for poultry keepers.
6. Customization: DIY tunnel systems offer flexibility in design, allowing owners to tailor the size, shape, and features to suit their specific needs and preferences.
Customization extends beyond mere dimensions. Owners can imbue the tunnel system with additional features tailored to the specific behaviours and preferences of their chickens. For instance, incorporating multiple access points, perches, or nesting boxes enhances functionality and convenience while catering to the instincts of the birds.
7. Reduced Feed Costs: Chickens that have access to outdoor foraging opportunities consume fewer commercial feeds, resulting in cost savings for poultry keepers.
With access to outdoor foraging opportunities, chickens have the chance to supplement their diet with insects, worms, seeds, and vegetation found in the surrounding environment. This natural foraging behaviour helps fulfill their nutritional needs, reducing their dependence on commercial feeds. As a result, poultry keepers can save money on feed costs over time, leading to significant long-term savings.
The reduced reliance on commercial feeds can have additional benefits beyond cost savings. Chickens that engage in natural foraging behaviours tend to exhibit better overall health and well-being. They receive a more diverse diet, leading to improved egg quality and flavour. Additionally, foraging encourages physical activity, which can help prevent obesity and behavioural issues in chickens.
Overall, the DIY chicken tunnel system offers advantages such as enhanced foraging, predator protection, garden preservation, space efficiency, cost-effectiveness, customization, and reduced feed costs, making it an efficient and practical choice for poultry keepers.
What you’ll need to build a chicken tunnel system…
You’ll need these materials:
- 4′ Wire Fencing
- 1″ thick Wood Slats
- Bungee Cords / Zip Ties
- Wood Screws
And these tools:
- Wire Cutter
- Saw
- Drill
Steps:
1. Plan Your Layout
Decide where you want to install your chicken tunnel system and plan the layout accordingly. Consider factors such as available space, terrain, and proximity to your home or existing chicken coop. Sketching out a rough design can help visualize the layout before proceeding.
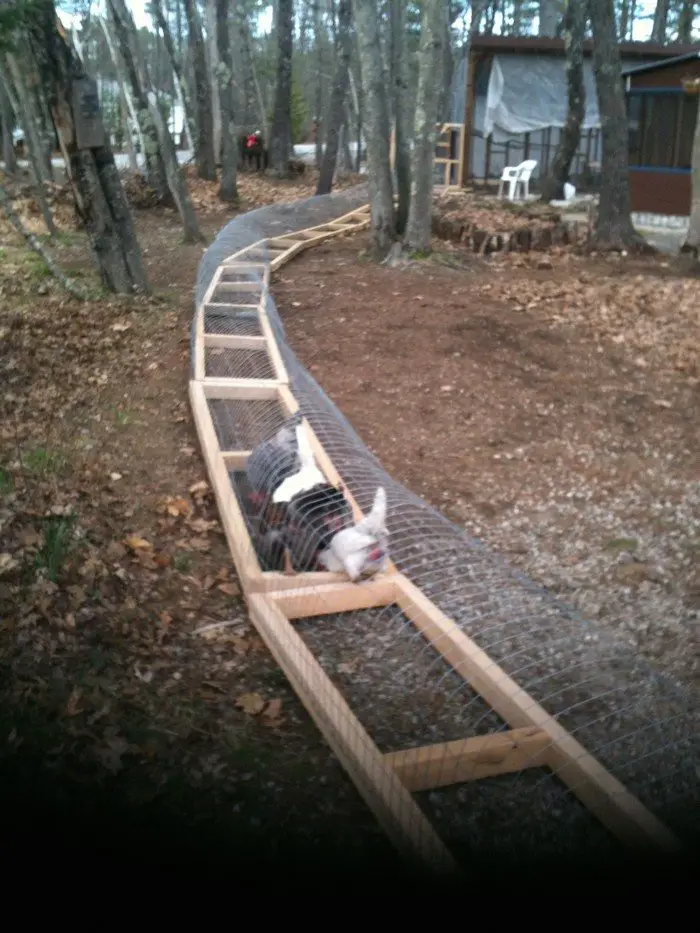
2. Install the Support Structure
Begin by installing the support structure for your chicken tunnel system. Use wooden stakes or posts to anchor the corners of the tunnel and provide stability. Space the stakes or posts evenly along the planned route of the tunnel, ensuring they are securely anchored in the ground.
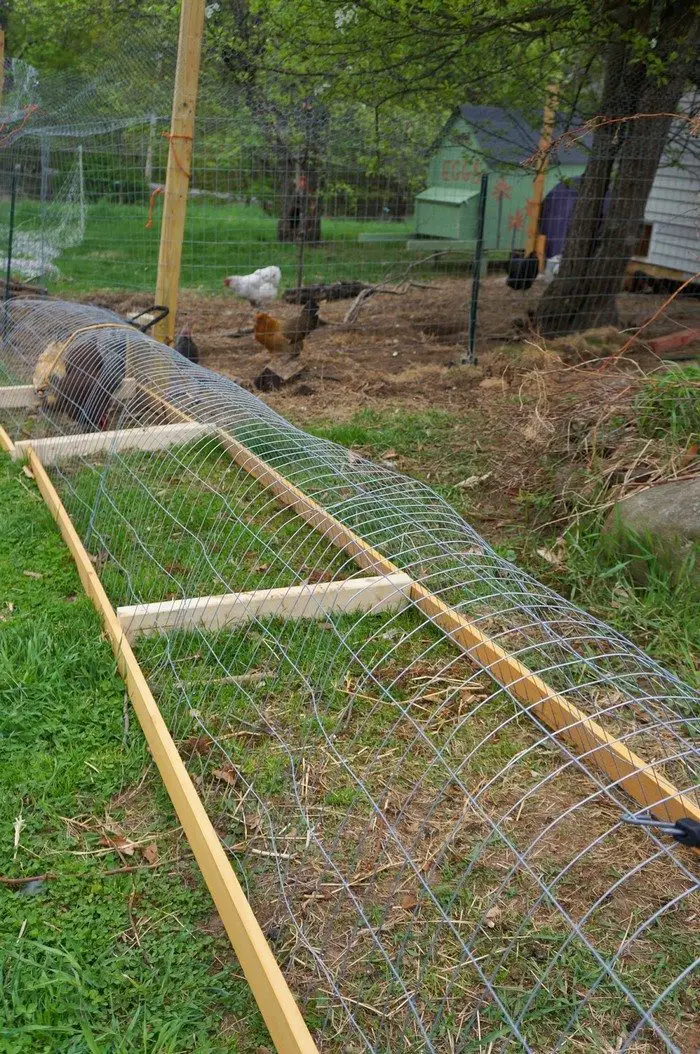
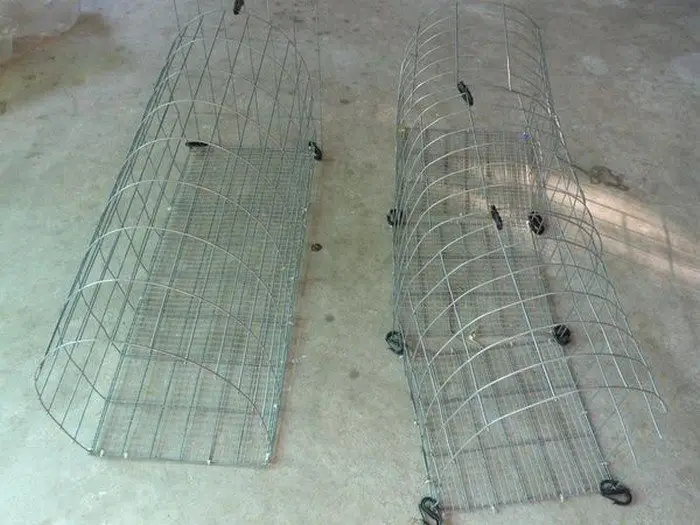
3. Attach Wire Fencing
Unroll the wire fencing along the length of the tunnel, ensuring it is taut and securely fastened to the support structure using bungee cords or zip ties. Trim any excess fencing as needed using wire cutters.
4. Add Wood Slats for Support
Strengthen the tunnel structure by attaching wooden slats horizontally along the length of the tunnel. Use wood screws to secure the slats to the support structure, spacing them evenly apart to prevent sagging or bending of the wire fencing.
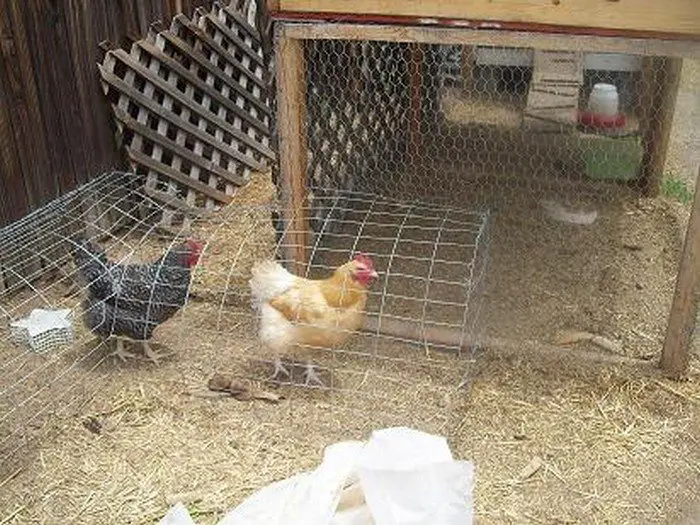
5. Create Entry and Exit Points
Cut openings in the wire fencing at each end of the tunnel and attach hinged doors using hinges and screws. This will allow you to easily open and close the doors to let the chickens in and out of the tunnel.
6. Secure and Finish
Ensure all components of the chicken tunnel system are securely fastened and reinforced as needed. Inspect the structure for sharp edges or hazards, and make any necessary adjustments. Add finishing touches such as additional wire mesh or netting to cover the top of the tunnel for extra protection.
Building a DIY chicken tunnel system is a practical and rewarding project that can provide your flock with a safe and enjoyable outdoor space. By following these steps and using basic materials, you can create a functional and secure enclosure that will enhance the well-being of your chickens while giving them the freedom to explore and forage in a protected environment.
Whether you are a novice or an experienced chicken keeper, a chicken tunnel system is a valuable addition to any backyard or homestead.
Click on any image to start the lightbox display. Use your Esc key to close the lightbox.![]()
Thanks to The Backyard Farming Connection for sharing tips on how to make a chicken tunnel system.
Wrapping It Up
The DIY chicken tunnel system offers a practical and efficient solution for poultry enthusiasts seeking to enhance the well-being of their chickens and optimize their backyard space. Through just seven simple steps, individuals can create a secure and enriching outdoor environment that promotes natural behaviours, safeguards against predators, and minimizes damage to garden beds.
This innovative idea not only benefits the chickens by providing access to fresh vegetation and insects but also contributes to a more sustainable and harmonious backyard ecosystem. By confining chickens to designated outdoor areas, the DIY chicken tunnel system helps preserve garden beds and landscaping while promoting natural pest control and waste management.
The DIY chicken tunnel system is adaptable and customizable, allowing poultry keepers to tailor the design to their specific needs and preferences. It also offers a cost-effective solution, utilizing simple materials that are accessible and affordable for individuals of all skill levels and budgets.
Overall, the DIY chicken tunnel system exemplifies the power of ingenuity and practicality in poultry keeping. By implementing this efficient idea, individuals can create a healthier, safer, and more sustainable outdoor environment for their feathered friends, while also reaping the rewards of responsible and ethical poultry management.
Frequently Asked Questions
1. How much space is required for a DIY chicken tunnel system?
The amount of space needed depends on the size of your chicken flock and the area available in your backyard. Generally, each chicken requires around 4-5 square feet of space in the run area.
2. How long does it take to build a DIY chicken tunnel system?
The time required to build the tunnel system varies based on factors such as your construction skills, the size of the project, and the availability of materials. On average, it may take a few hours to a couple of days to complete the project.
Outdoor projects are susceptible to weather interruptions. Adverse weather such as rain, extreme heat, or strong winds can delay progress or make it unsafe to work.
3. Can you customize the design of the DIY chicken tunnel system?
Yes, the design of the tunnel system can be customized to suit your specific needs and preferences. You can adjust the dimensions, shape, and materials used to accommodate your backyard layout and the number of chickens you have.
Choose suitable materials for the frame and cover of the tunnel based on factors such as durability, weather resistance, and cost. Wire fencing is commonly used for the frame due to its strength, but you can also consider alternatives like PVC pipes or wooden slats. For the cover, options include mesh netting, clear plastic sheeting, or even greenhouse fabric.
4. How do you maintain a DIY Chicken Tunnel System?
Regular maintenance of the chicken tunnel system involves cleaning the area, checking for wear and tear, and ensuring that the fencing remains secure. Additionally, providing fresh bedding and cleaning the water and food containers regularly is essential for the health of your chickens.
5. Are there any safety considerations to keep in mind when building a DIY chicken tunnel system?
Yes, safety is important when constructing a chicken tunnel system. Ensure that the fencing is securely installed to prevent predators from entering the enclosure. Also, check for any sharp edges or protruding nails that could injure your chickens.
6. Can you move the DIY chicken tunnel system to different locations in your backyard?
Yes, depending on the design of your tunnel system, it may be possible to relocate it to different areas of your backyard. However, consider factors such as terrain, sunlight exposure, and accessibility when choosing a new location.


