There’s something about wooden furniture that immediately warms up the room. Combine them with steel or glass-made ones and the character of the wood will still pop out. Additionally, they’re stronger, more durable, flexible, and easy to maintain. It’s no wonder why a lot of people are so into them.
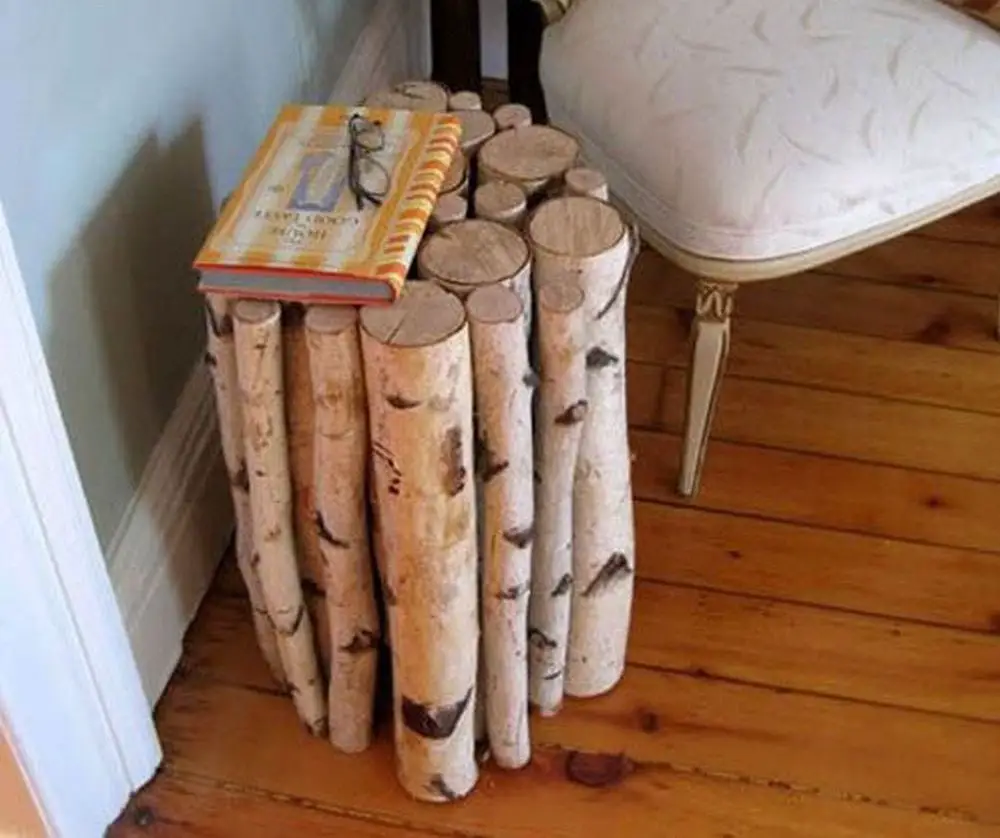
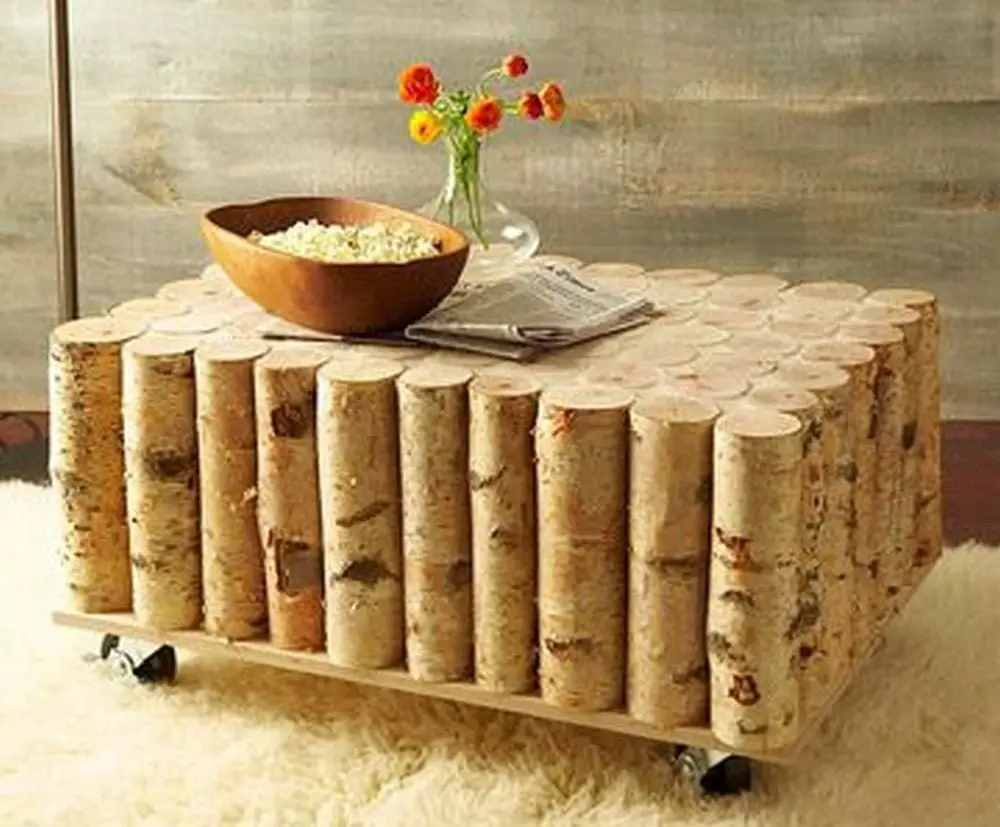
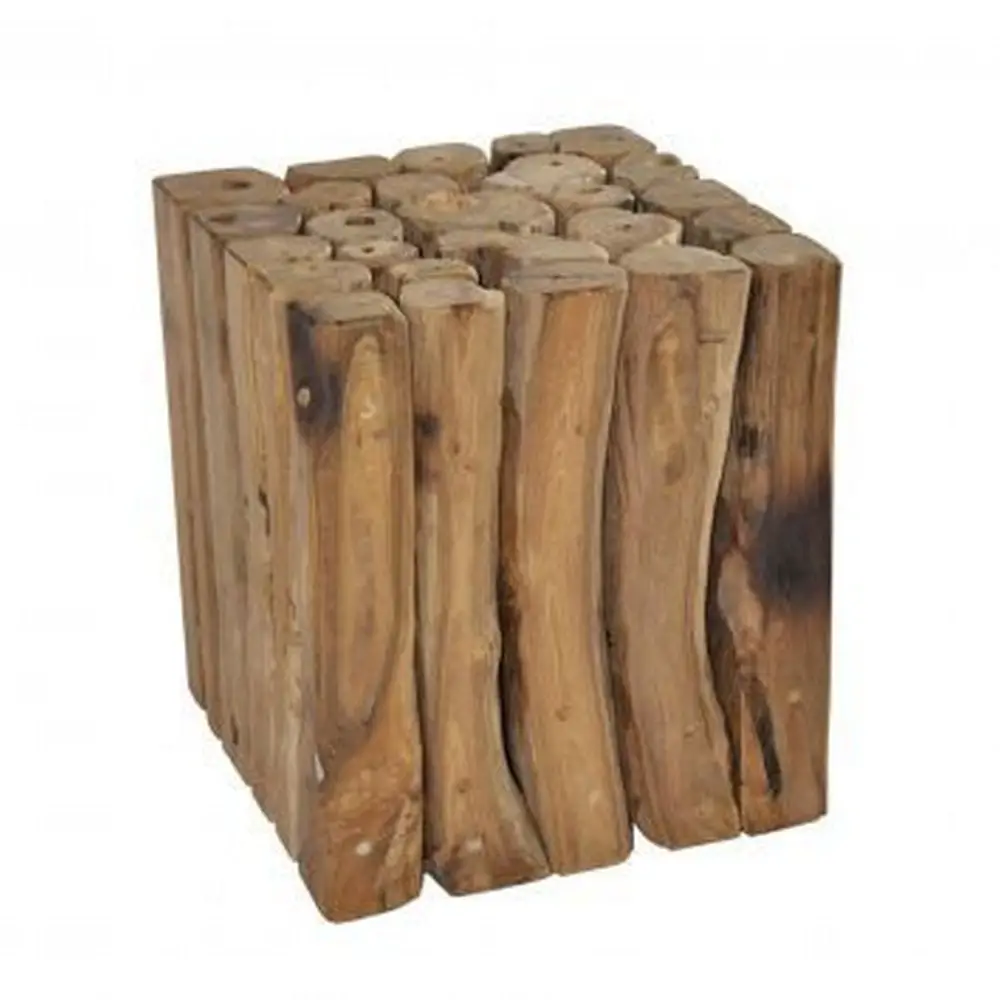
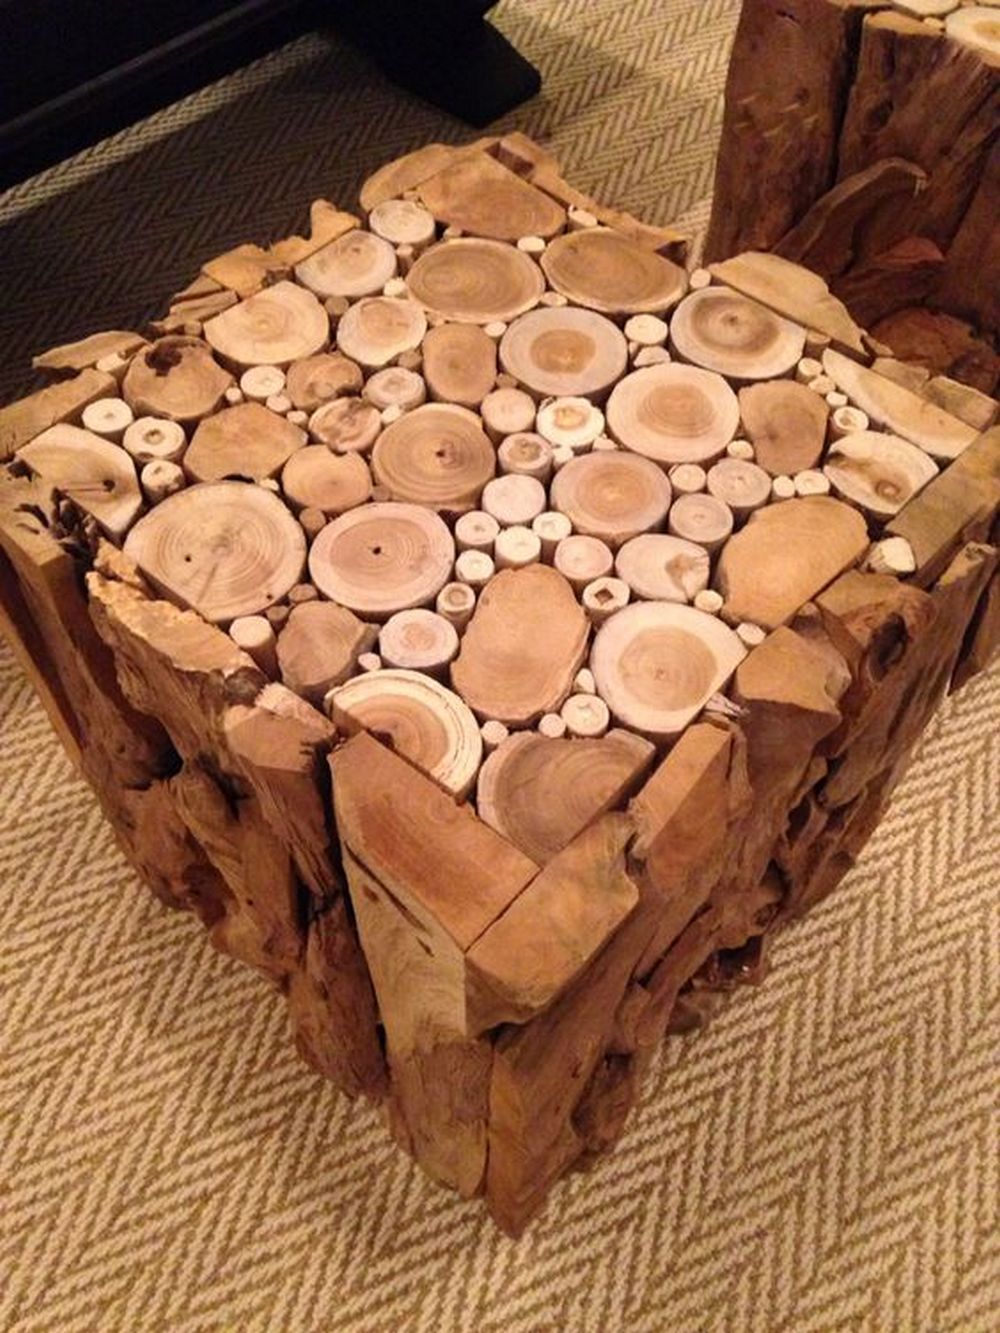
Today, there are a lot of designs for wooden furniture. But there’s one that my sister-in-law had been in love with for the longest time. It’s a wooden log side table made out of small logs put together. I can’t blame her; it’s really beautiful. It has a rustic feel to it and the details are lovely.

One day, my brother – her husband – surprised her with the exact wooden log side table. It turns out he found a DIY project on the Internet and quietly went to work. My mom loved the table, too and now he’s working on three more for the rest of the family!
Contents
How to Build Your Wooden Log Side Table
Materials:
- Several wooden branches (dried out)
- 2 pcs – 300mm x 300mm plywood
- Wood glue
- Epoxy with sawdust
- Varnish
Tools:
- Table saw
- Clamps
- Jig saw
- TURBOplane
- Tape
- Random sander
Click on any image to start the lightbox display. Use your Esc key to close the lightbox.


You can get step-by-step instructions here…
Building your wooden log side table can be a rewarding and creative project that adds a touch of rustic charm to your home decor. Whether you’re a seasoned woodworker or just starting, with the right tools and materials, you can create a beautiful and functional piece of furniture. Here are five essentials to consider when embarking on this DIY wooden log side table project.
1. Selecting the Right Wood Logs
The first step in building a wooden log side table is choosing the right logs. Look for logs that are straight and free of major cracks or defects. Cedar, pine, and oak are popular choices due to their durability and attractive grain patterns. Additionally, consider the diameter of the logs; they should be thick enough to provide stability for the wooden log side table. If you’re unable to find suitable logs in your area, many lumberyards or online retailers offer pre-cut logs for woodworking projects.
2. Preparing the Logs
Once you’ve selected your logs, it’s essential to prepare them for construction. Start by removing any bark and sanding down rough edges to create a smooth surface. If the logs are not level, you may need to trim them to ensure they sit flat on the ground. It’s also a good idea to apply a wood sealant or preservative to protect the logs from moisture and pests, especially if you plan to use the table outdoors.
3. Joinery and Assembly
There are several methods for joining the logs together to form the table’s structure. One common technique is to use half-lap joints, where notches are cut into the ends of the logs and then fitted together. Alternatively, you could use dowels or screws to secure the logs in place. Experiment with different joining methods to find the one that best suits your skill level and aesthetic preferences. As you assemble the wooden log side table, periodically check for squareness and stability to ensure a sturdy final product.
4. Finishing Touches
After the wooden log side table is assembled, you can add finishing touches to enhance its appearance and durability. Applying a coat of wood stain or paint can help protect the wood and complement your existing decor. You may also choose to seal the table with a clear polyurethane finish for added shine and protection against scratches and spills. Consider adding decorative elements such as metal accents or carved designs to personalize your table and make it truly one-of-a-kind.
5. Functional Considerations
Finally, think about how you’ll use the wooden log side table and any additional features it may need. For example, if you plan to use it as a bedside table, you might want to incorporate a drawer for storage. If the table will be placed outdoors, make sure to use weather-resistant finishes and consider adding adjustable feet to compensate for uneven terrain. Keep in mind the height and proportions of the table relative to nearby furniture to ensure it fits seamlessly into your space.
Building a wooden log side table requires careful planning, attention to detail, and a bit of elbow grease, but the result is a unique piece of furniture that you can take pride in. Whether you’re drawn to the natural beauty of the wood or the satisfaction of crafting something with your hands, this DIY project is sure to be a conversation starter in your home for years to come.
Safety Should Always Come First!
1. Wear Personal Protective Equipment (PPE):
Before starting any woodworking tasks, ensure you’re wearing the appropriate personal protective equipment (PPE). This typically includes safety goggles to protect your eyes from flying debris, hearing protection to guard against loud noises from power tools, and sturdy work gloves to shield your hands from splinters and cuts. Additionally, consider wearing a dust mask or respirator to prevent inhalation of wood dust, especially when sanding or cutting.
2. Work in a Well-Ventilated Area
Woodworking can produce a significant amount of dust and fumes, which can be hazardous to your health if inhaled. To minimize exposure, work in a well-ventilated area, ideally outdoors or in a workshop with proper ventilation. If working indoors, consider using a dust collection system or portable air filtration unit to remove airborne particles. Proper ventilation is critical for maintaining air quality and reducing the risk of respiratory problems.
3. Use Tools Safely and Properly
Familiarize yourself with the safe operation of all tools and equipment before using them. Always follow the manufacturer’s instructions and safety guidelines when operating power tools such as saws, drills, and sanders. Ensure that tools are in good working condition, with guards and safety features intact. Keep cutting tools sharp and clean to prevent kickback and ensure smooth, controlled cuts. When using hand tools, maintain a firm grip and exercise caution to avoid slips or accidents.
4. Secure Workpieces and Maintain a Clutter-Free Workspace
Securely clamp workpieces in place before cutting, drilling, or sanding to prevent them from shifting or moving unexpectedly. Use appropriate clamps or vices to hold logs firmly in place while working on them. Keep your work area clean and free of clutter to reduce the risk of trips, slips, and falls. Store tools and materials in designated areas when not in use to maintain a safe and organized workspace.
5. Take Your Time and Stay Focused
Woodworking requires precision and concentration, so avoid rushing through tasks or working when you’re tired or distracted. Take regular breaks to rest and refocus, especially during long or repetitive tasks. Double-check measurements and cuts before proceeding to ensure accuracy and prevent costly mistakes. If you’re feeling fatigued or unfocused, it’s better to pause and resume work later when you can give it your full attention.
By following these safety precautions, you can minimize the risk of accidents and injuries while building your wooden log side table. Remember to prioritize safety at all times and take the necessary steps to protect yourself and others in your workspace.
Designing a Wooden Log Side Table
1. Rustic Round Log Table:
For a classic rustic look, consider a simple round log table design. Use thick, solid logs as the legs and a larger log slice as the tabletop. You can leave the natural bark intact for added texture and character or remove it for a smoother finish. To enhance the rustic charm, lightly sand the edges and apply a clear sealant to protect the wood while preserving its natural beauty.
2. Modern Tree Stump Stool:
Embrace the natural irregularities of tree stumps with a modern twist. Choose a sleek and minimalist design by sanding the stump smooth and adding tapered legs for a contemporary look. Consider painting the legs in a bold colour or metallic finish to add contrast and visual interest. This design serves not only as a wooden log side table but also as a versatile stool or plant stand.
3. Live Edge Slab Table:
Showcase the organic beauty of live edge wood with a stunning slab table design. Select a large, thick slab of wood with live edges preserved to serve as the tabletop. Pair it with hairpin legs or custom-made metal legs for a stylish and industrial touch. The natural variations in wood grain and edge contours will make each wooden log side table a unique work of art, perfect for adding a touch of nature to any space.
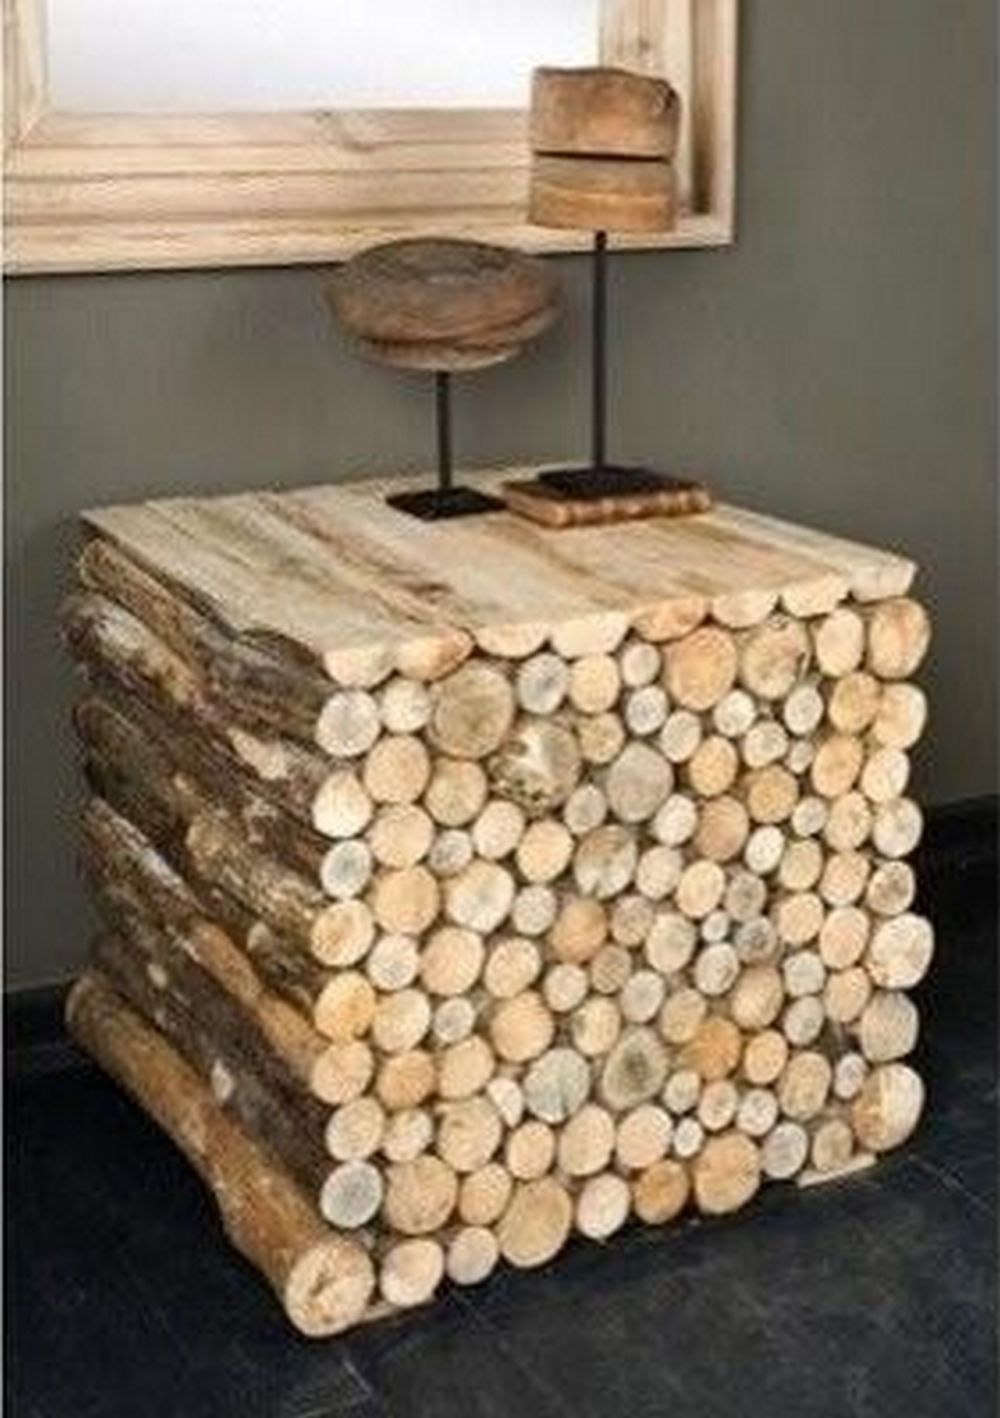
4. Nested Log Tables:
Create a visually intriguing set of nested log tables with varying heights and diameters. Choose logs of different sizes and stack them to form a nested arrangement, allowing each wooden log side table to slide neatly under the larger one. Sand the tops smooth for a functional surface while leaving the sides and natural contours untouched for added character. This design offers versatility and space-saving benefits, ideal for small living areas.
5. Twisted Branch Accent Table:
Make a statement with a one-of-a-kind accent wooden log side table featuring twisted branches or gnarled wood. Select branches with interesting shapes and textures, then arrange and secure them together to form the base of the table. Top it off with a circular or oval tabletop made from a solid wood slice or a custom-cut piece of wood. This whimsical design adds a touch of organic elegance to any room and serves as a conversation starter.
Whichever design you choose, remember to prioritize functionality, stability, and safety throughout the construction process. Experiment with different wood species, finishes, and embellishments to tailor the wooden log side table to your style and preferences. With creativity and attention to detail, you can create a stunning wooden log side table that adds warmth and character to your home decor.
The Wrap Up
In crafting your own wooden log side table, there’s a symphony of elements to orchestrate: functionality, aesthetics, and sustainability harmonize to create a piece that transcends mere utility, becoming a statement of craftsmanship and care.
First and foremost, functionality lays the groundwork. Your side table should seamlessly integrate into your living space, providing a convenient surface for items and perhaps storage for essentials. Consider the height, width, and shape to ensure it complements your furniture arrangement and fulfills your needs effortlessly.
Yet, functionality alone doesn’t suffice. Aesthetics elevate your creation from a mere piece of furniture to a work of art. Embrace the natural beauty of wood, whether it’s the rich hues of mahogany or the rustic charm of reclaimed timber. Pay attention to grain patterns, knots, and imperfections—they’re the fingerprints of nature that add character and uniqueness to your wooden log side table.
But beauty without sustainability is fleeting. Selecting eco-friendly materials and employing responsible woodworking practices not only minimizes environmental impact but also ensures the longevity of your creation. Look for sustainably sourced wood or consider upcycling materials to breathe new life into old resources.
Delve deeper into design elements to infuse your side table with personality. Whether you opt for sleek modern lines or embrace the rustic charm of raw edges, every detail contributes to the overall aesthetic. Experiment with finishes, textures, and embellishments to tailor your creation to your taste and style.
Yet amidst these considerations, never forget the joy of creation. Let your imagination soar, and don’t be afraid to deviate from convention. Embrace creativity as your guiding force, allowing intuition to lead you through the woodworking process. Adapt the design to your preferences, allowing room for spontaneity and inspiration to strike.
Ultimately, crafting a wooden log side table is not just about the result—it’s about the journey. Embrace each step with enthusiasm, relishing the tactile sensation of shaping wood with your hands. Whether you’re a seasoned woodworker or a novice enthusiast, let passion be your compass as you navigate the twists and turns of your woodworking adventure.
So, with functionality, aesthetics, sustainability, design, and creativity as your guiding stars, embark on your woodworking journey with confidence and passion. Let each stroke of the saw and each polish of the finish be a testament to your dedication and craftsmanship. With these top 5 essentials in mind, watch as your vision transforms into a tangible masterpiece that not only enhances your living space but also reflects the love and care poured into its creation.
Frequently Asked Questions
1. What tools do I need to build a wooden log side table?
The tools you’ll need depend on the complexity of your design, but generally, you’ll require basic woodworking tools like a saw, drill, sander, and measuring tape. Additionally, specialized tools like a drawknife or chisel might be necessary if you’re working with raw logs.
2. Where can you find suitable logs for your side table?
You can source logs from local lumberyards, tree service companies, or even your property if you have access to fallen trees. Ensure that the logs are properly seasoned and free from rot or pests before using them in your project.
3. How do you ensure that your side table is stable and sturdy?
Stability and sturdiness are critical for any piece of furniture. Make sure to select logs that are uniform in diameter and properly dried to prevent warping or cracking over time. Additionally, consider adding bracing or reinforcing elements to the design to provide extra support.
4. What type of finish should you use for your wooden log side table?
The choice of finish depends on your desired aesthetic and the type of wood you’re using. Options include natural oils, varnishes, or stains. Test the finish on a small, inconspicuous area of the wood to ensure it achieves the desired look before applying it to the entire table.
5. Can you customize the design of your wooden log side table?
Absolutely! One of the joys of woodworking is the ability to customize designs to suit your preferences and style. Experiment with different shapes, sizes, and finishes to create a side table that reflects your personality and complements your living space.
6. Is it necessary to treat the wood to prevent rot or decay?
Yes, treating the wood with a suitable preservative or sealant can help protect it from moisture, rot, and decay, especially if the table will be used outdoors or in damp environments. Be sure to follow the manufacturer’s instructions for application and reapplication as needed.
7. How can you incorporate sustainability into your woodworking project?
Choose sustainably sourced or reclaimed wood for your side table to minimize environmental impact. Additionally, consider using environmentally friendly finishes and avoiding harmful chemicals in the construction process.
When sourcing wood for your side table, look for materials that are certified by reputable organizations such as the Forest Stewardship Council (FSC) or the Sustainable Forestry Initiative (SFI). These certifications ensure that the wood comes from responsibly managed forests, where trees are harvested in a sustainable manner, and ecosystems are protected.
These FAQs should help address some common questions that readers may have as they embark on their wooden log side table building project.


