We live busy, often hectic lives. Between television, smartphones, email, and social media, there’s almost always a screen in our faces.
Fishing presents the perfect opportunity to turn off your cell phone and unplug from the cacophony. There is nothing quite like that happy, nervous feeling you get, seeing that water again and knowing for sure that the trout are there.
Even when the fishing is slow, I’ll take sitting by a trout stream over sitting in traffic or sitting in front of the TV any day.
If you are a fishing enthusiast, you’ll find this post really useful. Not only will this allow you to organize your fishing rods, but you’ll also save money. If, however, you don’t fish but you know of someone who does, this will make a perfect gift. I’m pretty sure they’ll appreciate your thoughtfulness.
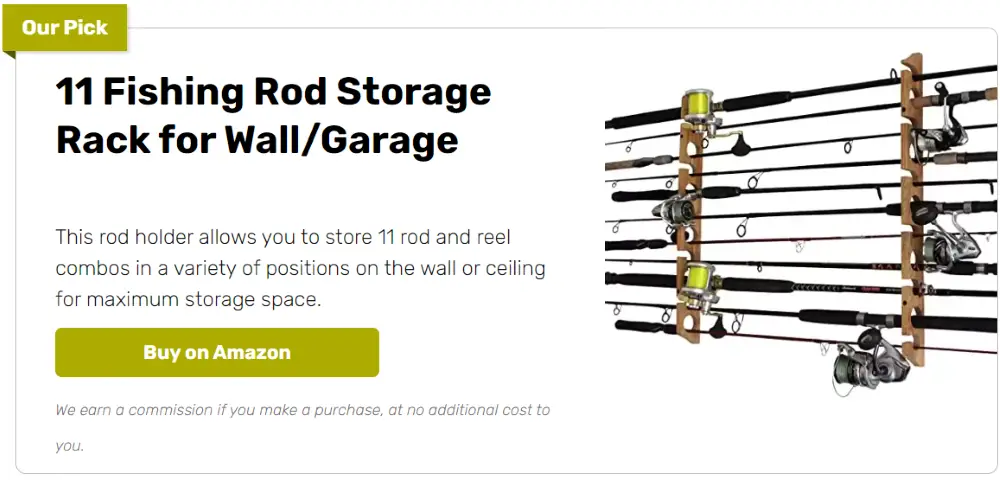
A good quality fishing rod rack will set you back anywhere around US $40 to $60 these days. But why spend when you can just make one? It’s a fairly easy project and won’t take you more than a day to finish.
This is an inexpensive project that’ll cost you no more than $25. So keep your hands busy and start working!
Contents
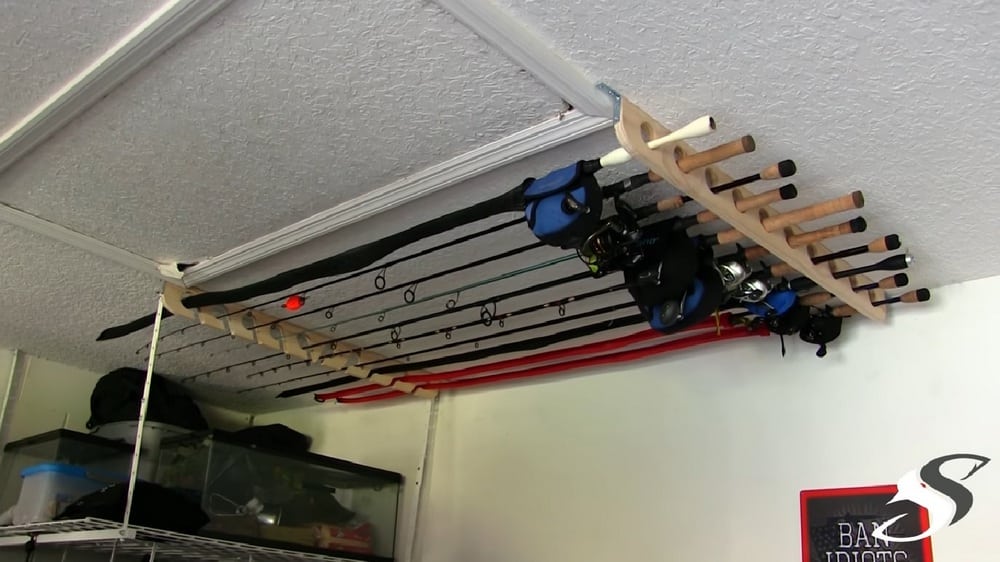
Advantages of Ceiling-Mounted Fishing Rod Racks
1. Space-saving: By mounting the rack on the ceiling, you utilize otherwise unused space, keeping your valuable floor space free for other items or activities.
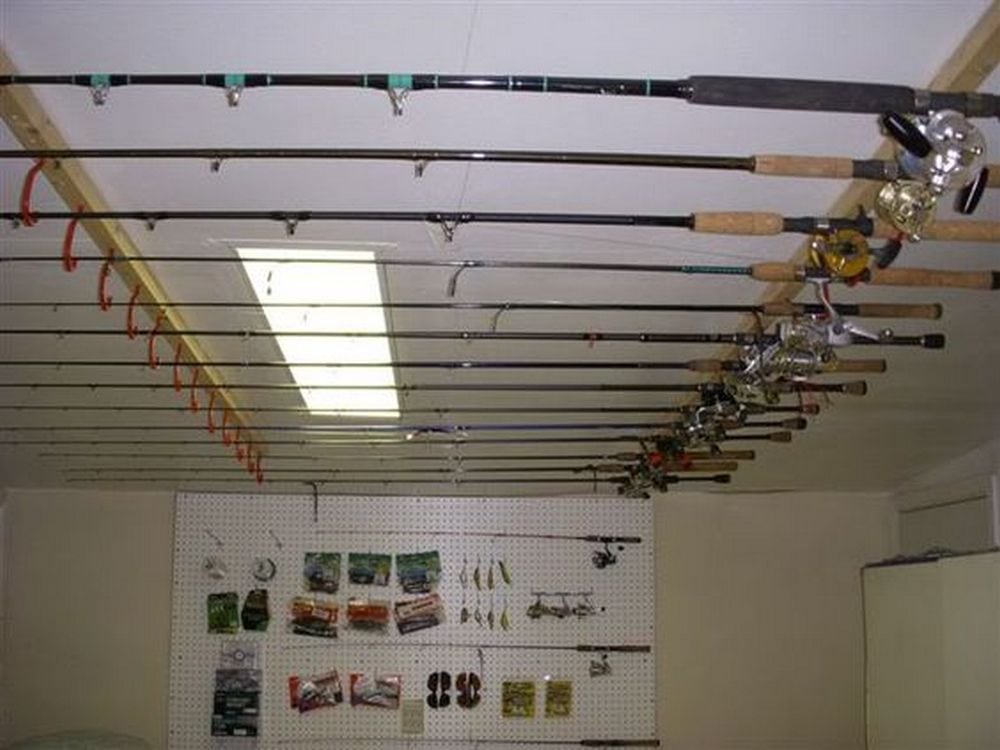
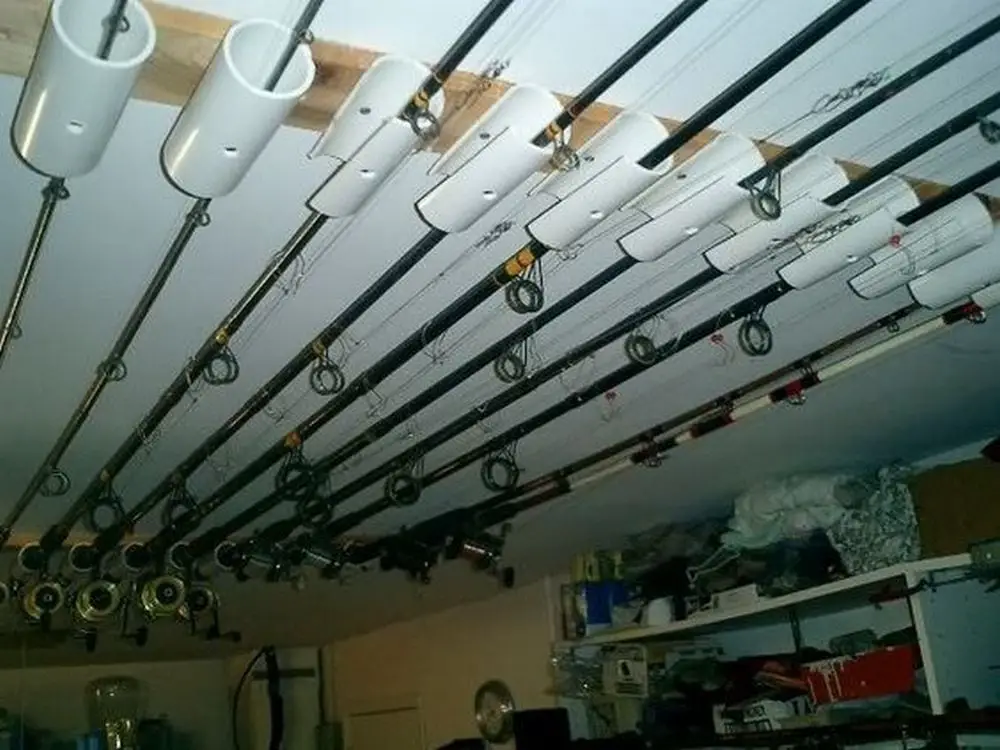
2. Organization: These racks help keep your fishing rods neatly organized and easily accessible. With designated slots or hooks on the pine boards, you can arrange your rods systematically, preventing tangling and damage.
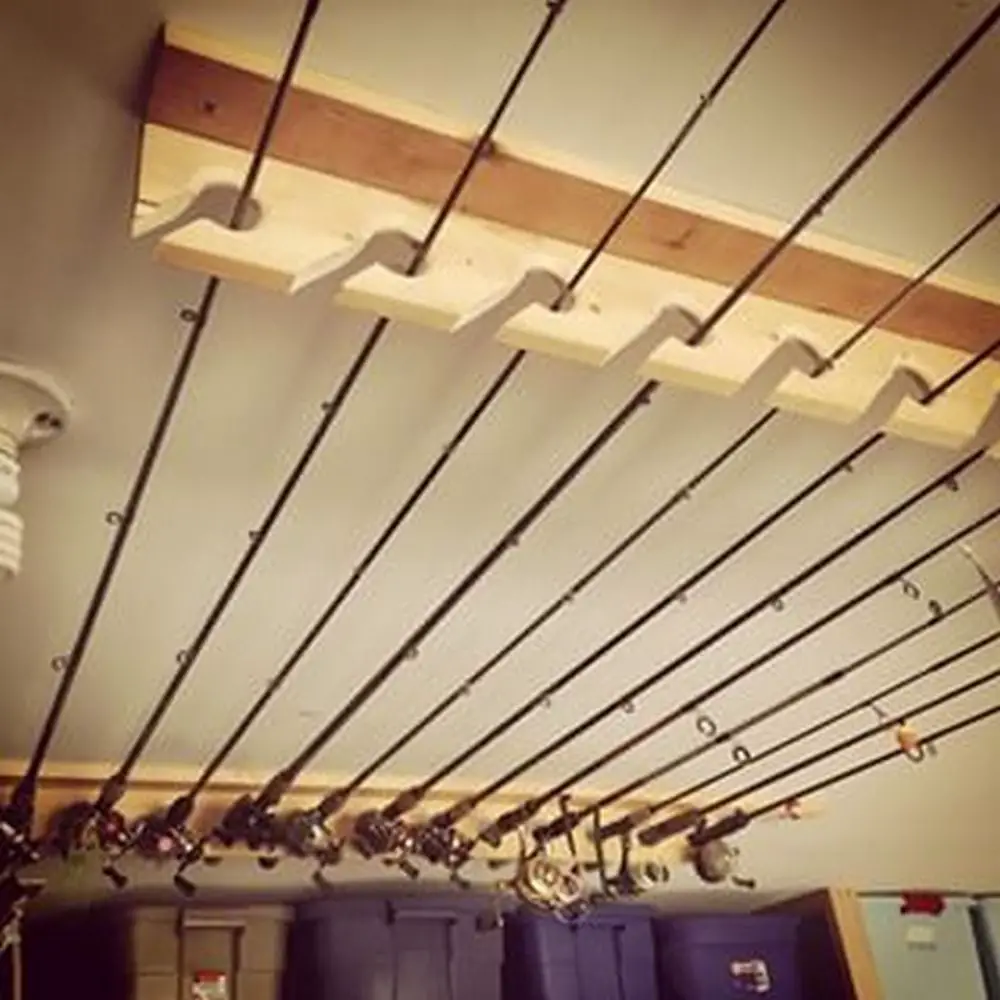
3. Protection: Pine boards provide a natural, soft surface that protects your fishing rods from scratches and abrasions. This helps maintain the integrity of your rods, prolonging their lifespan.
4. Customization: Pine boards are relatively easy to work with, allowing you to customize the rack to fit your specific needs. You can adjust the spacing between rods, add extra features like storage compartments for accessories, or even decorate the boards to match your decor.
5. Durability: Pine is a sturdy wood that can withstand the weight of multiple fishing rods without bending or warping. When properly installed, a ceiling-mounted rack with pine boards can last for years.
6. Visibility: Mounting your fishing rods on the ceiling keeps them in plain sight, making it easier to locate the rod you need for your next fishing trip. This visibility also serves as a reminder to properly maintain and care for your equipment.
7. Safety: By keeping your fishing rods off the ground, you reduce the risk of accidental damage caused by stepping on them or bumping into them with other objects.
Overall, a ceiling-mounted fishing rod rack with pine boards offers a practical and aesthetically pleasing solution for storing and organizing your fishing equipment.
Materials:
- 1×4 inch pine boards (42 inches)
Tools:
- Jigsaw
- Drill with two-inch cup bit
- Sandpaper and hand sander preferably
- Clearcoat or stain for the finish
- C-Clamp
- Tape Measure
Click on any image to start the lightbox display. Use your Esc key to close the lightbox.
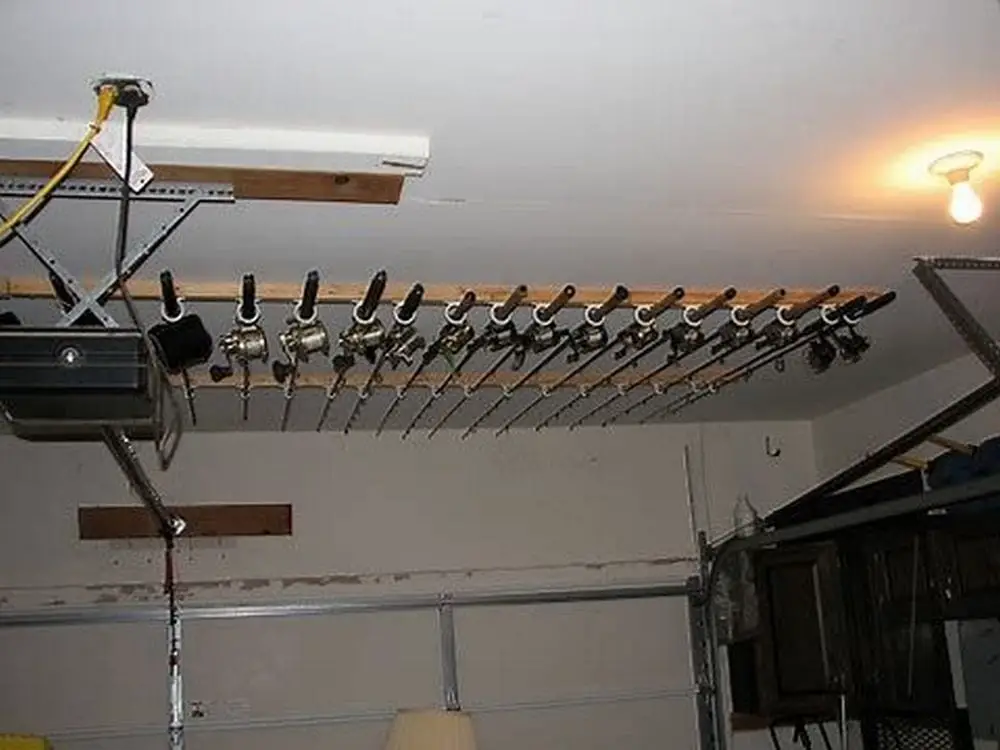
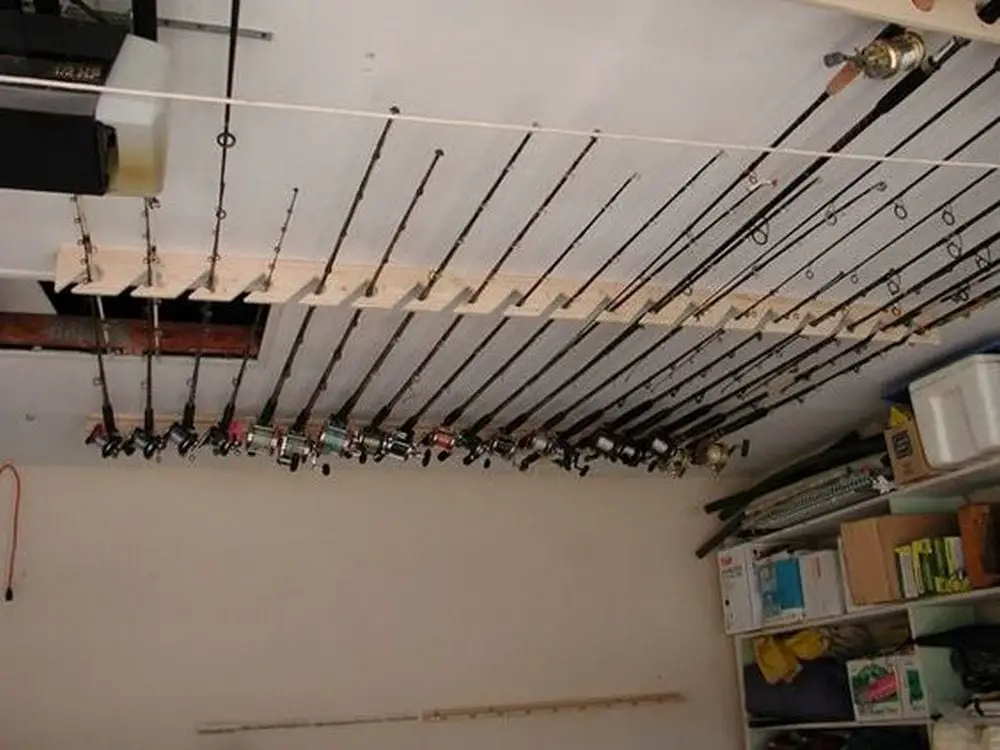
Start organizing your fishing rods by making this rack. Watch the video below to learn how…
Building a Fishing Rod Rack With Pine Boards
1. Measurements and Planning:
- Measure the space where you intend to place the fishing rod rack to determine the appropriate dimensions.
- Plan the design of the rack considering the number of fishing rods you need to accommodate and any additional storage requirements for reels, tackle boxes, etc.
2. Material Selection:
- Choose pine boards of appropriate thickness and quality for durability and aesthetics.
- Consider the finish of the pine boards – whether you prefer stained, painted, or natural wood appearance.
3. Design Considerations:
- Decide on the type of fishing rod rack you want – vertical, horizontal, wall-mounted, or freestanding.
- Determine the spacing between rods and any additional features such as shelves or drawers for storage.
4. Cutting and Assembly:
- Use a saw to cut the pine boards to the desired lengths according to your design plan.
- Assemble the rack using wood glue and screws for stability. Pre-drill holes to prevent splitting.
5. Customization:
- Add decorative touches such as routed edges or carved designs if desired.
- Consider adding padding or cushioning to protect the fishing rods from scratches.
6. Finishing Touches:
- Sand the rack to smooth out any rough edges and surfaces.
- Apply wood stain, paint, or sealant to enhance the appearance and protect the wood from moisture and wear.
- Allow the finish to dry completely before placing fishing rods on the rack.
7. Mounting or Placement:
- If building a wall-mounted rack, use appropriate hardware to securely attach it to the wall studs.
- For freestanding racks, ensure stability by placing them on a level surface or attaching them to a base for added support.
8. Testing and Adjustments:
- Test the rack by placing fishing rods and other equipment to ensure everything fits properly.
- Make any necessary adjustments to the spacing or configuration to accommodate your gear effectively.
By following these strategies, you can build a functional and attractive fishing rod rack using pine boards that meets your storage needs and complements your fishing gear collection.
Advantages of Pine Boards
Pine boards offer several advantages for fishing rod racks:
- Affordability: Pine is generally more affordable than hardwoods, making it a cost-effective option for DIY projects like fishing rod racks. This makes it accessible to a wider range of anglers, especially those on a budget.
- Ease of Workability: Pine is relatively soft and easy to work with, making it ideal for DIY enthusiasts and beginners. It can be cut, drilled, and shaped with basic tools, allowing for customization and personalization of the fishing rod rack.
- Lightweight: Pine is lighter than many other types of wood, which can be advantageous for ceiling-mounted fishing rod racks. The lighter weight makes it easier to install and reduces the strain on the ceiling or mounting hardware.
- Natural Aesthetic: Pine has a warm, natural appearance with visible grain patterns that can add rustic charm to a fishing rod rack. It can be left unfinished for a simple, minimalist look or stained and sealed to enhance its beauty and durability.
- Shock Absorption: Pine has some natural flexibility and shock-absorbing properties, which can help protect fishing rods from damage caused by minor impacts or vibrations. This can be particularly beneficial for storing delicate or expensive rods.
- Readily Available: Pine boards are widely available at most lumberyards and home improvement stores, making them easy to source for DIY projects. They come in various sizes and thicknesses, allowing for flexibility in design and construction.
- Sustainability: Pine is a renewable resource that is often sourced from responsibly managed forests. Choosing pine boards for a fishing rod rack can be an environmentally friendly option compared to using non-renewable materials or those harvested from endangered forests.
Overall, pine boards offer a combination of affordability, workability, and aesthetic appeal that makes them a popular choice for fishing rod racks. With proper care and maintenance, a pine board rack can provide years of reliable service for organizing and storing fishing gear.
Safety Precautions First!
- Wear Personal Protective Equipment (PPE): Always wear appropriate safety gear, including safety glasses or goggles to protect your eyes from wood chips, gloves to protect your hands, and a dust mask if you’re working with treated or fine wood dust.
- Use Proper Tools: Make sure you have the right tools for the job, including a saw, drill, screws, sandpaper, and measuring tape. Keep tools properly maintained and sharp to reduce the risk of accidents.
- Work in a Well-Ventilated Area: If you’re working indoors, ensure proper ventilation to prevent the buildup of wood dust and fumes from adhesives or finishes.
- Follow Instructions: If you’re using plans or following a tutorial, read and understand the instructions thoroughly before starting. Pay attention to details such as measurements, angles, and assembly steps to avoid mistakes that could compromise safety.
- Secure Workpiece Properly: When cutting or drilling, make sure the pine boards are securely clamped down to prevent them from moving unexpectedly, which could lead to kickbacks or inaccurate cuts. Periodically check the clamps and pine boards during the cutting or drilling process to ensure they remain securely in place. If any adjustments are needed, pause the work and make necessary corrections to maintain stability and safety.
- Mind Your Fingers: Be cautious when using power tools and keep your fingers away from blades and moving parts. Use push sticks or other tools to guide the wood through the saw, especially when making narrow cuts.
- Watch for Knots and Imperfections: Pine boards can have knots and other imperfections that may affect their strength and stability. Inspect the boards carefully before use and avoid areas with large knots or cracks.
- Smooth Edges and Surfaces: Use sandpaper to smooth any rough edges or surfaces to prevent splinters and make handling safer.
- Work Safely with Finishes: If you’re applying a finish to the racks, such as varnish or paint, follow the manufacturer’s instructions carefully and work in a well-ventilated area to avoid inhaling fumes.
- Take Breaks: Working on a project for an extended period can lead to fatigue, which increases the risk of accidents. Take regular breaks to rest and recharge.
By following these safety precautions, you can reduce the risk of accidents and injuries while building fishing rod racks with pine boards.
The Wrap Up
Crafting a fishing rod rack using pine boards is a venture that seamlessly marries functionality with aesthetic appeal. Pine’s natural beauty and versatility make it an ideal material for such DIY projects, offering both durability and customization ease.
By constructing your rod rack with pine boards, you not only ensure a sturdy and dependable storage solution for your fishing gear but also introduce a rustic charm to your space that enhances its ambiance. Whether opting for a simple design or incorporating intricate details, the result is bound to elevate your fishing experience.
Moreover, building your rack allows you to tailor it precisely to your needs and preferences, ensuring optimal organization and functionality. With careful planning and attention to detail, you can create a piece that not only fulfills its purpose but also becomes a focal point in your fishing area.
Embrace the versatility of pine boards, unleash your creativity, and embark on this rewarding DIY project. Whether you’re a seasoned angler or just starting, crafting a fishing rod rack with pine boards promises to enrich your fishing space with both practicality and charm.
Frequently Asked Questions
1. Why choose pine boards for a fishing rod rack?
Pine boards offer a blend of affordability, durability, and natural aesthetics, making them an excellent choice for DIY projects like fishing rod racks. They are readily available, easy to work with, and can be customized to fit various design preferences and space constraints.
2. What tools are needed to build a fishing rod rack with pine boards?
Common tools required include a saw (such as a circular saw or handsaw), drill, screws, sandpaper or sander, measuring tape, and possibly a level for precise alignment. These tools enable cutting, drilling, sanding, and assembling the pine boards into a functional rack.
3. How can I ensure the stability and durability of the fishing rod rack?
To enhance stability and durability, it’s crucial to select high-quality pine boards of suitable thickness and strength. Additionally, employing proper construction techniques such as secure fastening and reinforcement at key joints ensures the rack can withstand the weight of fishing rods and resist wear over time.
4. Can you customize the design and size of the fishing rod rack to fit my needs?
Yes, one of the main advantages of DIY projects is the ability to tailor them to specific requirements. With pine boards, you can easily adjust dimensions, add or remove rod slots, and incorporate features like storage compartments or hooks according to your preferences and available space.
5. Are there any special considerations for finishing or treating the pine boards?
While pine boards possess inherent beauty, applying a finish or protective treatment can enhance their appearance and longevity. Options include staining, painting, or sealing the boards with varnish or polyurethane to shield them from moisture and wear. Following proper application techniques ensures a professional-looking finish.
6. What are some safety precautions to observe when building a fishing rod rack with pine boards?
Safety should always be a priority when working with tools and materials. Wearing appropriate protective gear such as safety glasses and gloves, following tool manufacturer’s guidelines, and maintaining a tidy work area to minimize hazards are essential safety measures to prevent accidents or injuries.
7. Can you build a fishing rod rack with pine boards if I have limited woodworking experience?
Yes, building a fishing rod rack with pine boards is suitable for beginners with basic woodworking skills. Starting with a simple design and following detailed instructions or tutorials can help build confidence and proficiency in woodworking techniques over time.
8. How do you mount the fishing rod rack securely?
Mounting the rack securely involves selecting appropriate hardware such as screws and anchors suitable for the mounting surface (e.g., wall studs). Ensuring the rack is level during installation and distributing weight evenly across mounting points enhances stability and prevents accidents.
9. What maintenance is required for a fishing rod rack with pine boards?
Regular maintenance involves periodic cleaning to remove dust and debris, inspecting for signs of damage or wear, and performing any necessary repairs or refinishing to preserve the rack’s appearance and functionality over time.
10. Can you transport or relocate the fishing rod rack if needed?
Depending on its design and mounting method, some fishing rod racks with pine boards can be disassembled and relocated if necessary. Portable or modular designs may offer flexibility for transportation and installation in different locations.
11. Are there any eco-friendly considerations when using pine boards for a fishing rod rack?
Yes, using sustainably sourced or reclaimed pine boards promotes eco-friendliness by reducing demand for new timber and minimizing waste. Additionally, proper disposal of any waste materials and selecting low-VOC finishes contribute to environmental conservation efforts.
12. Can you build additional accessories or features into the fishing rod rack?
Yes, incorporating additional features such as storage shelves, tackle box compartments, or rod holder attachments enhances the functionality and versatility of the rack. Customizing accessories to meet specific fishing gear storage needs maximizes utility and organization.
13. How can you prevent damage to fishing rods when stored on the rack?
To prevent damage, ensure fishing rods are securely positioned in the rack with adequate spacing between them. Using protective rod sleeves or covers, particularly for delicate rod tips, safeguards against scratches and abrasions during storage.
14. What are some design inspirations or resources for building a fishing rod rack with pine boards?
Design inspirations can be found in woodworking magazines, online forums, and DIY websites showcasing various rod rack designs. Adapting existing plans or incorporating unique elements allows for personalized touches and creative expression in the final product.


