When you don’t or can’t have a garden with a lawn in your backyard, there’s no reason why you can’t enjoy the nice feeling of relaxing on your own lawn with this lawn chair!
If you have limited space or your yard is paved in concrete, then this DIY lawn chair project is for you!

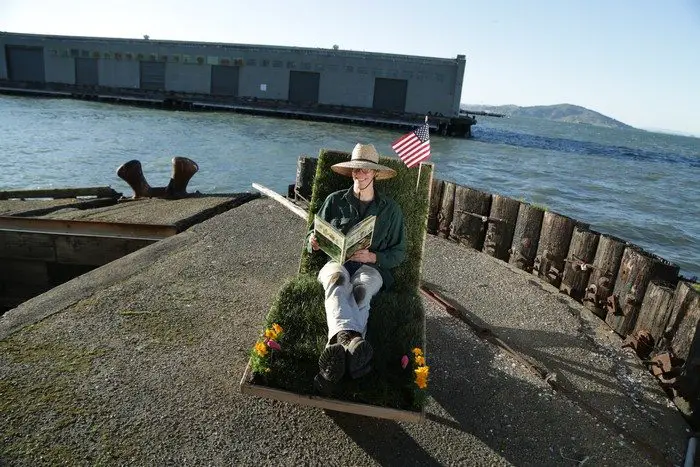
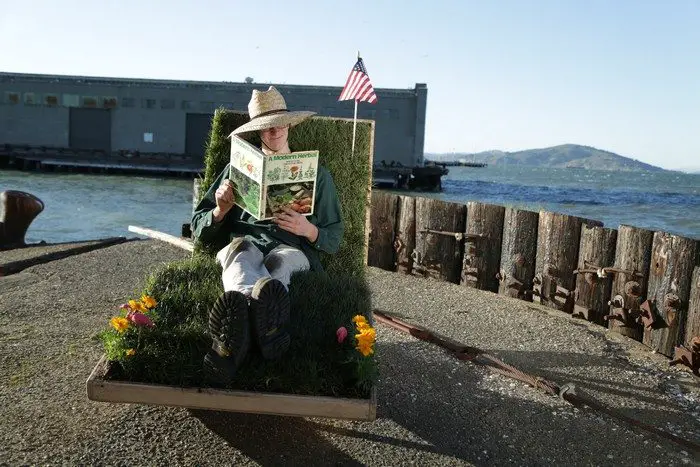
As you can see this ‘lawn chair’ is not your ordinary lawn chair. It is called such because the lounge chair is made with grass ;)
It may seem like furniture that needs a CNC machine to make, but it doesn’t and it is easier to build than it looks! Even if you are a beginner at woodworking, you can absolutely DIY this impressive piece of furniture given the proper tools.

The best thing about this idea is that you can enjoy your lawn pretty much wherever and whenever you like. You can bring it inside your house and take it outside as well! We know it would require some effort but it is possible! :D
Just imagine reading a good book or taking a much-needed nap in this ultimate lawn chair… Do you need this clever DIY furniture item in your home?
BTW, if you haven’t seen it already, we have also featured a daybed made with grass which you might also like. It’s perfect for bigger concrete yards! ;)
Click on any image to start the lightbox display. Use your Esc key to close the lightbox.![]()


Materials:
- Plywood
- Wood Glue
- Wood Screws
- Sticker Paper
- Thick Plastic
- Duct Tape
- Potting Soil
- Hardware Cloth
- Fertilizer
- Sod
Tools:
- Printer
- Jigsaw
- Cordless Drill
- Staple Gun
- Wire Cutter
- Router
- Wood Clamps
Steps:
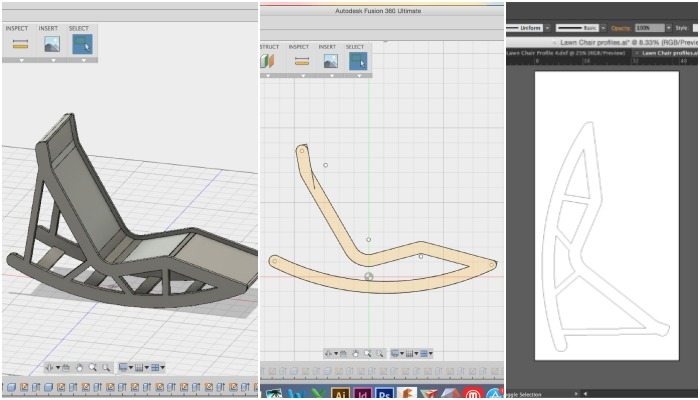
The design: I designed the Lawn Chair in Fusion 360 and used Illustrator to extract the profiles for printing. After I had a digital file of the chair’s profile I used a large format printer to make a giant sticker with the chair’s shape on it. I used a technique perfected by Jon-A-Tron to avoid using a CNC machine for this project. The chair’s design is based on the geometry of some lounge chairs that I found particularly comfortable.
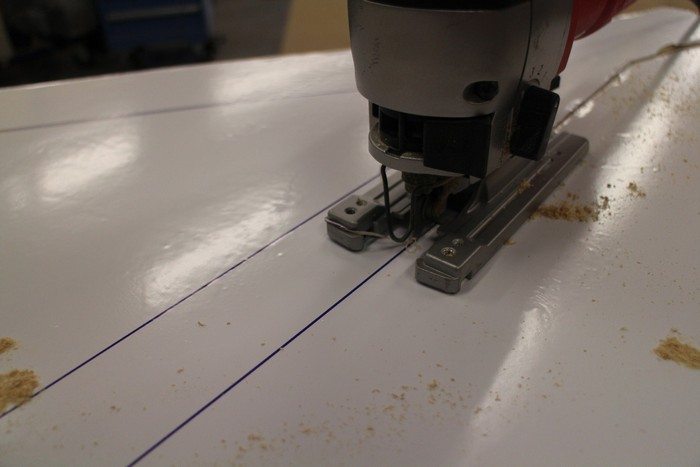
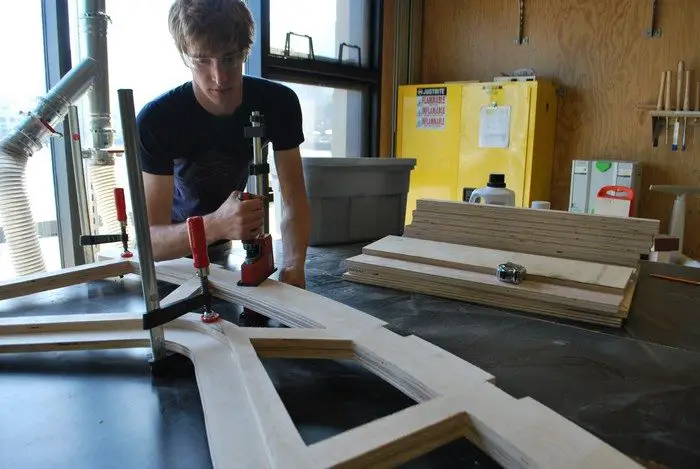
Cutting the profile: After printing out the chair’s profile I laid down the giant sticker on a piece of plywood. I followed the line on the paper with a jig saw to cut out the shape of the chair in wood. It is important to be careful when cutting out profiles to pay attention to which side of the line you are cutting on. Make sure the saw blade stays in the off-cut section to avoid making cuts into your work piece.
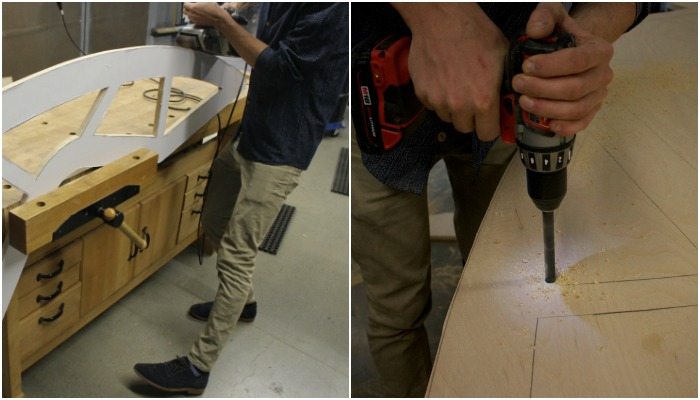
If you are like me and cut a bit too far outside the line in a few places, don’t worry, you can easily sand off the excess with a sander. To cut out internal shapes you will need to drill a hole larger than the jigsaw blade to start your cut.
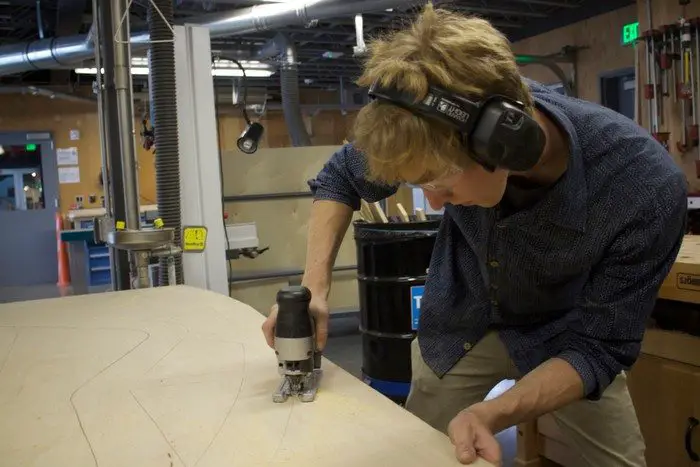
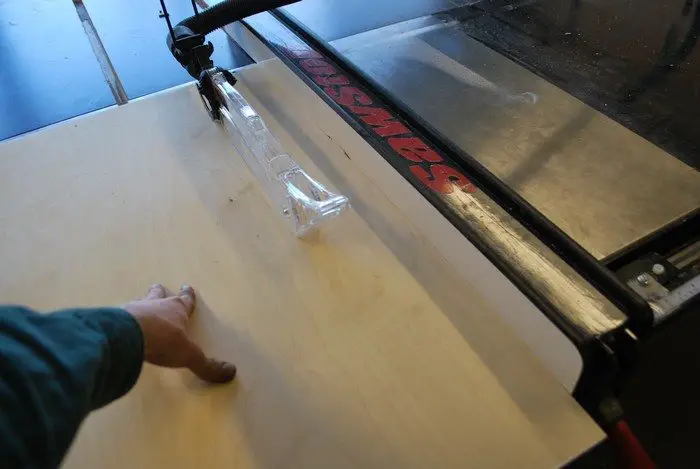
Duplicating the pattern: You’ll need four identical pieces for the frame of the chair, but don’t worry, you don’t have to cut them all with a jig saw. Using a router and a duplication bit is an easy way to make perfect copies of plywood pieces fairly quickly.
You will need to roughly cut out each of the remaining 3 pieces, but be generous, leave some extra space around the edges. The router will take care of making it perfect.

Stack the precisely cut pattern on top of the rough cut piece and clamp the two together. Find a straight router bit with a bearing on the end and set it to cut the top sheet using the bottom as the bearing surface. Now simply run the router around the edge of the chair profile until the entire piece is duplicated. Repeat these steps three times so that you have four identical pattern pieces.

More cutting: Two of the pieces from the last step need to be altered slightly to make room for the grass to grow and for reinforcement members. For this step you’ll need to go back to the jigsaw.
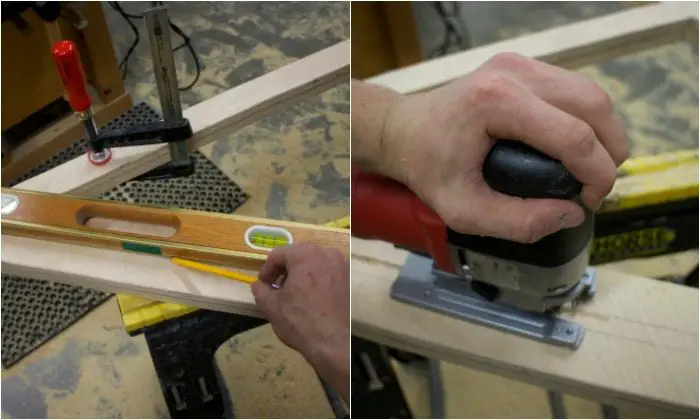
Use a straight edge or piece of precisely cut plywood to make a line on one of your chair profiles that follows the top edge about 2 1/2 inches down.
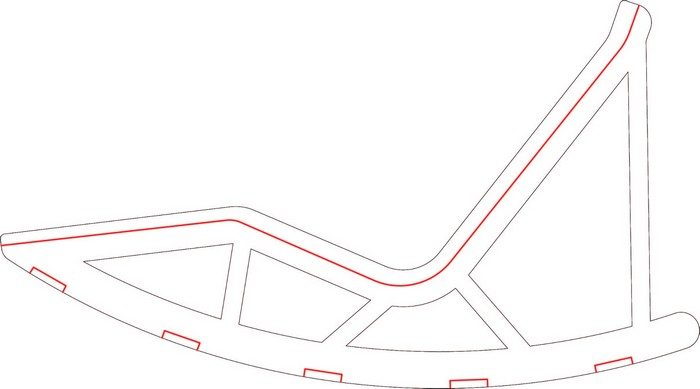
Also make five evenly spaced notches that are 3 inches wide and 3/4 of an inch deep along the rocker edge. See the red lines in the image above for clarification.
Gluing: It’s time to do a bit of gluing.
The pieces you trimmed in the last step will become the inner supporting profiles for the chair and the ones that you did not trim are the outside profiles. Spread glue on one of the inner pieces lay it on top of the outer piece so that they line up on all the edges. Repeat this with the other set. It is important that the stacks are mirror images of each other so that the inside parts are both facing in.
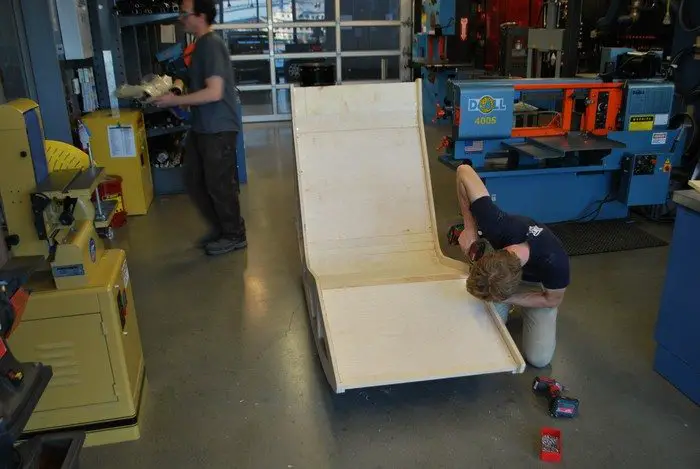
Cutting slats: After the two sides of the chair are complete it is time to cut the pieces that space them apart and give you a place to sit.
First, cut a sheet of plywood down to the desired width of the chair. I used 30 inches, but if you don’t mind it being a bit narrower, I’d suggest 24 inches because that is the most common width for grass sod.
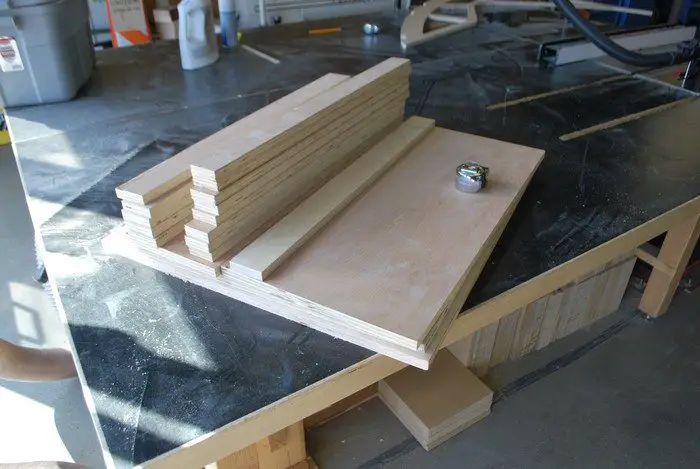
Once your stock is cut to width you can make cut it into pieces for the ribs. I kept the sheets as long as possible for the straight sections of the chair, but if you want to cut them all to two or three inches that will work too.
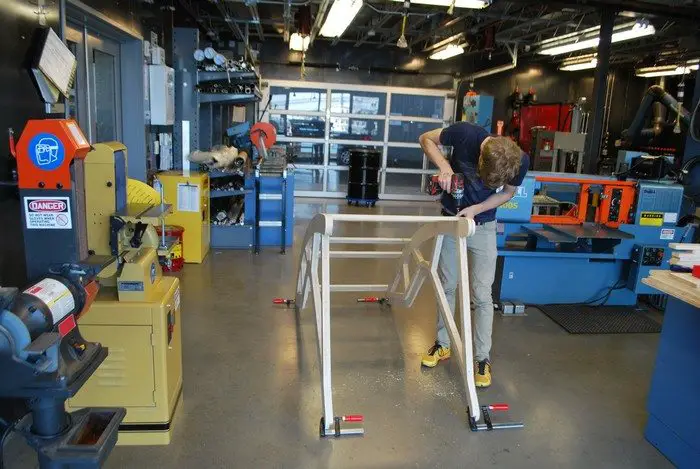
Screw it together: In this step the chair will really start to take shape.
Start by standing the sides up on edge upside down. I used clamps on the ends to keep the pieces upright while laying on the reinforcement pieces.
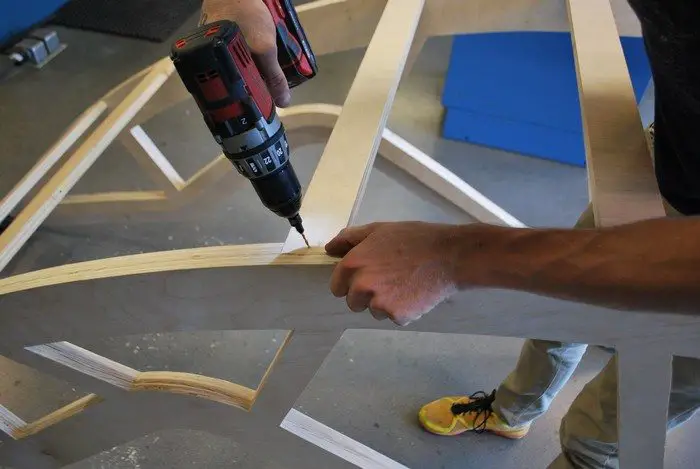
Before driving in a screw it is a good idea to drill pilot holes to prevent the wood from splitting. Once you have pilot holes drilled at each of the intersections you can go ahead and screw on the reinforcements.
With the reinforcement pieces on you can now flip the chair over onto the rockers and screw on the slats and boards in the same way.

Rounding and sanding: Use a router with a radius bit to round over all the edges on the chair. This is an important step for two reasons. First of all the wood will look nicer, and feel better with rounded edges. Secondly, rounded edges are less likely to get damaged. After rounding over all the edges you can hit the whole chair with a few grades of sand paper. It is up to you how much time you want to spend on this. I ended up sanding with 120 grit and 220 grit sand paper.
Admittedly, it would have probably been a good idea to do this step before putting the slats on. But I did it after, and that’s fine too.

Sealing the wood: Sealing the plywood is particularly important in this project since there will be soil and water involved. Choose a wood finish that is rated for outdoor use. Polyurethane is probably a good choice.

Plastic Lining: Even with a quality wood finish on the chair there is no guarantee that it will be completely water tight. Adding a layer of thick plastic sheet helps with the waterproofing of the chair. I used a staple gun to attach the plastic sheet and then covered the staples with duct tape for just a little extra waterproofing.
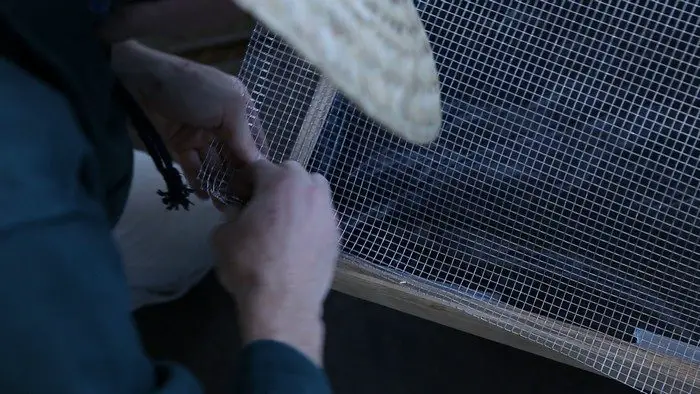
Dirt and wire mesh: Sod comes with a layer of soil, but it isn’t really enough for the grass to live on. The chair will need an extra layer of soil and some fertilizer if you want it to last.
To keep the soil in place I used a layer of wire mesh offset from the bottom by about an inch. After bending the edges of the wire mesh up and trimming it to size I used the staple gun again to keep it in place. These staples are harder to cover with duct tape, so we just have to hope that not too much water gets through the holes.
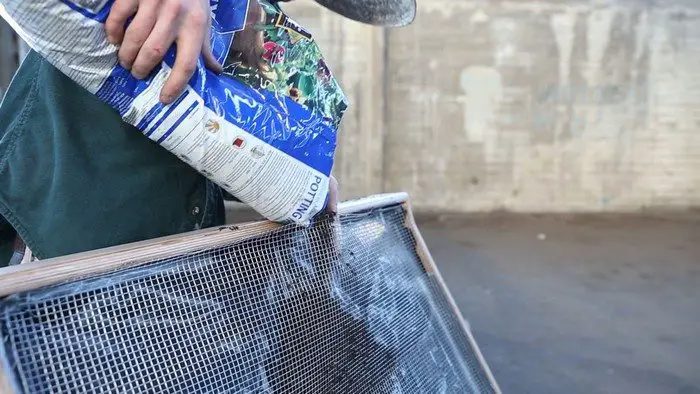
Getting the soil in behind the wire mesh is a bit of a challenge. I found that the best way to do this was to leave an opening at the top of the back rest and pour in the soil before putting in the last few staples.
I was a bit concerned about the sod sliding down at the top of the back rest. To prevent this from happening I cut a small sheet of plywood and put some long wood screws in it. I slid this piece in behind the wire mesh with the screws protruding out to stick into the sod and keep it in place.
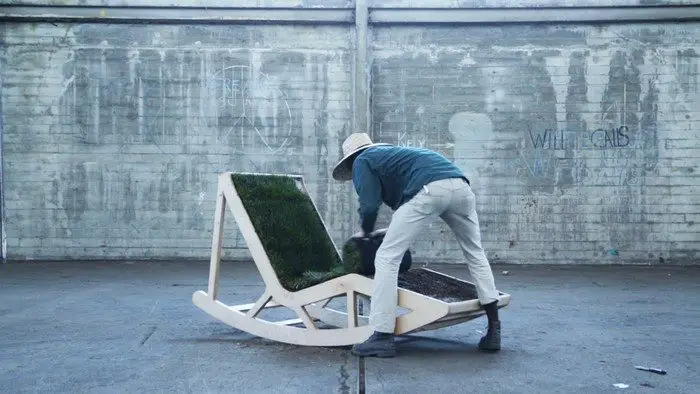
Laying the grass: I hope you are ready to get your hands really dirty.
Laying on the sod is really pretty easy. All you really need to do is unroll the sod, place it on the chair and trim the edges with a trowel or large knife.
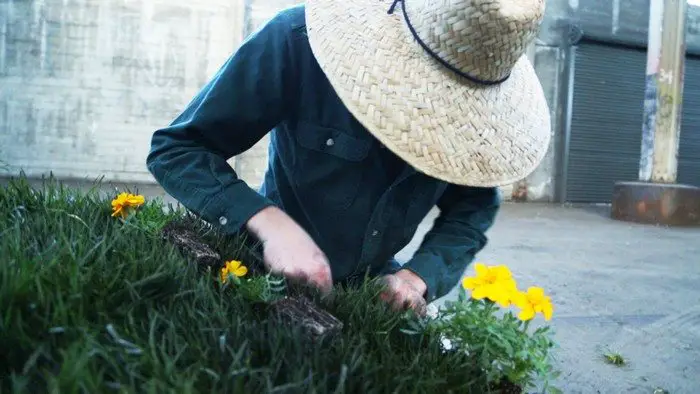
Extras: The flowers, flamingos and flag are fun ways to make the chair uniquely your own but are totally optional additions.
I recommend cutting out a piece of the sod and the wire mesh below it before planting the flowers.
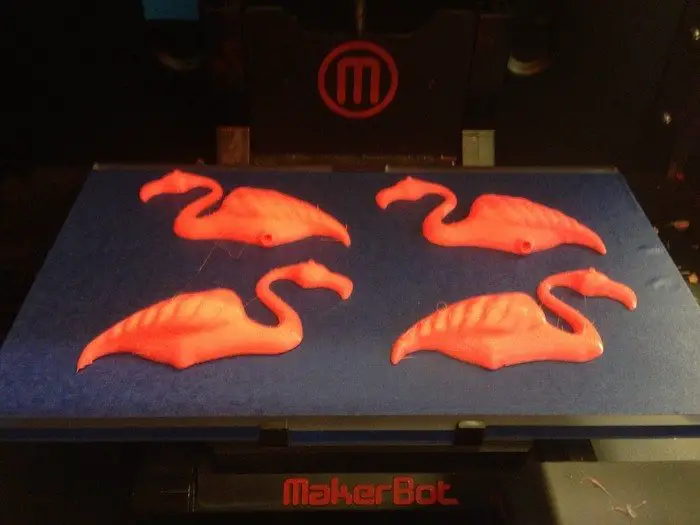
I found a 3D model of a flamingo on Thingiverse and printed it on a Makerbot in a flexible pink material.
Water and enjoy: Like any other lawn this one will require some maintenance in if you expect it to remain green and beautiful. Since the back rest is inclined at a steep angle it will dry out faster than the rest of the chair and will require more watering to keep it green and happy.
If kept properly watered and fertilized the lawn chair should be able to grow naturally and last quite a long time. It is not recommended however to sit in the chair directly after watering as it will likely result in an uncomfortably wet behind.
Thanks to Coby Unger for this great project!


