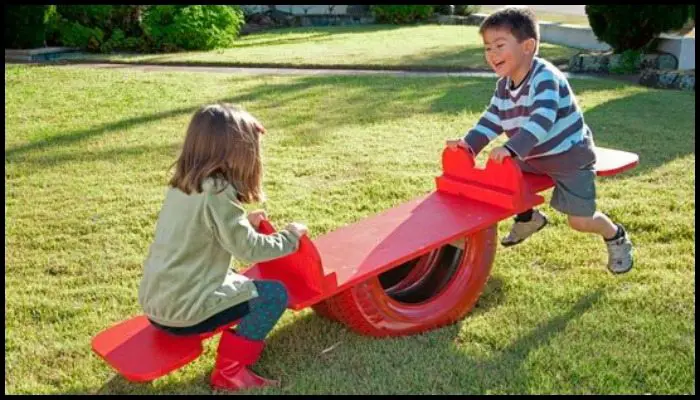
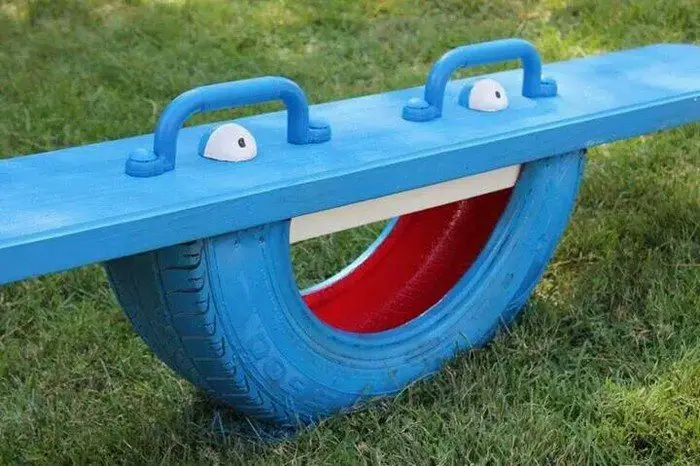
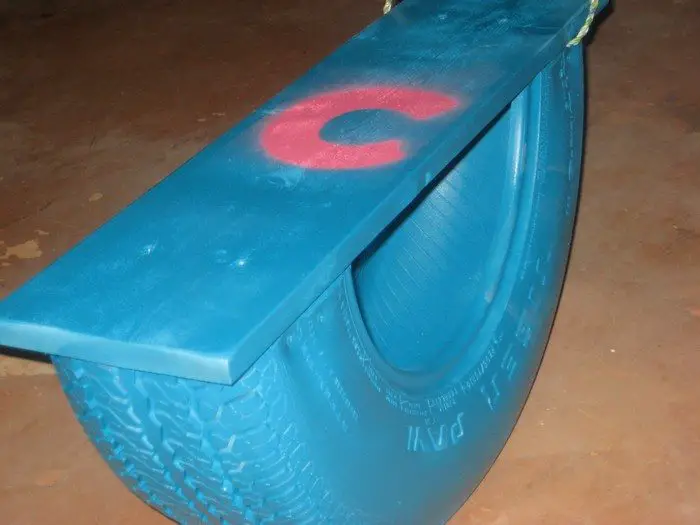
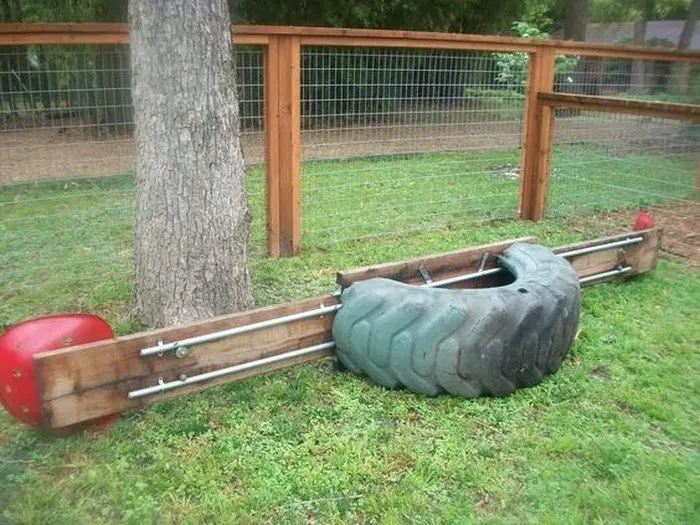
Why let your kids wait for a trip to the playground when they can play anytime right in your yard? Here’s one project with old tires which will surely make them happy – a DIY tire seesaw/teeter-totter!
This DIY project is a great alternative to the usual, metal seesaws you can buy.
A tire seesaw is typically smaller, lighter, and not anchored to the ground. This allows your play equipment to be easily moved, especially when your lawn is starting to look worn out.
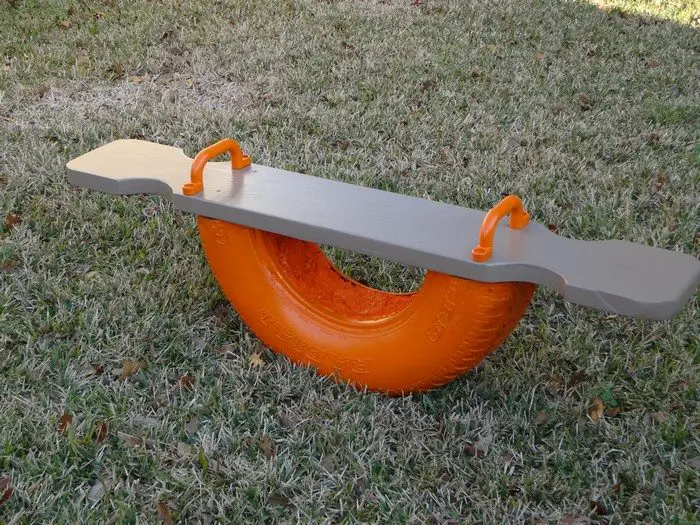
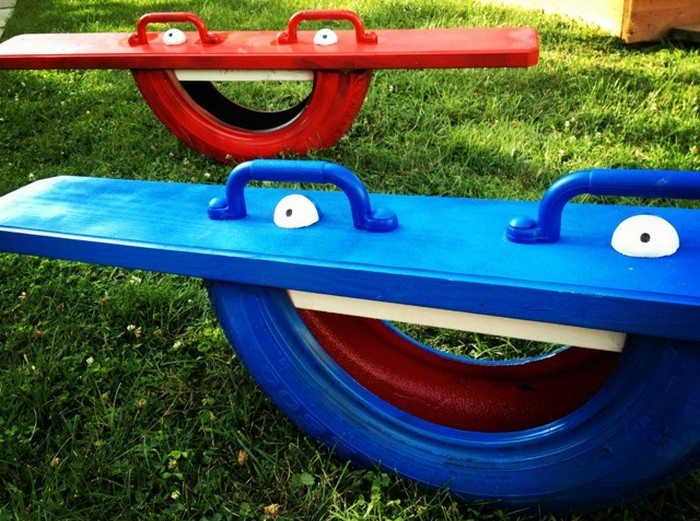
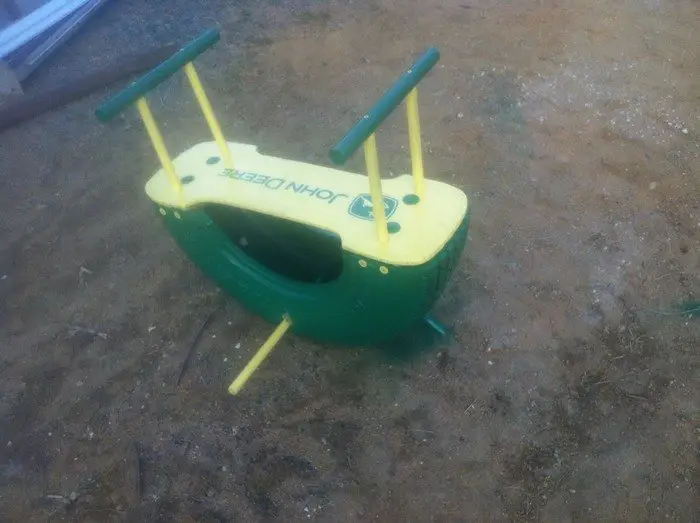
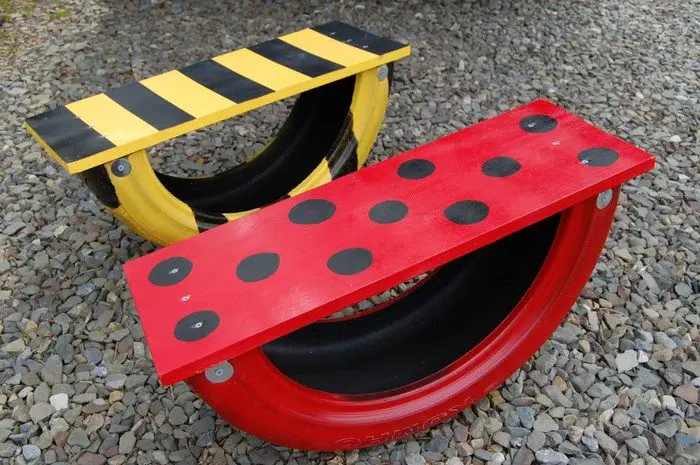
You can also customize your seesaw to suit your child’s personality!

Don’t have a tire? Go to your nearest tire shop and they will give you as many as you want!
With a DIY tire seesaw, your kids are happy, you are happy and the environment is happy! What’s not to love?
Do you know anyone who would love this idea, too? :)
Contents
Why Build a Tire Seesaw?
Creating a repurposed tire seesaw offers numerous advantages beyond just providing a fun activity for children. Here are seven benefits of building a repurposed tyre seesaw:
1. Environmental Sustainability: Repurposing old tires prevents them from ending up in landfills, where they pose environmental hazards due to their non-biodegradable nature. By giving tires a new life as a seesaw, you contribute to waste reduction and promote sustainable practices.
2. Cost-Effectiveness: Building a repurposed tire seesaw is often more cost-effective than purchasing a new one. Tires can often be obtained for free or at a low cost from tire shops or recycling centres, making this project an affordable option for families or communities.
3. Creative Expression: Building a repurposed tire seesaw allows for creative expression and customization. You can paint the tires in vibrant colours, add decorative elements, or even incorporate themes that reflect the interests of the children who will use the seesaw, fostering a sense of ownership and pride in the finished product.
4. Physical Activity: Seesaws provide a fun way for children to engage in physical activity and develop gross motor skills such as balance, coordination, and strength. By building a repurposed tire seesaw, you create an outdoor play space that encourages active play and promotes physical health and well-being.
5. Community Engagement: Collaborating on a repurposed tire seesaw project can bring together members of the community, including parents, children, and local volunteers. Working together to build and install the seesaw fosters a sense of community spirit and strengthens social connections.
6. Longevity and Durability: Tires are made to withstand harsh outdoor conditions, making them durable materials for a seesaw. A repurposed tire seesaw is likely to last for many years with minimal maintenance, providing long-term enjoyment for children in the community.
7. Educational Opportunities: Building a repurposed tire seesaw offers educational opportunities for children to learn about recycling, upcycling, and environmental stewardship. Through hands-on participation in the project, children gain valuable knowledge and appreciation for sustainable practices that they can carry with them into the future.
Overall, building a repurposed tire seesaw offers numerous advantages, from promoting environmental sustainability and community engagement to providing children with a fun and physically active outdoor play experience. By harnessing creativity, resourcefulness, and collaboration, you can create a unique and meaningful play space that benefits both children and the environment.
How to Build Your DIY Tire Seesaw
Materials:
- 13″ Tire
- 1800 x 350 x 18mm Plywood
- 2 pcs of 350 x 150 x 18mm Plywood (for handles)
- 4 pcs of 45 x 35 x 350mm or similar Pine Cleats
- 4 pcs of 90 x 35 x 155mm Fixing Blocks
- Spray Paint of choice
- Acrylic Primer
- Sealer & Undercoat
- PVA
- Wood Screws
Tools:
- Reciprocating Saw
- Marker
- Jigsaw
- Cordless Drill
- Safety Gear
Click on any image to start the lightbox display. Use your Esc key to close the lightbox.![]()
Thanks to Better Homes and Gardens for this great project.
To build a tire seesaw with the provided materials and tools, follow these steps:
Steps:
1. Prepare the Plywood Base
Lay the 1800 x 350 x 18mm plywood flat on the ground. This will be the base of the seesaw.
2. Attach Cleats to the Base
Position the four pine cleats (45 x 35 x 350mm) evenly along the length of the plywood base. These will support the tires.
Securely attach the cleats to the plywood base using wood screws. Make sure they are evenly spaced and flush with the edges.
3. Attach Fixing Blocks
Attach the four fixing blocks (90 x 35 x 155mm) to the underside of the plywood base at each corner. These will provide stability.
Use wood screws to securely attach the fixing blocks, ensuring they are flush with the edges.
4. Prepare and Paint the Tires (Optional)
Clean the 13″ tire thoroughly and allow it to dry completely. Apply a coat of acrylic primer to the tire’s surface to help the paint adhere better. Once the primer is dry, spray paint the tire with the colour of your choice. Allow it to dry completely before handling.
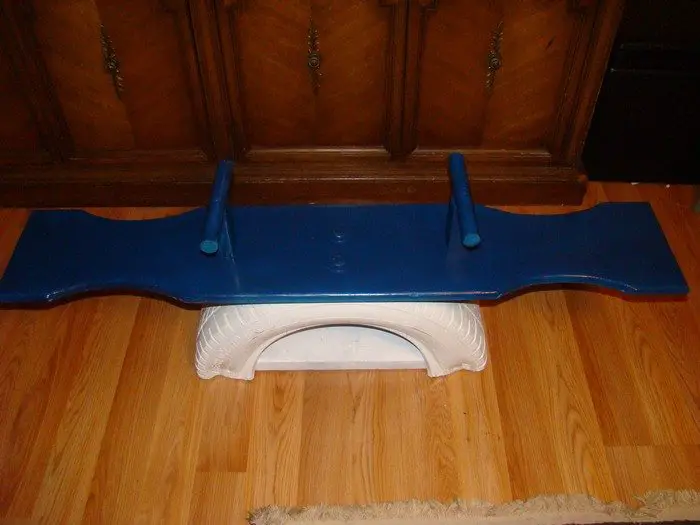
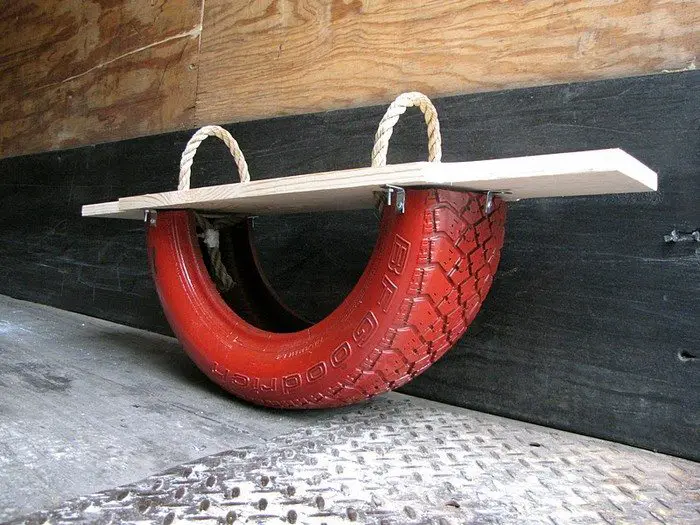
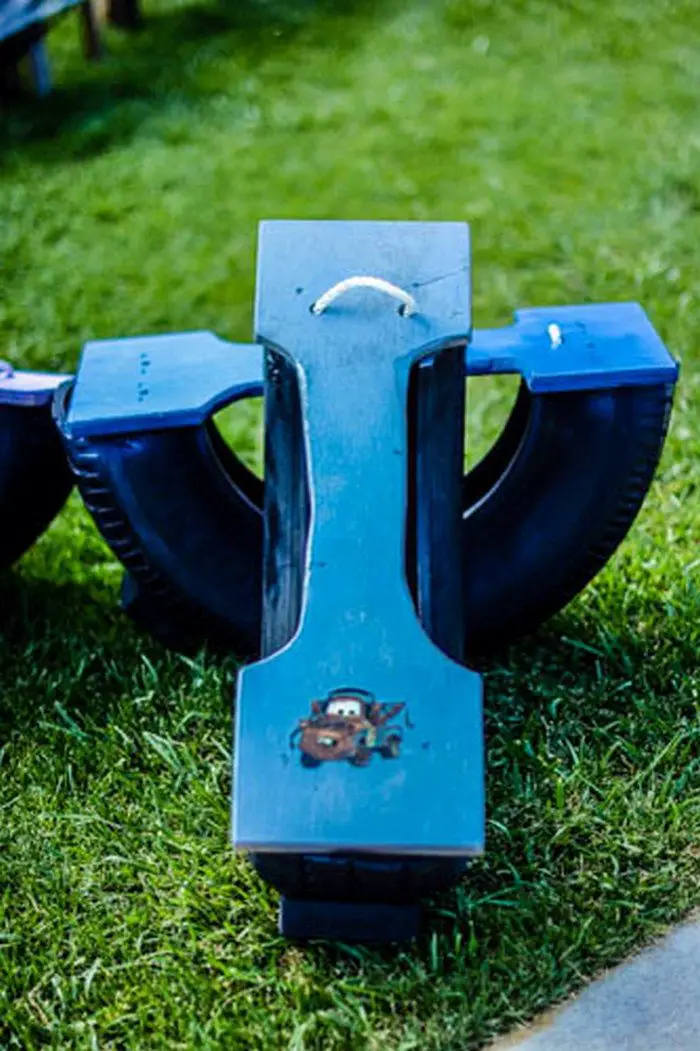
5. Attach Handles
Take the two pieces of 350 x 150 x 18mm plywood and position them vertically on opposite ends of the plywood base to serve as handles. Securely attach the handles to the base using wood screws. Make sure they are firmly anchored and provide a comfortable grip.
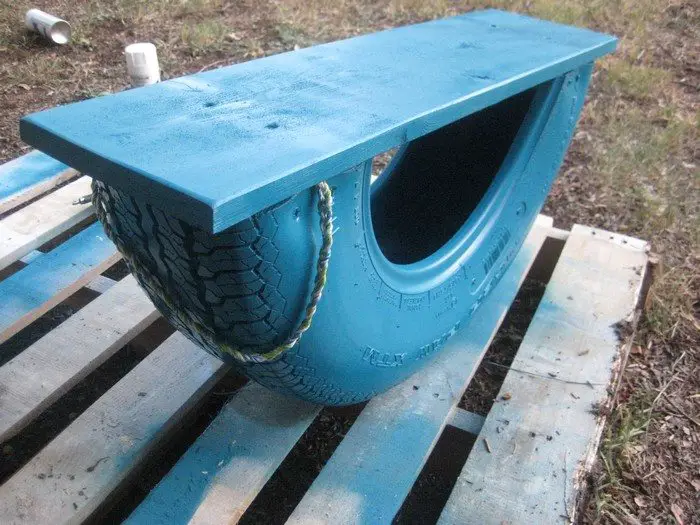
6. Assemble the Seesaw
Place the painted tire on top of each cleat attached to the plywood base. Ensure they are centred and stable.
7. Finish and Seal
Apply a coat of sealer and undercoat to the entire structure to protect it from the elements. Allow the sealer to dry completely before using the seesaw.
8. Safety Check and Supervision
Before allowing anyone to use the seesaw, conduct a safety check to ensure all components are securely attached and there are no sharp edges. Supervise children while they play on the seesaw to prevent accidents and ensure safe play.
Safety: The Top Priority
When building a repurposed tire seesaw, safety should be a top priority. Here are some important safety precautions to consider:
1. Wear Protective Gear: Always wear appropriate protective gear, including gloves and eye protection, when handling tools and materials. Accidents can happen unexpectedly, but wearing protective gear significantly reduces the severity of injuries. Gloves and eye protection act as a barrier against potential harm, providing added peace of mind during construction.
2. Inspect Materials: Before starting construction, thoroughly inspect all materials for any defects, such as sharp edges or cracks, and ensure they are suitable for use.
3. Secure Base: Ensure that the base of the seesaw is stable and securely anchored to the ground to prevent tipping or movement during use. Use appropriate anchoring methods to secure the base of the seesaw to the ground. This may involve driving stakes, using concrete footings, or securing with heavy-duty bolts and anchors, depending on the seesaw’s design and the surface type.
4. Use Proper Tools: Use the correct tools for the job and operate them according to safety guidelines. Avoid using damaged or malfunctioning tools. Inspect all tools before use to ensure they are in good condition. Avoid using tools that are damaged, rusted, or malfunctioning, as they can pose safety risks and compromise the quality of your work.
5. Follow Instructions: Follow the step-by-step instructions carefully and avoid taking shortcuts. Pay attention to details and make sure all components are assembled correctly. Pay close attention to the details outlined in the instructions, such as measurements, angles, and alignment. Even seemingly minor discrepancies can affect the stability and functionality of the seesaw, so accuracy is paramount.
Before proceeding to the next step, double-check your work to ensure that everything is assembled correctly. Confirm that all bolts are tightened securely, components are properly aligned, and any connections are firmly in place.
6. Check Weight Limits: Determine the weight limits of the seesaw and ensure that it is not exceeded during use. Do not allow too many children to use the seesaw at once. Exceeding weight limits can strain the seesaw’s components, leading to premature wear and potential breakage. By staying within the specified limits, you preserve the integrity of the equipment and ensure its continued usability.
Allowing too many children to use the seesaw simultaneously can surpass the weight capacity and compromise stability. Limiting the number of users helps distribute weight evenly and reduces the risk of accidents.
7. Supervision: Always supervise children while they are using the seesaw to prevent accidents and ensure safe play. Teach them how to use the seesaw properly and encourage them to take turns. Remind them to keep their hands and feet clear of moving parts and to dismount safely when they are finished playing.
8. Inspect Regularly: Periodically inspect the seesaw for any signs of wear and tear, such as loose bolts or cracks, and make any necessary repairs promptly. During inspections, carefully examine all components of the seesaw, including the base, tyres, handles, and fasteners. Pay attention to areas that may be subjected to more wear, such as the pivot point where the seesaw rocks back and forth.
9. Place on Level Ground: Install the seesaw on a flat, level surface free from obstacles to prevent accidents and ensure stability during use.
10. Use Soft Landing Surface: Place a soft landing surface, such as wood chips or rubber mulch, underneath the seesaw to cushion falls and reduce the risk of injury. Distribute the chosen landing surface material evenly beneath the entire area where children may dismount from the seesaw.
Ensure consistent coverage to provide uniform cushioning and protection across the play area. Periodically inspect the soft landing surface for wear, compaction, or displacement. Replenish or redistribute the material as necessary to maintain its effectiveness in cushioning falls and ensuring optimal safety.
By following these safety precautions, you can help ensure that your repurposed tire seesaw is fun and safe outdoor play equipment for children.
The Wrap Up
Creating a tire seesaw is not merely about crafting a simple plaything; it embodies a harmonious blend of creativity, sustainability, and safety in outdoor recreation. Through the innovative repurposing of old tires and plywood, we not only construct a source of delight for children but also contribute significantly to environmental conservation by minimizing waste.
By integrating essential safety measures such as routine inspections, attentive supervision, and the provision of a soft landing surface, we ensure that children engage in play with utmost security and enjoyment.
Ultimately, the tire seesaw stands as a testament to our ingenuity, commitment to environmental stewardship, and dedication to fostering wholesome and memorable childhood experiences. It symbolizes the transformative power of repurposing, the enduring importance of safety, and the timeless joy of outdoor play for generations to come.
Frequently Asked Questions
1. What materials do you need to build a repurposed tire seesaw?
The materials needed typically include a tire, plywood, wooden cleats, fixing blocks, spray paint, acrylic primer, sealer & undercoat, PVA glue, and wood screws.
2. Where can you find a suitable tire for this project?
You can often find tires at auto repair shops, tire stores, junkyards, or through online marketplaces. Make sure to choose a tire that is in good condition and suitable for outdoor use.
3. Do you need any special tools to build a repurposed tire seesaw?
Basic tools such as a drill, saw, screwdriver, and measuring tape are typically required for this project. Depending on the design and materials used, you may also need a jigsaw or circular saw.
In addition to these basic tools, you may also need sandpaper or sander and paintbrushes or spray gun. Sanding the edges of the plywood or any rough surfaces on the tire can help create a smoother finish and reduce the risk of splinters or injuries. If you plan to paint or seal the seesaw, you will need brushes or a spray gun to apply the paint, primer, or sealant evenly.
Don’t forget to prioritize safety! Wear appropriate protective gear such as gloves, safety goggles, and a dust mask when using power tools or handling materials.
4. How difficult is it to build a repurposed tire seesaw?
The difficulty level can vary depending on your DIY skills and experience with woodworking. However, with clear instructions and basic carpentry knowledge, building a repurposed tire seesaw can be a fun and achievable project for many DIY enthusiasts.
Building a repurposed tire seesaw offers an excellent opportunity to learn new skills and techniques. Even if you encounter challenges along the way, each obstacle presents a chance to problem-solve and expand your knowledge base. Embrace the learning process and don’t be afraid to ask for help or seek advice from more experienced builders.
By approaching the project with a positive attitude, a willingness to learn, and a readiness to adapt to challenges, building a repurposed tire seesaw can be a rewarding and fulfilling experience.
5. Can you customize the design or size of the seesaw to fit my space?
Yes, you can customize the design, size, and colour of the seesaw to suit your preferences and available space. Consider factors such as the age and size of the intended users, as well as the location where the seesaw will be installed.
Ensure that there is enough space for safe play and that the ground is level and stable. Take into account factors such as sunlight exposure, drainage, and accessibility to create a suitable environment for enjoying the seesaw.
By customizing the design, size, and colour of your repurposed tire seesaw, you can create a one-of-a-kind outdoor play experience that brings joy and excitement to users of all ages. So let your imagination run wild, and have fun creating a seesaw that reflects your personality and enhances your outdoor space!
7. Is the repurposed tire seesaw suitable for children of all ages?
The repurposed tire seesaw can be suitable for children of various ages, but adult supervision is recommended, especially for younger children. Make sure to follow safety guidelines and regularly inspect the seesaw for any signs of wear or damage.
8. Can you paint or decorate the repurposed tire seesaw?
Yes, you can paint or decorate the repurposed tire seesaw to add a personal touch or match your outdoor decor. Use outdoor-grade paint and sealant to protect the wood and tire from the elements.
9. How can you ensure the stability and safety of the repurposed tire seesaw?
Ensuring that the base is level and securely anchored to the ground is essential for stability and safety. Follow the assembly instructions carefully, use appropriate materials, and regularly inspect the seesaw for any maintenance or repairs needed.
After installation, regularly inspect the seesaw for any signs of wear, damage, or deterioration. Check for loose bolts, cracks in the wood or tire, and any other potential safety hazards. Perform routine maintenance tasks such as tightening screws, lubricating moving parts, and replacing worn-out components as needed.
By following these guidelines and taking appropriate safety precautions, you can ensure that your repurposed tire seesaw remains stable, safe, and enjoyable for users. Regular maintenance and inspections will help prolong its lifespan and minimize the risk of accidents or injuries.
These FAQs should provide helpful guidance for anyone considering building a repurposed tire seesaw. If you have any additional questions or concerns, feel free to ask!


