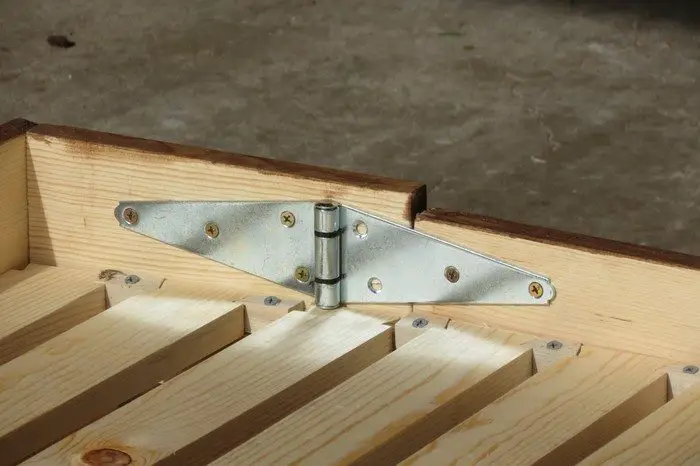
I placed the hinges almost flush with the top and bottom of the 1″x8″ pieces, but I offset the 1″x8″ from the 10″ sides of the box by about 3/4″. Initially, I designed this offset to allow for a lid to be placed on top of the box, but I ended up nixing that idea so you could easily set these flush with one another.
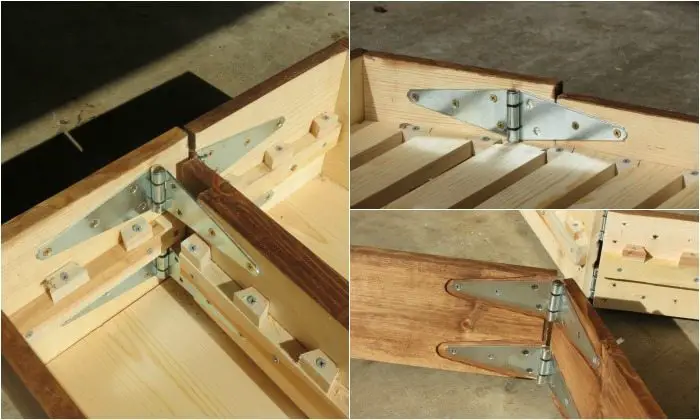
Some reminders/tips for the hinges: Make sure that attach the hinges in the right orientation. These hinges will normally bind in one direction and then fold completely in the other direction. Depending on where they are being placed, the hinges will need to be attached accordingly. Also, I used a router to knock of an 1/8″ of wood behind the hinges in order to buy myself a little more space when in the “closed” position. Once again, see the pictures for clarification.
The Slats: This is where it gets complicated. First, the 1″x2″ lengths must be cut into corresponding lengths to run along the 10″, 26.75″, and 28.25″ lengths. It wouldn’t hurt to miter every one of these before screwing them to the sides of the bed. This will allow the sides to open and close without bumping into each other.
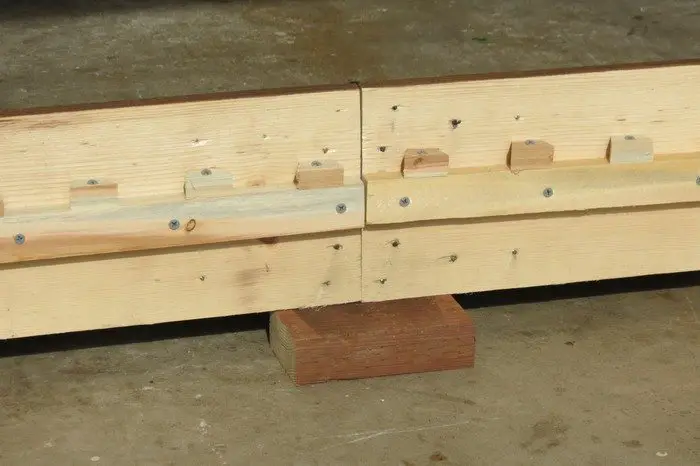
I attached these “rails” 3/4″ under the top set of hinges. Try your best to keep these level relative to each other (and especially from one side to the next , so that there’s no incline when you put the mattress down).
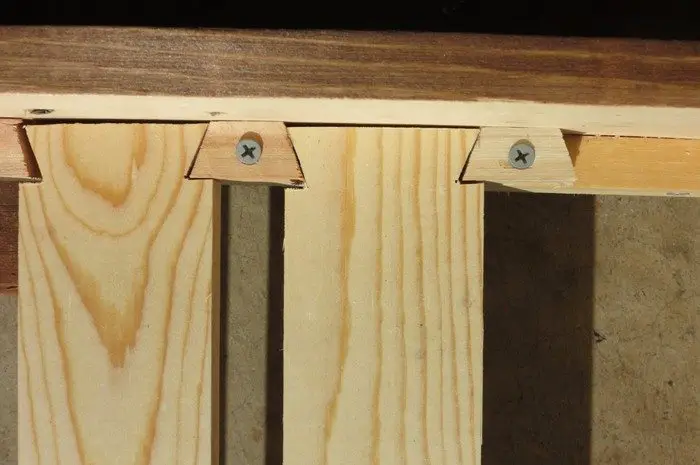
Once these are in place, cut your remaining 1″x2″ into 3/4″x3/4″x1.5″ pieces, with a slight miter on both sides. This miter can be anywhere from 20-30 degrees, and must correspond directly with the dovetail that will be cut into each of the slats.
Now the slats. Cut your 1″x3″ lumber into as many 39″ lengths as possible (I ended up using 21, but in hindsight I would have preferred a round 20). Trace and cut a 3/4″ deep dovetail into both sides of each slat, once again corresponding to the depth and angle of the trapezoidal pieces that were just cut.
Now ensues the tedious process that I will summarize in the following 4 steps:
1. Set slat on rail.
2. Place one trapezoidal piece on both ends, engaging the dovetails in the slat.
3. Drill a pilot hole and screw the trapezoidal piece into the rail.
4. Rinse, repeat
**Tip: Number your slats 1-20 and mark one side of the bed as the starting point. This will help you avoid some complications in the future.

It sounds simple, but you’ll also have to check often to ensure that the pieces you’re screwing in aren’t interfering with the box’s ability to close and open. This will require some adjusting of the pieces around the hinges.
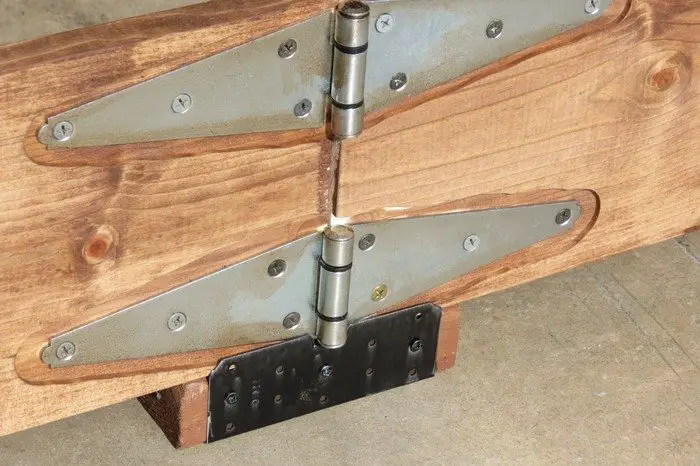
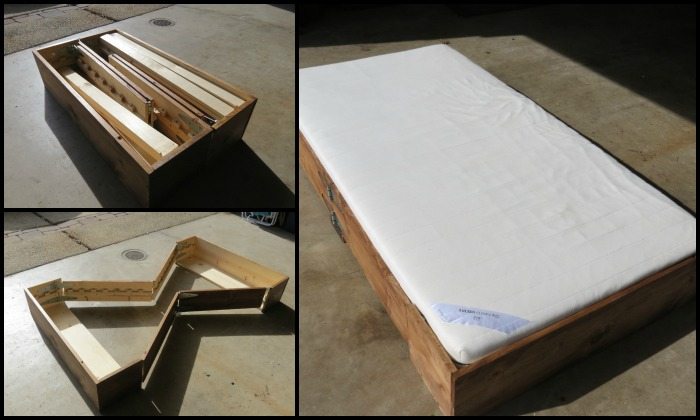
Finishing Touches: Now that you’ve got everything assembled, there’s just a few more finishing touches before it’s ready for a mattress! First of all, you’ll need something to support the sides of the bed, near the hinges. My simple, practical solution was to attach a small bracket to a 2″x4″, which -conveniently- fit perfectly under the sides of the bed. These, as well as the slats, fit conveniently into the box when collapsed into the “closed” position.
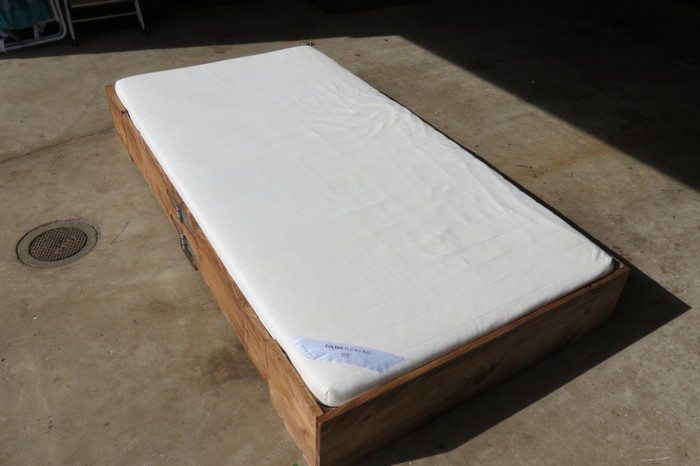
I also applied a dark stain to the outside of the box, which gives it a much better look overall, both in the open and closed positions. Let it dry and it’s ready for a mattress! The twin-sized mattress fits perfectly inside the frame, and if I do say so myself it looks great. Simple. Practical. Beautiful. Oh yeah, and less than $150.
Thanks to ineverfinishanyth for this great project!


