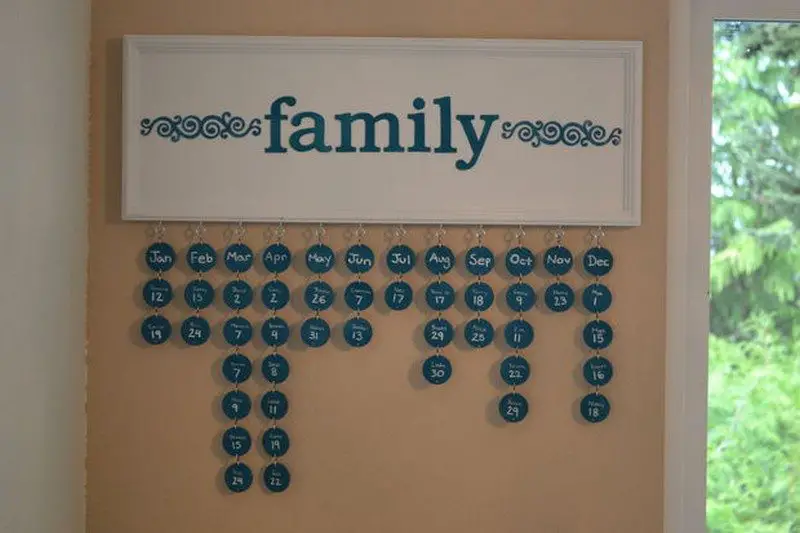
Are you always scrambling at the last minute to buy gifts for a loved one whose birthday you forgot? You might have forgotten to check your date book or missed the notification on Facebook. This functional and decorative event calendar is the solution – a DIY Hanging Birthday Calendar!
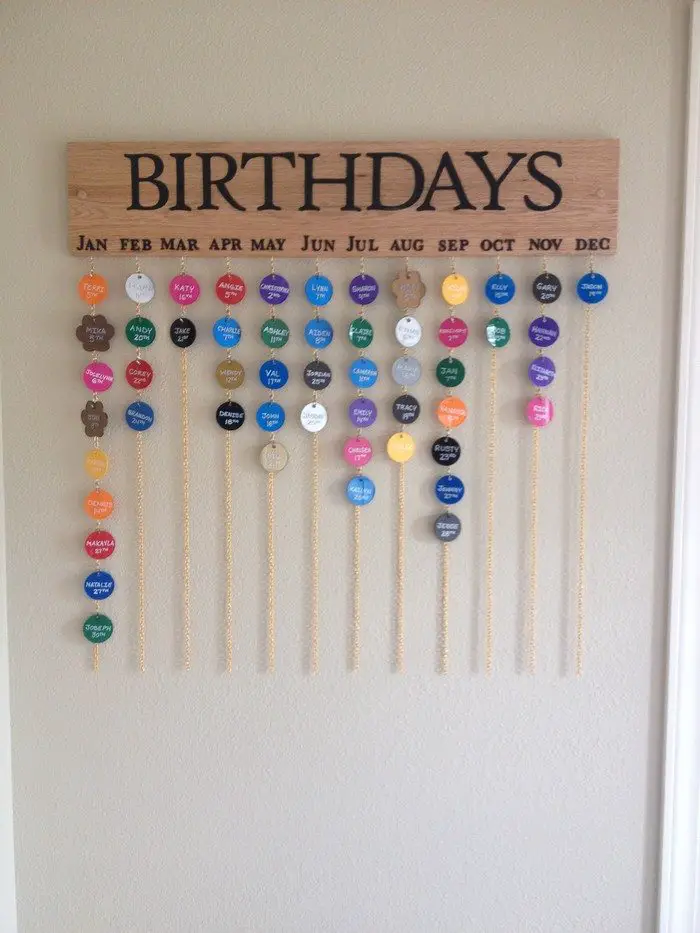
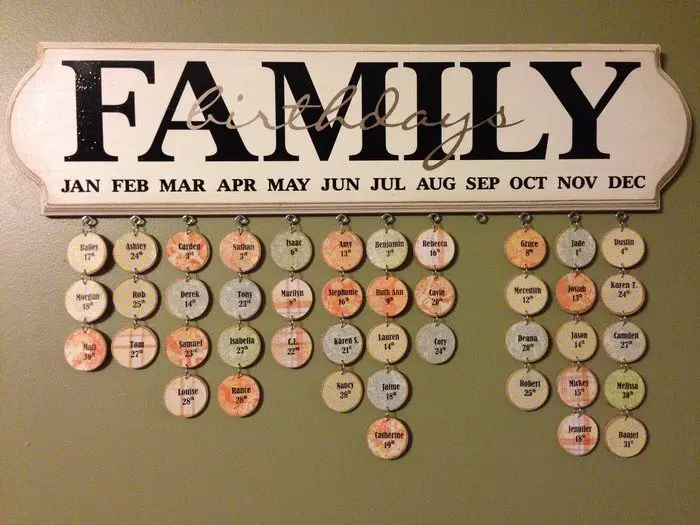
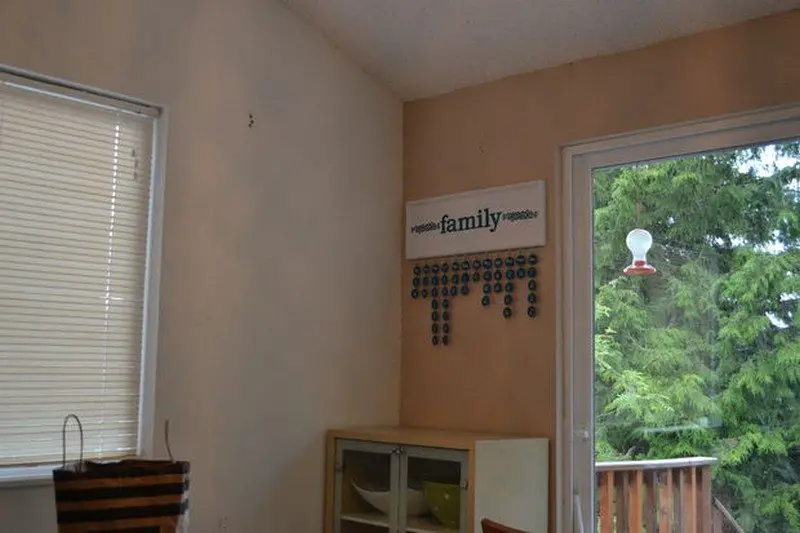
This hanging birthday calendar is very easy to make and is made of materials you can easily find at home or source from your local hardware store. It has a board with 12 hooks, one for each month of the year. From these hooks hangs tags with the names and birthdays of each family member, relative or friend.
Contents
- 1 Personalized and Customizable Hanging Birthday Calendar
- 1.1 You’ll need these materials
- 1.2 And these tools:
- 1.3 Step-by-step Guide
- 1.3.1 Determine the Size and Cut the Board
- 1.3.2 Measure and Cut the Moldings
- 1.3.3 Sand the Board and Moldings
- 1.3.4 Drill Pilot Holes for Eyelets
- 1.3.5 Glue the Moldings to the Board
- 1.3.6 Spackle and Prepare for Painting
- 1.3.7 Apply Primer and Add Design
- 1.3.8 Install the Eyelets
- 1.3.9 Create the Wooden Pieces
- 1.3.10 Thread the Wooden Pieces
- 1.3.11 Personalize the Wooden Pieces
- 2 Conclusion
- 2.1 FAQs (Frequently Asked Questions)
- 2.1.1 Q1: Can I use alternative materials for this project?
- 2.1.2 Q2: How long does it take to complete this project?
- 2.1.3 Q3: Can I make this calendar as a gift for someone?
- 2.1.4 Q4: How do I ensure the DIY hanging birthday calendar stays securely on the wall?
- 2.1.5 Q5: Can I add more than one wooden piece for each person’s birthday?
- 2.1 FAQs (Frequently Asked Questions)
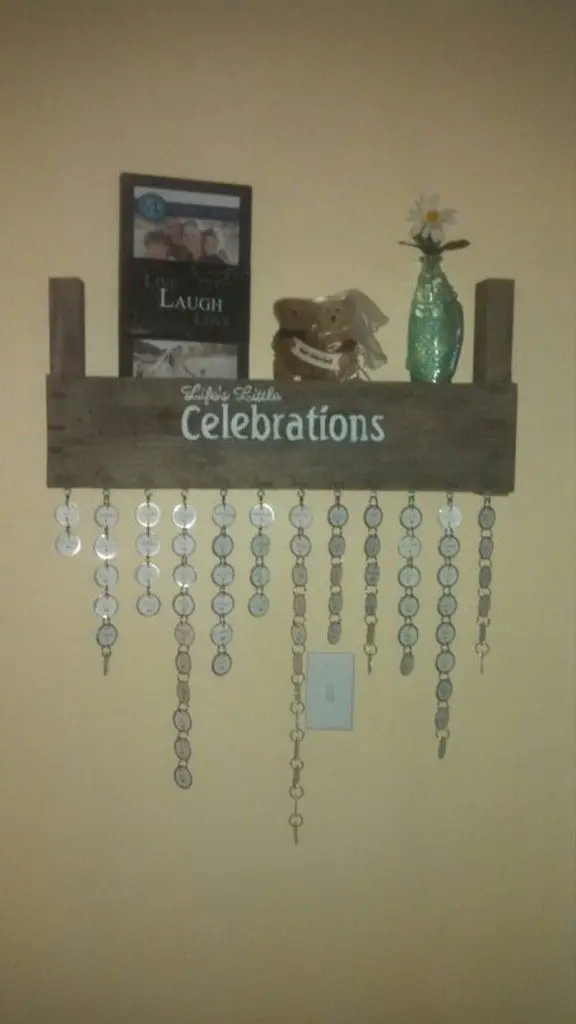
Personalized and Customizable Hanging Birthday Calendar
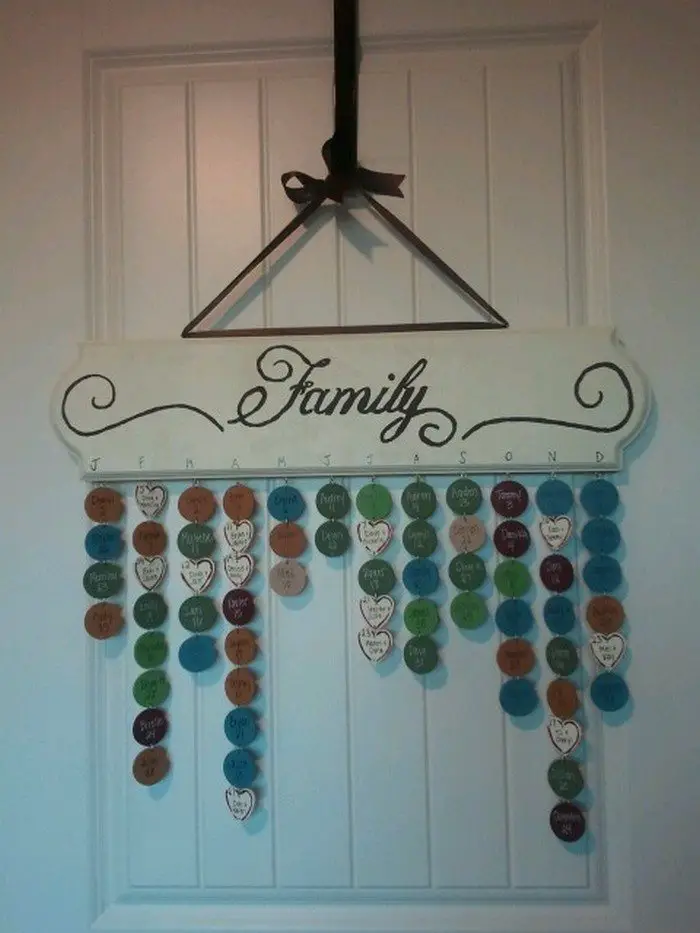
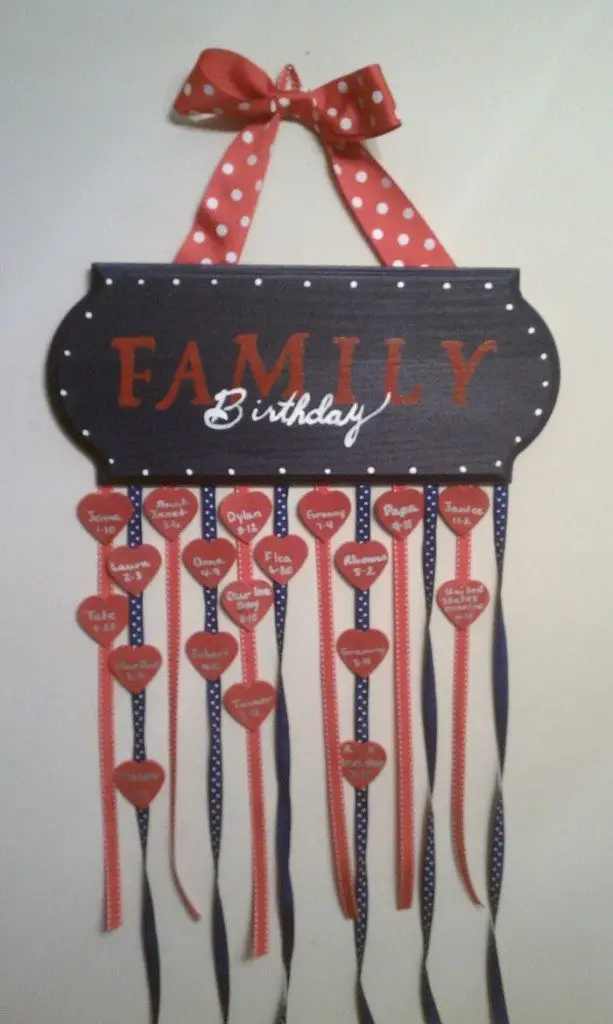
What’s great about this hanging birthday calendar is that it’s so easy to customize and personalize. You can use different colours to represent the gender of the celebrant. You can make use of different shapes of tags to indicate if it’s a family member, relative, or close friend. The customization opportunities are limitless.
Don’t want to miss another birthday? Why not make this DIY hanging birthday calendar?
Click on any image to start the lightbox display. Use your Esc key to close the lightbox. ?

You’ll need these materials
- Wooden Shapes – around 1 1/2″ wide and 1/8″ thick
- 3/4″ Wooden Board
- 5′ Wall Molding – just a thin one to give the calendar a better look
- Paint of various colours – depending on your design/preference
- Spackle – Used to fill gaps in the moulding corners and holes in the header board’s surface.
- 12 pieces Eyelet Screws – for each month
- S-Hooks – two hooks attached at one end forming an S shape to hang the names/dates. The quantity depends on the number of wood shapes you have – one S shape for each.
- Wood Glue
- 2 pieces Picture Hangers – or any piece you plan to hang your calendar
- Decorative Materials – Paint pens for writing on the disks, stencils for lettering the board, etc.
And these tools:
- Drill and Bits
- Sand Paper
- Painting Equipment
- Saw
- Miter Box
- Fishing Line – Floss or very small gauge string will work too.
- Palm Sander – Optional but it is much easier than sanding everything by hand.
- Clamps
Step-by-step Guide
Now let’s walk through the process of creating your own DIY hanging birthday calendar:
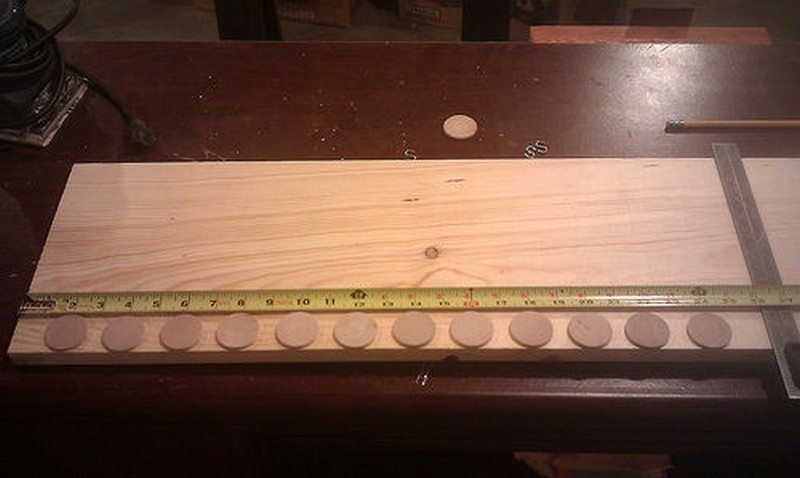
Determine the Size and Cut the Board
Start by lining up 12 wooden shapes across your board to determine the desired length. Ensure you account for the moulding trim on both sides and leave enough spacing between the wood shapes. Once you have the measurements, cut the board accordingly.
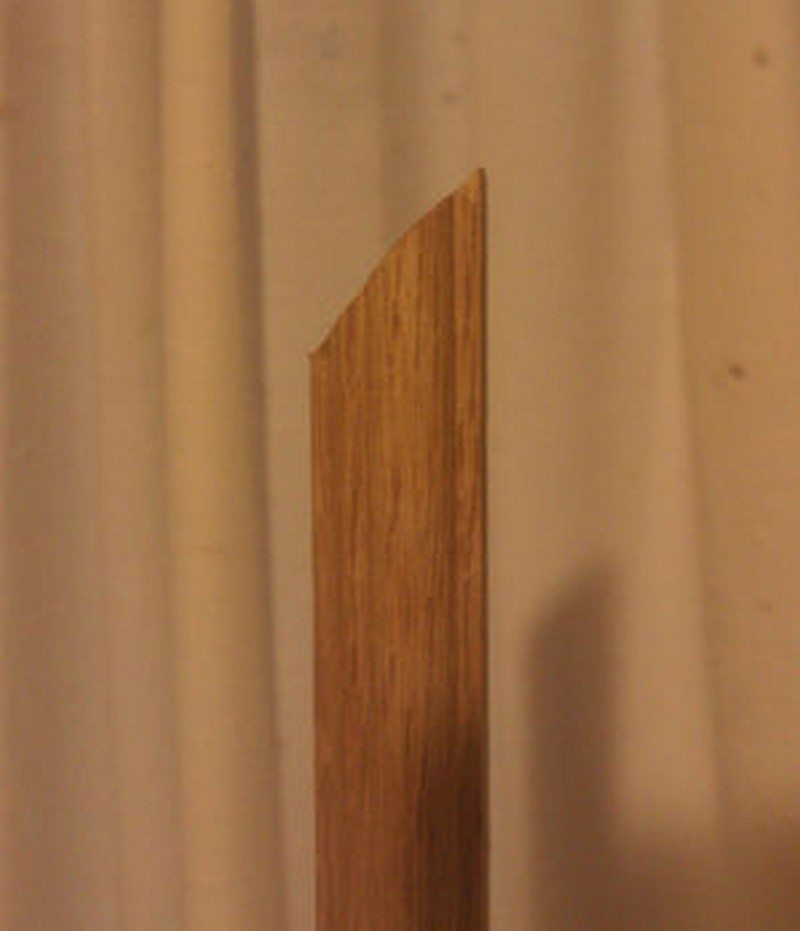
Measure and Cut the Moldings
To ensure a precise fit, measure the thin mouldings and carefully cut them to match the dimensions of the board. Utilize a mitre box to make accurate, angled cuts on the ends of the mouldings, guaranteeing a polished and professional-looking result for your DIY project.
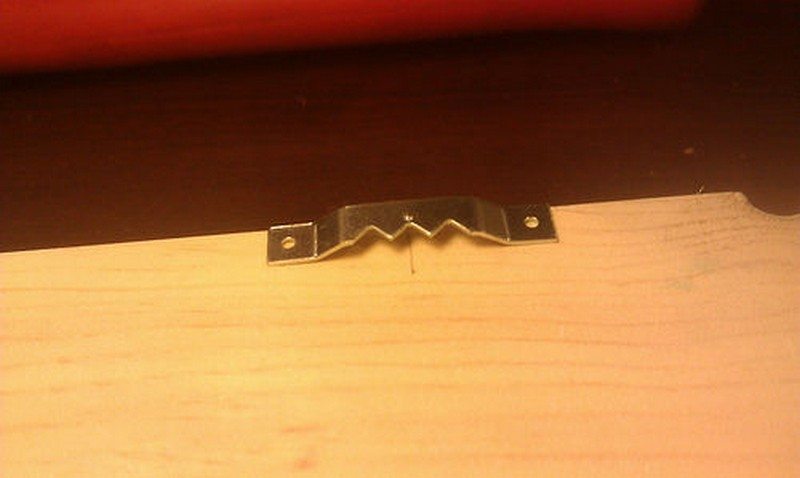
Sand the Board and Moldings
Sand the board and mouldings to prepare for painting and to get rid of rough edges. At this point, you can screw the hardware for hanging the calendar. You can choose to install it after everything is done, but you risk damaging the face of your hanging birthday calendar if you are not careful enough.
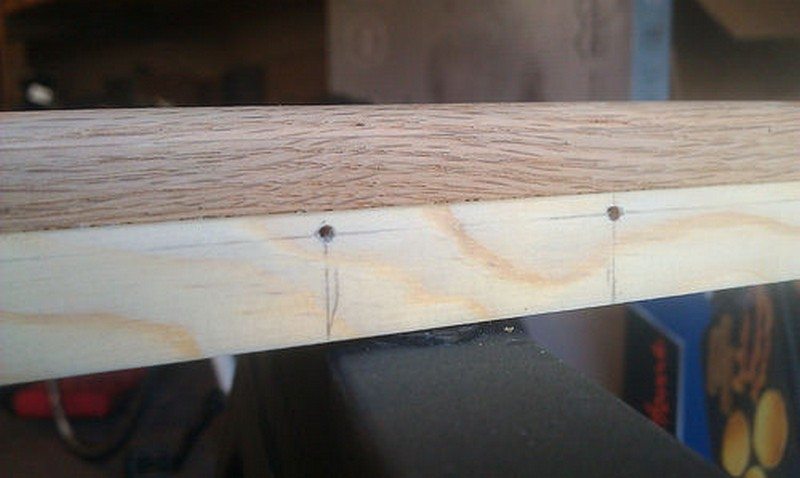
Drill Pilot Holes for Eyelets
Drill pilot holes for each of the twelve eyelet locations at the bottom of the board. Determine standard spacing, centre-to-centre. In this photo, the holes are 2 inches apart from each other and are about 1/8 of an inch from the front edge of the board.
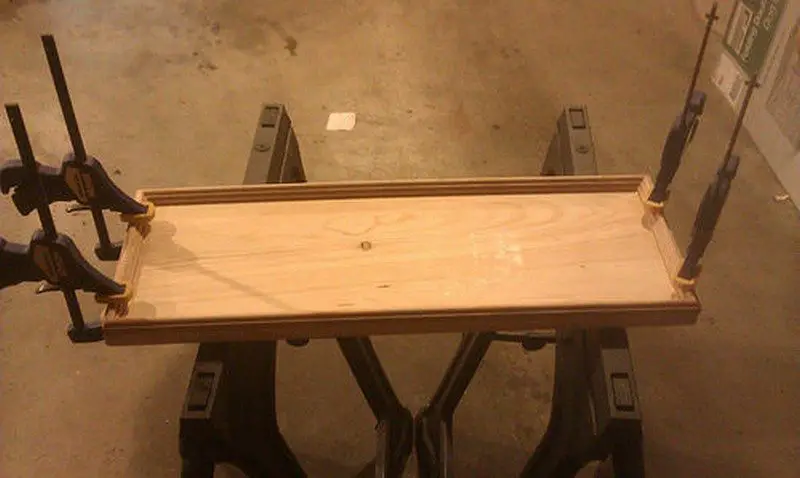
Glue the Moldings to the Board
Once you have measured and cut the thin mouldings, it’s time to attach them to the wooden board. Apply a generous amount of wood glue to the back of each moulding piece and firmly press them onto the board, making sure they align with the edges.
To secure a strong bond, use clamps to hold the mouldings in place while the glue dries. This step is crucial as it not only ensures the stability of the hanging birthday calendar but also adds a polished and finished look to the overall design.
Allow the glue to fully dry before proceeding to the next step of your DIY birthday hanging calendar.
Spackle and Prepare for Painting
After attaching the mouldings to the wooden board, it’s important to inspect the hanging birthday calendar for any imperfections such as tiny holes or uneven surfaces. These flaws can be easily addressed by applying spackle.
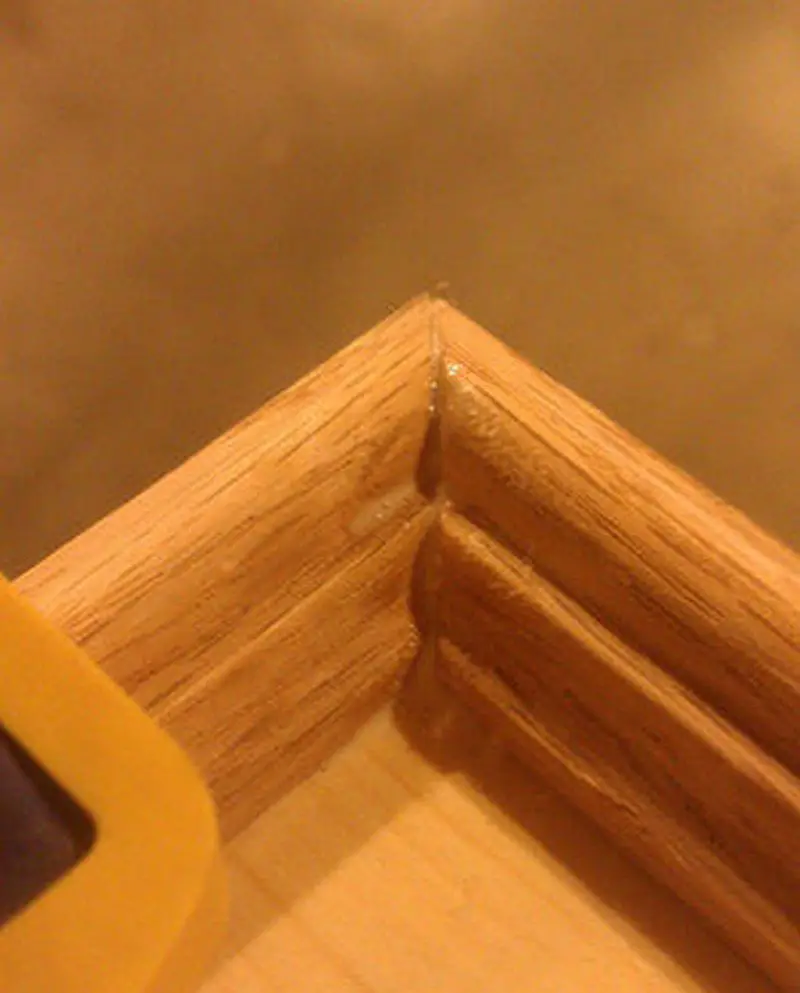
To achieve a flawless finish, take a putty knife or a similar tool and apply a spackle to fill in any gaps or holes on the wooden board. Ensure that the spackle is applied evenly, creating a smooth surface. It’s important to follow the manufacturer’s instructions regarding drying time for the spackle.
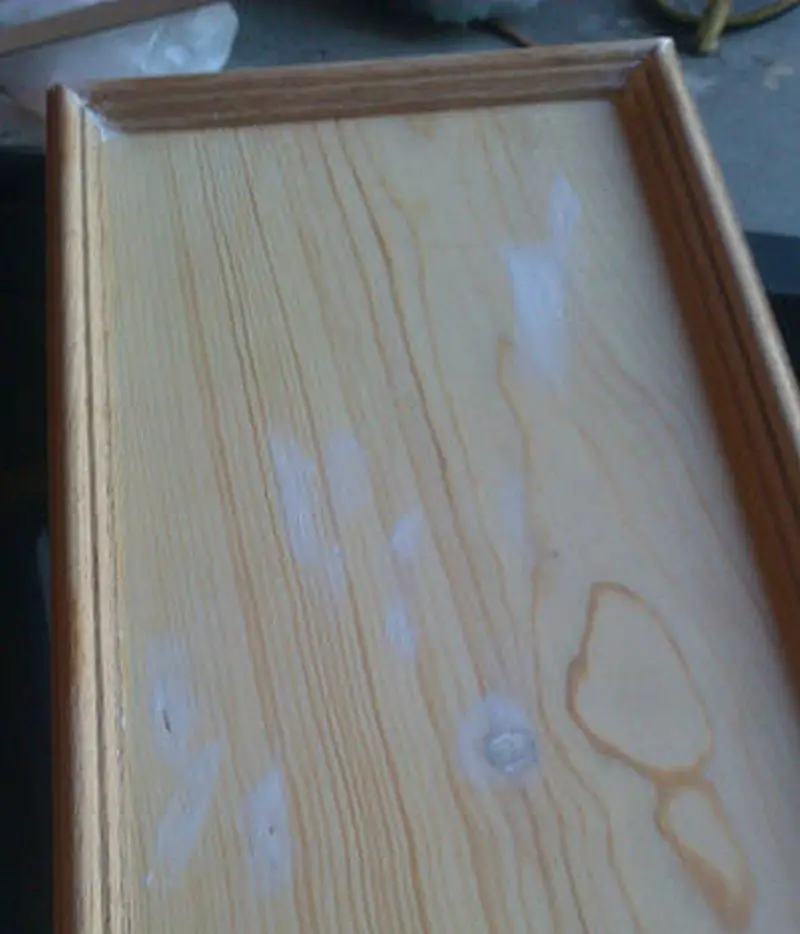
Allowing it to dry completely will guarantee a solid and even foundation for the next steps of your DIY project. Take the time to be patient during this stage, as it will contribute to the overall professional appearance of your hanging birthday calendar.
Once the spackle is fully dry, you can proceed with confidence to the next phase of your project.
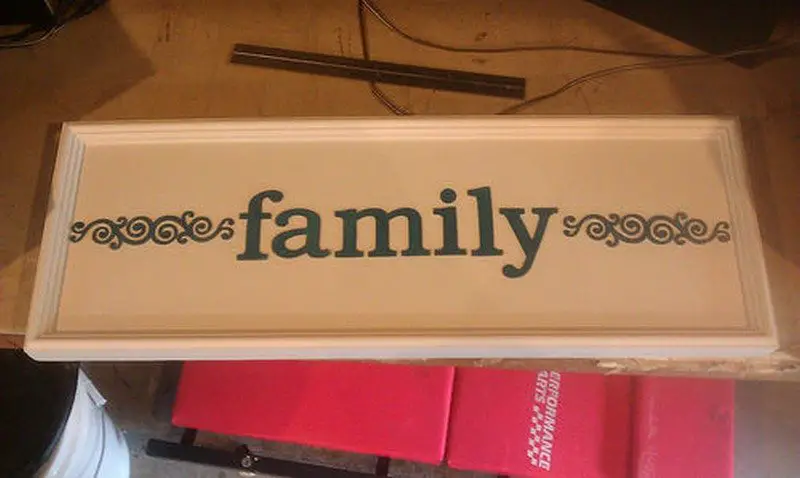
Apply Primer and Add Design
To achieve a superior paint finish for your DIY hanging birthday calendar, it is highly recommended to apply a primer. The primer serves as a preparatory layer, creating a smooth and adhesive surface for the paint.
By applying a primer, you ensure that the paint adheres effectively to the wooden board and mouldings, resulting in a long-lasting and professional-looking finish.
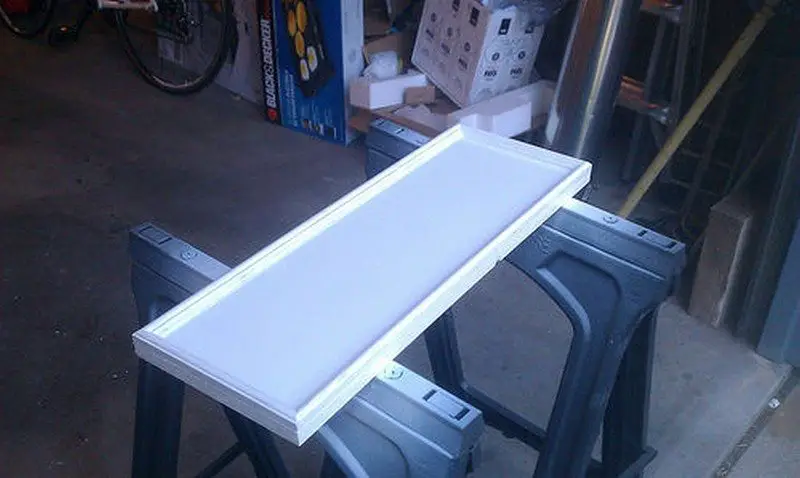
After the primer has been applied, allow it to dry completely according to the instructions provided by the manufacturer. Once the primer is dry, you can unleash your creativity and add personalized lettering and design elements to the hanging birthday calendar.
Stencils can be a handy tool for achieving precise and consistent lettering, or you can opt for a freehand approach if you prefer a more artistic touch.
Take your time during this step to ensure accurate placement and a visually appealing design. Whether you choose to incorporate names, dates, or decorative motifs, the lettering and design will add a unique charm to your hanging birthday calendar, making it a truly personalized gift or home decor item.
Install the Eyelets
To complete your DIY hanging birthday calendar, it’s time to install the eyelets at the bottom of the wooden board. Ensure that the “faces” of the eyelets are parallel with the face of the board, providing a neat and aligned appearance.
It’s important to thread all the eyelets equally to maintain consistency in both aesthetics and functionality. This ensures that each month’s tag can be easily hung and displayed without any hassle.
Taking the time to install the eyelets properly will guarantee a well-organized and functional calendar that you can rely on to keep track of important birthdays and events throughout the year.

Create the Wooden Pieces
Once you have completed the board and its accompanying mouldings, it’s time to shift your attention to the wood pieces that will hang from the calendar.
To begin, gather a comprehensive list of the names and dates of your family members and relatives. This will ensure that you have an accurate count of the wood pieces needed. Additionally, keep in mind that you will require 12 additional pieces to represent each month of the year.
By having a detailed list at hand, you can easily determine the number of wood pieces required for each category. Whether it’s immediate family, extended relatives, or close friends, organizing the wood pieces based on the provided information will simplify the process.
This thoughtful approach will ensure that each person’s name and birthday are represented on the hanging birthday calendar, allowing you to keep track of important occasions throughout the year.
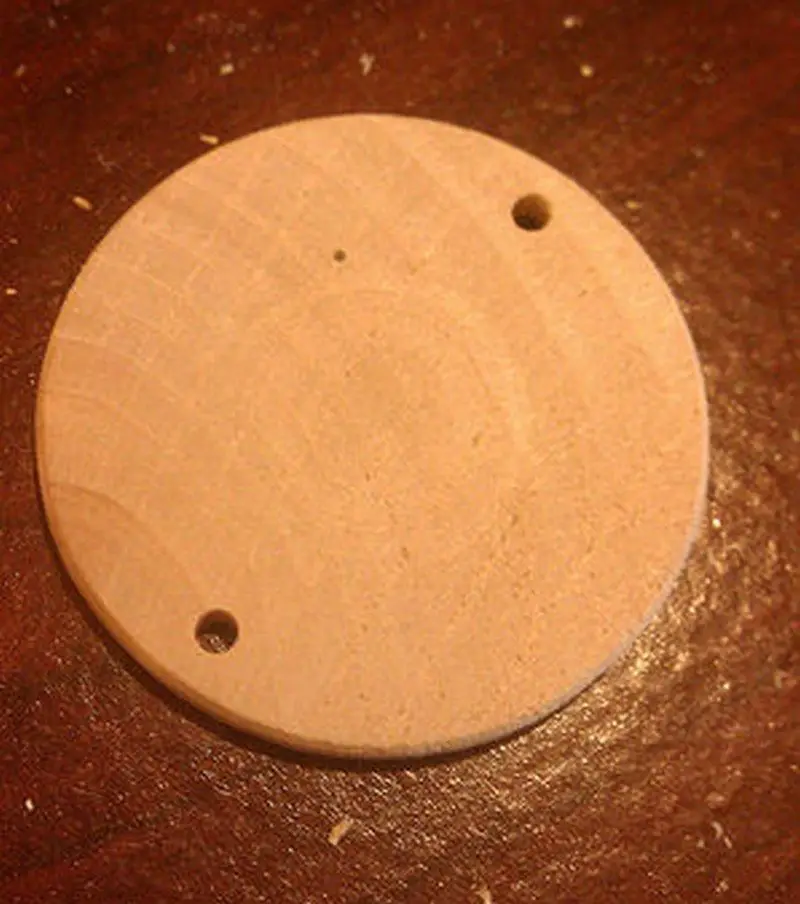
To create the wooden pieces for the names and dates, start by drilling two holes in each piece. The size of the holes should be slightly larger than the hooks you plan to use. Drill the holes approximately 1/8 inch from the edges and on the centre line of each wooden piece.
To streamline the process of creating the wood pieces for your hanging birthday calendar, there’s a handy technique you can employ. Once you have drilled the necessary holes in one wood piece, you can use it as a guide for the remaining pieces.
Simply place the newly drilled wood piece below the one you just completed. By doing so, you can ensure proper alignment and spacing.
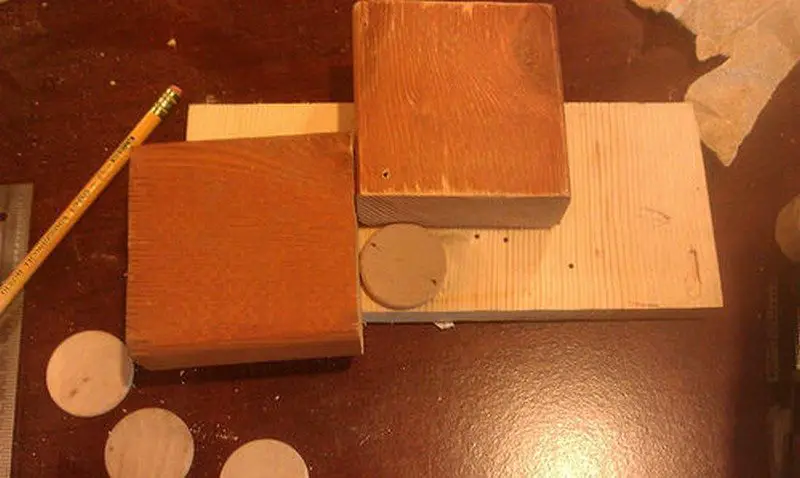
To secure the alignment, gently push the new wood pieces towards a corner, making sure they are snugly fitted. This will help maintain consistency and prevent any misalignment during the drilling process. With the wood pieces positioned securely, you can proceed to drill the required holes using the existing piece as a template.
By adopting this method, you can expedite the creation of the wood pieces for your calendar while ensuring they are evenly spaced and aligned. It’s a practical approach that saves time and effort, making the entire process more efficient and enjoyable.
Thread the Wooden Pieces
After drilling the necessary holes in the wood pieces, it’s time to thread them onto a thin line. This can be easily accomplished by using a needle to insert the line through each hole. The needle helps navigate the line smoothly, ensuring a hassle-free process.
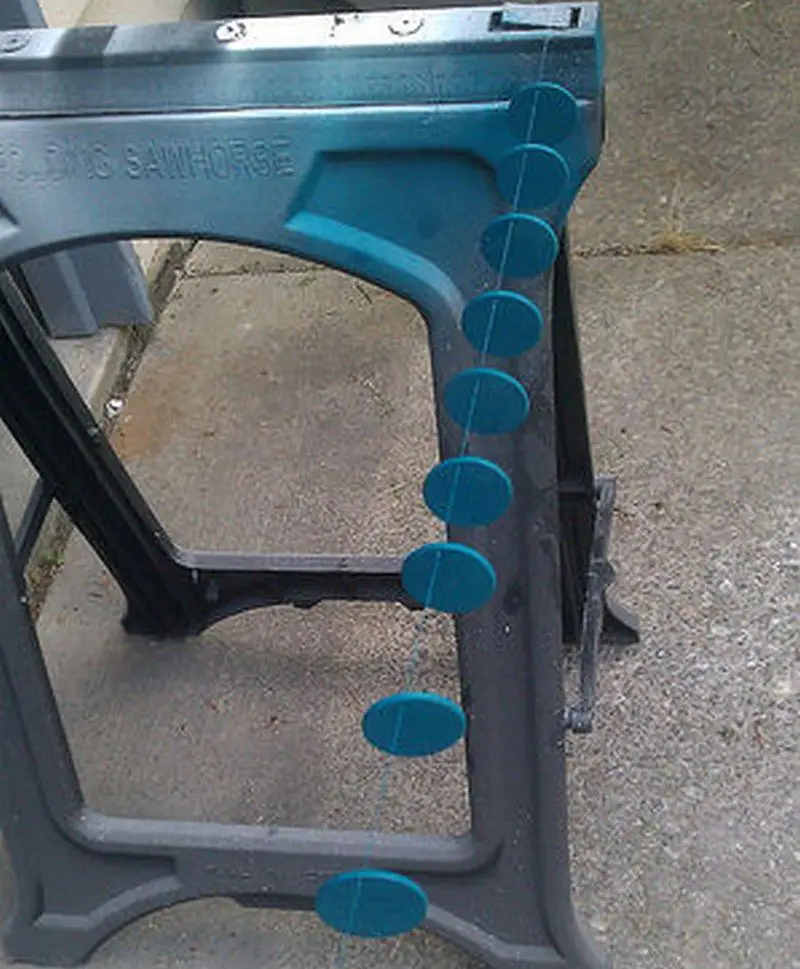
As you thread the wood pieces, make sure to tie the line securely at intervals to create tension and keep the pieces spread out evenly. This spacing allows for clear visibility and easy access to each individual tag.
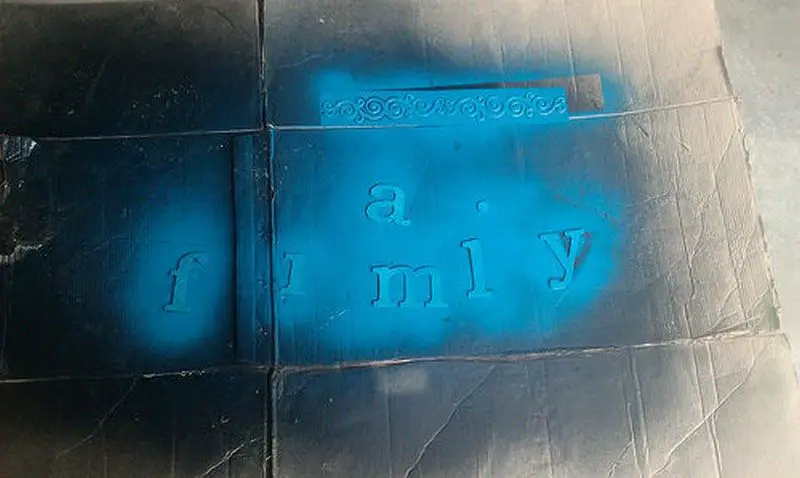
With the wood pieces in place, it’s time to apply the finishing touch – spray paint. Be meticulous during this step, ensuring that every piece is coated evenly and no spot is left unpainted.
This will give your hanging birthday calendar a vibrant and cohesive appearance. Allow the paint to dry completely before moving on to the next step.
Personalize the Wooden Pieces
Once the wood pieces have dried, you can start the final customization by writing down the names and dates on each tag. This personalization adds a heartfelt touch to the calendar, making it truly unique and tailored to your loved ones.
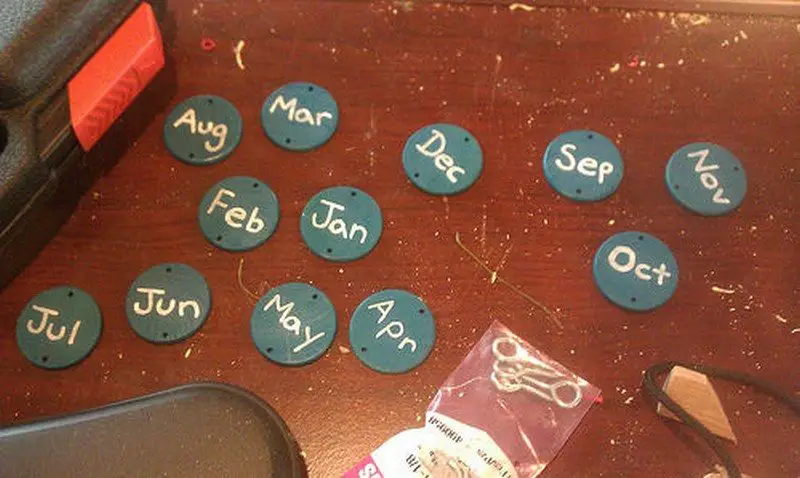
Take your time to carefully write the names and dates, ensuring clarity and legibility. By following these steps, you’ll have a beautifully crafted DIY birthday hanging calendar that is both functional and visually appealing.
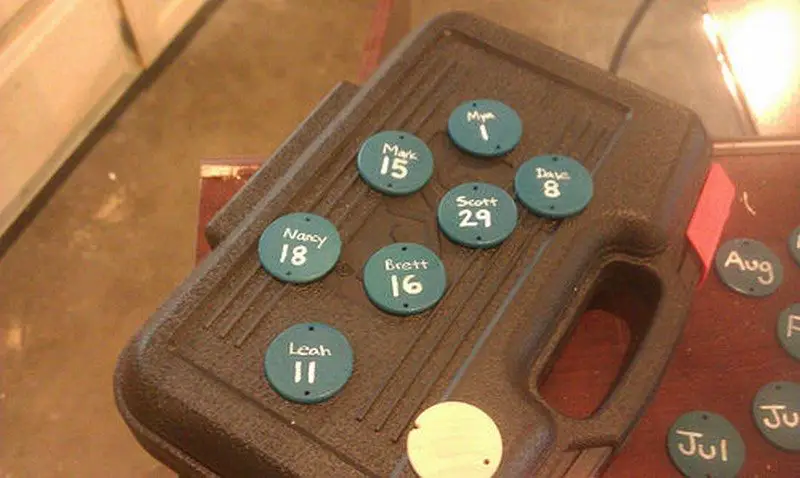
You can also use different colours per group (kids, parents, girls or boys), or per side of the family. Organize your wood pieces, know how many you need for each group and separate them for an efficient painting job.
Conclusion
The DIY hanging birthday calendar is a practical and creative solution for those who often find themselves scrambling to buy last-minute gifts for loved ones.
By following the simple steps outlined in this guide, you can create a personalized and customizable hanging birthday calendar that will keep you organized and ensure you never forget another birthday again.
With its easy-to-find materials and straightforward construction process, this calendar is a perfect project for DIY enthusiasts of all skill levels.
By incorporating different colours, shapes, and designs, you can make the calendar truly unique and reflective of the individuals it represents. Whether it’s family members, relatives, or close friends, this calendar will serve as a constant reminder of the special moments you share with your loved ones.
So, why wait? Say goodbye to last-minute gift shopping and missed notifications. Embrace your creativity, gather the materials, and embark on the journey of making your very own DIY hanging birthday calendar.
FAQs (Frequently Asked Questions)
Q1: Can I use alternative materials for this project?
Absolutely! While we’ve provided a list of materials commonly used for this DIY hanging birthday calendar, feel free to get creative and substitute materials based on your preferences and what’s available to you. The key is to ensure the materials are suitable for the purpose and can withstand regular use.
Q2: How long does it take to complete this project?
The time required to complete this project may vary depending on your skill level, the availability of tools, and the complexity of your design. Generally, it can take a few hours to a day to finish all the steps involved. However, you can break the process into smaller sessions and work at your own pace.
Q3: Can I make this calendar as a gift for someone?
Absolutely! The DIY hanging birthday calendar makes a thoughtful and personalized gift for your loved ones. You can customize it further by incorporating their favourite colours, adding special touches, or including personalized messages on the wooden pieces. It’s a unique and heartfelt present that shows you care.
Q4: How do I ensure the DIY hanging birthday calendar stays securely on the wall?
To ensure the DIY hanging birthday calendar stays securely on the wall, make sure to use appropriate hanging hardware that can support the weight of the board and wooden pieces. Picture hangers or similar devices are recommended. Additionally, ensure the hooks and eyelets are properly installed and tightened to prevent any accidental falls.
Q5: Can I add more than one wooden piece for each person’s birthday?
Absolutely! If you have multiple family members or friends with the same birthday, you can add multiple wooden pieces to represent each person. Simply adjust the number of wooden pieces and spacing accordingly. This hanging birthday calendar is highly customizable, allowing you to adapt it to your specific needs.
Thanks to bwrussell for the original idea. If you like this, you may also want to check out these must-try DIY Pallet Projects.


