
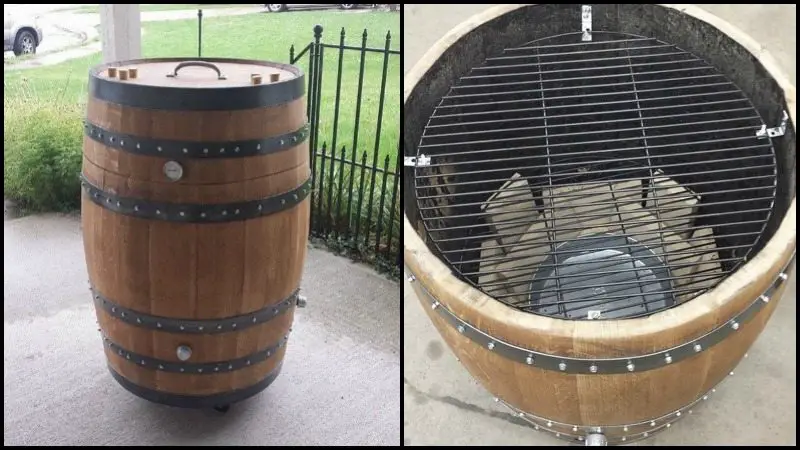
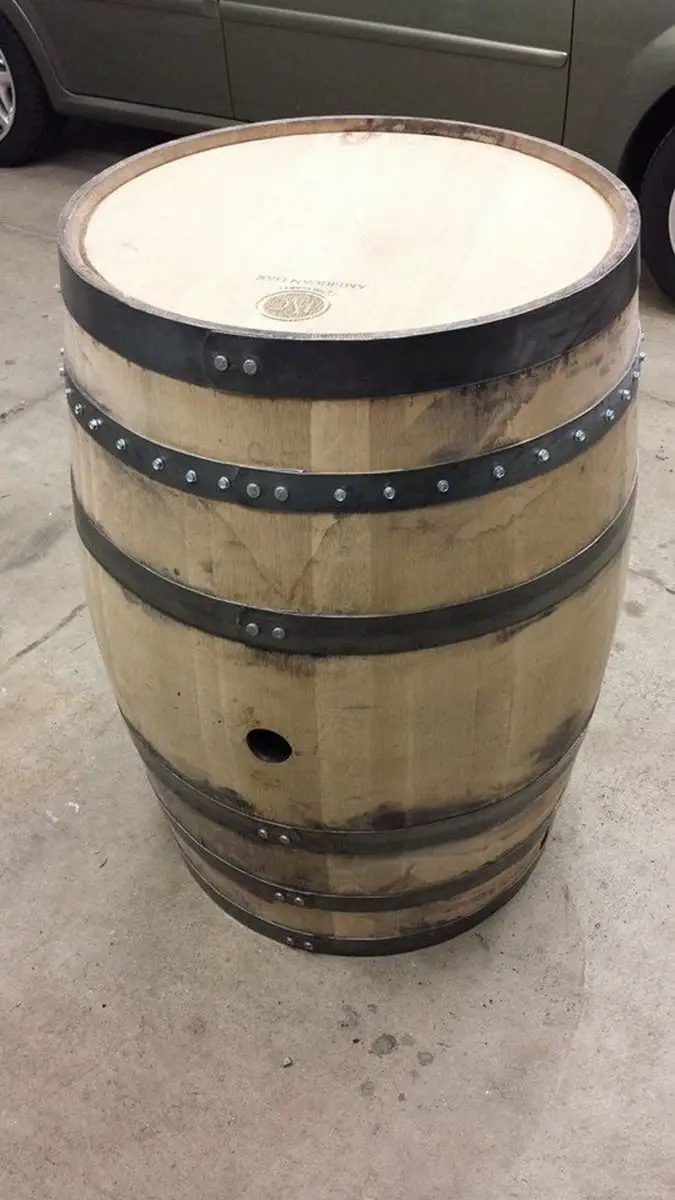
Here’s another material you can use for making a barbecue smoker — a whisky / wine barrel. Prettier than a drum barrel, eh?

This DIY whiskey barrel BBQ smoker is different as it doesn’t have a hinged door for adding/removing charcoal while cooking. Heat regulation is done simply by capping and un-capping its air intakes. Though its design is not the usual, it definitely functions well without any issues.
Do you have any access to a good empty whisky barrel? Then this should be your next project!
Don’t get too excited for this weekend’s barbecue though — this whiskey barrel BBQ smoker project also requires some time and patience. But we’re sure it’s worth it. ;)
Click on any image to start lightbox display. Use your Esc key to close the lightbox. 8-)


Contents
Building a Whiskey Barrel BBQ Smoker
Materials
- Empty Whiskey or Wine Barrel
- Generic Pull Handle
- 1 large Cork and 6-ish small Corks
- 2 grilling grates – size will depend on the interior size of your barrel
- Self Tapping Screws
- Wood Stain and Sealant (optional)
- Temperature Gauge w/ 4in long stem
- 3 – 3/4″ x close NPT threaded nipple fittings
- 3 – 3/4″ NPT End Caps
- 4 – 90 degree Brackets
- Fire Bricks
- Water Pan
- Dolly/ Cart or Wheels (optional)
Tools
- Electric Sander
- Electric Drill
- Jigsaw
Instructions
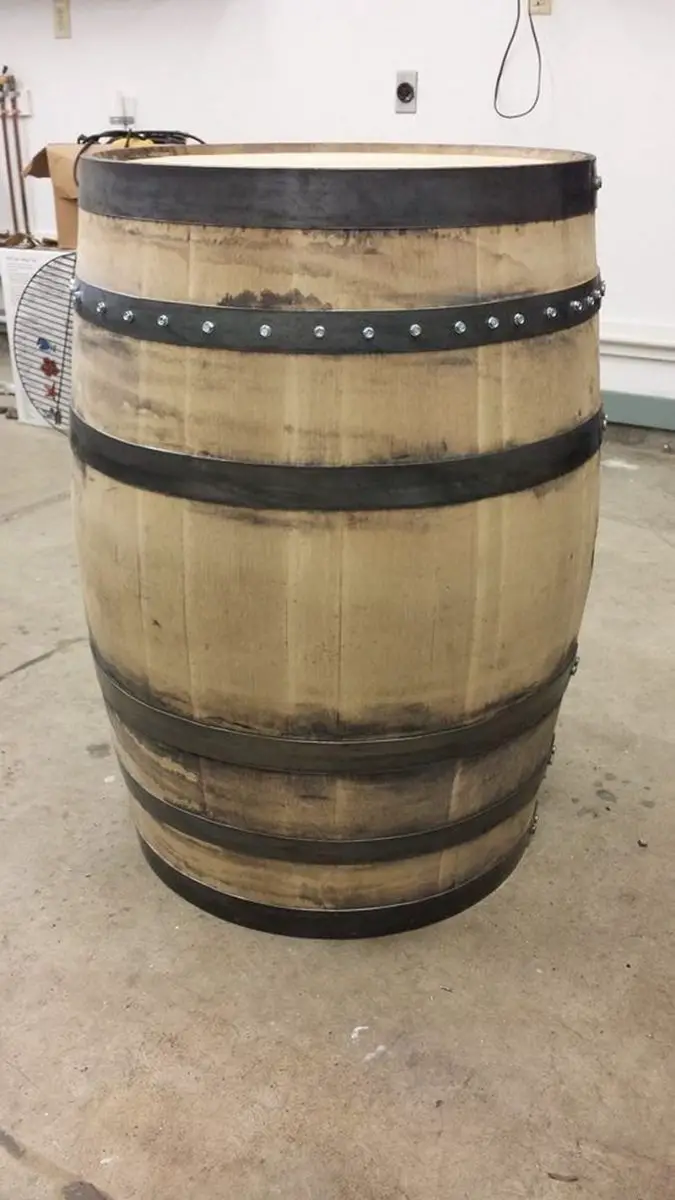
Depending on how dirty the barrel is, you will want to use either an electric sander if you have one or hand sand it and clean off the outside of the barrel.
In order to prevent the individual pieces of wood (staves) from moving when I use my whiskey barrel BBQ smoker, we screwed each stave to the metal bands. This was by far the most grueling part of this project. Using an electric drill (would be easier with an electric impact drill) and self tapping screws, we made sure each stave had at least one screw securing it to the metal band. Since the staves vary in size, some were wide enough that they needed 2 screws.
Your screw might try to walk a bit or have issues first grabbing onto the metal of your whiskey barrel BBQ smoker. We ended up needing to use a hammer and center punch to make a pilot for each hole so the screws wouldn’t walk.
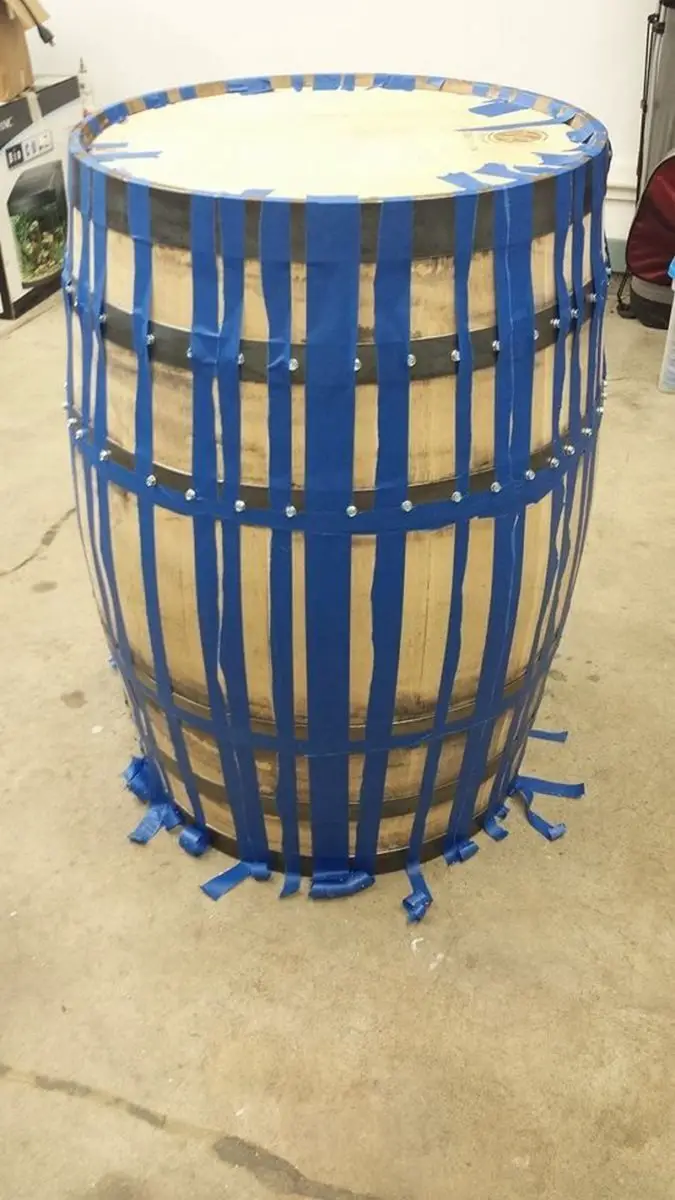
Once you have the first band of screws of our whiskey barrel BBQ smoker completed, the same needs to be done for the next three bands. If you want all of your screws to line up then you can either draw pencil lines from the first band, or (as we did) use lines of tape to line the screws up along all 4 bands. If you are not quite as OCD, then you can just wing it and put the screws wherever you want on the other 3 bands. Like I said before, this is definitely the most time consuming part of the project and took us a couple of days to complete.
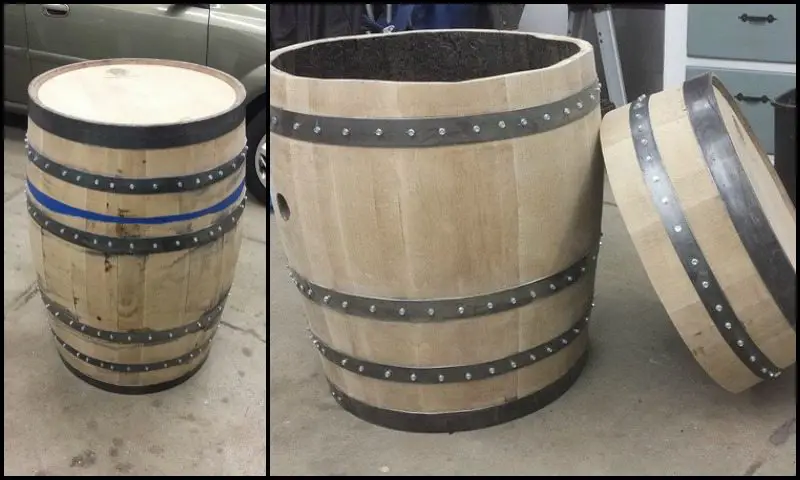
Once all the screws are finally done, it is time to make the lid of my whiskey barrel BBQ smoker. Either draw a line or use tape to mark where you want to cut for the lid. We used tape to create our line and then used a jigsaw to follow along the edge of the tape to cut the top of the barrel off and thus create our lid.
Chances are you won’t have the straightest cut (we definitely didn’t) but as long as the lid still fits pretty snugly on the top of the barrel it should work fine. Afterwards we sanded down the top edge of the barrel and bottom edge of the lid so they didn’t have any rough edges.
Next we completely sanded down the outside of the whiskey barrel BBQ smoker until it had a nice, smooth, even exterior. At this point, if you like the natural look you can leave it and move on to the next step. We wanted our barrel a little darker so we stained it and put a sealant on it since it was going to be kept outside every once in awhile.
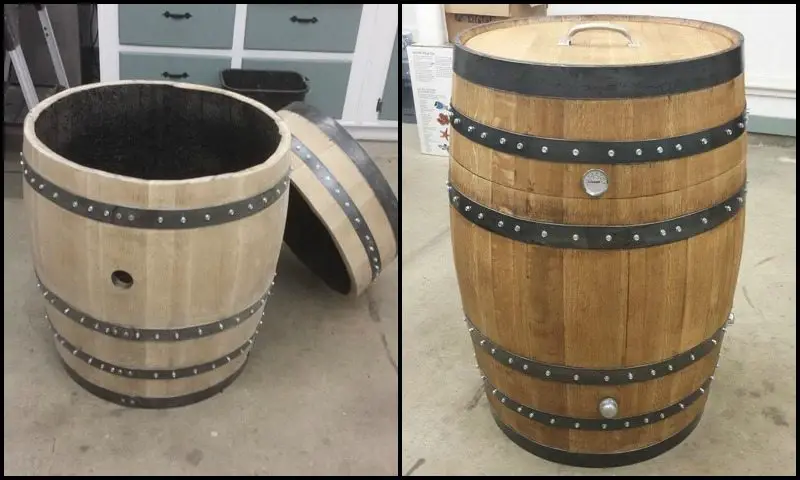
We just used wood deck sealant. At this point, if your barrel has a cork hole in the side like ours did you will want to find out what size large cork you will need in order to fill the hole. You can also make a cork by cutting a circle out of a spare 2×4 you have lying around. Just make sure it fits tightly. We put silicone around the cork on the inside of the barrel to make sure it is air tight.
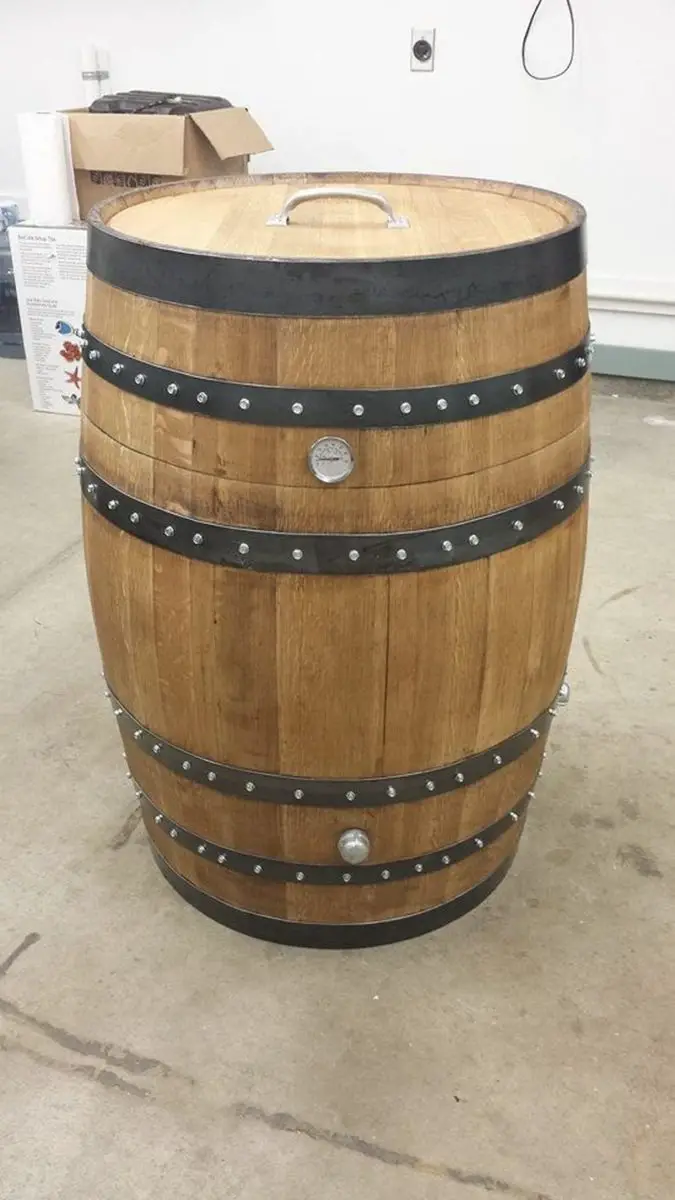
Now that the look of the barrel is complete, it is time to add the fittings that will transform this into a working smoker. At the bottom of the barrel (between the 3rd and 4th metal bands) we drilled three 3/4″ holes equally spaced around the barrel. We chose to only have 3 but you can have more if you want. We screwed the threaded nipple fittings into each of these holes as air intakes. Make sure to leave some of the threads sticking out so you can put end caps on them. During smoking, the caps can be removed to adjust air flow and heat.
At this time, we also drilled a small hole towards the bottom of our lid for our temperature gauge. Make sure to have a gauge with a long stem so that it can give you a good internal temperature reading. The size of the hole will depend on what gauge you get, but make sure it screws in snugly.
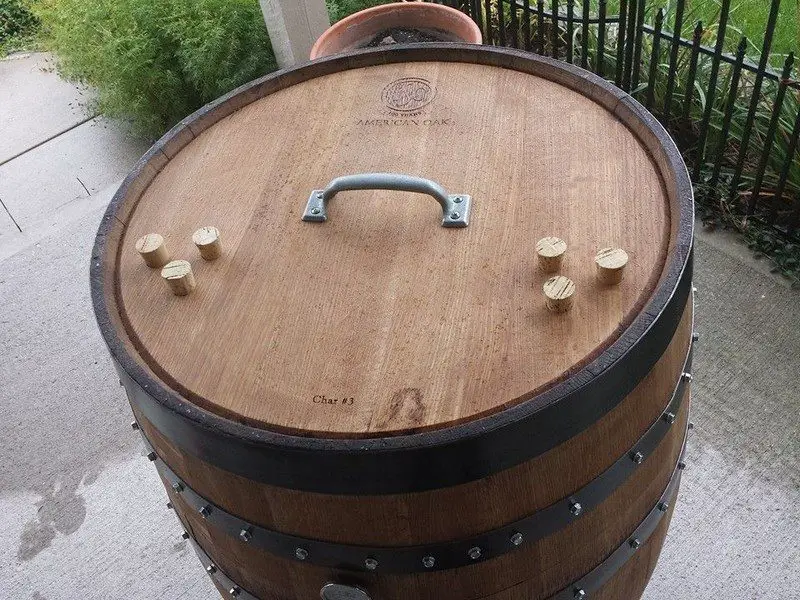
On the center of the lid we attached a generic handle so that it is easier to take the lid on and off while smoking.
We also drilled 6 small holes that we could fit corks into. The size of the holes will depend on the size of your corks. We added these holes as a way to adjust the temperature. If you need the temp hotter then close all the holes up with corks. If the temp gets too hot and you need to cool it down, take corks out and leave the holes open. We chose to do just 6 holes, but you can have as many as you deem necessary.
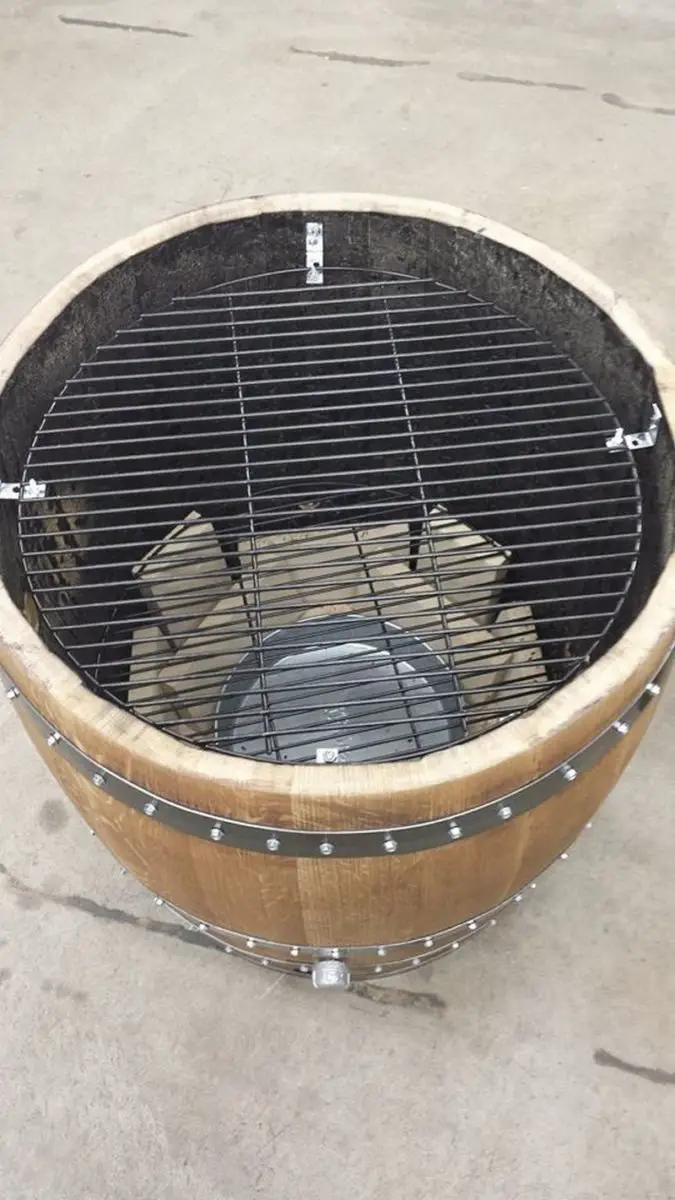
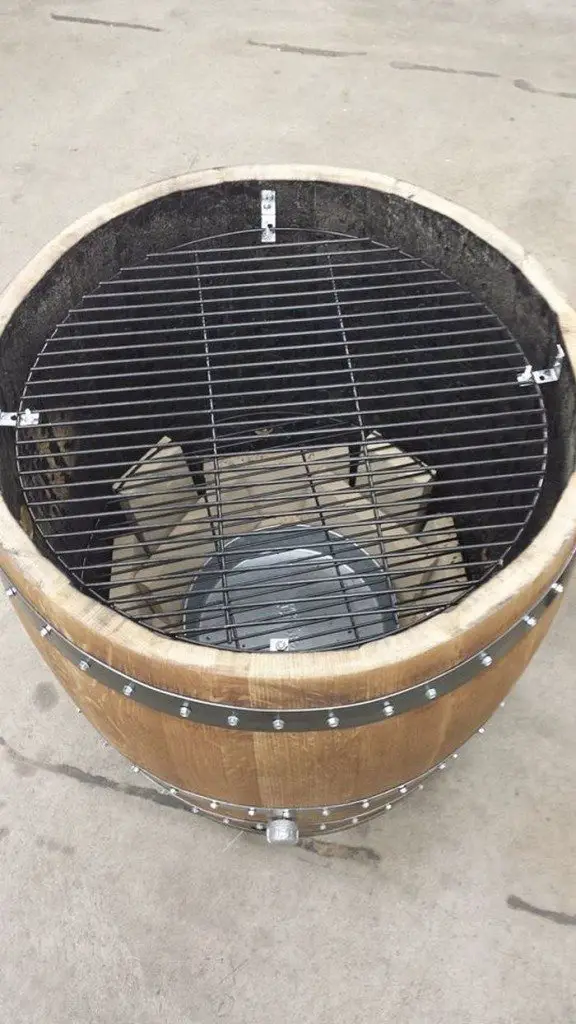
Next was getting the interior of the barrel all set up to be a smoker. First we laid fire bricks in the bottom. We made flat layer covering the whole bottom of the barrel, but we also had some standing vertically in order to hold the lower grate. When laying the bricks make sure none of them cover any of your air intakes.
The water pan can lay directly on top fire bricks. This will also work as a drip pan to make for easier cleaning.
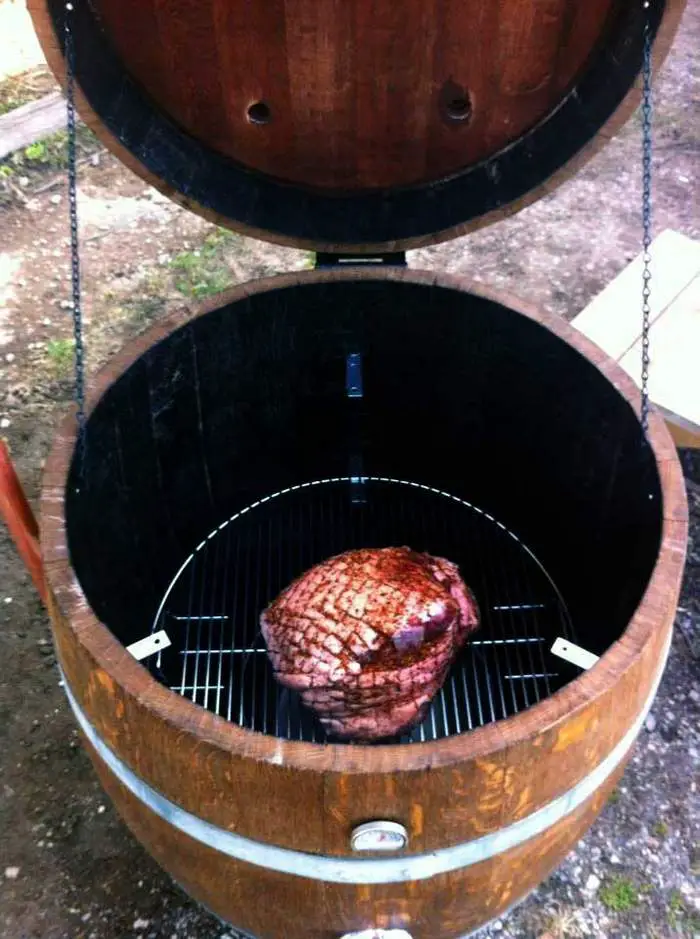
The lower grate sits on top of the vertical fire bricks. This is where we put our charcoal. Our smoking chips are either put in a box or wrapped in foil and placed directly on top of the charcoal.
For the top grate we screwed in four 90 degree brackets along the inside of the barrel. We made it so the grate sits just inside the mouth of the barrel. It might take a few attempts to get the grate balanced. This is grate the meat will be placed on for smoking.
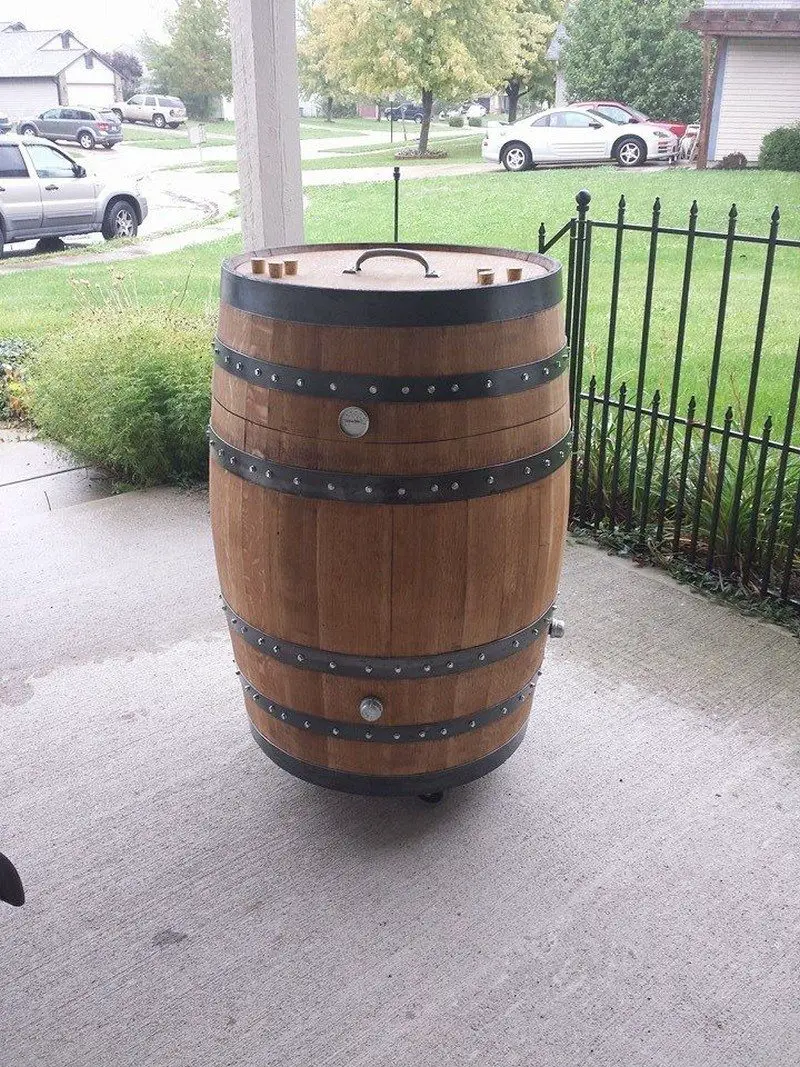
After you get the inside all set up, you are ready to start using the smoker. If you are not planning on leaving the whiskey barrel BBQ smoker in one spot then we recommend either getting a dolly to put it on or attaching wheels to the bottom. We have ours on a dolly so can move it into the garage when we aren’t using it. Also if you plan on leaving it outside, it might be a good idea to put some type of rust preventer on all the metal bands.
It takes a little bit of practice to figure out the best way to regulate temperature, but it still works as a good BBQ smoker.
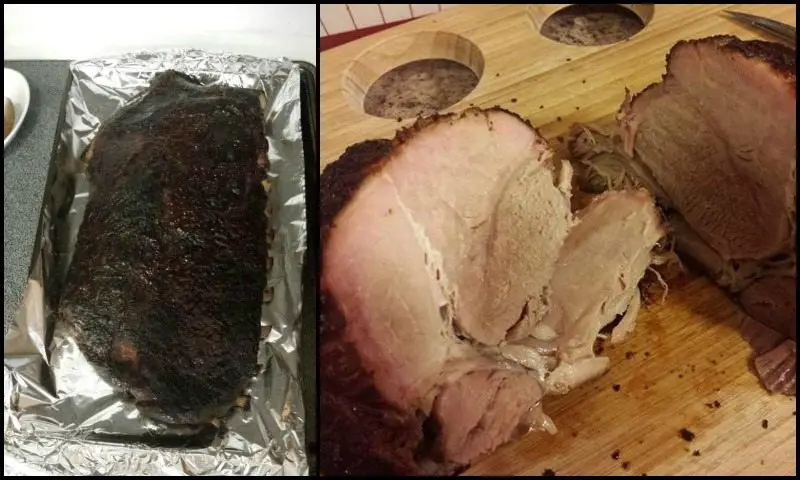
The Results:
Thanks to
Maintenance and Upkeep of Your Whiskey Barrel BBQ Smoker
Maintaining your whiskey barrel BBQ smoker is crucial for ensuring it continues to operate efficiently and safely for years to come. Regular upkeep not only helps in preserving the unique flavors that your smoker imparts to your food, but it also prevents common issues like wood degradation and rust. Here’s a detailed guide on how to keep your whiskey barrel BBQ smoker in top condition.
Regular Cleaning
After each use of your whiskey barrel BBQ smoker, it’s important to perform a basic cleaning. This includes removing ash and food residue from the grates and the interior of the barrel. Use a grill brush to clean the grates and a shop vacuum or a brush for ash removal. Ensure the smoker is completely cool before you start cleaning. Regular cleaning prevents build-up that can affect the taste of your smoked foods and the smoker’s overall performance.
Checking for Leaks
The wooden staves of your whiskey barrel BBQ smoker can shrink and expand with changes in moisture and temperature, which might lead to smoke leaks. Periodically check for gaps between the staves, especially before a big cooking session. If you notice any smoke escaping from unintended areas, you may need to seal these gaps. Applying a safe, heat-resistant sealant can help maintain the integrity of the smoker.
Wood Care and Moisture Control
To prevent the wood of your whiskey barrel BBQ smoker from drying out and shrinking, it’s crucial to maintain its moisture levels. Every six months or so, depending on your climate and smoker usage, fill the barrel with water to allow the wood to swell and seal any minor leaks. Ensure the water covers as much surface as possible, and let it sit for a few days. This process helps to keep the wood staves tight and the barrel sealed.
Protecting Metal Components
The metal bands and hardware of your whiskey barrel BBQ smoker are susceptible to rust, especially if left outdoors. To protect these components, apply a rust inhibitor or a coat of high-temperature paint that’s suitable for metal surfaces exposed to heat. Regularly inspect these parts for any signs of corrosion or wear, and address them promptly to prevent further damage.
Seasonal Storage
If you’re not planning to use your whiskey barrel BBQ smoker during the off-season, proper storage is key to its longevity. Clean the smoker thoroughly and ensure it’s completely dry. Cover the smoker with a waterproof cover or store it in a dry, sheltered area to protect it from the elements. If possible, elevate the smoker off the ground to prevent moisture from seeping in and to deter pests.
Long-Term Maintenance
Every year, give your whiskey barrel BBQ smoker a thorough inspection. Check all fittings and fixtures for tightness and integrity. Replace any worn-out or damaged parts like seals, handles, or grates. This annual check-up helps you catch potential problems early and keeps your smoker ready for another season of delicious barbecuing.
By following these maintenance tips, your whiskey barrel BBQ smoker will continue to be a centerpiece of your outdoor cooking adventures, providing delicious, smoky flavors to your meals for years to come.
Conclusion
Building a whiskey barrel BBQ smoker offers a unique and rewarding DIY experience that enhances your outdoor cooking with distinct flavors. With the right tools and a bit of creativity, you can transform an old whiskey barrel into a functional and stylish smoker. Regular maintenance ensures your smoker remains in great condition, ready for many barbecue seasons to come.
If you do not have a whiskey barrel, you still make a great smoker. Check out our fridge smoker project!


