The temperatures we have outdoors nowadays are getting worse compared to the conditions 10 or 20 years ago. Back then, spending time outside was enjoyable because of the fresher, cooler air – even during summer. But today, it’s either too hot or too cold to stay long out there. Most of the time it’s the unbearable sun.
This is mainly the reason why most of the kids today spend less time getting active outdoors. The environment is too uncomfortable for the kids to play around.
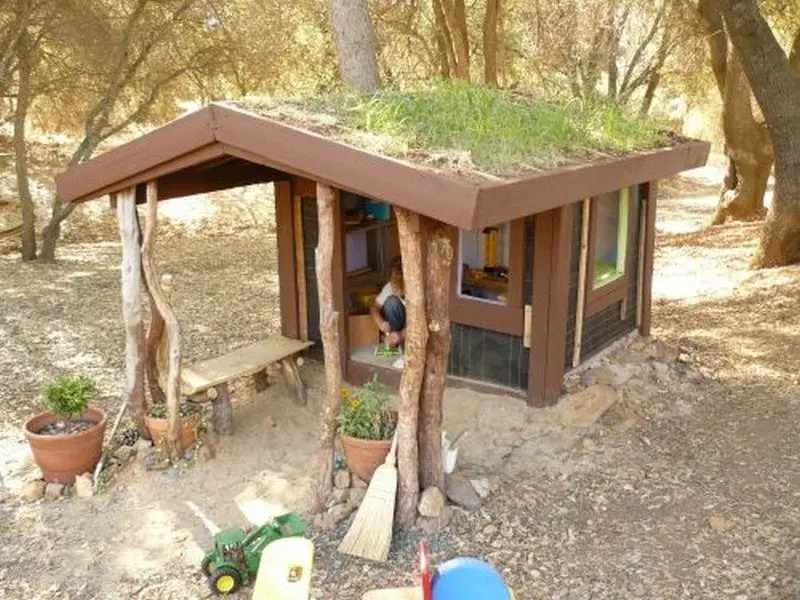
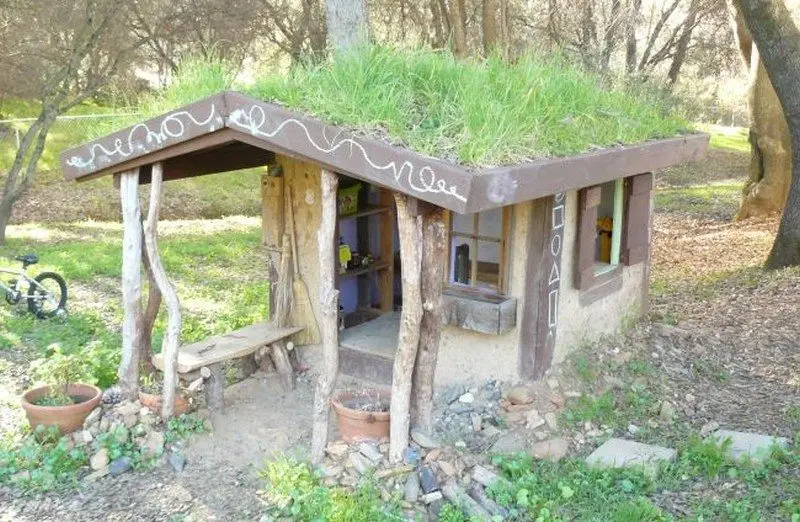
However, the cob playhouse project can encourage the kids to play outdoors. It has a roof planter that provides cool temperatures for the little ones while they play during the day.
By providing them with this inexpensive playhouse, they could enjoy outdoor activities as long as they want to. If it gets too hot, they can simply go inside their own little house and continue playing there.
Does this playhouse sound good for the kids? Learn how to build your own now!
Contents
How to Build a DIY Cob Playhouse
Step into a world of imagination and creativity as you embark on a whimsical journey – it’s time to learn how to craft your very own DIY cob playhouse. This enchanting project isn’t just about building a structure; it’s about cultivating cherished memories, fostering creativity, and providing a magical space where young hearts can flourish.
Materials
- Wheelbarrow
- Clay, Sand and Straw
- Cat-tail and Horse Manure
- Reclaimed/Scrap Wood
- Oak Branches
- Roofing Tar
- Gravel
- Old Cotton Rug
- Soil
- Paint
- Wood Stain
- Tar Paper
- Wire Fencing
- Rocks
- Screws
Tools
- Shovel
- Sledge Hammer
- Saw
- Sander
- Caulking Gun
- Paintbrush
- Drill
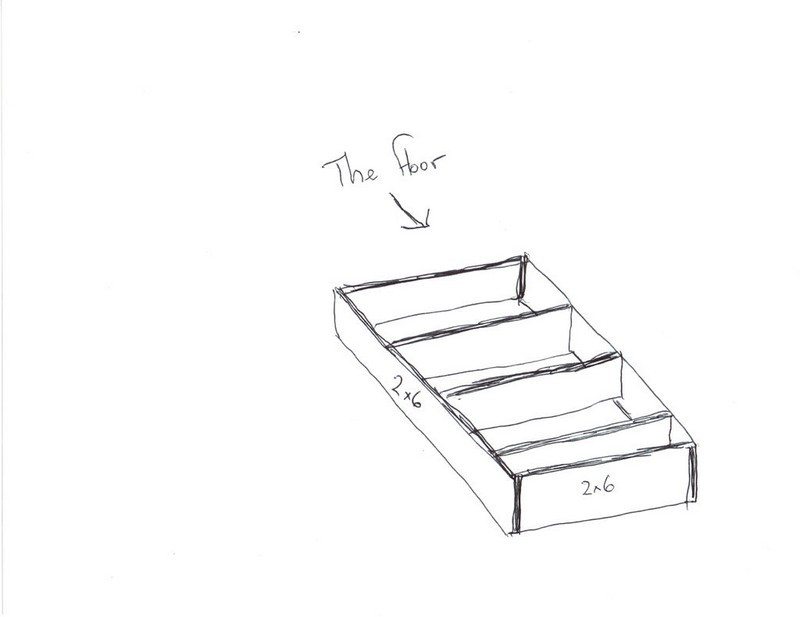
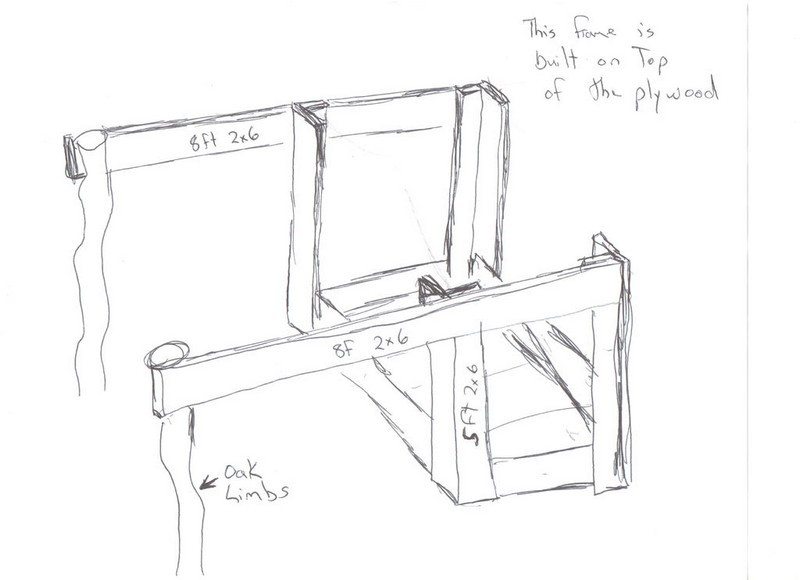
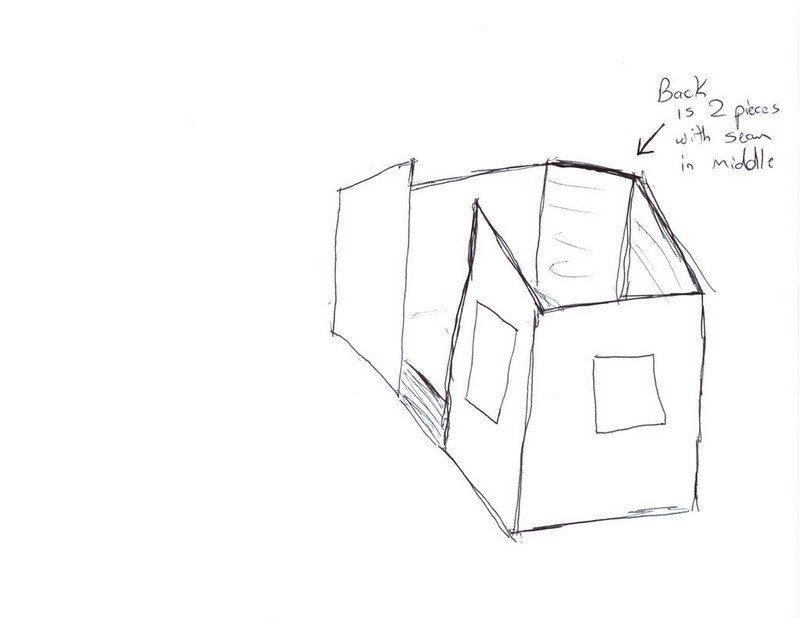
Rather than focus on building the actual structure, this tutorial will mainly cover the cobbing part of the project. Nevertheless, here are some rough drawings for the frame.

Steps
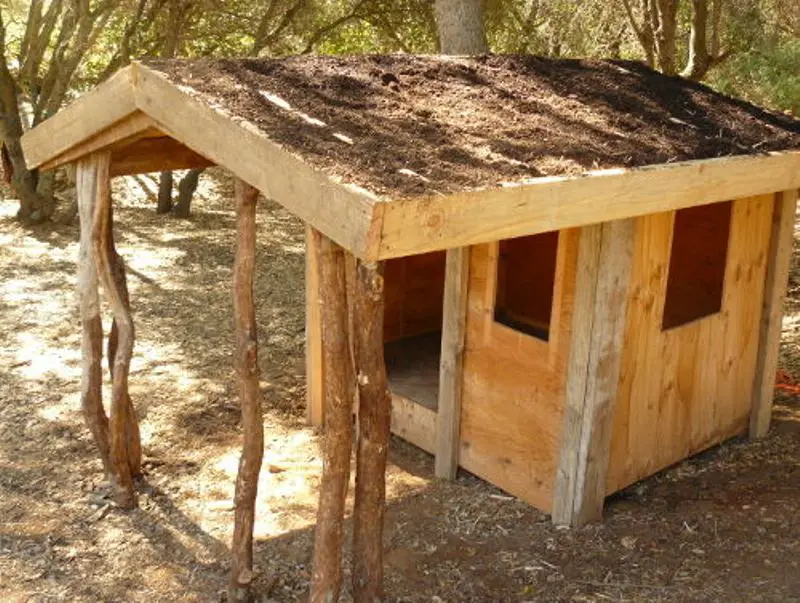
Using some leftover wood from a previous construction project, I was able to put together a sturdy frame to hold the living roof (which is very heavy). I also used some oak limbs for columns in the front. Those limbs might look thin, but the oak wood here is like iron, and will probably outlast the rest of the structure.
The living roof is around 5 inches deep, with a layer of roofing tar at the bottom (dried properly), a thin layer of gravel on top of that, a layer of old cotton rug found at the local thrift store on top of that, and finally the soil, I have 2×4’s spaced out to help hold the soil in place (you can just make them out in the photo).
Also, plenty of drainage along the edges for excess water to run out of. Note that there is plenty of roof hanging away from the house all the way around.
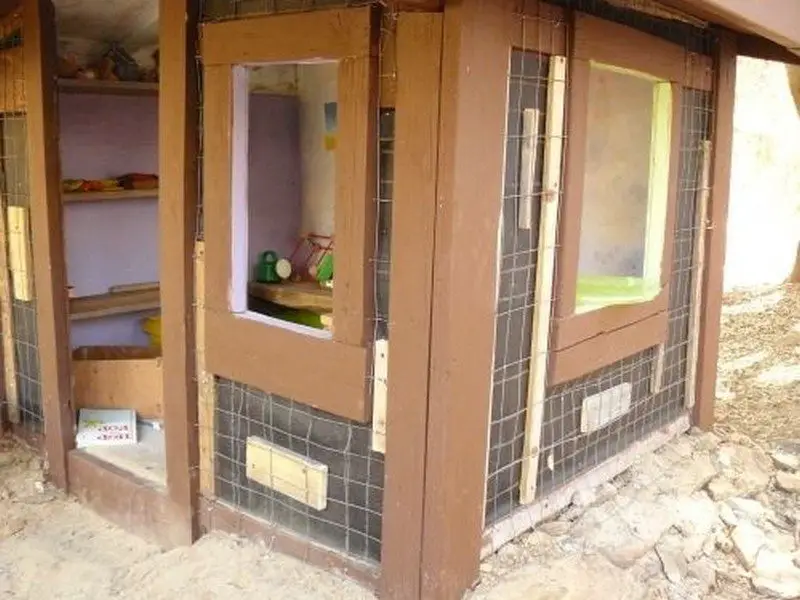
To keep the wood dry, we caulked and painted the inside, and then stained the outside with a dark-brown stain. Tar paper was used as a moisture barrier between the plywood and cob to prevent rotting. You can see the black tar paper against the plywood. I then added some scraps of wood strips around 1/2 inch thick, and put a layer of wirefencing on top of that.
The result: sturdy wire fencing held 1/2 inch away from the surface. This will be what holds the cob in place.
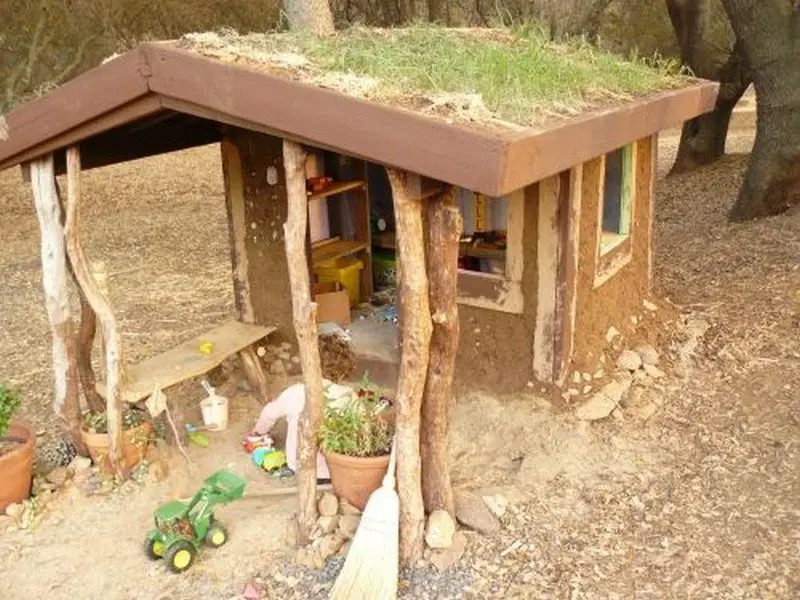
You can also see that I have brought in rocks and earth around the base of the playhouse. This gives it more thermal mass, which is how this structure stays cool during the hot summer. Thermal mass will absorb the heat and release it at night. I also added sand in front of the house for comfortable bare feet playing.
Now comes the fun part: mixing and mudding. The dirt where we live is naturally clay, so the only thing we had to bring in was sand. Luckily, when our neighbours moved out the month before, they left a large sandbox full for us to use.
As there are plenty of websites that cover mixing cob, I will forego that here. I will just go so far as to say that most of the websites I read about cob were people building serious houses, so they were very rigid in their requirements of fine-sifting the dirt and carefully measuring the mixing amount.
Since I was building a mere playhouse, I was not so hard on myself. I simply dug up the natural clay, mixed in sand and straw, and plopped it onto the house.
It was A LOT OF WORK! Even this tiny playhouse required quite a few wheelbarrows full of clay that I had to dig up. We have a seasonal creek bed that I can dig as much as I like. It had plenty of tiny gravel bits, clay and sand already, so I just mixed it with the sandbox sand until it felt right.
You have to use your feet to get the mix really blended well. Don’t even waste your time trying to do it with the shovel.
Mix the mud, straw and sand until it is like peanut butter. Plop it on the wall starting from the bottom…continue until it is completely coated. Let it dry for a week or more.
Once the thick layer of mud has sufficiently dried, there will be cracks all over. Not to worry. That is natural. The final layer will take care of that.
By making a mix of some slightly sifted clay, sand and cat-tail fluff, you can add a final layer that will seal those cracks and provide a lovely light-brown finish. It does not take many heads of cat-tail, as each head will put out a huge amount of fluff.
You can also use horse-manure, which also has a fine fibre in it that will work. I used a mixture of both the cat-tail and horse manure since some nearby neighbours have horses and it was easy to get to. Once it is mixed up and dries it DOES NOT smell like horses or poo. Just a clean sort of earthy smell.
Apply your final layer..about 1/2 to 1 inch thick. Let dry..apply another if you need to.
———–
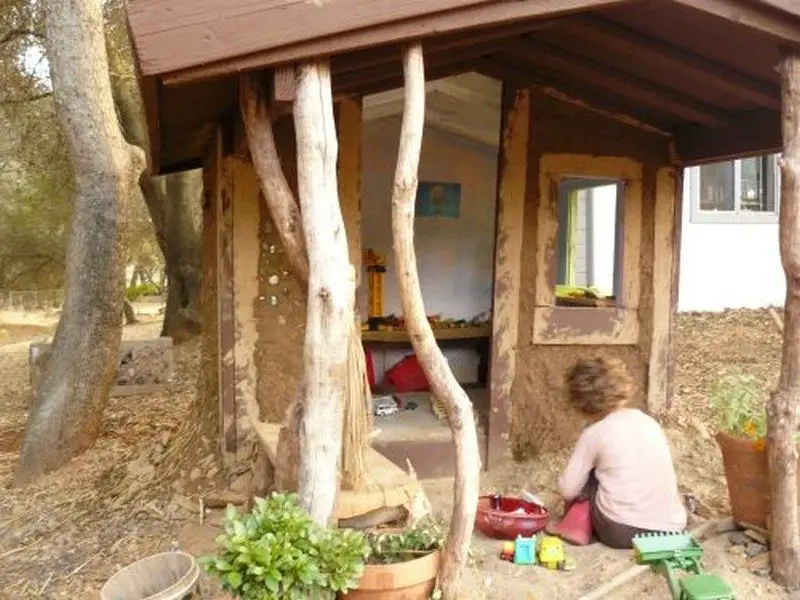
This structure has held up fine for one year. It lasted through winter rains, and 2012 hottest summer on record. Inside the house is cool and dry. The little porch has play sand (mixed with rounded-smooth river stones to discourage cats but still be comfortable on little bare feet).
Cob structures are also fire-resistant. One other thing we have noticed is that no wasps have made nests here, which is unusual for our area. Generally, we have wasps nests on every structure available. For some reason, the wasps have shunned this playhouse.
Thanks to Ghetto Cottage for providing valuable insights and tips for this magnificent DIY cob playhouse project!
A Playhouse Like No Other
Discover the extraordinary world of cob playhouse construction! You have unearthed the secrets to creating an enchanting haven for your children where imagination knows no bounds. From mixing the perfect cob blend to sculpting whimsical walls, this guide will lead you on a journey of creativity and craftsmanship.
So, get ready to embark on an adventure filled with mud, magic, and memories, as you transform raw earth into a cherished playhouse paradise that will captivate young hearts and inspire unforgettable moments.


