Do you need more storage in your bedroom, but lack the floor space for cabinets? The space under the bed is great for extra storage, but the dust bunnies can get annoying. This system will give you heaps of organised storage without the dust.

It’s completely DIY and unlike store-bought beds with storage, this one won’t cost you a fortune. Building it yourself is a better option especially if you have limited bedroom space. You can customize the measurements of the bed to easily fit it in your bedroom.
You also have the option of how many drawers and how wide or deep they will be. You have free choice of materials depending on what style or cost you’re after. Learn how this DIY platform bed with drawers is made, and maximize the space in your bedroom!
Materials:
- Wood Shims
- ¾” Plywood
- 3/8″ Plywood
- ½” Plywood
- ¼” Luan Plywood
- 1/4″ Oak plywood
- 3/4″ Maple Veneered Plywood
- 2×4 Lumber
- Wood Glue
- Screws
- 1 1/4″ Finish Nails
- Extension Drawer Slides
- Birch Veneer Edging
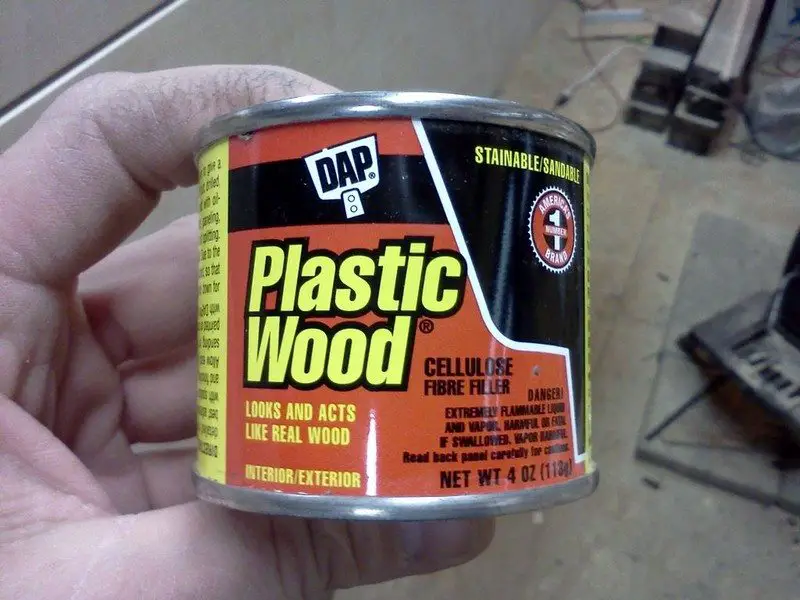
- Plastic Wood Filler
- Ebony Wood Stain
- Water Based Polyurethane
- Black Paint
- 220 and 300 Grit Sandpaper
[adinserter block=”11″]
Tools:
- Table Saw
- Hammer
- Chisel
- Drill
- Mitre Saw
- Circular Saw
- Sander
- Pneumatic Nailer
- Foam Brush
- Iron
- Clamps
- Carpenters Square
[embedit snippet=”adsense-728×15-inline-text-only-ad”]
Steps:
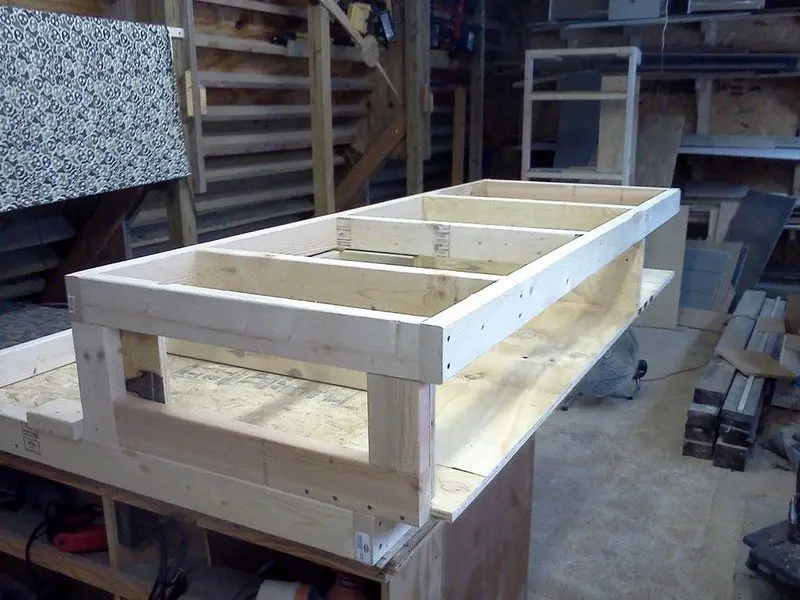
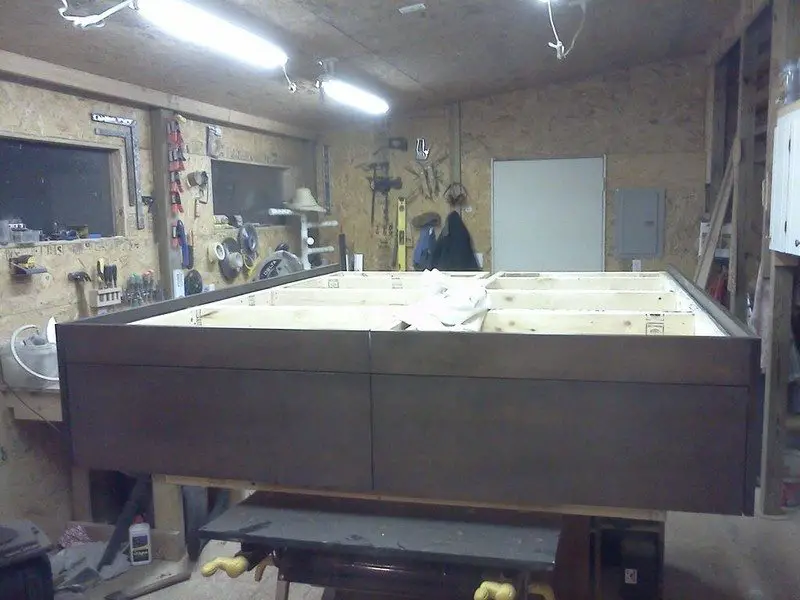
Bed construction begins with building of the base. I wanted the main body of the bed to be sitting on a smaller base to allow the side and end edges to overhang. I built this bed for a Queen size mattress which has dimensions of 60″ wide by 80″ in length. I choose to have a 5″ overhang on the sides and end of bed. To achieve this, I built the frame 75″ long by 50″ wide. I used 2″ x 4″ ‘s laid on edge which resulted in a base that is 3-1/2″ tall.
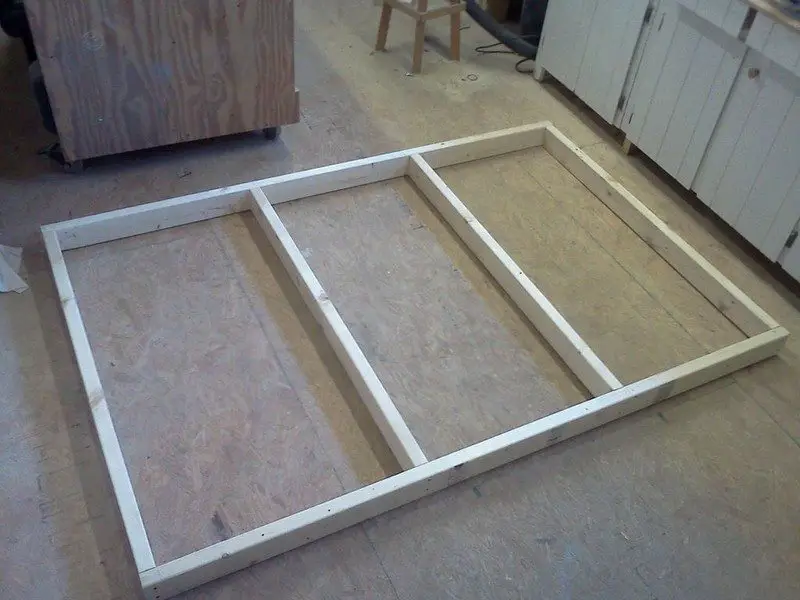
I leveled and squared the frame on the table using wood shims where needed. Then I clamped it down to my work surface to keep it in place during construction.
I built the Bed frame in two halves. This allows the bed to be disassembled for easier transporting. I constructed them out of 2 x 4 lumber and 3/4″ plywood, thus making the finished bed very solid and quite heavy. I choose to have two large drawers at the foot of the bed and two smaller drawers on each side of the bed.
I started by laying out and cutting the top rails of the frame out of 2 x 4’s.
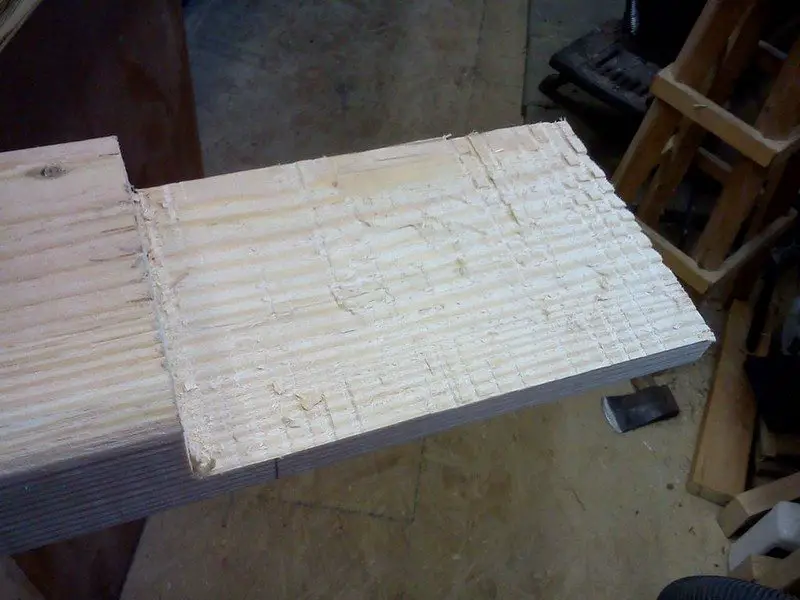
The piece towards the inside of the bed is cut shorter and has a half-lap joint cut out of its end.
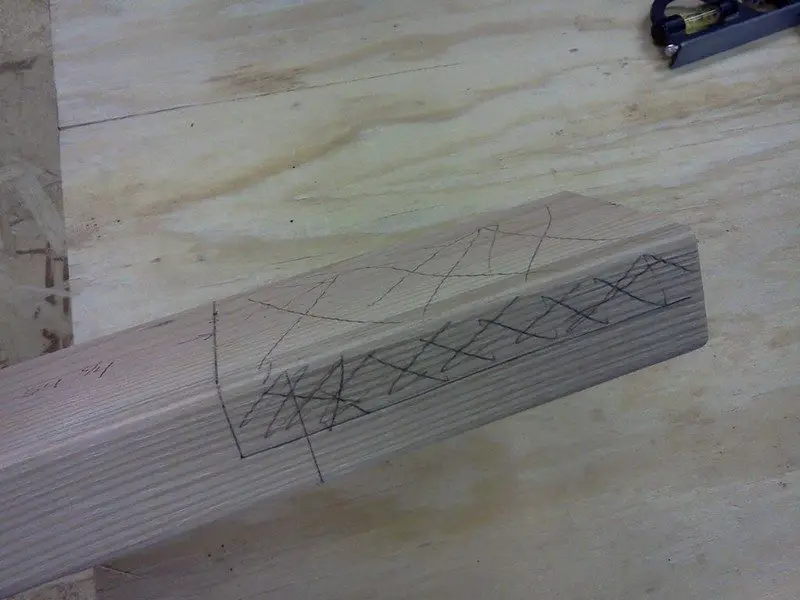
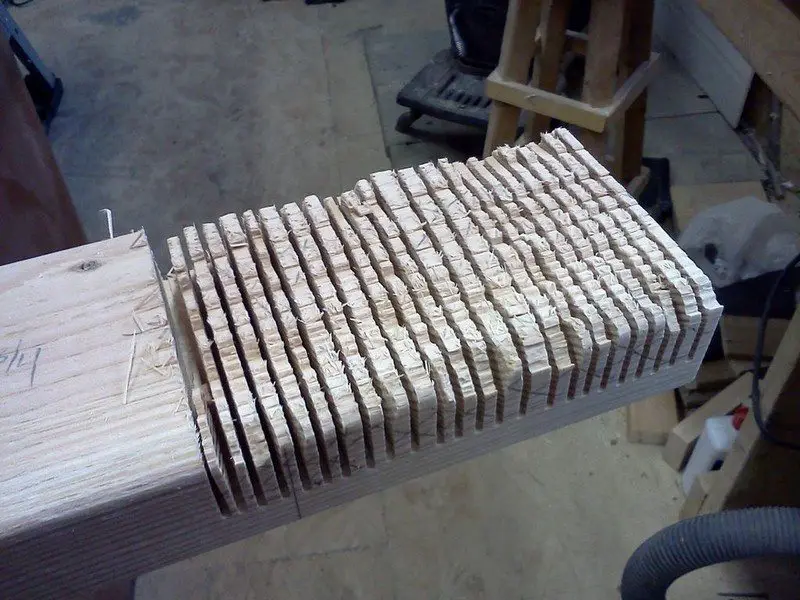
The half-lap is to accept a plywood panel that will continue the remaining length of the bed.
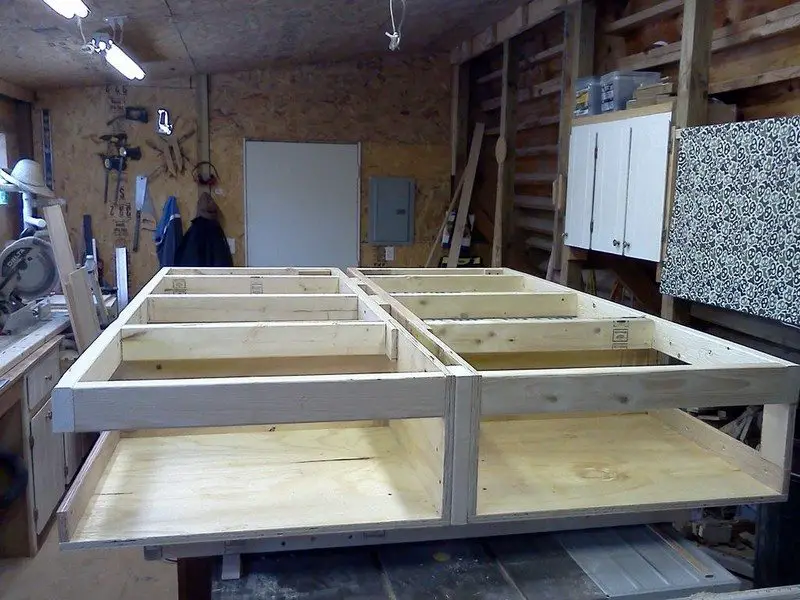
Next I cut the plywood panels to size. I used my table saw to rip the plywood to size.
I cut one floor piece 30″ ( half the total bed width) by 25″, which is the depth of the end drawers. I cut three vertical pieces 14″ high by 28 1/2″ for side drawer dividers and one piece 14′ by 25″ for the center end wall piece.
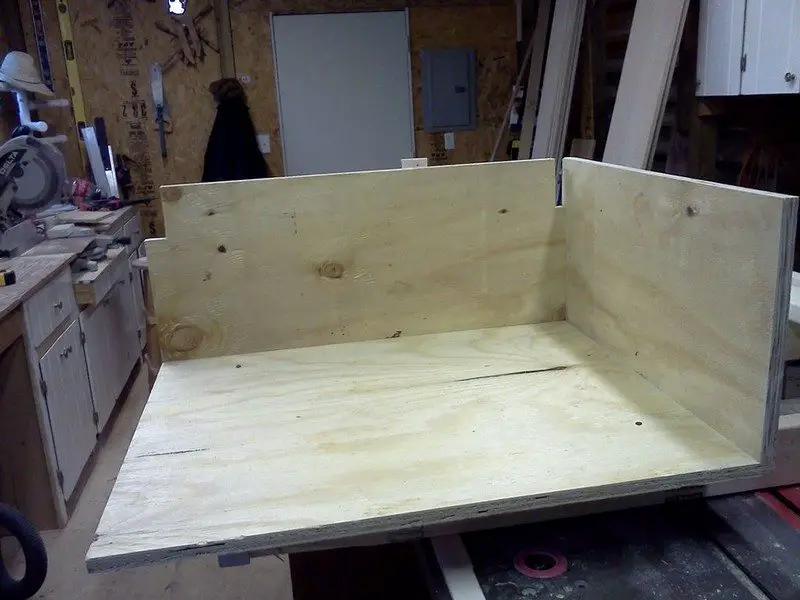
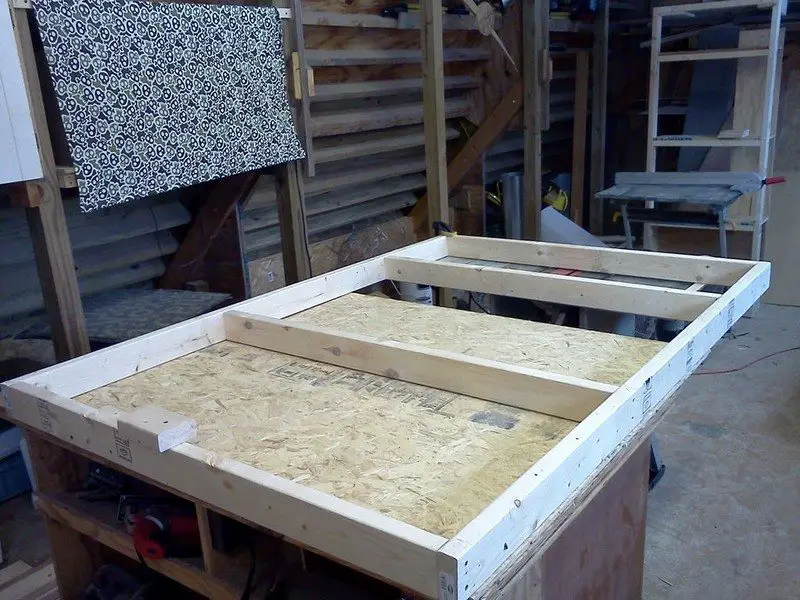
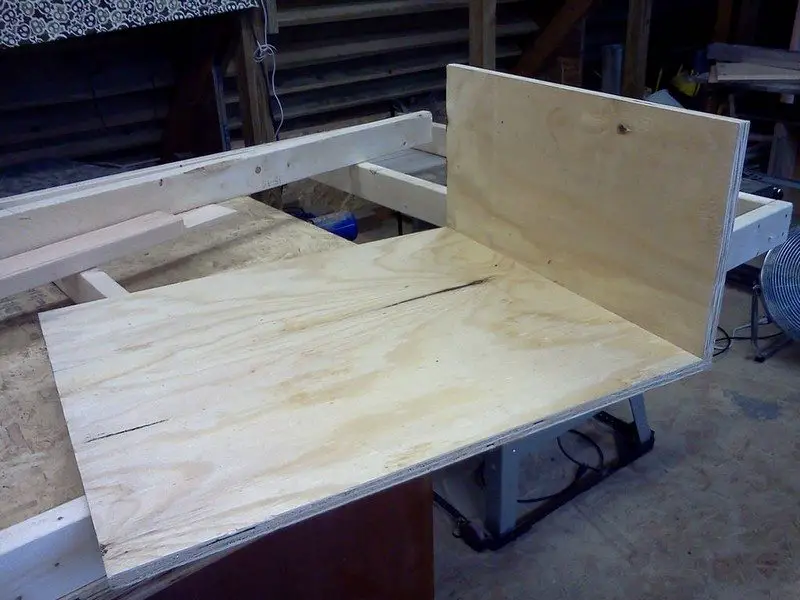
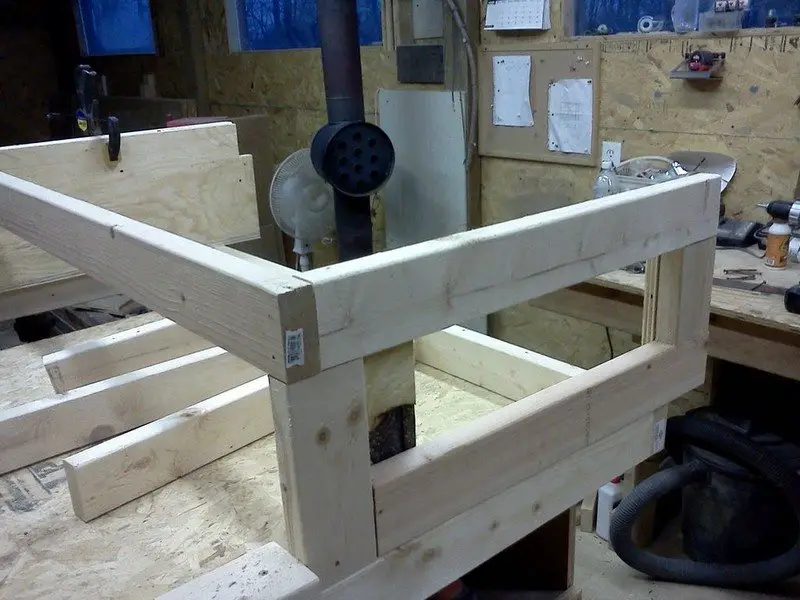
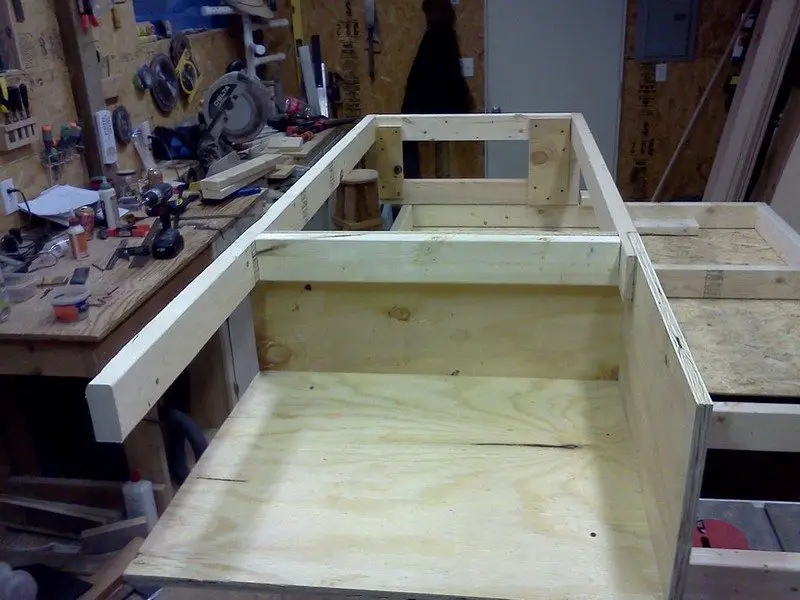
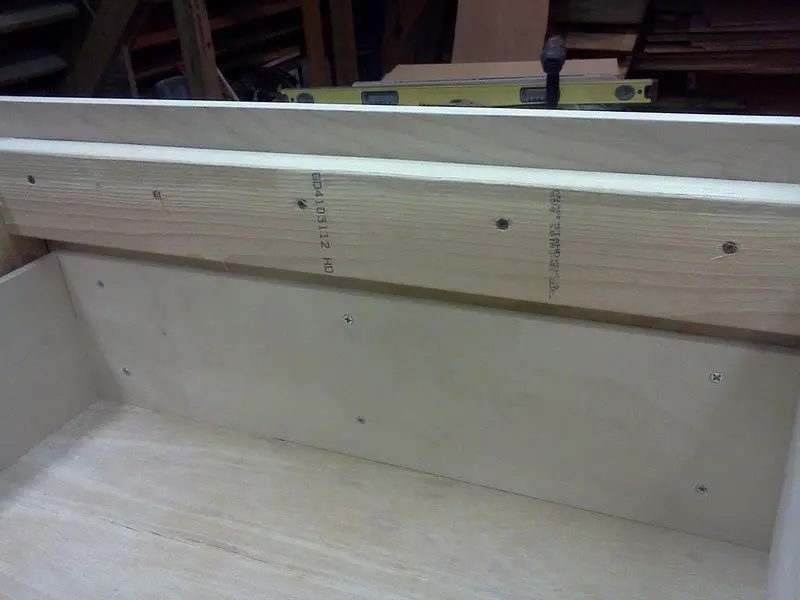
First I glued and screwed the end wall piece to the floor piece. Then I cut notches out of the side wall pieces to accept the 2×4 top rails. I fastened a side wall / drawer divider to the floor piece. Once secured, I positioned the floor section on the base frame and screwed it in place temporarily with two screws. The inside top rail went on next, I glued and screwed the half-lap joint to the corresponding plywood panel. I supported the opposite end of the top rail with a chunk of 2×4 . Then I installed a 2×4 cross member in place adjacent to the plywood sidewall . I used screws to fasten the cross member to the sidewall as well as the top rails. I then positioned the outer top rail and fastened it to the cross member. I attached a 2×4 cross member to the rails at the head end of the bed. Instead of a plywood panel at the head of the bed, I used a 2×4 frame secured with scrap pieces of plywood for gussets. I drilled pilot holes in the ends of the top rails where the cross members are fastened to prevent the boards from splitting. I also attached a 2-1/2″ strip of plywood to the side edge of the plywood floor piece. This piece provides a surface for the lower edge of the finished panel to be fastened to.
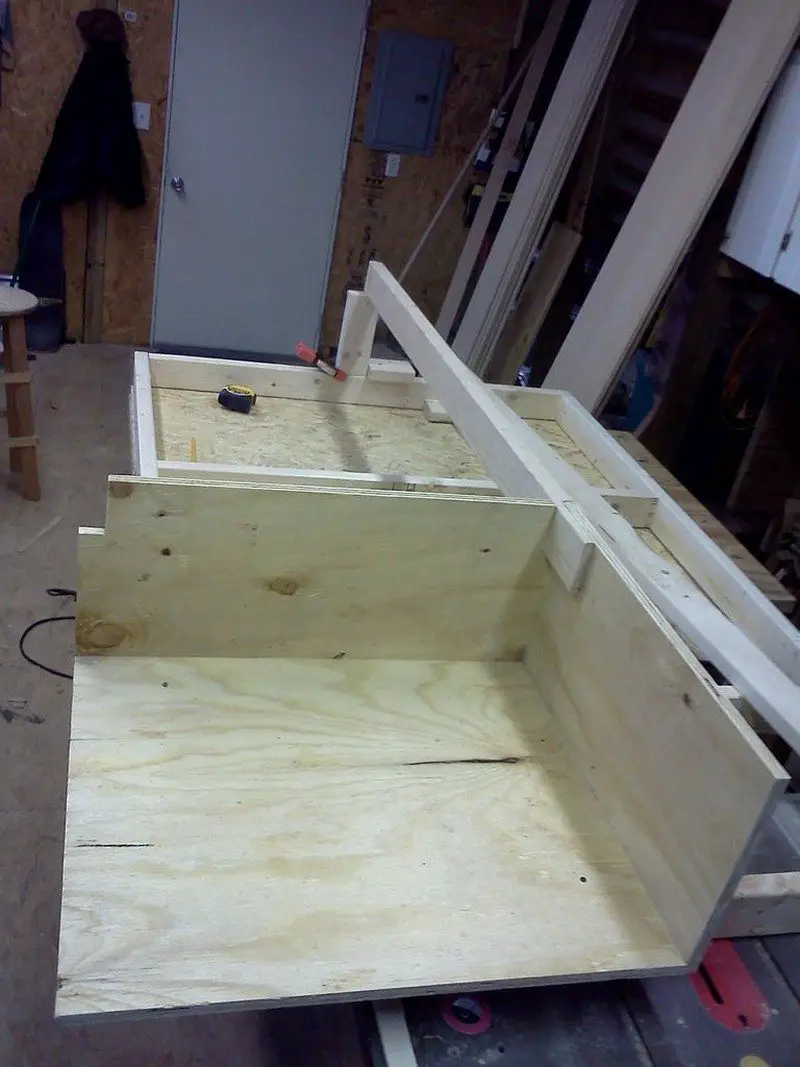
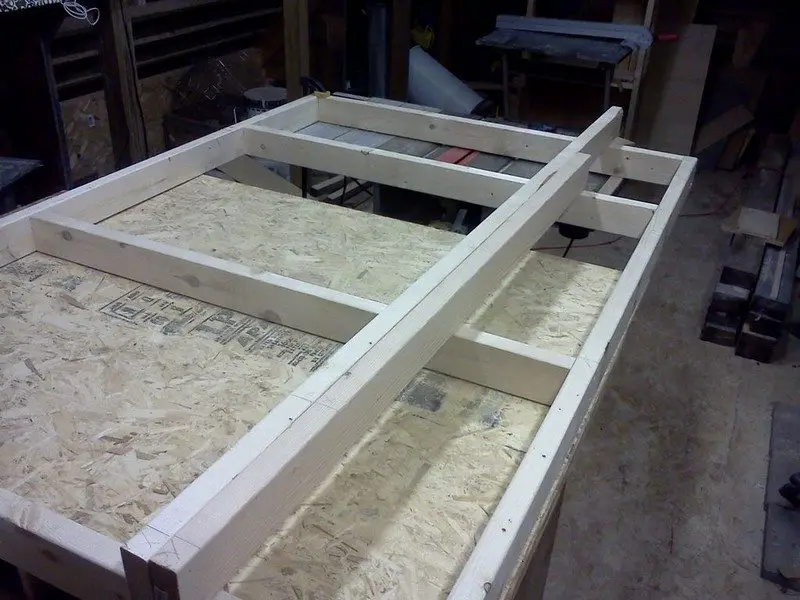
The next thing I did was install a plywood floor piece running the remaining length of the bed frame, I used 3/4″ plywood ripped to 12″ wide. I really just need the plywood along the outer edges of the bed to support the lower edges of the drawer dividers. I fastened a scrap of plywood to the underside of the floor piece to help secure it to the floor section already in place. Then I installed the remaining 2×4 cross members between the top rails . I positioned them adjacent to the locations of the drawer divider panels.
Next I installed the drawer dividers, which also needed to have notches cut out to accept the outer top rails. I screwed the panels to the cross members and also through the floor panel. I spaced the drawer dividers to allow room for two, 20″ wide drawers. About 13″ of space is remaining at the head of the bed to allow room for a night stand. I plan on building a head board next , that will be 6″-8″ deep, which will result in about 20″ of night stand space.
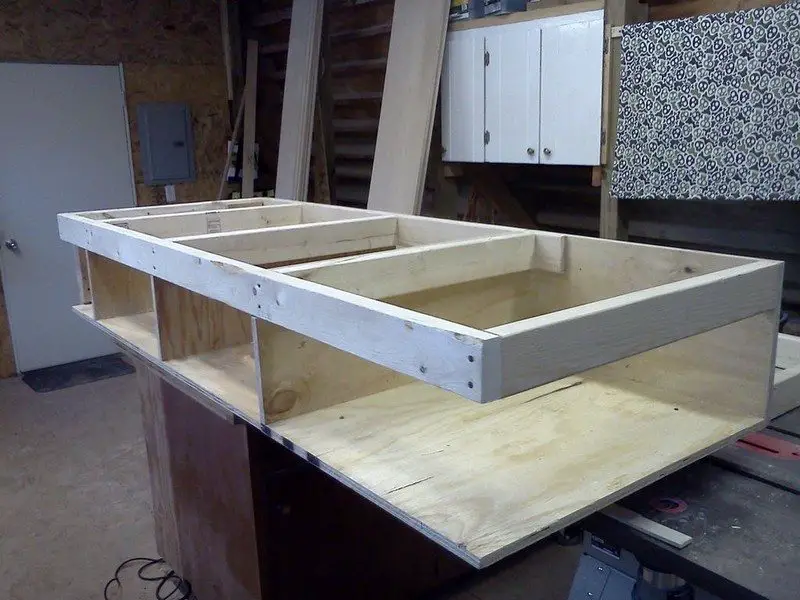
This side of the bed is done for now.
Repeat the process and build the opposite half of the bed frame.
I built very basic drawers for this project using butt joints instead of dovetail joints. The width of the drawer box should be 1″ less than the width of the opening to allow for drawer slide clearance.
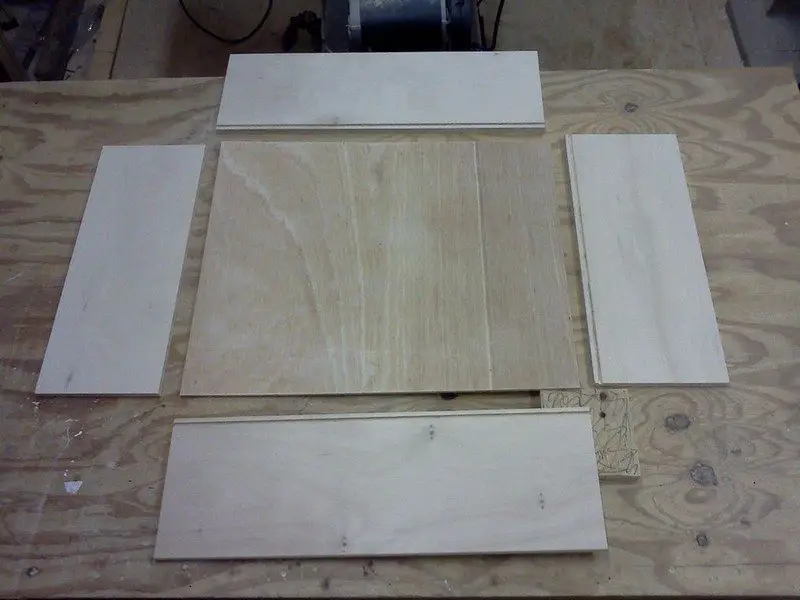
I made the front and rear drawer pieces fit inside the side pieces. Before assembling the drawers I finish sanded all off the sides of the pieces that would be inside the drawer once assembled. Its much easier to do it before hand than to try and do it after the drawer is assembled. I used glue and an pneumatic nailer with 1 1/4″ finish nails.
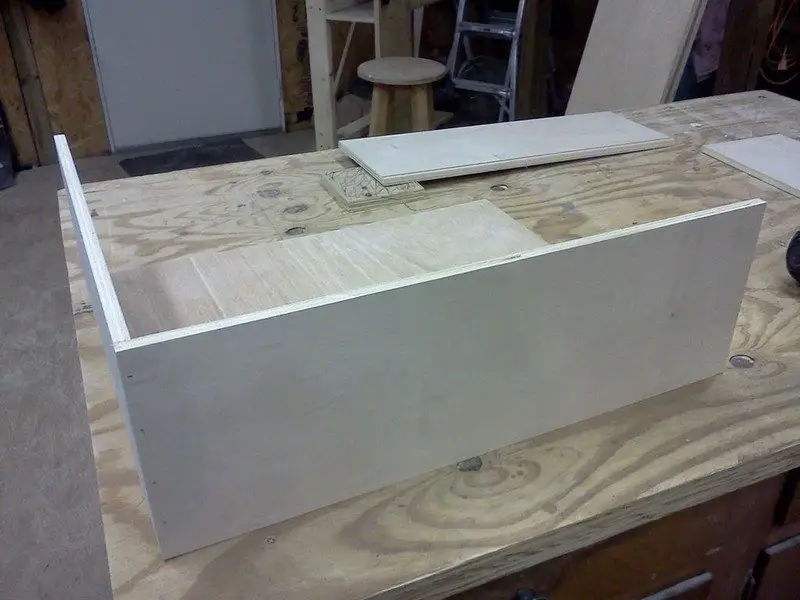
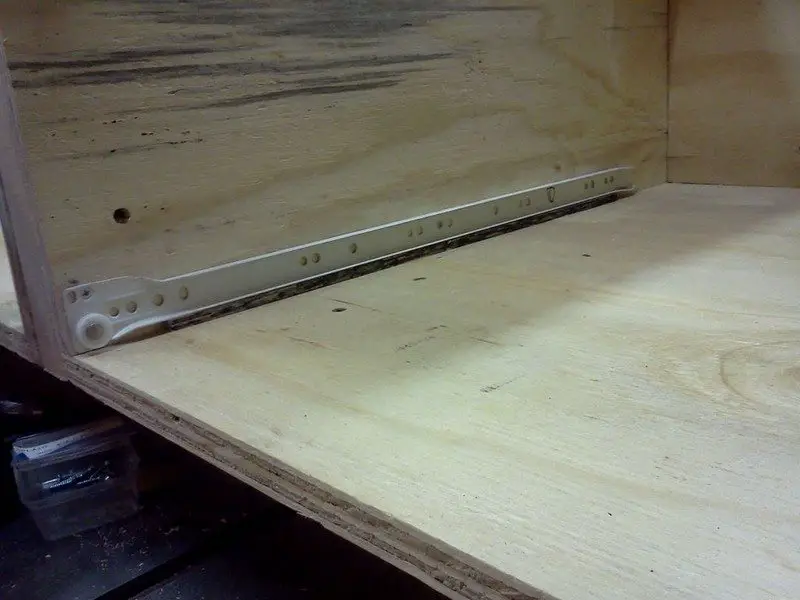
Each pair of drawer slides comes with two pieces, one to be mounted on the drawer and one to fasten to the drawer divider on the bed frame. First I installed the drawer portion of the slides using the screws provided with the slides. I kept the front edge of the slide 1/16″ back from the front edge of the drawer.
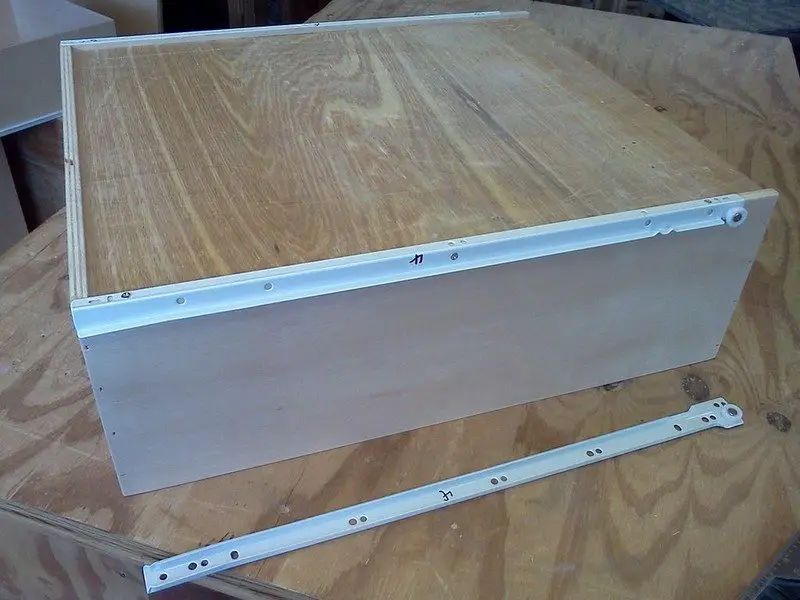
Next I installed the piece of the drawer slide that attaches to the drawer divider panel. I also kept the front edge of the drawer slide 1/16″ back from the front edge of the divider panel. The bottom of the slides sits on the bottom of the divider panel at the front of slide. I ripped a piece of wood to 1/4″ in thickness to use as a shim to hold the drawer slides level while they are screwed in place. After installing the slides, I numbered each drawer and its matching location on the bed.
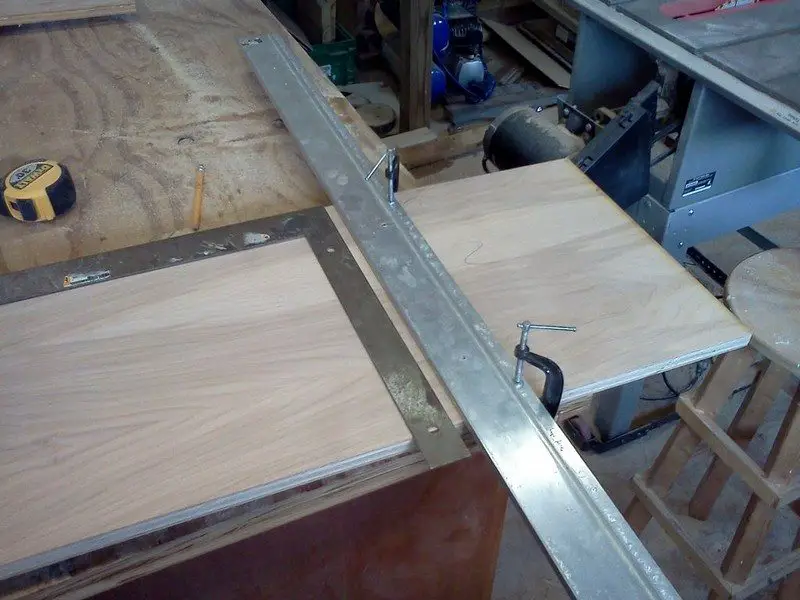
I ripped the plywood to a width of 14-1/2″ on the table saw. I then cut the pieces to length. I clamped a straight edge to the plywood to use as a cutting guide. I used a carpenters square to align the straight edge and assure a perfectly square cut. I used a circular saw to make the cuts.
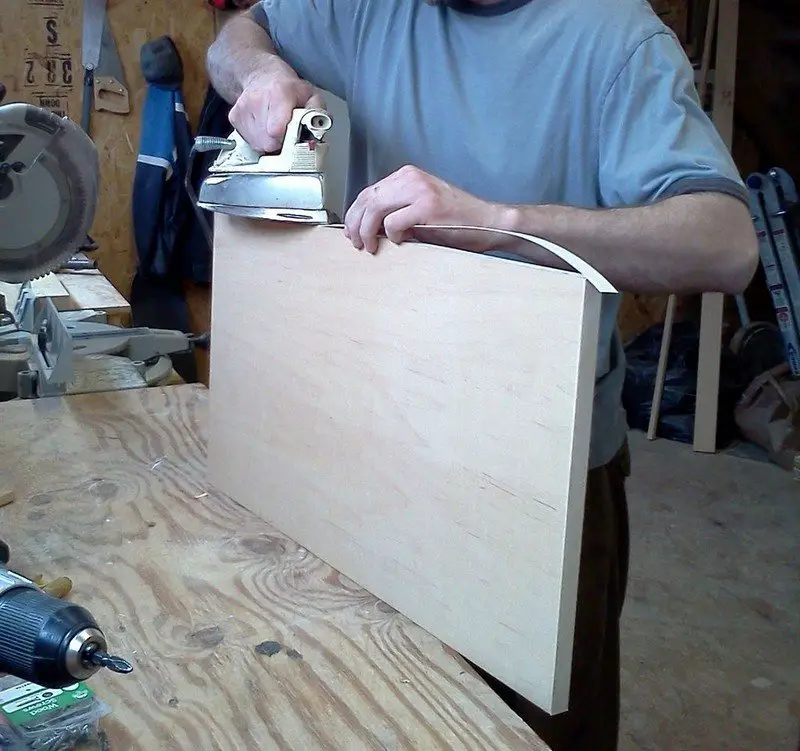
I covered the exposed end grain of the plywood with a iron-on Birch veneer.
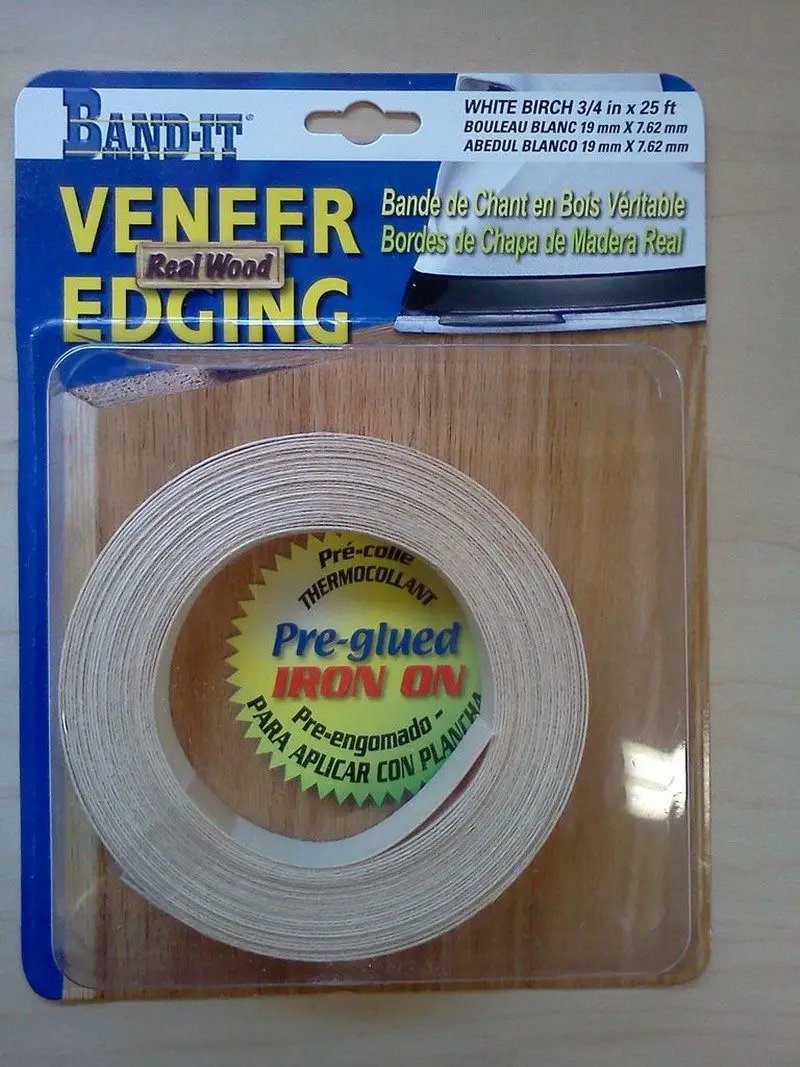
Application of the veneer is fairly easy. It has a heat activated glue on the under side of it. I use an old house hold iron to apply the veneer. If the veneer needs to be re-positioned, simply reheat the area and adjust as desired.
I temporarily clamped the board into position on the bed frame. I allowed the top edge of the panel to stick up 1-1/2″ above the top surface of the bed frame to conceal the bottom of the mattress when completed.
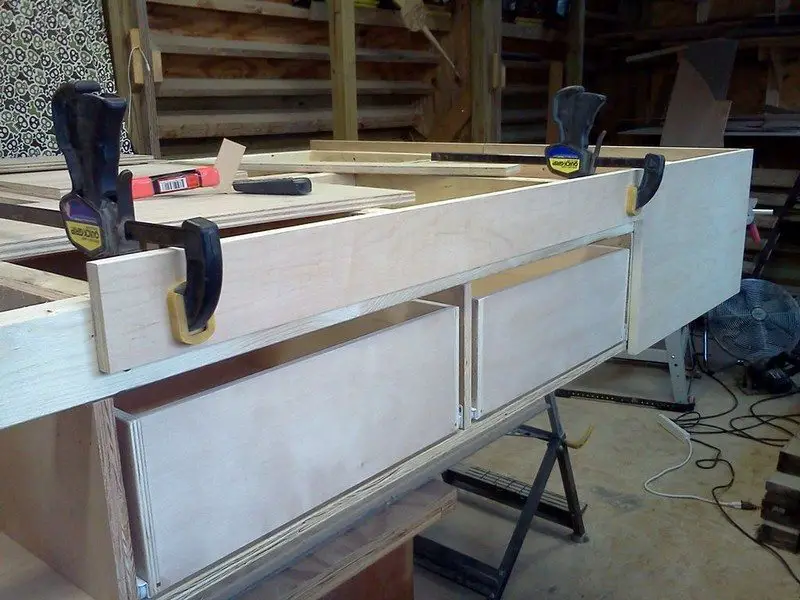
When I was satisfied with its position, I fastened the panel in place by screwing it to the bed frame from the inside.
With the drawer boxes installed in place in the drawer slides, I positioned the drawer fronts in place. the drawer front panels extend about 5/8″ below the bottom surface of the bed frame to allow a spot to open the drawer with out the use of drawer pull hardware.
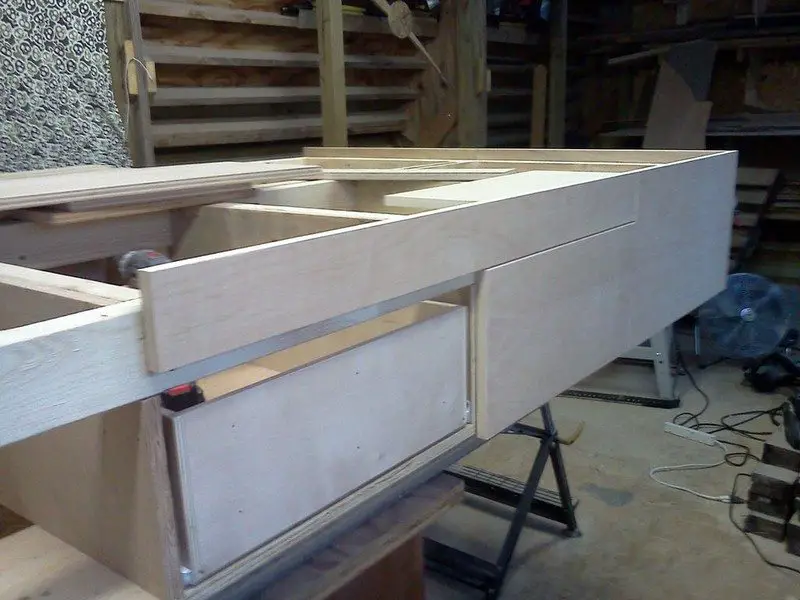
I used 1/8″ thick spacer sticks, placed between the top and side edges of the drawer front panel, to maintain even gap spacing.

No matter how hard I tried, I still ended up having a few minor blemishes that needed filler. I used Dap brand plastic wood filler, mixed with a little of the stain I will be using, to fill the imperfections.
Once the filler dried, I sanded the entire exterior of the bed with 220 grit sandpaper to prepare the surface for finishing. I used a Ebony stain on the exterior of the bed.
What do you think of this DIY bed? Are there any areas for changes to better fit your needs? :)
Thank you VertDude for this DIY guide!


