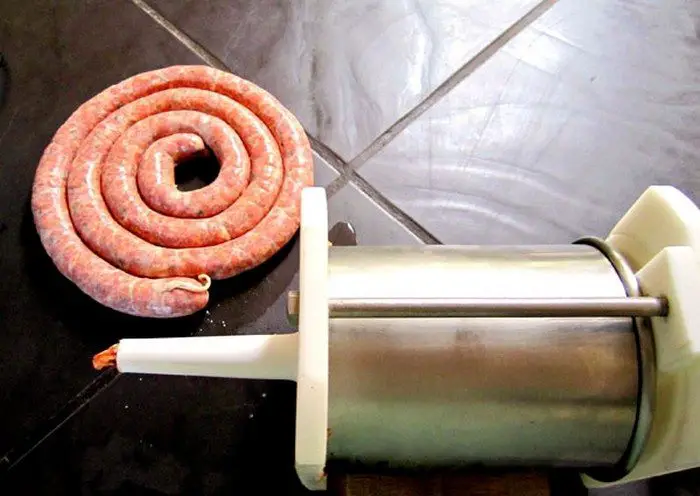
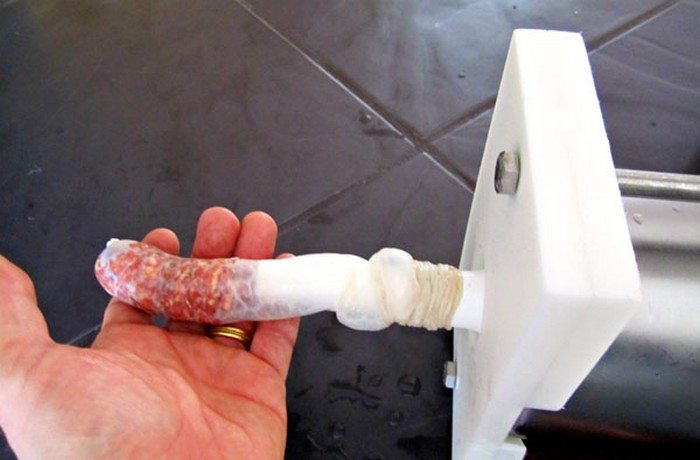
Sausages are delicious and usually an all-time favorite. And it’s more delicious when they are homemade, especially if they are formed with your own DIY sausage stuffer.
Now if you’ve been wanting to make your own sausage at home but are discouraged by the expensive or annoying use of commercial sausage stuffers, a DIY sausage stuffer is a cheap and effective alternative.
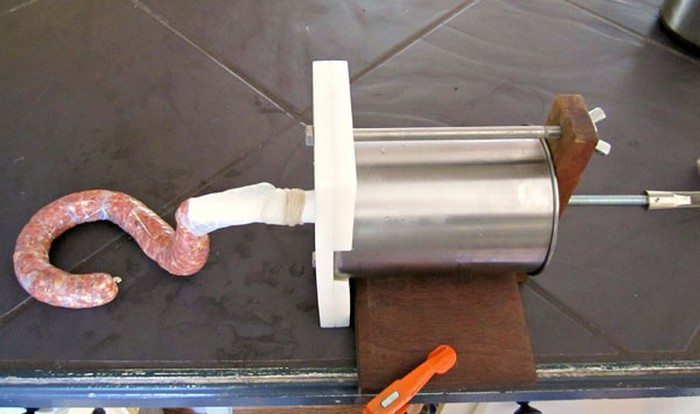
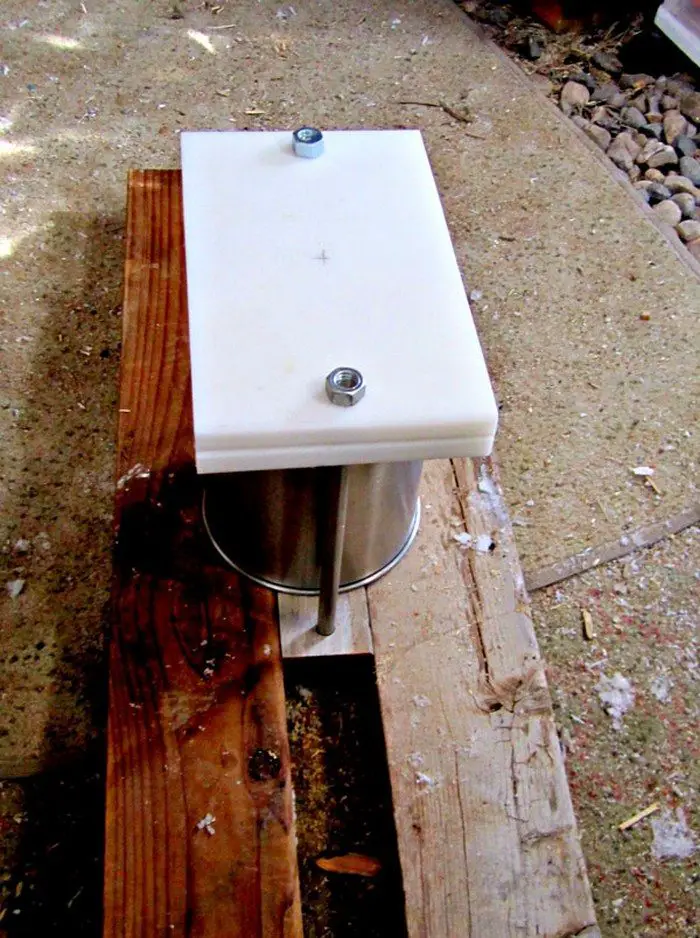
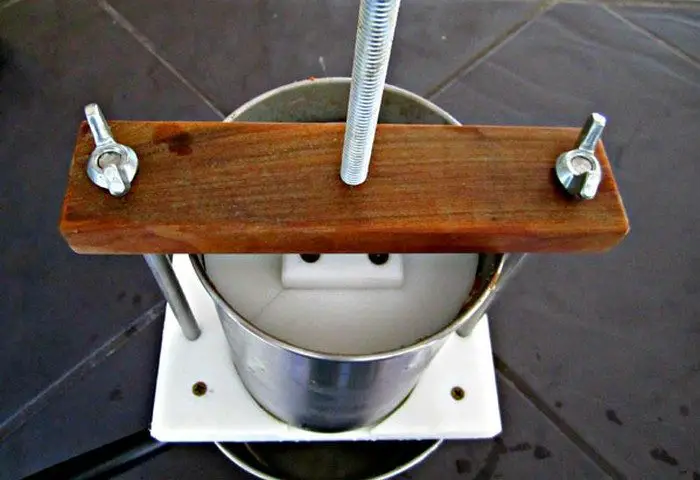
A DIY sausage stuffer is a very easy build as it is simply designed to function like a big syringe. It’s made with a stainless steel utensil holder, scrap timber, and a few other parts that you can easily find in home improvement or hardware stores. You can also use other similar parts that you may already have at home as long as it is safe to use for food.
The DIY sausage stuffer you see here can hold up to five pounds of sausage. The size of the stainless steel container is indicated in the materials listed below. All other measurements were based on it. If you’re going to use a different size of the container, then you simply adjust accordingly. :)
This DIY project will only cost you around $30. By making your own sausage stuffer, you get to save around $100 since commercial products usually cost $130!
What’s not to love about this DIY sausage stuffer? :)
Click on any image to start the lightbox display. Use your Esc key to close the lightbox.![]()


Contents
Building Your Own DIY Sausage Stuffer
Materials:
- 5″ diameter, 6″ tall Stainless Steel Cylindrical Utensil Holder
- 2 pcs 5″ x 7.5″ x 1/2″ Plastic Cutting Board (High Density Polyethelyene)
- 1 pc 2″ x 2″ x 1/2″ Plastic Cutting Board (High Density Polyethelyene)
- 1 pc 2″ x 7″ x 3/4″ Hardwood
- 1 pc 6″ x 6″ x 1″ Wood
- 2 pcs 3/8″, 8″ long Bolts with Wingnuts
- 1 pc 3/8″, 8″ long Carriage Bolts (stainless and threaded)
- Sausage Stuffer Nozzles
- 1 pc Casement Window Crank
- 8 pcs 3/4″ Screws (brass or stainless)
- Sandpaper
- Mineral Oil
- Clamp
Tools:
- Jigsaw
- Table Saw
- Drill (with various bits and 1 1/2″ bi-metal holesaw)
- 3/4″ Paddle or Forstner Bit
- 3/8″ Tap
- Grinder
- File
Steps:
Make the base: I made my base out of a salvaged cutting board from a deli. You could use wood but plastic is really easier to work with and it looks cleaner.
Cut two pieces of the HDPE to size- 5″ x 7 1/2″.
Clamp the base parts of the DIY Sausage Stuffer together and drill two holes in them. Each hole should be 5/8″ in from the end and centered in the width. The holes need to be big enough to let the 3/8″ bolts slide through easily.
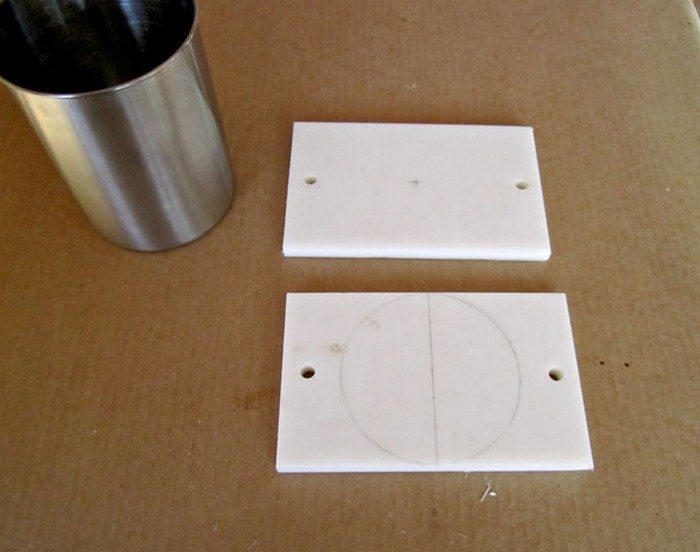
Find the center of each of the pieces.
On the first one (base) drill a 1/8″ pilot hole in the center. On the other (guide), mark a line down the center and trace the bottom of the stainless container.

Cut the circle you traced out carefully with a jigsaw. The circle is going to be the plunger and the outsides are guides for the container.
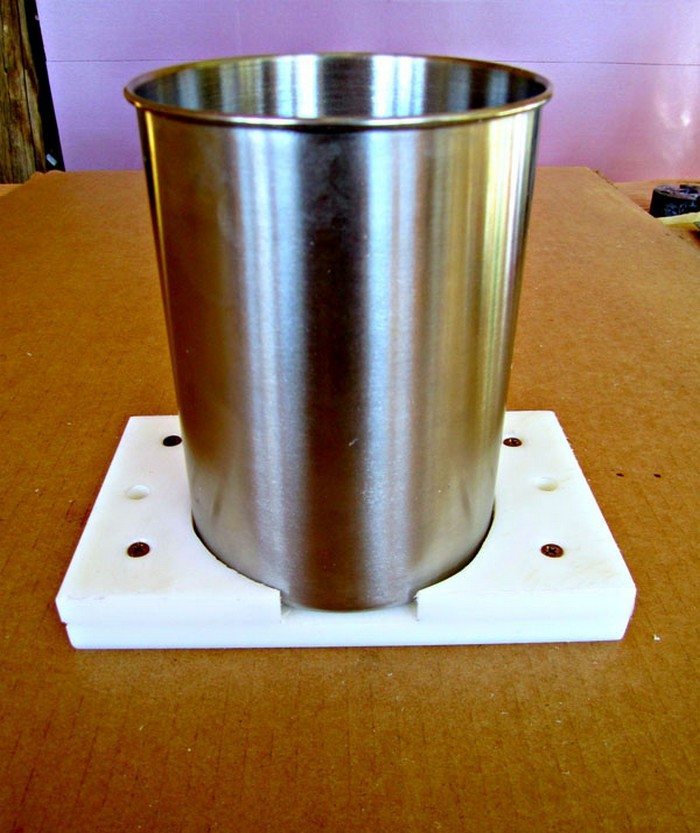
Set the circle aside and attach the guides to the base with some of the 3/4″ screws. The guides should hold the container snugly in place.

Top bar: My top bar is made from a piece of Ipe (super dense tropical hardwood) salvaged from a piece of decking. You can use anything that is available. The wood is threaded to the plunger, so the stronger the better.
Cut the wood to 2″ x 7 1/2″.
Drill two holes in the ends just like the ones in the base. Place them 5/8″ in from the end and centered on the width. Same diameter as the holes in the base.
Drill and tap a 3/8″ hole in the center.
Sand the wood and lightly round the edges and corners so it feels good in your hand.
Apply a coating of mineral oil.
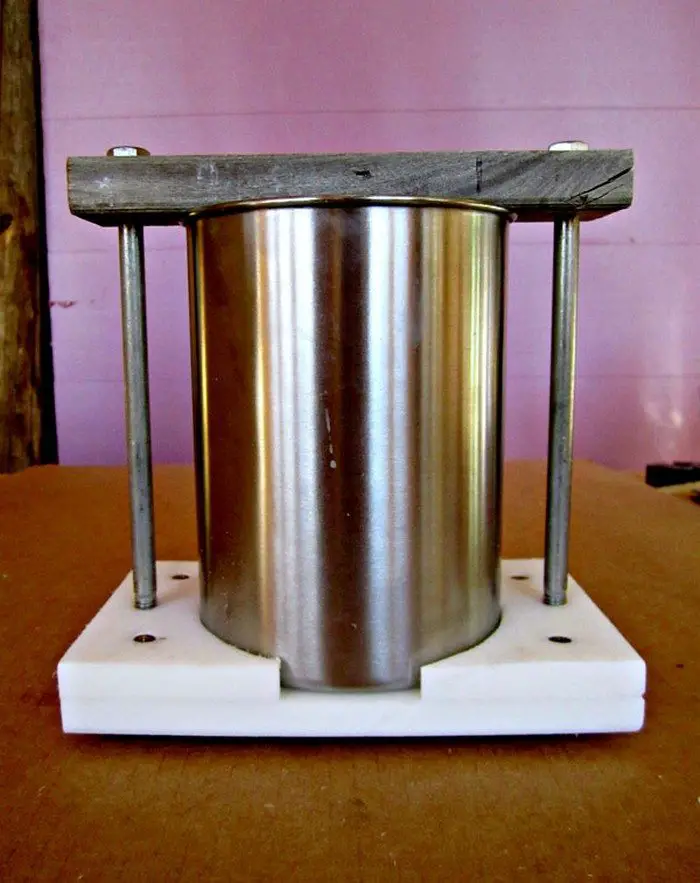
Drill the big hole: This method for drilling the big hole at the bottom of the base and the container is certainly not the only way to go about it but it worked well for me as it kept the holes aligned. It also prevented the stainless container from spinning while drilling.
Take the container and sandwich it between the base and the top bar.
Use the 8″ bolts to hold everything together.
Place two pieces of wood on the ground and put the top bar between them. The edge of the container will be resting on the wood pieces.
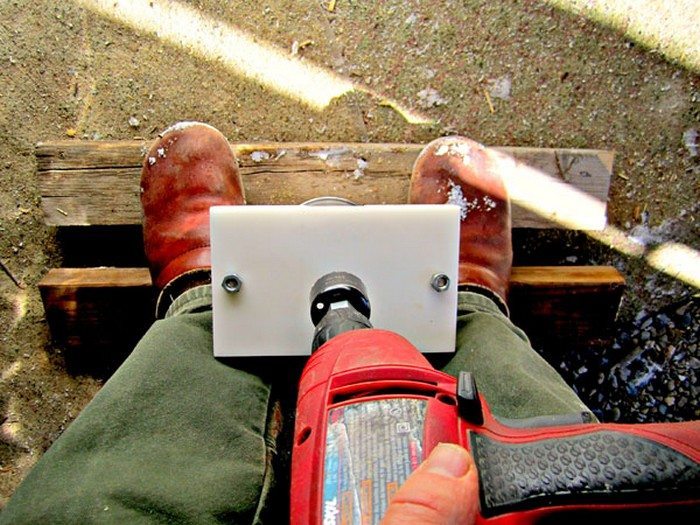
Stand on the wood and use the pilot hole in the base to guide you as you drill the 1 1/2″ hole. Make sure that your hole saw is for cutting metal or you will trash it on the stainless steel. Use plenty of oil to keep things cool.
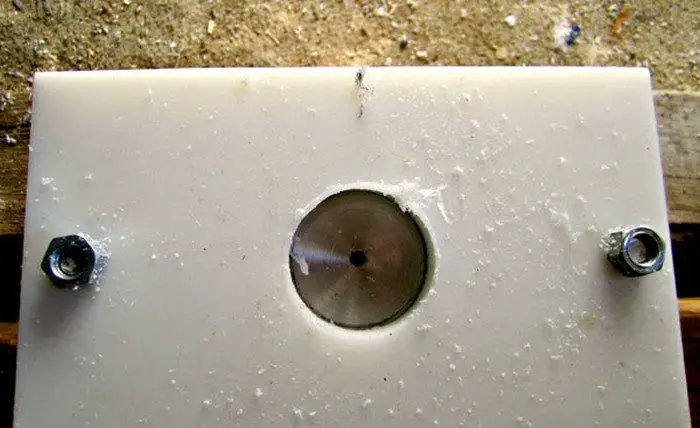
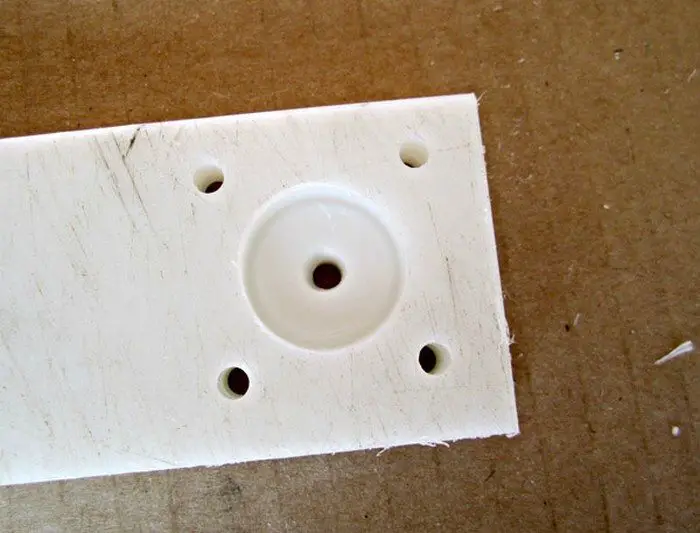
File the hole in the container to smooth the edges.
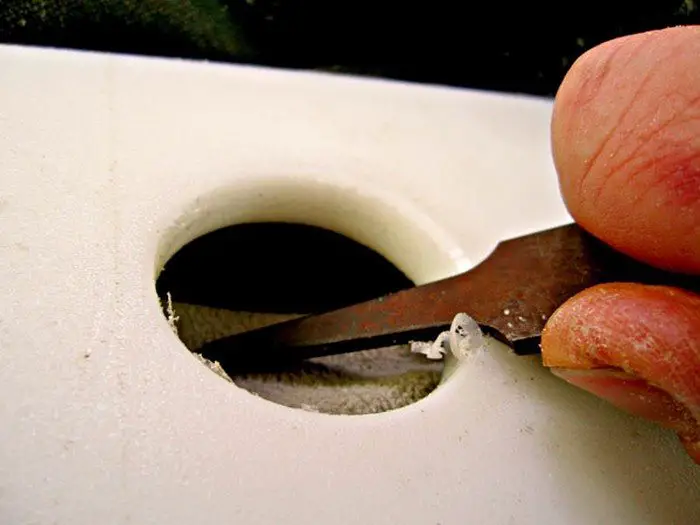
Use the shoulder of the file to scrape the plastic on the inside of the base. The hole needs to be tapered to fit the nozzle. The nozzle will be squeezed between the base and the container so it needs to fit well.
Take the plunge: The plunger is where all the action is. The better it fits in the container the better it will force the meat out through the nozzle. Fitting the plastic disk to the container can be a little fiddly. If it’s too tight it won’t go all the way to the bottom. If it’s too loose the sausage will squeeze past the plunger rather than into the casing. Most of the stainless containers I’ve seen have some sort of taper to its walls. A little bit is ok but a large variation in the diameter at the top to the diameter at the bottom will give you trouble.
Take the plastic disk that you set aside and sand it down until it just fits all the way down to the bottom of the container.
Grind or file the top of the carriage bolt so that it is flattened.
Grind or file the corners off the square part under the carriage bolt head.
Grind or file a flat spot on the end of the carriage bolt to have a spot for the set screw in the casement window crank.
Cut a square of plastic 2″ x 2″.
Drill a hole in the center with the paddle/Forstner bit just deep enough that the carriage bolt head fits in it without protruding.
Widen the center of the hole to fit the shaft of the carriage bolt.
Drill and countersink four holes for the 3/4″ screws.

Attach the square of plastic to the disk with the screws. The carriage bolt should be held securely but it should spin freely.
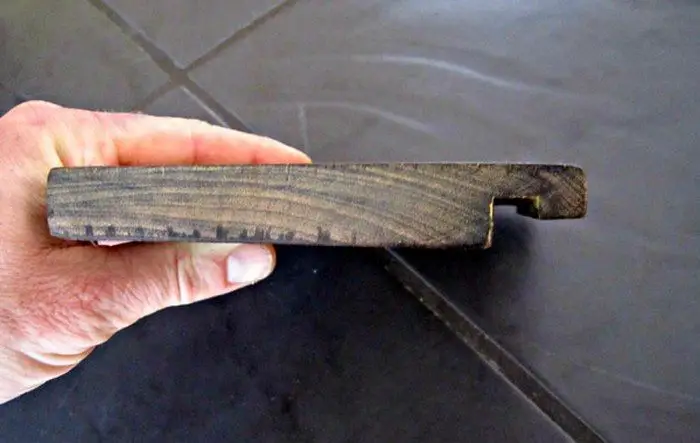
Clamp down: The clamping board helps to hold the stuffer securely to the counter. You still need a clamp of some sort to hold everything in place. This piece distributes the clamping action along the length of the lower bolt.
Cut the 1″ thick wood into a 6″ square.
Use a table saw to cut a dado along one edge of the board. It should be about 3/8″ wide and 1/4″ deep. Leave 1/2″ from the edge of the dado to the end of the board.
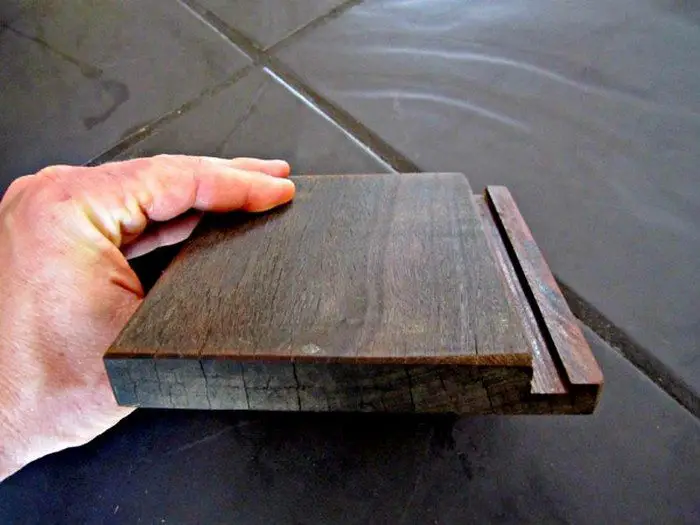
Sand it and lightly round the edges and corners. Apply a coat of mineral oil.

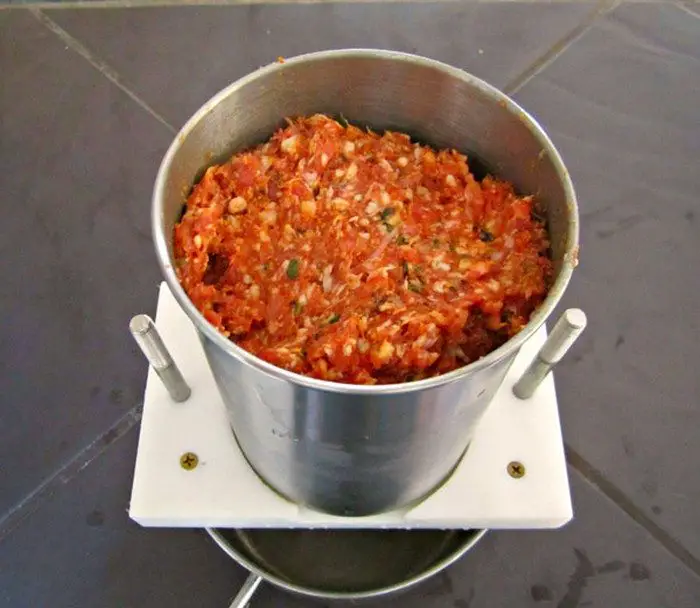
Putting it all together: First a test run to make sure everything fits…
Clean everything well and dry it.
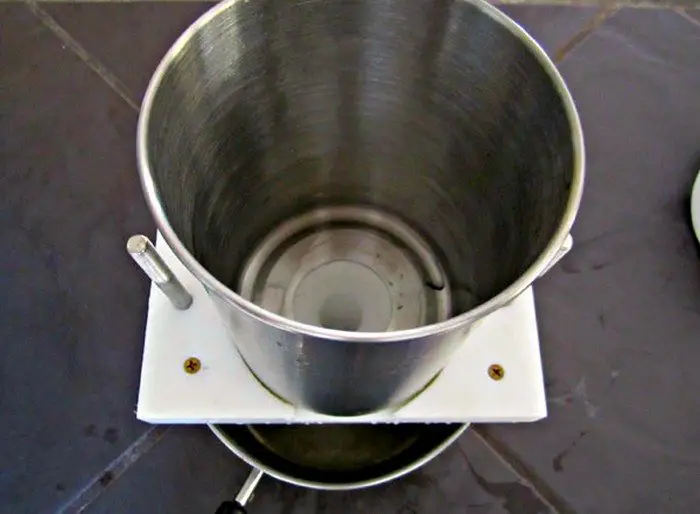
Grab a pan that is deeper than the nozzle is long.
Insert the bolts into the base.
Place the base on the top edge of the pan. The bolts will slide down into the pan.
Stick the nozzle into the base.
Place the container on the base.
Thread the top bar onto the carriage bolt in the plunger.
Slip the plunger into the container.
Feed the bolts up and through the holes in the top bar. Secure them with the wing nuts.
Put the window crank on the plunger shaft and tighten the set screw.
Take the whole deal and lay it on its side on the counter. Slide the clamping block over the lower bolt. Clamp the stuffer to the counter.
Turn the handle and make sure the plunger goes smoothly to the bottom of the container.
Fine tune anything that needs tweaking.
Congratulate yourself on a job well done.
Thanks to Mike and Molly’s House for this great project!
Comparison Between Homemade and Commercial Sausage Stuffers
This comparison explores the differences between homemade and commercial sausage stuffers. This will help you decide whether a DIY sausage stuffer or a commercial option best suits your needs.
Cost Efficiency
Regarding cost efficiency, a DIY sausage stuffer is a standout choice. Building a homemade sausage stuffer presents a fantastic opportunity for those looking to dive into sausage making without spending a lot.
The materials needed for a DIY sausage stuffer, such as a stainless steel utensil holder, plastic cutting boards, and a few bolts and wingnuts, are inexpensive and can often be sourced from hardware stores or even found at home. This makes the DIY route significantly more budget-friendly than commercial stuffers, which can be quite costly. Commercial sausage stuffers typically start at a higher price point, easily reaching into the hundreds for models with more features or greater capacity.
For casual or first-time sausage makers, investing in a commercial stuffer might not make sense, especially when a homemade sausage stuffer can achieve similar results for a fraction of the cost. This cost-effectiveness is a major advantage for those wanting to try sausage making without committing to expensive equipment.
Customization
Customization is another area where the DIY sausage stuffer truly shines. Unlike commercial sausage stuffers, which come in fixed sizes and with predetermined features, a homemade sausage stuffer can be completely tailored to meet your needs. Whether you’re looking to adjust the size of the stuffer to fit your kitchen space, alter its capacity to suit the amount of sausage you plan to make, or tweak the mechanics to better handle the types of meat you’re using, a DIY sausage stuffer offers unparalleled flexibility.
This level of customization ensures that you can design a stuffer that fits your sausage-making requirements and enhances your overall experience. For example, if you find that a larger capacity stuffer would make your process more efficient, you can easily modify your DIY design to accommodate more meat. Similarly, if you need a more portable or easier storage stuffer, you can adjust the dimensions accordingly.
Commercial sausage stuffers, while reliable and professionally manufactured, often lack this level of adaptability. They are designed to meet general needs rather than specific preferences, which may not align with every sausage maker’s desires. This makes the DIY sausage stuffer a more appealing option for those who value the ability to customize their sausage-making equipment to their exact specifications.
Durability and Reliability
Commercial models typically have the upper hand when considering the durability and reliability of sausage stuffers. These units are engineered for heavy use, and crafted from materials that can endure the demands of frequent sausage-making. The construction of commercial sausage stuffers is often robust, featuring stainless steel bodies and components that resist wear and tear, ensuring longevity.
This durability is critical for those who plan to make sausages regularly or in large quantities. The reliability of commercial stuffers extends to their performance, offering consistent results with every use. This consistency is crucial for achieving the perfect texture and filling of sausages, making commercial stuffers a favorite among serious home chefs and small-scale commercial producers.
On the other hand, a DIY sausage stuffer, while a cost-effective and customizable solution, may face challenges in matching the durability and reliability of its commercial counterparts. Although a homemade sausage stuffer can be effective and meet the needs of occasional or hobbyist sausage makers, the materials and construction may not withstand prolonged or rigorous use.
For instance, a DIY sausage stuffer made from a stainless steel utensil holder and scrap timber may not maintain its integrity over time, especially if exposed to the stresses of frequent stuffing. The assembly and parts used in a DIY sausage stuffer, such as bolts, wingnuts, and homemade seals, might also show wear more quickly than the commercial-grade components.
However, for many, the appeal of a DIY sausage stuffer lies not just in its cost savings but also in the satisfaction of building and customizing their equipment. While it might not offer the same level of durability and reliability as a commercial stuffer, with proper care and occasional maintenance, a DIY sausage stuffer can still serve well for home use.
Ease of Use
Regarding ease of use, commercial sausage stuffers typically have the edge over DIY sausage stuffer options. Commercial stuffers are designed with the user’s convenience, featuring user-friendly mechanisms that streamline the sausage-making process.
These models often come equipped with various nozzle sizes, allowing users to easily switch between different sausage casings and sizes according to their recipes. Additionally, the ergonomic designs of commercial stuffers are a significant advantage, making the stuffing process quicker and reducing the physical effort required. This can be particularly beneficial during long sausage-making sessions, where comfort and efficiency are paramount.
In contrast, while certainly capable and effective for its intended purpose, a DIY sausage stuffer may not offer the same level of ease and convenience. The functionality of a homemade stuffer depends largely on the design and the materials used in its construction.
It may lack the refined mechanisms and ergonomic features of commercial models, potentially making the stuffing process more labor-intensive and time-consuming. Depending on how well the stuffer is made, users of a DIY sausage stuffer might need to apply more force or deal with less efficient operations.
Maintenance and Support
Maintenance and support further distinguish commercial sausage stuffers from DIY sausage stuffer options. Owners of commercial stuffers benefit from the availability of customer support and warranties, offering peace of mind in case of malfunction or the need for parts replacement.
This level of support ensures that any issues can be promptly addressed with guidance from the manufacturer or supplier. Additionally, commercial stuffers are designed for easy maintenance, with readily available and replaceable parts, ensuring the equipment’s longevity.
Conversely, maintenance for a DIY sausage stuffer falls entirely on the shoulders of the creator. If a homemade stuffer encounters a problem or requires a replacement part, the responsibility to diagnose, repair, or fabricate a solution rests with the user. This can pose a significant challenge, especially for those who may not have extensive mechanical skills or access to the necessary tools and materials. The absence of customer support or a warranty means that any fixes must be self-managed, potentially leading to downtime or frustration.
In summary, while a DIY sausage stuffer presents an opportunity for customization and cost savings, it is essential to consider the trade-offs regarding ease of use, maintenance, and support.
For individuals who prioritize convenience, longevity, and the availability of assistance, a commercial sausage stuffer may be the more suitable choice. However, for those who enjoy the process of building and problem-solving or who have specific needs that only a custom solution can meet, the DIY sausage stuffer remains a valuable and rewarding option.
Conclusion
A DIY sausage stuffer offers the satisfaction of building something tailored to personal specifications at a lower cost. The customization and cost-effective aspect makes them worth the time and effort in building them compared to buying a professional stuffer.
If you want the best way to cook your custom sausages, read our post on 6 unique fire pit grills next!


