
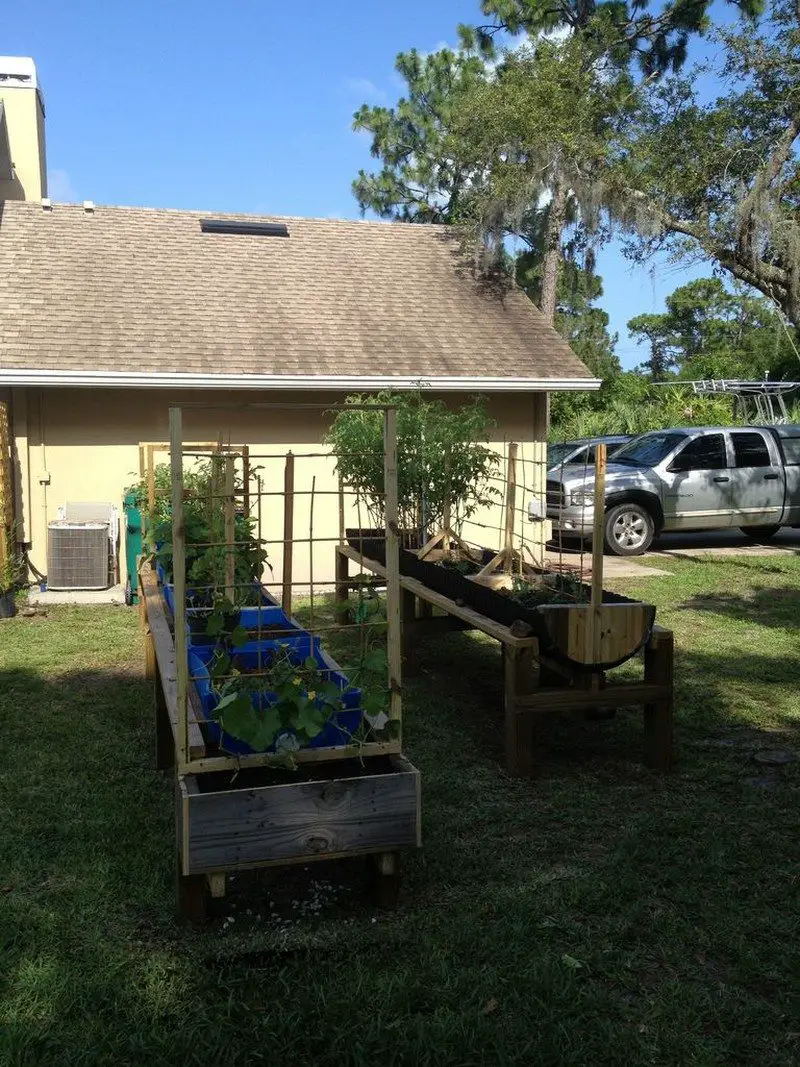
A simple and inexpensive raised planter stand is a great solution for a variety of garden issues. It is a great option for keeping your garden organized, and if you don’t want to plant directly on the ground to keep critters away from your produce. It is easier on your back when watering or tending your plants. This design is also ideal for trellising.
This technique not only adds dimension and intrigue to your outdoor space but also gives you additional space to work with. Consider it a green skyscraper soaring for the sky and creating a lush paradise.
This design is ideal for growing climbing roses, ivy, or even vegetables like cucumbers and tomatoes. Additionally, its structure is strong enough to support even the heaviest plant weight.
One of the most significant advantages of a DIY approach is the flexibility to tailor the size of your planter stand. Whether you have a petite balcony or an expansive backyard, you can adjust the dimensions to maximize your available space without compromise.
Your DIY project embodies your personal style. You can select materials and finishes that resonate with your taste, ensuring that your raised planter stand becomes a true reflection of your outdoor vision.
Also, a homemade raised planter stand can be engineered with your comfort in mind. By crafting it to your desired height, you can ensure that gardening tasks become more ergonomic, reducing strain on your back and knees. This thoughtful consideration for your physical well-being enhances the overall gardening experience, making it more enjoyable and sustainable.
Building one can also save you some cash as the raised planter stand can be made of repurposed timber from your previous woodworking projects. Those leftover wood pieces that might otherwise collect dust or be discarded can now be given a new lease on life as integral components of your raised planter stand.
This not only prevents unnecessary expenses on fresh materials but also aligns with a sustainable and eco-conscious approach by making the most of existing resources. What about repurposing some drums? It is a win-win scenario that exemplifies the synergy between budget-friendly practices and eco-consciousness.
What would you be planting on your own raised planter stand?
If you have other ideas on how this can be improved, let us know in the comments section.
Click on any image to start lightbox display. Use your Esc key to close the lightbox.![]()


Contents
How to Make Your Own Raised Planter Stand
Embark on an incredible journey into the world of gardening and unlock the secrets to creating your own raised garden planter. This comprehensive guide will empower you to cultivate a magnificent garden that exudes elegance and requires minimal effort.
Gather the essential materials and tools to start making your own raised garden planter.
Materials
(3) 55-gallon juice drum
2×4 pressure-treated lumber
Tools
- Hand Saw
- Measuring Tape
- Clamps
- Straight Edge (square)
- Wood Glue
- Hammer
- Chisel
- Screws
- Power Drill/Driver
Steps
Here are the steps for making your own raised planter stand:
Build the Assemblies
You will need four assemblies for three drums. Begin by building the four support assemblies that will connect the 2×4 stringers. For simplicity, make them identical and symmetrical.
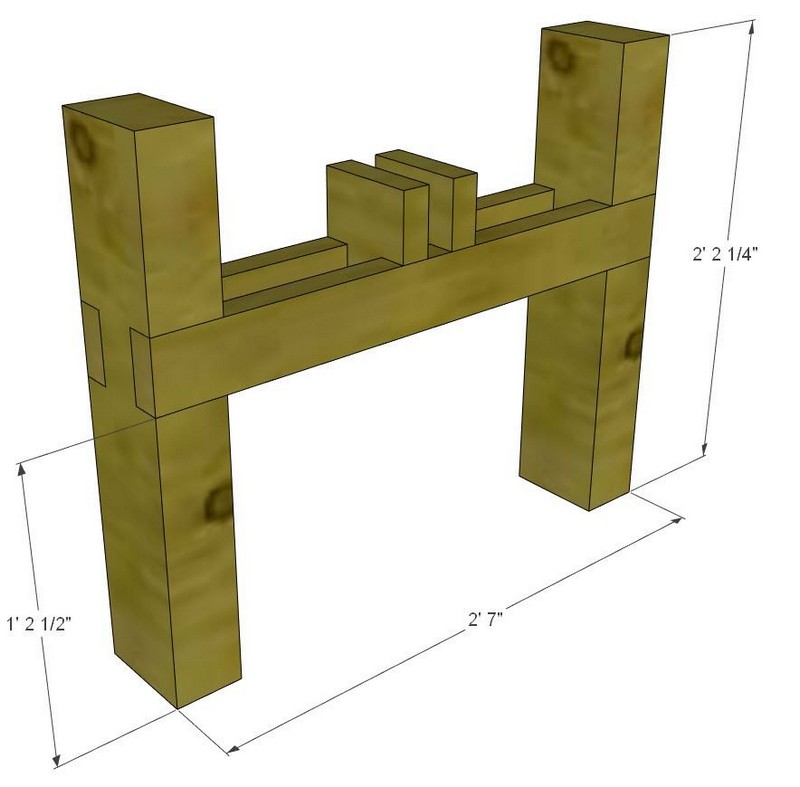
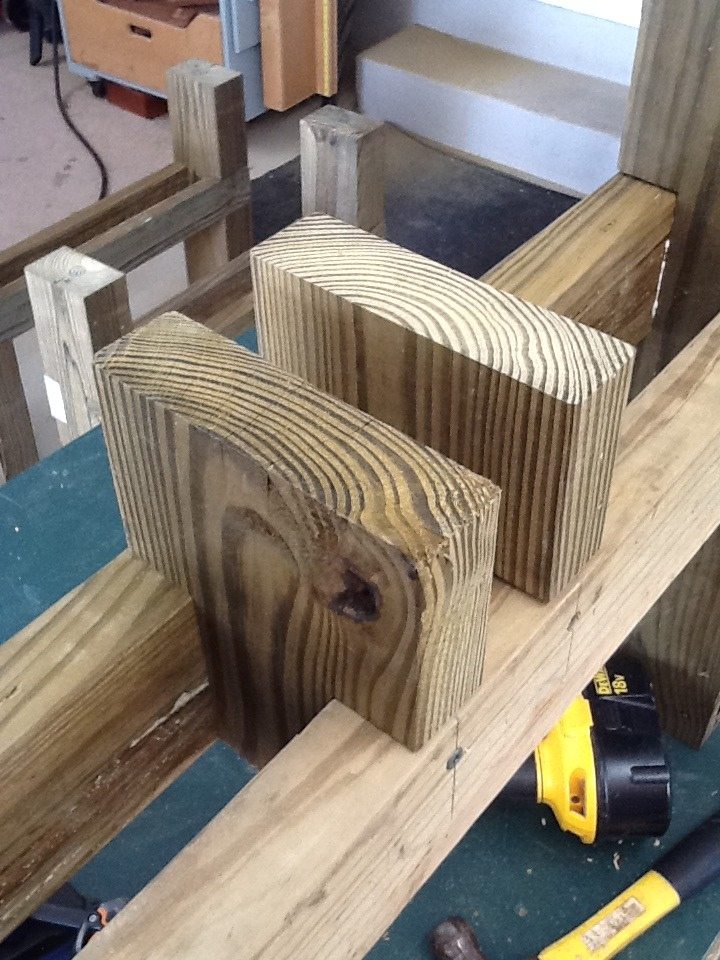
The legs are made from 4×6 pressure-treated (PT) lumber, with a height of 26-1/4″. The cross members connecting each leg are made from 2×4 PT and are joined together using dadoes cut.
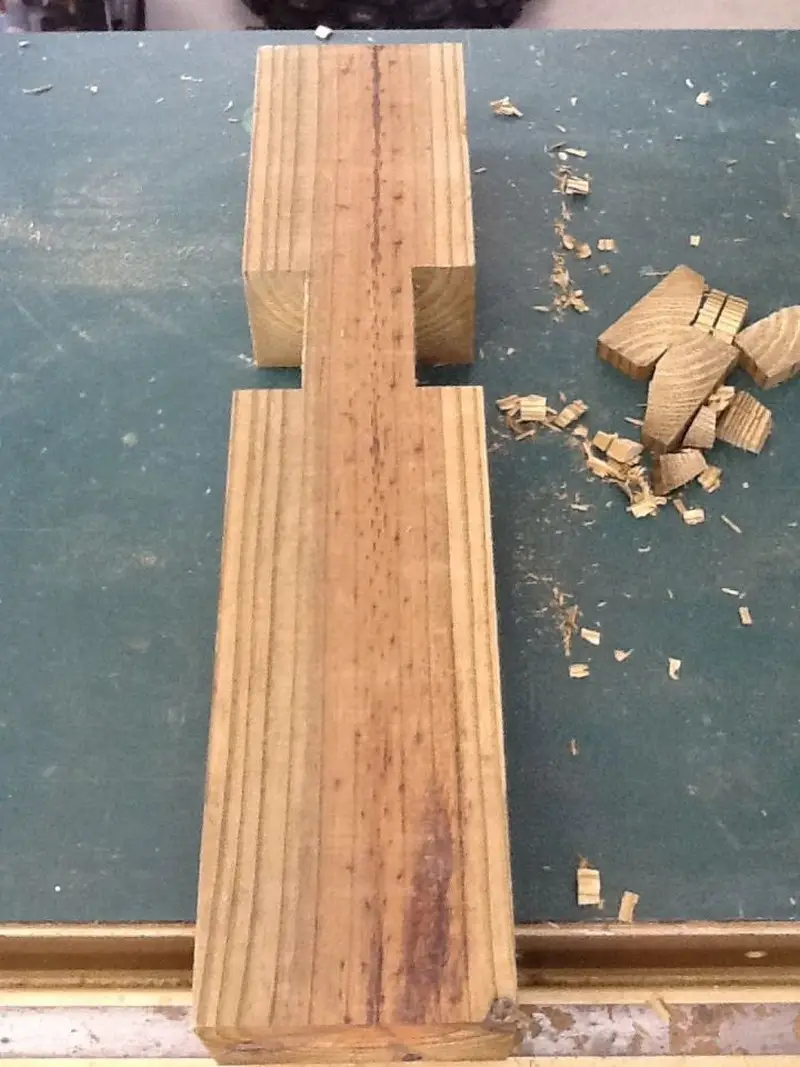
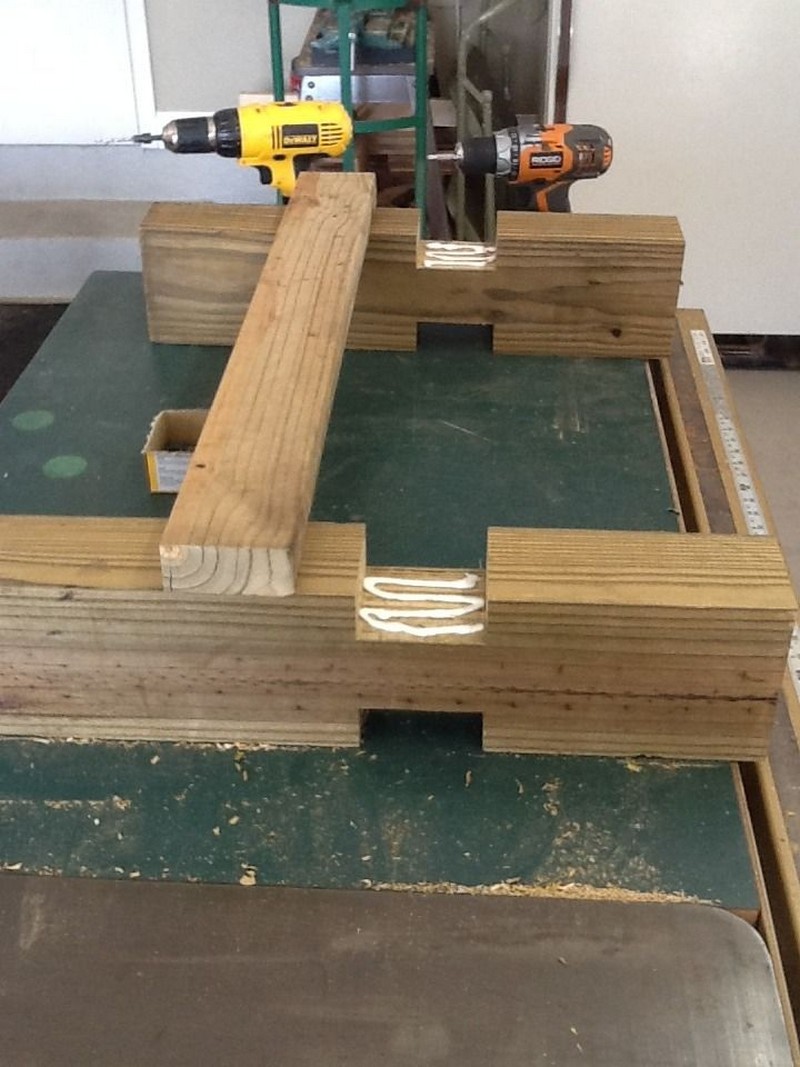
Cut cross members to 31″ then apply adhesive and attach screws in points connecting the members.
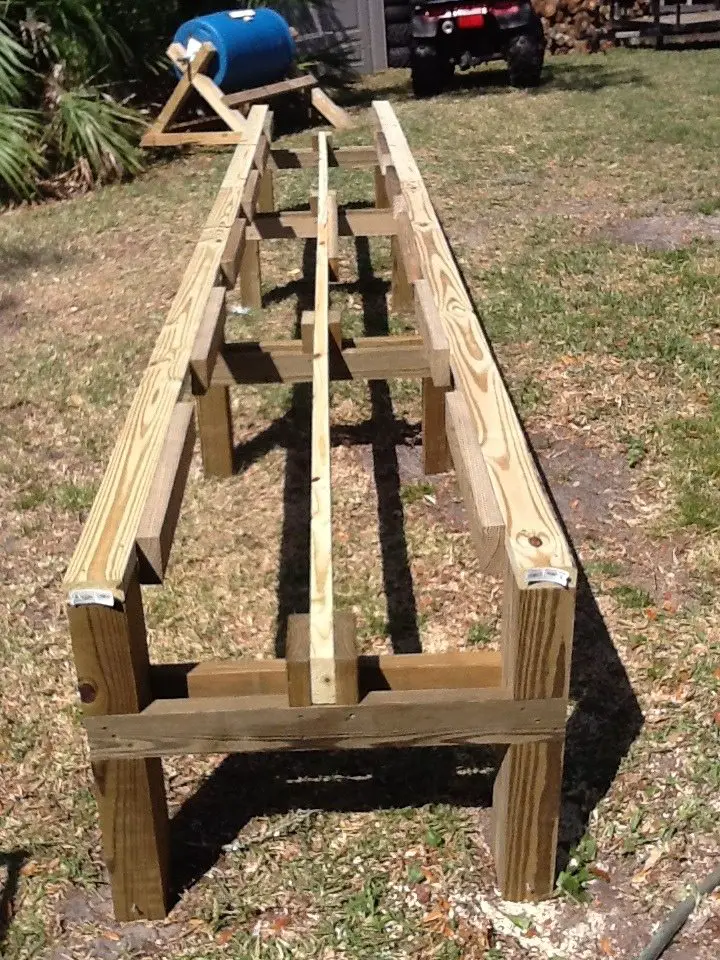
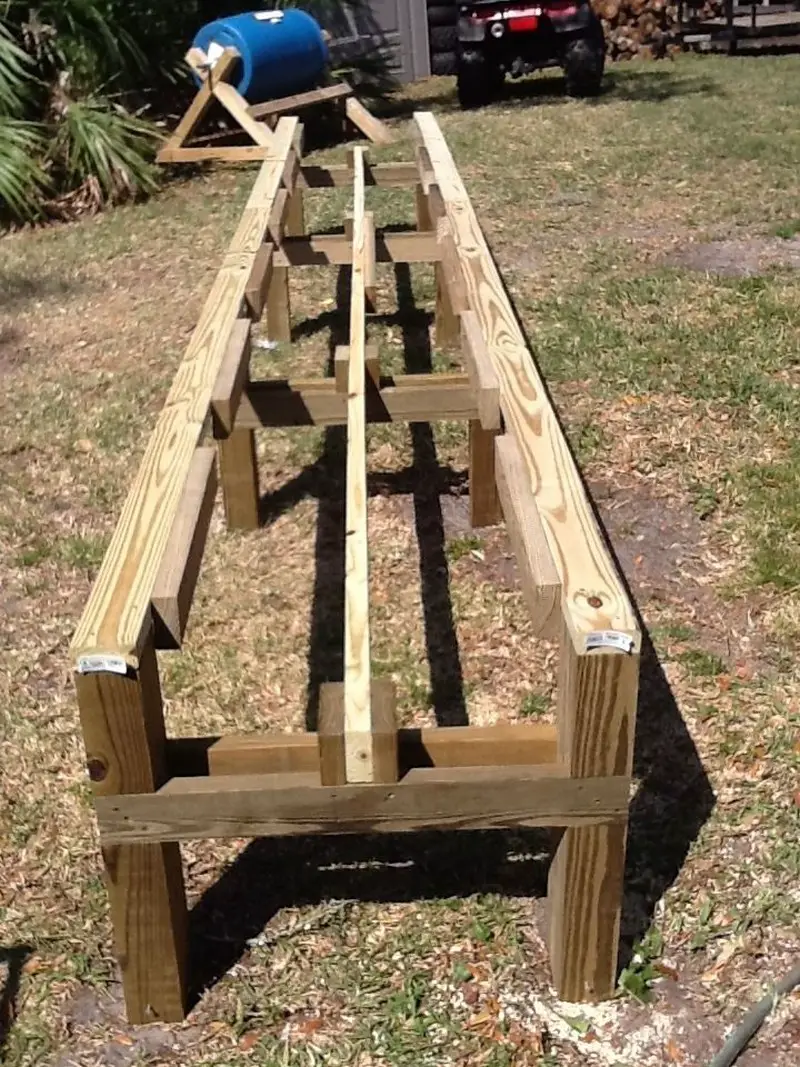
Connect the Assemblies
After building the assemblies you are now to connect them. Stake one of the four assemblies to the ground to prevent it from moving. Then measure the exact location where the next assembly should be attached. Stake the second assembly in the location determined earlier.
You can then lay a 2×4 on top of the legs and fasten them using a screw. After that side is done proceed to the other side. Attach a 2×4 on the assemblies’ cross member and screw it into place.
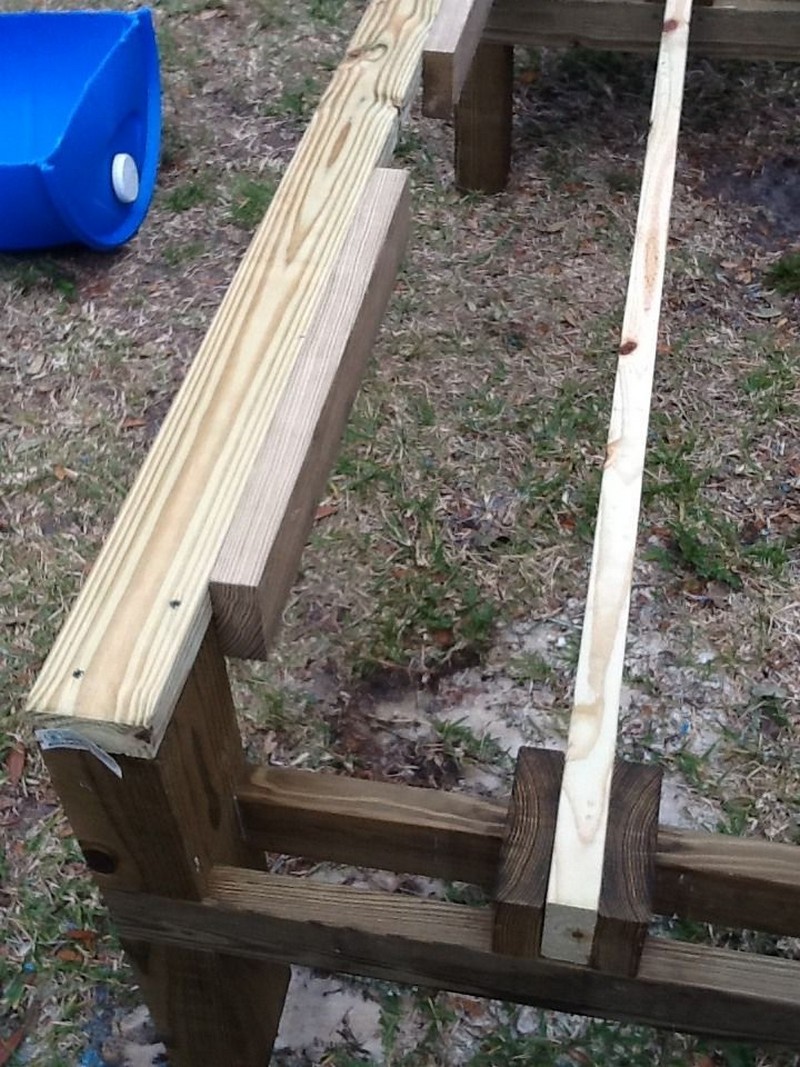
Attach Spacers
Using screws attach 2×4’s with the length of 2′ to the inner side of the 2×4’s connecting the legs of assemblies. These will serve as spacers giving the drums a snug fit and preventing them from rolling.
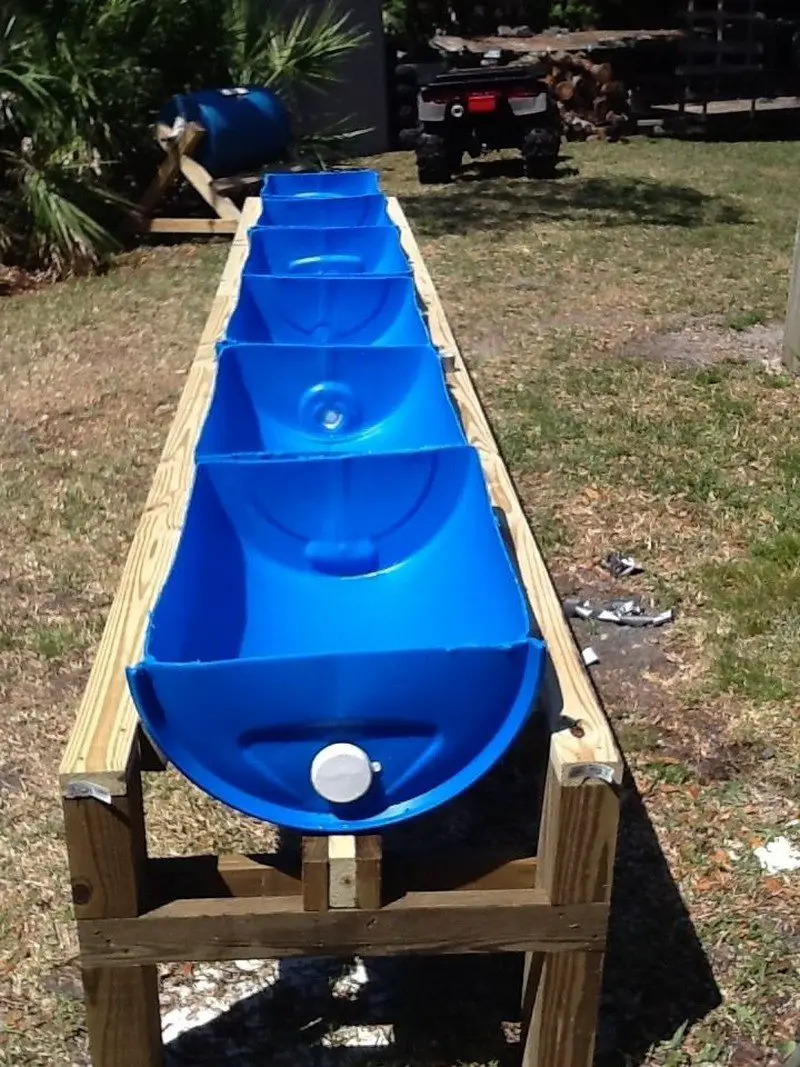
Cut and Install Drums
Carefully draw lines on the drums where the cut will be made. Cut those drums in half with a circular saw fitted with a carbide-tipped blade. After that, wash and dry them thoroughly. Drill holes for the drainage. Lastly, install the drums and fill them with soil. You can use the 2x4s that connect the legs of the assemblies to add a trellis.
Thanks to RushFan for sharing helpful tips on how to build a raised planter stand!
Green Thumbs, Stand Tall!
Be fancy with some elevated gardening! Put this simple tutorial on making your own raised planter stand to good use!
Whether you are a seasoned green thumb or a novice cultivator, this DIY project is your passport to growing your garden with style and ease. Elevate your plants, your environment, and your gardening skills in just five simple steps.
The idea of building a raised planter stand may seem intimidating at first, but do not let that stop you from creating something genuinely unique for your garden. You can change your backyard into a blooming sanctuary full of lush herbs and veggies that you can harvest with ease if you have the appropriate tools and approach.
Consider how wonderful it would be to have access to fresh vegetables right in your own garden! The planter can also be fashioned from reclaimed timber, which is cheap and readily available locally. This is not only an environmentally beneficial solution, but it also provides a distinct and industrial flavour to your yard or patio.
You will also feel proud knowing that you not only created something beautiful but that you did so in a sustainable and cost-effective manner.
So, are you ready to take on the challenge and create your own raised planter stand? Get ready for a rewarding crafting endeavour!


